Love this? Save it for later!
Share the inspiration with your friends
This was supposed to be pumpkin cookies. The kind you roll into balls, flatten with a fork, and bake in batches while the kitchen fills with that cozy, spiced aroma. I had everything laid out—the butter softened, the pumpkin puree measured, the mixer ready to go. But somewhere between answering my phone and realizing I was out of chocolate chips (the regular kind, anyway), the plan went sideways. I grabbed a bag of chocolate chunks from the pantry, dumped them in, and then stared at the dough. It was too wet. Too sticky. There was no way this was going to hold a cookie shape.
Honestly, I almost scraped the whole thing into the trash. But I had already made a mess, and the pumpkin was already open, and let me tell you—there is something about October that makes you stubborn. So I pressed the whole thing into a baking dish instead. I figured, at worst, I would have some weird pumpkin breakfast bar situation. At best? Well, I was about to find out.
What came out of the oven was nothing like the plan. It was better. The edges were chewy and caramelized, the center was soft and almost fudgy, and those chocolate chunks had melted into puddles of rich, dark goodness. I stood there eating a warm piece straight from the pan, and I knew I had accidentally stumbled onto something special. These pumpkin chocolate chip cookie bars have become my go-to fall dessert ever since. They are easier than cookies, faster than a cake, and somehow taste like everything you want autumn to be. Maybe you have been there—standing in your kitchen with a half-failed recipe and a stubborn streak. Trust me, this one is worth the detour.
Why You’ll Love This Recipe
Let me tell you why these bars have earned a permanent spot in my baking rotation. I have tested this recipe at least a dozen times, tweaking the flour ratio, the spice blend, the baking time, until it was exactly right. This is not just another pumpkin recipe thrown together—it is the version I would serve to guests without a second thought.
- Quick & Easy: From mixing bowl to oven in under 15 minutes. No rolling, no chilling, no fuss. Perfect for those weeknights when you need dessert fast.
- Simple Ingredients: You probably have everything in your pantry right now. Canned pumpkin, basic baking staples, and chocolate chips. No fancy trips to specialty stores required.
- Perfect for Fall Gatherings: Whether it is a Halloween party, Thanksgiving potluck, or just a cozy Sunday afternoon, these bars travel well and disappear fast.
- Crowd-Pleaser: Kids love the chocolate, adults love the pumpkin spice, and everyone loves that they are bar cookies—no plates, no forks, just grab and go.
- Unbelievably Delicious: The texture is what gets me every time. Crispy edges, soft center, and melty chocolate in every bite. It is comfort food in bar form.
What makes this recipe different from all the other pumpkin bar recipes out there? It is the technique. I use a slightly higher ratio of pumpkin to butter, which keeps the bars incredibly moist without making them gummy. And I add the chocolate chips in two stages—some folded into the batter, some pressed onto the top before baking. That way, every single piece has visible chocolate on top and hidden pockets throughout. It is a small detail, but it makes a big difference.
This recipe is the kind that makes you close your eyes after the first bite. It is fall baking without the stress—healthier than a traditional cookie bar, faster than a layer cake, but with the same soul-soothing satisfaction. Perfect for impressing guests without breaking a sweat, or turning a simple Tuesday into something memorable.
What Ingredients You Will Need
This recipe uses simple, wholesome ingredients to deliver bold pumpkin flavor and satisfying chocolate richness without any unnecessary fuss. Most of these are pantry staples, which makes this an easy last-minute baking project.
For the Cookie Bars
- 1/2 cup unsalted butter, melted (I use Land O’Lakes for consistent results; salted butter works too, just reduce the added salt by half)
- 1 cup granulated sugar (adds sweetness and helps create those crispy edges)
- 1/2 cup packed light brown sugar (adds moisture and a subtle molasses flavor that pairs beautifully with pumpkin)
- 1 large egg, room temperature (cold egg will seize the melted butter, so let it sit out for 15 minutes)
- 1 teaspoon vanilla extract (pure vanilla is best, but imitation works in a pinch)
- 1 cup canned pumpkin puree (not pumpkin pie filling—make sure it is 100% pure pumpkin. I prefer Libby’s for its consistent thickness)
- 1 and 1/2 cups all-purpose flour (spoon and level it—do not scoop directly from the bag or you will get too much)
- 1 teaspoon baking soda (helps the bars rise and stay soft)
- 1/2 teaspoon salt (balances the sweetness and enhances the spices)
- 1 and 1/2 teaspoons pumpkin pie spice (store-bought is fine, or make your own with cinnamon, nutmeg, ginger, and cloves)
- 1 teaspoon ground cinnamon (because you can never have too much cinnamon with pumpkin)
- 1 and 1/2 cups semi-sweet chocolate chips (I use Ghirardelli for the best melt; dark or milk chocolate both work well)
Ingredient Selection Tips
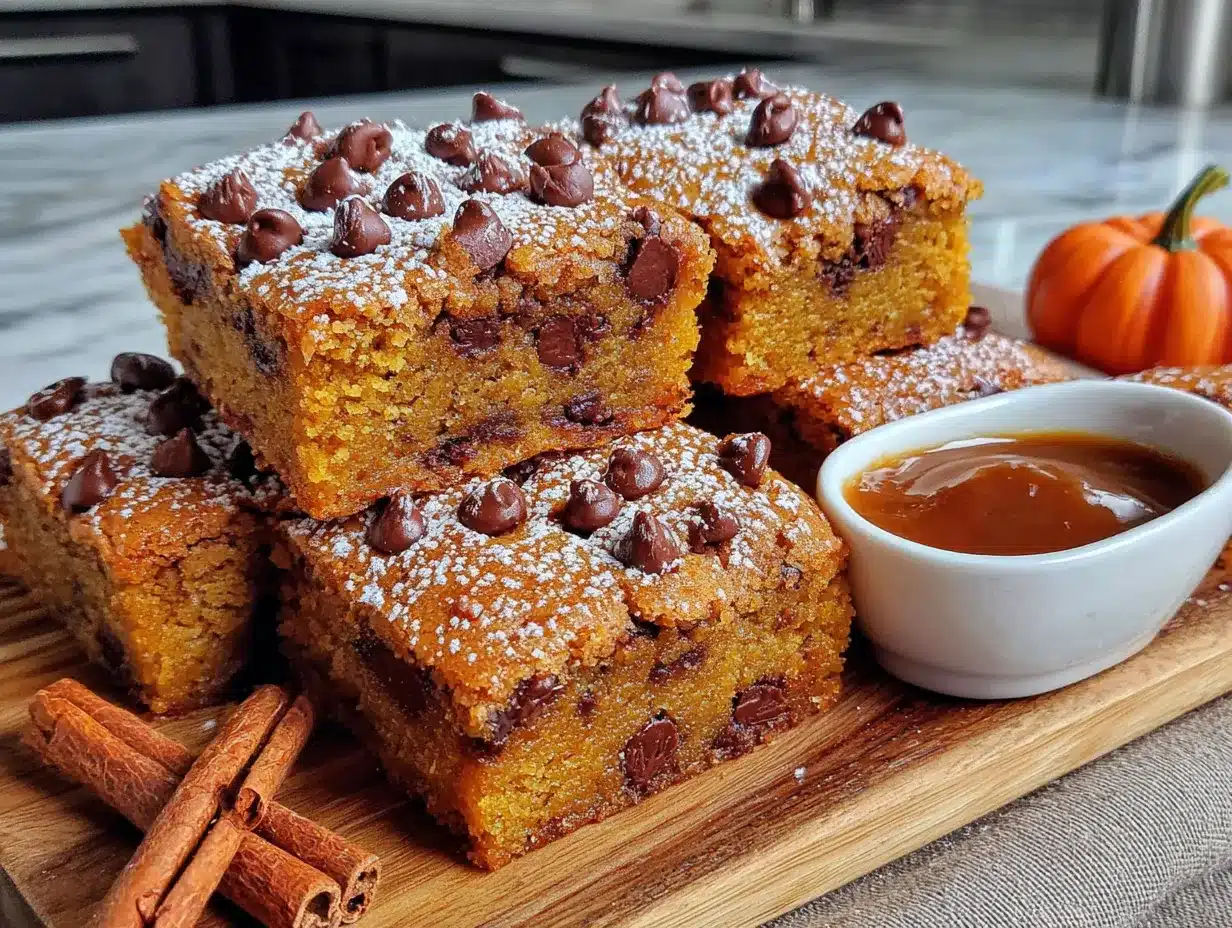
When choosing pumpkin puree, look for cans that feel heavy for their size—that means thicker puree with less water content. If your puree looks watery, spread it on a paper towel-lined plate for a few minutes to remove excess moisture. This small step prevents soggy bars.
For the chocolate chips, I recommend semi-sweet because it balances the sweetness of the pumpkin and sugar without being overpowering. But if you are a dark chocolate lover like me, go ahead and use dark chocolate chips—the bitterness cuts through the spice beautifully. Milk chocolate will make the bars sweeter, which is great if you are serving kids.
If you are out of pumpkin pie spice, mix 1/2 teaspoon cinnamon, 1/4 teaspoon nutmeg, 1/4 teaspoon ginger, and 1/8 teaspoon cloves. That is basically the same blend and works perfectly here.
Equipment Needed
You do not need a ton of fancy equipment for these bars, which is part of why I love making them. Here is what you will need:
- 9×13-inch baking pan (metal or glass both work; metal gives slightly crisper edges)
- Mixing bowls (one large, one medium)
- Whisk (for combining dry ingredients)
- Spatula or wooden spoon (for folding the batter)
- Measuring cups and spoons
- Parchment paper (optional but highly recommended for easy lifting and cleanup)
- Cooling rack
If you do not have a 9×13 pan, you can use a 9×9 square pan, but the bars will be thicker and will need about 5-7 extra minutes of baking time. Just keep an eye on them. I have also made these in an 8×8 pan, and while they turned out fine, the edges were less crispy and the center took forever to bake through. Stick with the 9×13 if you can.
Parchment paper is my secret weapon here. Cut a piece long enough to overhang on two sides, and you can lift the entire batch out of the pan in one piece for clean slicing. No scraping, no stuck-on bits. Worth the extra 30 seconds.
Preparation Method
Follow these steps carefully, and you will have perfect pumpkin chocolate chip cookie bars every single time. I have numbered them so you can keep track.
- Preheat your oven to 350°F (175°C). Line your 9×13-inch baking pan with parchment paper, leaving some overhang on the long sides. Lightly grease any exposed parts of the pan with cooking spray.
- Melt the butter. In a large microwave-safe bowl, melt the 1/2 cup unsalted butter in 20-second bursts until just melted. Do not let it boil—you want it liquid, not hot. Set it aside to cool for 2 minutes while you measure the other ingredients.
- Mix the sugars and butter. Add the granulated sugar and brown sugar to the melted butter. Whisk vigorously for about 1 minute until the mixture looks smooth and slightly thickened. This step helps create that crackly top crust.
- Add the wet ingredients. Crack the egg into the bowl and add the vanilla extract. Whisk until fully combined—about 30 seconds. The mixture should look glossy and smooth. Now add the pumpkin puree and whisk again until it is completely incorporated. Do not worry if the mixture looks a little thin; that is normal.
- Combine the dry ingredients. In a separate medium bowl, whisk together the flour, baking soda, salt, pumpkin pie spice, and cinnamon. Make sure there are no lumps—the spices can clump together sometimes. I use a fork to break up any stubborn bits.
- Fold the dry ingredients into the wet. Pour the flour mixture into the pumpkin mixture. Use a spatula to fold gently—do not overmix! Stop as soon as you no longer see streaks of flour. Overmixing will make the bars tough instead of tender. The batter will be thick and slightly sticky, like a soft cookie dough.
- Add the chocolate chips. Fold in 1 cup of the chocolate chips. Reserve the remaining 1/2 cup for the top. Make sure the chips are evenly distributed without overworking the batter.
- Spread the batter into the pan. Transfer the batter to your prepared pan. Use the spatula to spread it evenly into all corners. The batter will be thick, so take your time. Wet the spatula slightly if it sticks too much.
- Top with remaining chocolate chips. Sprinkle the reserved 1/2 cup chocolate chips evenly over the top. Gently press them into the batter with your fingers or the spatula so they stick during baking.
- Bake for 22-26 minutes. Place the pan on the middle rack of your oven. Bake until the edges are golden brown and a toothpick inserted into the center comes out clean or with a few moist crumbs. The center will look slightly puffed and set. Start checking at 22 minutes—ovens vary, and you do not want to overbake these.
- Cool completely before slicing. Transfer the pan to a cooling rack and let the bars cool for at least 30 minutes. If you try to cut them while warm, they will fall apart. I know it is tempting, but trust me—wait. For clean slices, refrigerate the bars for 15 minutes before cutting.
Sensory cue: When the bars are done, your kitchen should smell like a pumpkin spice candle had a baby with a chocolate chip cookie. The edges will look slightly darker and the center will feel firm when gently pressed. If you jiggle the pan and the center wobbles, give it 3 more minutes.
Cooking Tips & Techniques
After making these bars more times than I care to count, I have learned a few things the hard way. Here are my best tips to save you from my mistakes.
Do not overmix the batter. This is the number one mistake people make with pumpkin baked goods. Pumpkin has a lot of moisture, and overmixing develops gluten, which makes the bars tough and rubbery. Fold until just combined—a few small flour streaks are better than a tough bar.
Use room temperature ingredients. I know I said this already, but it matters. If your egg is cold, it will seize the melted butter and create a lumpy batter. Leave the egg on the counter for 15 minutes, or place it in a bowl of warm water for 5 minutes. Same goes for the pumpkin puree—let it sit out while you prep everything else.
Watch your baking time closely. I once left these in the oven for 28 minutes because I got distracted folding laundry, and they came out dry and crumbly. Pumpkin bars go from perfectly moist to overbaked very quickly. Start checking at 22 minutes, and pull them out the moment a toothpick comes out clean. They will continue to set as they cool.
Let them cool completely. I cannot stress this enough. The first time I made these, I cut into them after 10 minutes because I could not wait. The bars fell apart into a delicious but ugly mess. They need that cooling time to firm up. If you are in a hurry, pop the pan in the fridge for 20 minutes after the initial 30-minute counter cool.
Use a kitchen scale for accuracy. If you have one, weigh your flour. A cup of all-purpose flour should weigh about 120-125 grams. Scooping directly from the bag can give you up to 150 grams, which will make your bars dry. Spoon and level if you do not have a scale.
Variations & Adaptations
One of the best things about this recipe is how flexible it is. Here are some variations I have tried and loved.
Gluten-Free Version
Substitute the all-purpose flour with a 1:1 gluten-free baking flour blend that contains xanthan gum. I have used Bob’s Red Mill with great results. The texture will be slightly more tender, but the flavor is spot on. Do not use almond flour or coconut flour alone—they will change the structure too much.
Vegan Version
Replace the butter with melted coconut oil or vegan butter. Use a flax egg (1 tablespoon ground flaxseed mixed with 3 tablespoons water, let sit for 5 minutes) instead of the regular egg. Most semi-sweet chocolate chips are accidentally vegan, but check the label to be sure. The bars will be slightly less rich but still delicious.
Spice It Up
If you love a strong spice profile, add 1/4 teaspoon of ground ginger and a pinch of ground cloves to the flour mixture. I sometimes add a tiny pinch of black pepper—sounds weird, but it enhances the pumpkin flavor in a subtle way. Do not tell anyone until after they have tried it.
Mix-In Variations
Swap half the chocolate chips for white chocolate chips and dried cranberries for a festive fall twist. Or add 1/2 cup of toasted pecans or walnuts for crunch. I once made a version with butterscotch chips instead of chocolate, and it was dangerously good—like a pumpkin caramel situation.
Low-Sugar Option
Reduce the granulated sugar to 3/4 cup and use a sugar substitute like monk fruit sweetener for the remaining 1/4 cup. The bars will be less sweet, but the pumpkin and chocolate will still shine. I have not tried this with all sugar substitute, so I cannot vouch for the texture.
Serving & Storage Suggestions
These bars are best served at room temperature or slightly warm. If you want that fresh-from-the-oven experience, microwave a single bar for 10-15 seconds. The chocolate gets all melty again, and the edges soften just enough. Serve them on a pretty plate with a dusting of powdered sugar if you are feeling fancy, or straight from the pan if you are not.
They pair beautifully with a cup of hot coffee, a chai latte, or a glass of cold milk. For a dessert spread, I like to serve them alongside vanilla ice cream or a dollop of whipped cream. The warm spice and cold cream combination is hard to beat.
Storage: Keep leftover bars in an airtight container at room temperature for up to 3 days. If your kitchen is warm or humid, store them in the refrigerator to prevent the chocolate from melting. Layer them with parchment paper between each bar to keep them from sticking together.
Freezing: These bars freeze beautifully. Wrap individual bars tightly in plastic wrap, then place them in a freezer-safe bag or container. They will keep for up to 3 months. To thaw, leave them at room temperature for about 30 minutes, or microwave for 20 seconds straight from frozen. I always keep a stash in my freezer for unexpected guests or late-night cravings.
One thing I have noticed—the flavors actually get better after a day or two. The spices meld together, and the pumpkin flavor becomes more pronounced. So do not be sad if you have leftovers. They might be even better tomorrow.
Nutritional Information & Benefits
Here is the approximate nutritional breakdown for one bar (based on 16 servings):
- Calories: 245
- Fat: 12g
- Saturated Fat: 7g
- Carbohydrates: 34g
- Sugar: 22g
- Fiber: 2g
- Protein: 3g
- Sodium: 180mg
Pumpkin is the star ingredient here, and it brings some real benefits to the table. It is packed with vitamin A (over 200% of your daily needs in one cup), which supports eye health and immune function. It is also a good source of fiber, which helps with digestion and keeps you feeling full longer. The chocolate chips add antioxidants, and the cinnamon has anti-inflammatory properties. So while these are definitely a treat, they are not completely empty calories.
If you are watching your sugar intake, you can reduce the sugar by 1/4 cup without affecting the texture too much. The bars will be less sweet, but the pumpkin and chocolate will still carry the flavor. For a lower-fat option, replace half the butter with unsweetened applesauce—the bars will be a bit more cake-like but still delicious.
These bars contain gluten, dairy, and eggs. For allergen-friendly versions, check the variations section above.
FAQs
Can I use fresh pumpkin instead of canned?
Yes, but you will need to roast and puree it first, then strain it to remove excess water. Fresh pumpkin has a higher water content than canned, which can make the bars soggy. Spread the puree on a paper towel for 10 minutes before using. Honestly, canned is more consistent and much easier, so I stick with it.
Why did my bars turn out dry?
Most likely, you overbaked them or used too much flour. Check your oven temperature with an oven thermometer—they can run hot. Also, make sure you are spooning and leveling your flour, not scooping it. If the bars are already baked and dry, serve them with ice cream or a drizzle of caramel sauce to add moisture.
Can I make these ahead of time?
Absolutely. These bars taste even better the next day. Bake them up to 2 days in advance, store them in an airtight container at room temperature, and they will be perfect for your event. You can also freeze them for up to 3 months.
Can I use a different size pan?
You can, but the baking time will change. A 9×9 pan will give you thicker bars that need about 30-35 minutes. A jelly roll pan (10×15) will give you thinner, crispier bars that bake in 18-20 minutes. Keep an eye on them and use the toothpick test.
Can I add nuts or other mix-ins?
Yes! Fold in up to 1/2 cup of chopped pecans, walnuts, or even dried cranberries along with the chocolate chips. If you add too many mix-ins, the bars may not hold together well, so stick to the 1/2 cup limit for extras.
Conclusion
These ultimate pumpkin chocolate chip cookie bars are everything I want in a fall dessert—easy, forgiving, and absolutely delicious. They started as a mistake in my kitchen, but now they are the recipe I turn to again and again when I need something reliable. The combination of warm pumpkin spice and rich chocolate is timeless, and the bar format makes them perfect for sharing.
I hope you give these a try and make them your own. Maybe you will add extra cinnamon like I do, or swap in dark chocolate chips, or press a few flaky sea salt flakes on top before baking (do this—it is amazing). Whatever you do, I would love to hear about it. Leave a comment below and tell me how your batch turned out. Did you make any substitutions? Did your family fight over the last piece? Share your stories—I read every single one.
Happy baking, and remember: some of the best recipes come from happy accidents. Do not be afraid to mess up. You might just stumble onto something wonderful.
Pin This Recipe!
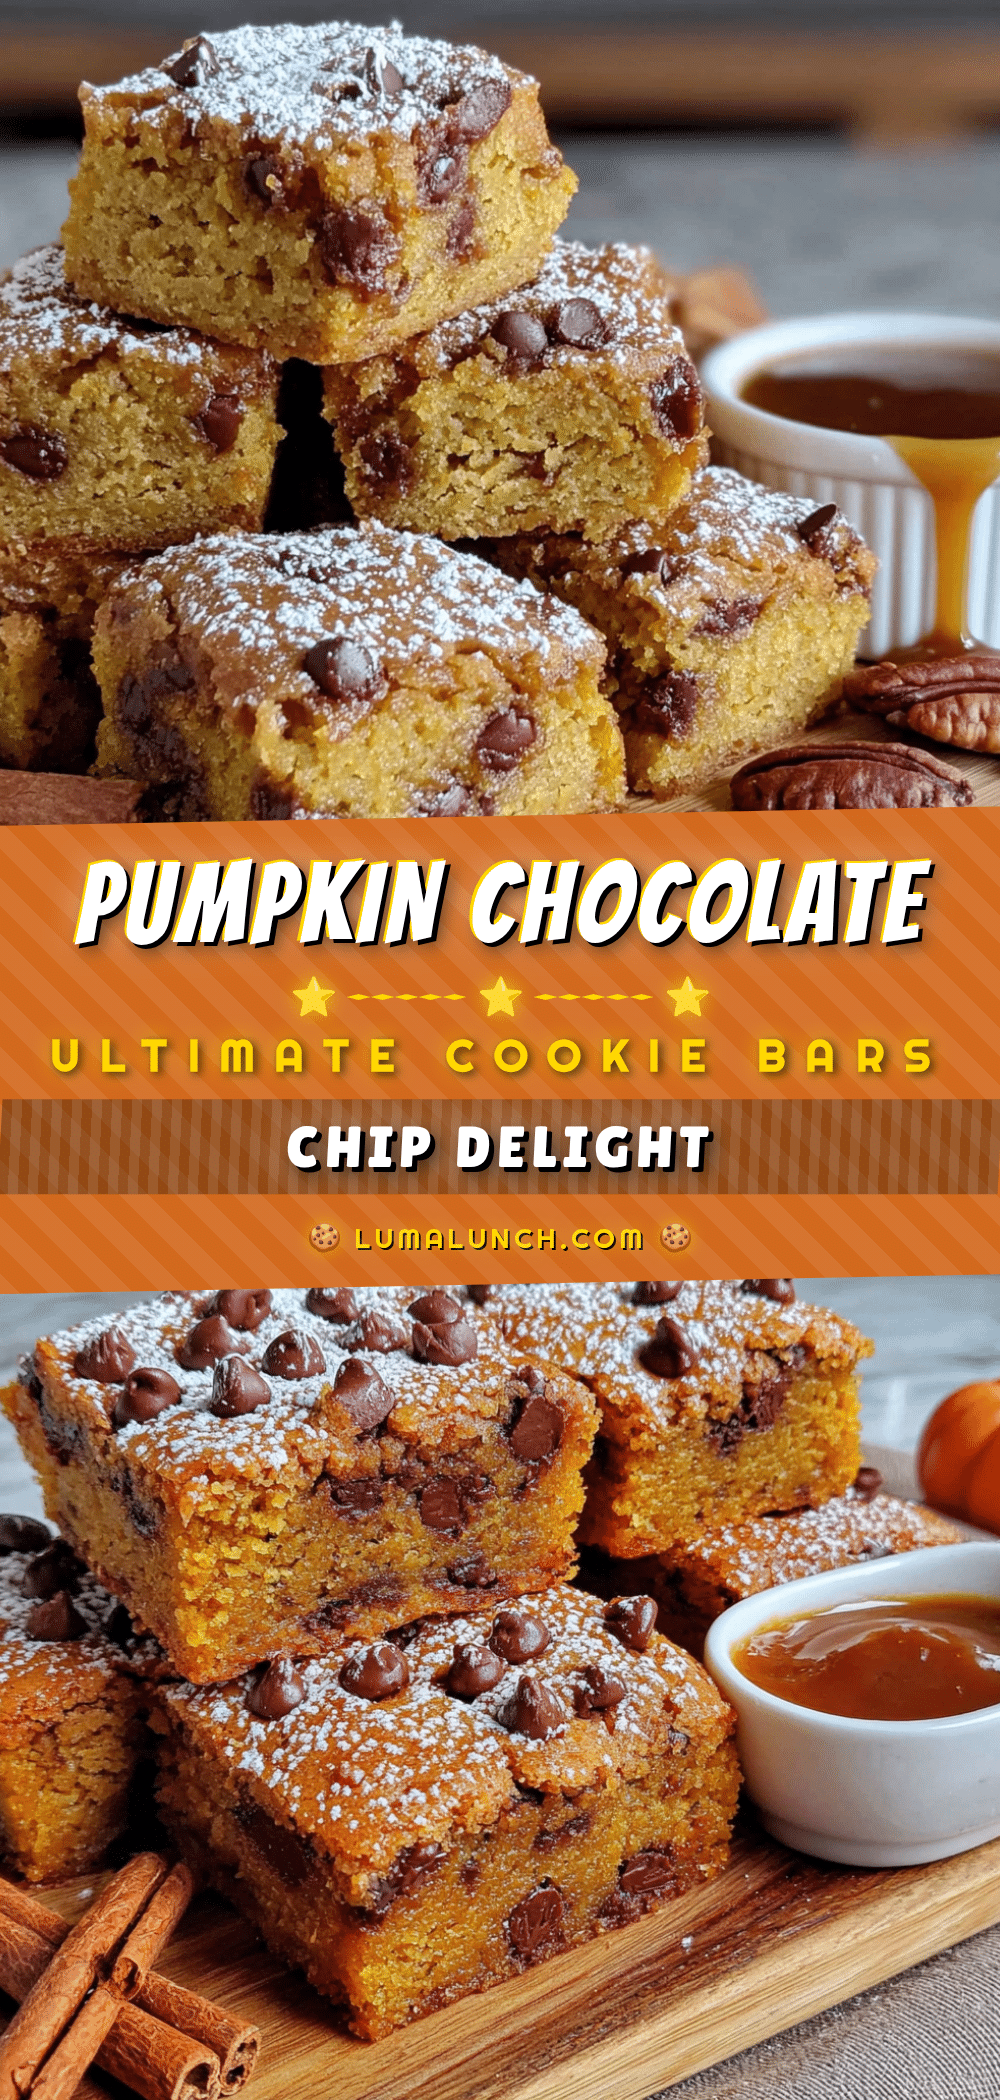
Ultimate Pumpkin Chocolate Chip Cookie Bars
These pumpkin chocolate chip cookie bars are the perfect fall dessert—easy, forgiving, and absolutely delicious. With crispy edges, a soft center, and melty chocolate in every bite, they are a crowd-pleaser that comes together in under 15 minutes.
- Prep Time: 15 minutes
- Cook Time: 25 minutes
- Total Time: 40 minutes
- Yield: 16 servings 1x
- Category: Dessert
- Cuisine: American
Ingredients
- 1/2 cup unsalted butter, melted
- 1 cup granulated sugar
- 1/2 cup packed light brown sugar
- 1 large egg, room temperature
- 1 teaspoon vanilla extract
- 1 cup canned pumpkin puree (not pumpkin pie filling)
- 1 and 1/2 cups all-purpose flour
- 1 teaspoon baking soda
- 1/2 teaspoon salt
- 1 and 1/2 teaspoons pumpkin pie spice
- 1 teaspoon ground cinnamon
- 1 and 1/2 cups semi-sweet chocolate chips
Instructions
- Preheat your oven to 350°F (175°C). Line a 9×13-inch baking pan with parchment paper, leaving some overhang on the long sides. Lightly grease any exposed parts of the pan with cooking spray.
- In a large microwave-safe bowl, melt the 1/2 cup unsalted butter in 20-second bursts until just melted. Do not let it boil. Set aside to cool for 2 minutes.
- Add the granulated sugar and brown sugar to the melted butter. Whisk vigorously for about 1 minute until the mixture looks smooth and slightly thickened.
- Add the egg and vanilla extract. Whisk until fully combined—about 30 seconds. Then add the pumpkin puree and whisk again until completely incorporated.
- In a separate medium bowl, whisk together the flour, baking soda, salt, pumpkin pie spice, and cinnamon until no lumps remain.
- Pour the flour mixture into the pumpkin mixture. Use a spatula to fold gently until just combined—do not overmix. The batter will be thick and slightly sticky.
- Fold in 1 cup of the chocolate chips. Reserve the remaining 1/2 cup for the top.
- Transfer the batter to the prepared pan and spread it evenly into all corners using a spatula.
- Sprinkle the reserved 1/2 cup chocolate chips evenly over the top. Gently press them into the batter with your fingers or the spatula.
- Bake for 22-26 minutes, until the edges are golden brown and a toothpick inserted into the center comes out clean or with a few moist crumbs. Start checking at 22 minutes.
- Cool completely in the pan on a cooling rack for at least 30 minutes before slicing. For clean slices, refrigerate for 15 minutes before cutting.
Notes
Do not overmix the batter to avoid tough bars. Use room temperature ingredients for best results. Watch baking time closely—start checking at 22 minutes. Cool completely before slicing to prevent crumbling. For gluten-free, use a 1:1 gluten-free baking flour blend. For vegan, use melted coconut oil or vegan butter and a flax egg. Store in an airtight container at room temperature for up to 3 days, or freeze for up to 3 months.
Nutrition
- Serving Size: 1 bar
- Calories: 245
- Sugar: 22
- Sodium: 180
- Fat: 12
- Saturated Fat: 7
- Carbohydrates: 34
- Fiber: 2
- Protein: 3
Keywords: pumpkin chocolate chip cookie bars, pumpkin bars, chocolate chip cookie bars, fall dessert, easy pumpkin recipe


