Love this? Save it for later!
Share the inspiration with your friends
My sister-in-law, Jen, wasn’t trying to impress anyone. I’d stopped by to drop off a birthday present for my nephew, and this smell—warm, nutty, a little sweet—hit me before I even got past the front door. It was nine in the morning, the kitchen was a wreck, and she was standing there in her pajamas, spooning something into little plastic cups for the kids’ lunchboxes. “Oh, that?” she said when I asked, barely looking up. “It’s just oatmeal. The boys won’t eat anything else for breakfast lately.”
She handed me a spoon, and honestly, that first bite stopped me cold. It was creamy, but not mushy. Sweet, but not sugary. And it had this staying power—I wasn’t hungry again until after noon, which never happens to me. I stood there in her messy kitchen, eating cold oatmeal out of a Tupperware container, feeling like I’d just discovered something incredible. Jen just shrugged and went back to packing lunches. To her, it was nothing. To me, it was a breakfast revelation.
I asked for the recipe, and she kind of mumbled it over her shoulder while wrestling a wiggly four-year-old into a jacket. “Peanut butter, some milk, oats, a scoop of protein powder if you have it. Leave it in the fridge overnight.” That was it. No measurements, no fancy techniques, no fuss. She’d figured it out through sheer survival mode—two picky boys, a tight grocery budget, and zero time in the morning. And let me tell you, she’d accidentally created the perfect breakfast. Maybe you’ve been there, standing in someone else’s kitchen, watching them do something ordinary that feels like magic. That’s what these overnight oats were. And I’ve been making them ever since.
Why You’ll Love This Recipe
I’ve tested this recipe more times than I can count, tweaking the ratios, swapping ingredients, and even messing it up a few times (too much milk, not enough oats—we’ve all been there). What I landed on is the version that works every single time, even for the busiest mornings and the pickiest eaters. Here’s why this one is different:
- Quick & Easy : It takes five minutes to throw together the night before. Five. Minutes. No cooking, no stirring, no standing over a stove while your kids ask for the hundredth time if breakfast is ready.
- Simple Ingredients : You probably already have peanut butter, milk, and oats in your pantry. The protein powder is optional, and I’ll tell you how to skip it without losing the good stuff.
- Perfect for Busy Mornings : Grab a jar out of the fridge, add a spoonful of toppings, and you’re done. No excuses, no stress, no hangry children.
- Crowd-Pleaser : My own kids went from “I don’t like oatmeal” to “Can I have this every day?” in one single bite. It’s sweet enough to feel like a treat but packed with enough protein to actually keep them full until lunch.
- Unbelievably Delicious : The texture is what gets me every time. The oats soak up the milk and peanut butter overnight, turning into this thick, creamy, almost pudding-like breakfast that feels way more indulgent than it actually is.
What makes this recipe different from every other overnight oats recipe out there? It’s the ratio. I spent weeks getting the milk-to-oats balance just right so it’s not too runny or too thick. And the peanut butter gets stirred in just before serving, not the night before, so it stays swirly and bold instead of disappearing into the oats. It’s a small thing, but it makes a huge difference.
This isn’t just another breakfast recipe. It’s the kind that makes you feel like you’ve got your act together, even on the chaotic mornings. It’s comfort food that actually fuels your family—without breaking the bank or your sanity.
What Ingredients You Will Need
This recipe uses simple, affordable ingredients that you can find at any grocery store. No fancy health food runs required. The beauty of these overnight oats is that every ingredient pulls its weight, delivering flavor, texture, and nutrition without any fuss.
For the Oats Base
- 1 cup old-fashioned rolled oats (not quick oats—they get too mushy; not steel-cut—they stay too chewy. Old-fashioned is the sweet spot for that perfect creamy texture)
- 1 cup milk of your choice (I use whole milk for creaminess, but 2% works fine. For a dairy-free version, unsweetened almond milk or oat milk are my go-tos. Coconut milk makes it extra rich, but watch the calories if that’s a concern)
- 1/2 cup plain Greek yogurt (this is the secret to the protein boost and that thick, tangy texture. I prefer full-fat for creaminess, but non-fat works too. If you’re dairy-free, use a thick coconut or soy yogurt)
- 2 tablespoons creamy peanut butter (plus more for swirling on top. I use natural peanut butter with no added sugar—just peanuts and salt. Skippy or Jif work too, but they’re sweeter, so you might want to cut back on the maple syrup)
- 1 scoop vanilla or unflavored protein powder (optional, but highly recommended for the protein boost. I use a whey-based vanilla powder, but plant-based protein works too—just make sure it’s a flavor you like, because it really comes through)
- 1 tablespoon maple syrup or honey (adjust based on sweetness preference. My kids like it on the sweeter side, so I use a full tablespoon. For less sugar, use half a tablespoon or a mashed ripe banana instead)
- 1/2 teaspoon vanilla extract (pure vanilla extract makes a difference, but imitation works in a pinch. Don’t skip it—it rounds out the flavors beautifully)
- Pinch of salt (sounds weird, I know, but salt makes the peanut butter and sweetness pop. Just a tiny pinch is all you need)
For Serving (Optional but Recommended)
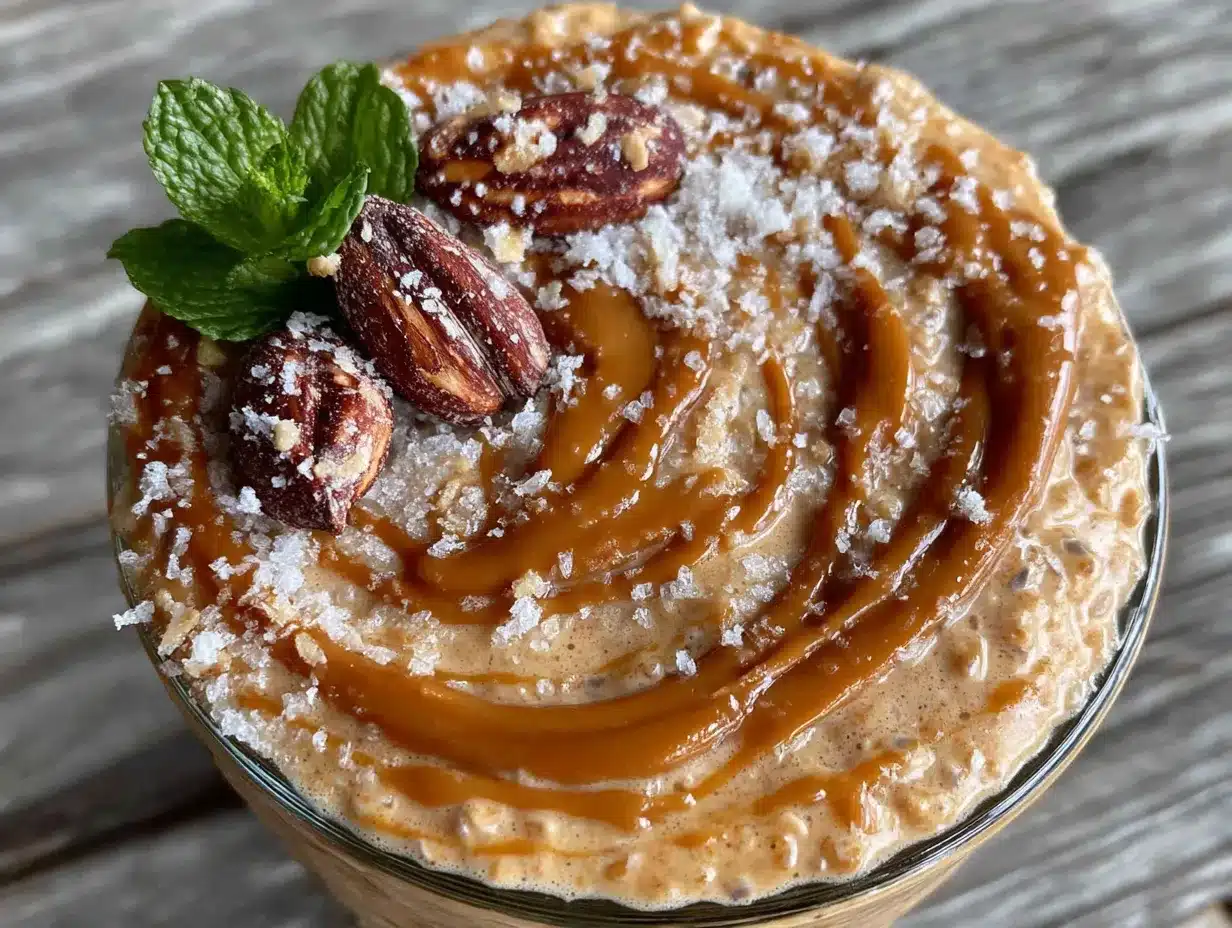
- Sliced banana or berries (fresh fruit adds natural sweetness and color. Bananas and peanut butter are a classic combo, but strawberries or blueberries work great too)
- Extra drizzle of peanut butter (because more peanut butter is never a bad idea)
- Mini chocolate chips or chopped peanuts (for a little crunch or a special treat. My kids go crazy for a sprinkle of mini chocolate chips on top)
- A dash of cinnamon (adds warmth and pairs beautifully with the peanut butter)
Ingredient Selection Tips: I recommend Bob’s Red Mill old-fashioned rolled oats for the best texture—they hold up perfectly overnight without getting mushy. For protein powder, I’ve had great results with Orgain Simple vanilla plant-based powder, but any brand you like will work. Just avoid collagen protein, as it doesn’t thicken the same way and can make the oats watery.
Substitution Guidance: If you don’t have Greek yogurt, you can use regular plain yogurt or even cottage cheese blended smooth (trust me on this one—it adds creaminess and protein without changing the flavor much). For a nut-free version, swap peanut butter for sunflower seed butter or WowButter. The flavor will be different, but still delicious. And if you’re out of maple syrup, honey or even a mashed ripe banana will do the trick.
Equipment Needed
You don’t need any fancy equipment for this recipe, which is part of why I love it so much. Here’s what you’ll need:
- Mason jars or small containers with lids (I use 8-ounce or 12-ounce wide-mouth mason jars. They’re cheap, reusable, and the perfect portion size for kids. Pint-sized deli containers work great too if that’s what you have on hand)
- Measuring cups and spoons (a set of dry measuring cups and a liquid measuring cup will make your life easier, but honestly, I’ve eyeballed this recipe plenty of times and it still works)
- A small mixing bowl or the jar itself (you can mix everything directly in the jar to save dishes. Just make sure it’s big enough to stir without spilling)
- A fork or small whisk (for mixing everything together. A fork works fine, but a small whisk gets the peanut butter incorporated more smoothly)
- A spoon for serving (and maybe an extra one for taste-testing—you’ll want to)
Budget-Friendly Options: Don’t have mason jars? Reuse glass jars from pasta sauce or jam. Just wash them thoroughly and remove the labels. I’ve also used plastic takeout containers in a pinch. The key is that they have a tight-fitting lid, because you’ll be shaking or stirring the oats before refrigerating them.
Personal Experience: I’ve tried making these oats in everything from fancy Weck jars to old pickle jars. Honestly, the pickle jars worked just fine (though my oats did taste faintly of pickles the first time—so maybe stick to jars that haven’t held anything strongly flavored). Wide-mouth jars are easiest for stirring and eating, but any container with a lid will do the job.
Preparation Method
Making these overnight oats is almost laughably simple, but I’ll walk you through every step so you get perfect results every time. The whole process takes less than five minutes, and most of the “work” happens while you sleep.
- Combine the wet ingredients first. In your jar or a small bowl, add 1 cup of milk, 1/2 cup of Greek yogurt, 1 tablespoon of maple syrup, and 1/2 teaspoon of vanilla extract. Whisk or stir until everything is smooth and well combined. I like to do this step first because it helps the peanut butter mix in more easily later.
- Add the protein powder (if using). Sprinkle 1 scoop of your protein powder over the wet mixture and stir until no dry clumps remain. This can take a little patience—protein powder tends to clump up. If you’re having trouble, use the back of a fork to press the clumps against the side of the jar until they break up. Don’t rush this step, or you’ll end up with chalky pockets in your oats.
- Stir in the oats and salt. Add 1 cup of old-fashioned rolled oats and a pinch of salt to the jar. Stir everything together until the oats are fully coated and evenly distributed. The mixture should look a little soupy at this point—that’s normal. The oats will absorb the liquid overnight and thicken up beautifully.
- Add the peanut butter (but don’t stir it in yet). Here’s my little trick: drop 2 tablespoons of peanut butter on top of the oat mixture, but don’t stir it in. Just let it sit there like a little island. I’ll explain why in the next step.
- Cover and refrigerate overnight (or at least 6 hours). Put the lid on your jar and place it in the refrigerator. I usually make these right after dinner, so they’ve got a solid 10 to 12 hours to do their thing. The minimum is about 6 hours—any less and the oats won’t be fully softened. If you’re in a hurry, you can eat them after 4 hours, but the texture won’t be as creamy.
- In the morning, stir in the peanut butter. Here’s why I don’t stir the peanut butter in the night before: when it sits overnight, it hardens and separates, leaving you with clumpy, unevenly distributed peanut butter. By adding it right before serving, you get that beautiful swirl of creamy peanut butter throughout every bite. So in the morning, take your jar out of the fridge, add the peanut butter that’s been sitting on top, and stir it in thoroughly. The oats will have thickened overnight, so give it a good 20 to 30 seconds of stirring to get everything well combined.
- Adjust the consistency. Overnight oats thicken up quite a bit, especially if you used protein powder. If your oats are too thick for your liking, stir in a splash of milk (about 1 to 2 tablespoons) until it reaches your desired consistency. I like mine on the thicker side, almost like a pudding, but my kids prefer them a little looser, so I usually add a splash of milk to theirs.
- Add your toppings and serve. This is the fun part. Top your oats with sliced banana, a handful of berries, a sprinkle of mini chocolate chips, or an extra drizzle of peanut butter. Let the kids customize their own—it makes them way more excited about eating it. Serve cold straight from the fridge, or let it sit at room temperature for 5 to 10 minutes if your family prefers less cold breakfasts.
Important Note: If you’re making these for lunchboxes, skip the fresh fruit toppings and pack them separately to prevent sogginess. The oats themselves hold up beautifully for hours, so you can make them the night before and they’ll be perfect for lunch the next day.
Cooking Tips & Techniques
I’ve made this recipe dozens of times, and I’ve learned a few things the hard way. Here are my best tips for getting it right every single time.
Don’t use quick oats. I made this mistake once when I was out of old-fashioned oats, and the result was a mushy, baby-food-like mess. Quick oats absorb liquid too fast and break down completely overnight, leaving you with a texture that’s more porridge than pudding. Steel-cut oats are the opposite problem—they stay too chewy and never fully soften. Old-fashioned rolled oats are the Goldilocks choice, and they’re worth seeking out.
Measure your oats correctly. This is probably the most common mistake people make with overnight oats. Scooping oats directly from the bag with your measuring cup packs them down, giving you way more oats than you need. Instead, spoon the oats into your measuring cup and level them off with a knife. This ensures you get the right ratio of oats to liquid, which is the key to that perfect creamy texture.
Let the peanut butter come to room temperature. If you’re adding peanut butter in the morning (as I recommend), take it out of the fridge about 10 minutes before you need it. Cold peanut butter is stiff and hard to stir in evenly. Room temperature peanut butter swirls in like a dream. If you forget, just microwave it for 10 seconds to soften it up.
Make a double batch on Sunday. These oats keep in the fridge for up to 5 days, so I often make a big batch on Sunday evening for the whole week. Just multiply the ingredients by the number of servings you need and divide them into individual jars. It’s a game-changer for busy mornings—grab and go, no thinking required.
Taste and adjust. Before you add your toppings in the morning, give your oats a taste. Is it sweet enough? Add a tiny drizzle more maple syrup. Needs more peanut butter flavor? Stir in an extra half tablespoon. This is your breakfast, and you should make it exactly how you like it. My sister-in-law Jen would probably roll her eyes at all this fussing, but I’ve found that a little tweaking makes the difference between good oats and great oats.
One mistake I made: The first time I tried adding the peanut butter the night before, I ended up with these hard little peanut butter nuggets scattered throughout the oats. It was not pleasant. That’s when I started experimenting with adding it in the morning, and I’ve never gone back. Sometimes the best tips come from our failures, you know?
Variations & Adaptations
One of the best things about this recipe is how easy it is to change up. Here are some of my favorite variations, all tested and approved by my family.
Chocolate Peanut Butter Version: Add 1 tablespoon of unsweetened cocoa powder along with the dry ingredients. Stir in a few mini chocolate chips before serving for that chocolate-peanut butter combo that kids (and adults) go crazy for. My daughter calls this “dessert breakfast,” and honestly, she’s not wrong.
Berry Peanut Butter Version: Swirl in 2 tablespoons of strawberry or raspberry jam along with the peanut butter in the morning. The tartness of the berries cuts through the richness of the peanut butter beautifully. It tastes like a PB&J in oatmeal form, and it’s my personal favorite.
Banana Bread Version: Mash half a ripe banana and stir it into the oat mixture before refrigerating. In the morning, top with sliced banana and a sprinkle of cinnamon and chopped walnuts. It tastes exactly like banana bread, but it’s way faster and healthier.
Nut-Free Version: Swap the peanut butter for sunflower seed butter or WowButter. The flavor is different—a little earthier—but it’s still delicious and completely safe for nut-free schools or lunchboxes. Just note that sunflower seed butter can turn green when combined with baking soda or other alkaline ingredients, but since there’s no baking soda in this recipe, you’re good.
Lower Sugar Version: Skip the maple syrup entirely and use a mashed ripe banana for sweetness instead. The banana adds natural sweetness plus extra creaminess and fiber. If you’re using protein powder, choose an unflavored variety to keep the sugar content as low as possible.
Dairy-Free Version: Use unsweetened almond milk or oat milk and a dairy-free yogurt alternative. I’ve had great results with coconut yogurt, which adds a subtle tropical flavor that pairs surprisingly well with peanut butter. Just make sure your yogurt is thick—runny yogurt will make your oats soupy.
Personal Variation: My husband is not a breakfast person—he usually skips it entirely—but he loves these oats when I add a tablespoon of chia seeds to the mix. The chia seeds add extra fiber and omega-3s, and they make the oats even thicker and more pudding-like. He calls them “breakfast pudding,” which I think is adorable.
Serving & Storage Suggestions
These overnight oats are incredibly versatile when it comes to serving and storing. Here’s everything you need to know.
Serving Temperature: These oats are meant to be served cold, straight from the fridge. That’s the whole point of overnight oats—no heating required. But if your family prefers warm breakfasts, you can absolutely microwave them. Just remove the lid, microwave for 30 to 45 seconds, stir, and check the temperature. Be careful not to overheat, or the peanut butter can get greasy and the oats can become gummy.
Presentation Ideas: For kids, I like to layer the toppings in a fun pattern—a smiley face made of banana slices, a little swirl of peanut butter, a sprinkle of chocolate chips. It takes 10 extra seconds and makes them way more excited to eat it. For adults, a simple drizzle of peanut butter and a few berries on top looks beautiful and effortless.
Complementary Dishes: These oats are a complete meal on their own, but they pair beautifully with a side of fresh fruit or a hard-boiled egg for extra protein. For a special weekend breakfast, serve them alongside scrambled eggs and turkey sausage for a balanced, satisfying meal.
Storage Instructions: Store your overnight oats in an airtight container in the refrigerator for up to 5 days. I don’t recommend freezing them, as the texture of the oats and yogurt can become watery and grainy when thawed. If you’ve already added toppings like fresh fruit or granola, those are best added fresh each morning to maintain their texture.
Reheating Tips: If you’re reheating a jar that’s been in the fridge for a few days, you might notice some separation—a little liquid pooling at the top. That’s totally normal. Just stir it vigorously, add a splash of milk if needed, and it’ll come right back together. For meal prep, I recommend storing the oats without toppings and adding them fresh each morning.
How Flavors Develop: I’ve noticed that these oats actually taste better on day two or three. The flavors meld together overnight, and the peanut butter and maple syrup become more evenly distributed. So don’t worry if you make a big batch—the later jars might be the best ones.
Nutritional Information & Benefits
Here’s an approximate nutritional breakdown for one serving (made with whole milk, full-fat Greek yogurt, and one scoop of vanilla protein powder, without toppings):
| Nutrient | Amount per Serving |
|---|---|
| Calories | 420 |
| Protein | 28g |
| Carbohydrates | 45g |
| Fiber | 6g |
| Sugar | 14g (8g added sugar) |
| Fat | 16g |
| Saturated Fat | 5g |
Health Benefits: These overnight oats are packed with protein from the Greek yogurt, milk, and protein powder, which helps keep kids (and adults) full and focused until lunchtime. The oats provide complex carbohydrates for steady energy, plus soluble fiber that supports heart health and digestion. Peanut butter adds healthy monounsaturated fats and a good dose of vitamin E and magnesium. If you use whole milk, you’re also getting calcium and vitamin D for strong bones.
Dietary Considerations: This recipe is naturally vegetarian. For a gluten-free version, make sure you use certified gluten-free oats (regular oats are often cross-contaminated with wheat during processing). For a lower-carb version, reduce the oats to 3/4 cup and add an extra tablespoon of chia seeds or flaxseed meal to maintain the texture. For a nut-free version, swap the peanut butter for sunflower seed butter as mentioned above.
Potential Allergens: This recipe contains dairy (milk, yogurt) and peanuts (peanut butter). It may contain gluten if you don’t use certified gluten-free oats. Always check your protein powder label for potential allergens, as some contain soy or other common allergens.
Personal Wellness Perspective: I love that this breakfast feels indulgent but is actually really nourishing. My kids think they’re getting a treat, but I know they’re getting protein, fiber, and healthy fats that will carry them through a busy school morning. It’s one of those rare recipes that makes everyone happy—the kids, the parents, and the nutrition-conscious part of my brain.
Conclusion
These Kid-Friendly Peanut Butter Protein Overnight Oats have become a staple in our house, and I have a feeling they’ll become one in yours too. They’re proof that you don’t need complicated techniques or fancy ingredients to make a breakfast that’s delicious, nutritious, and actually doable on a busy morning. Jen made them look like nothing, but what she stumbled into was something really special.
I love this recipe because it gives me back those precious morning minutes. No standing over a stove, no convincing kids to eat something they don’t want, no stress. Just a jar, a spoon, and a breakfast that everyone actually looks forward to. And honestly, on a Tuesday morning when you’re already running late, that’s everything.
I’d love to hear how these turn out for you! Try them with your favorite toppings, customize them for your family’s tastes, and let me know what variations you come up with. Drop a comment below if you try a fun twist—I’m always looking for new ideas to test out in my own kitchen. And if your kids love them as much as mine do, share this recipe with a friend who could use a little more ease in their mornings. Happy breakfasting!
Frequently Asked Questions
Can I use quick oats instead of old-fashioned rolled oats?
I really don’t recommend it. Quick oats absorb liquid much faster and break down completely overnight, leaving you with a mushy, unappealing texture. Old-fashioned rolled oats are the best choice for that perfect creamy-but-not-soggy consistency. If you’re in a pinch, you can use quick oats, but only let them sit for 2 to 3 hours instead of overnight.
Can I make these without protein powder?
Absolutely! The protein powder is completely optional. If you leave it out, the oats will be slightly less thick and have a little less protein, but they’ll still be delicious. You might want to reduce the milk by about 2 tablespoons to keep the consistency right, since protein powder absorbs liquid. The Greek yogurt and peanut butter already provide a good amount of protein on their own.
How long do these overnight oats last in the fridge?
These oats will keep well in an airtight container in the refrigerator for up to 5 days. I’ve found they actually taste best on days 2 and 3, after the flavors have had time to meld together. Just give them a good stir before serving, and add a splash of milk if they’ve thickened up too much. Don’t freeze them, though—the texture won’t be the same after thawing.
Can I use a different nut butter?
Yes, you can swap the peanut butter for any nut or seed butter you like. Almond butter, cashew butter, or sunflower seed butter all work well. Just keep in mind that different nut butters have different consistencies—some are runnier, some are thicker—so you might need to adjust the milk slightly. Sunflower seed butter can also turn green when combined with certain ingredients, but since there’s no baking soda in this recipe, it should stay a nice brown color.
My oats turned out too thick/too thin. What did I do wrong?
If your oats are too thick, you probably used too many oats or not enough liquid. Next time, make sure you’re measuring your oats correctly (spoon them into the cup, don’t scoop) and using exactly 1 cup of milk. If they’re too thin, you might have used too much milk or not let them sit long enough. Give them at least 6 hours in the fridge. You can also add a tablespoon of chia seeds to help thicken things up. In either case, you can fix the texture by stirring in a splash of milk (if too thick) or a spoonful of yogurt (if too thin).
Pin This Recipe!
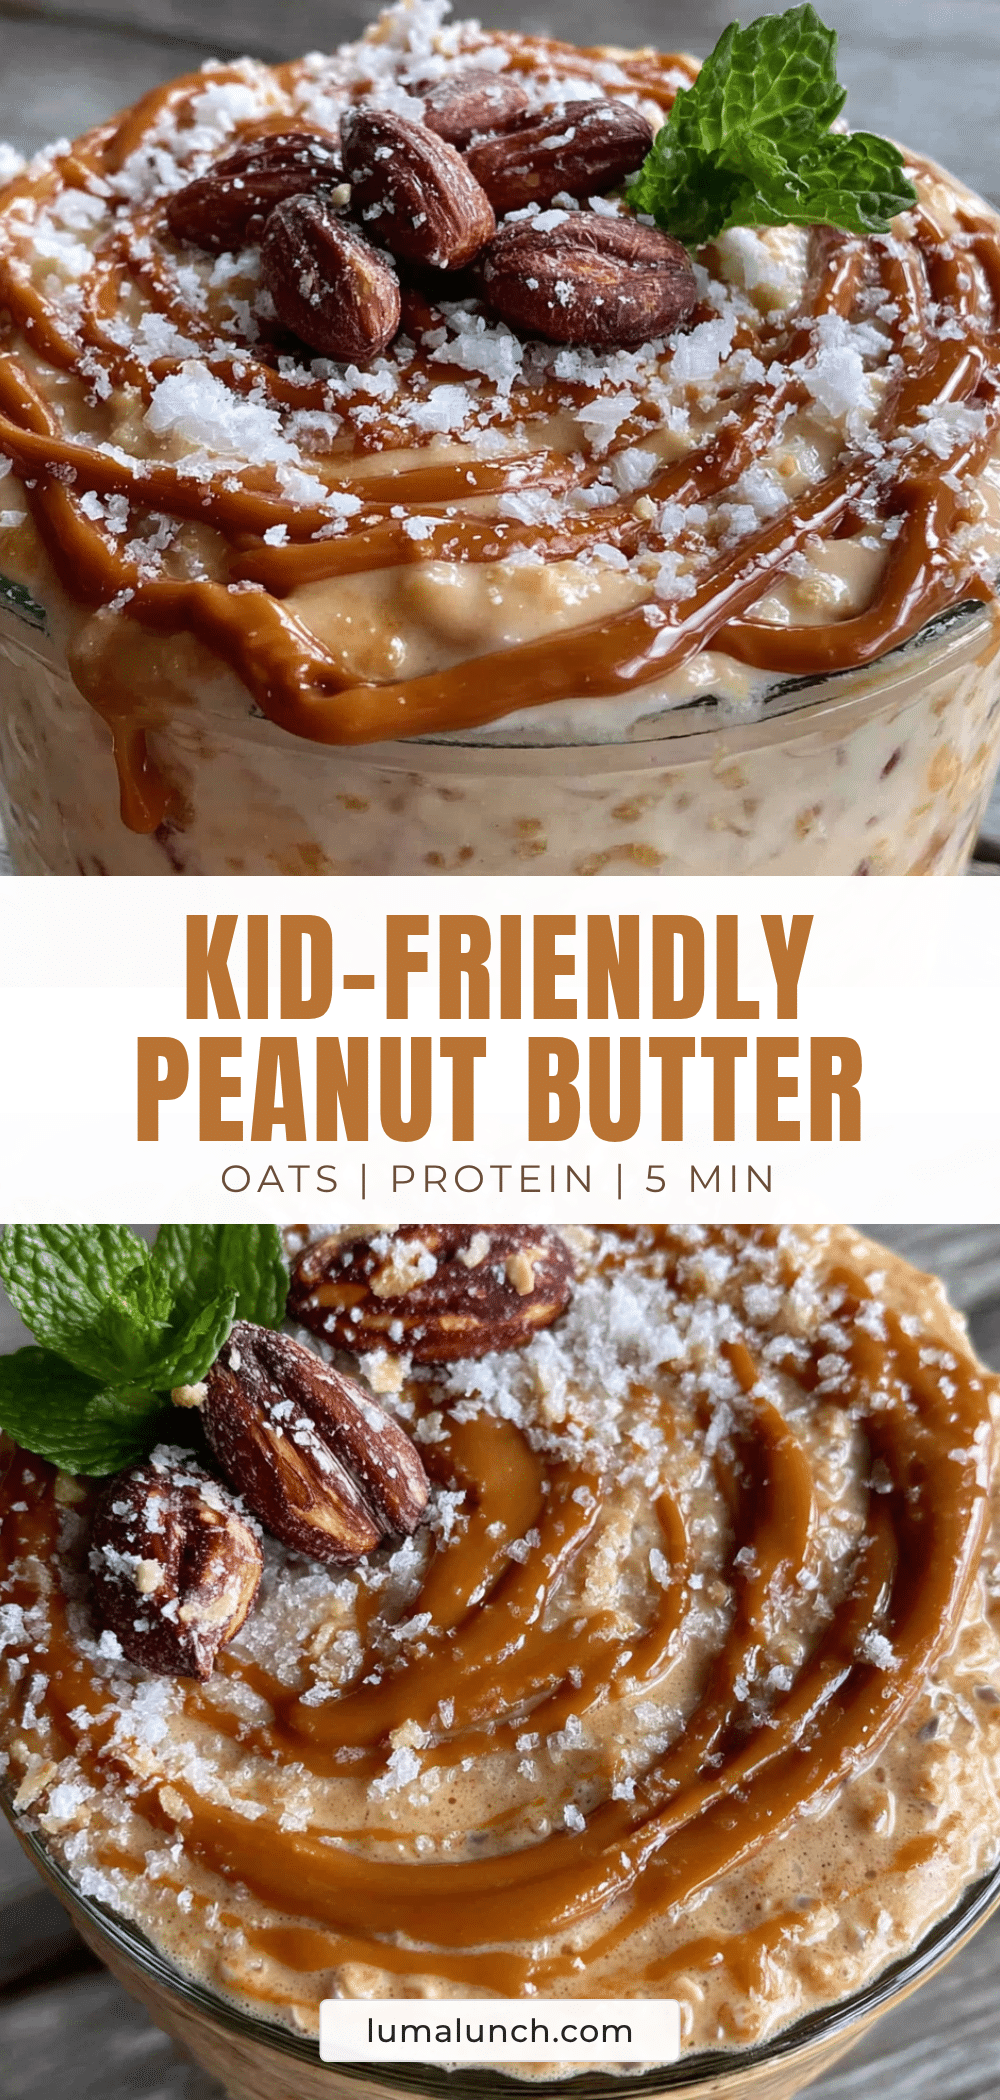
Easy Kid-Friendly Peanut Butter Protein Overnight Oats

Creamy, protein-packed overnight oats with peanut butter that come together in just five minutes. Perfect for busy mornings and picky eaters, this make-ahead breakfast is both delicious and nourishing.
- Prep Time: 5 minutes
- Cook Time: 0 minutes
- Total Time: 5 minutes plus overnight refrigeration
- Yield: 1 serving 1x
- Category: Breakfast
- Cuisine: American
Ingredients
- 1 cup old-fashioned rolled oats
- 1 cup milk of your choice
- 1/2 cup plain Greek yogurt
- 2 tablespoons creamy peanut butter
- 1 scoop vanilla or unflavored protein powder (optional)
- 1 tablespoon maple syrup or honey
- 1/2 teaspoon vanilla extract
- Pinch of salt
- For serving: sliced banana or berries, extra peanut butter drizzle, mini chocolate chips or chopped peanuts, dash of cinnamon
Instructions
- Combine the wet ingredients first. In your jar or a small bowl, add 1 cup of milk, 1/2 cup of Greek yogurt, 1 tablespoon of maple syrup, and 1/2 teaspoon of vanilla extract. Whisk or stir until everything is smooth and well combined.
- Add the protein powder (if using). Sprinkle 1 scoop of your protein powder over the wet mixture and stir until no dry clumps remain.
- Stir in the oats and salt. Add 1 cup of old-fashioned rolled oats and a pinch of salt to the jar. Stir everything together until the oats are fully coated and evenly distributed.
- Add the peanut butter (but don’t stir it in yet). Drop 2 tablespoons of peanut butter on top of the oat mixture, but don’t stir it in.
- Cover and refrigerate overnight (or at least 6 hours). Put the lid on your jar and place it in the refrigerator.
- In the morning, stir in the peanut butter. Take your jar out of the fridge, add the peanut butter that’s been sitting on top, and stir it in thoroughly.
- Adjust the consistency. If your oats are too thick, stir in a splash of milk (about 1 to 2 tablespoons) until it reaches your desired consistency.
- Add your toppings and serve. Top your oats with sliced banana, a handful of berries, a sprinkle of mini chocolate chips, or an extra drizzle of peanut butter. Serve cold straight from the fridge, or let it sit at room temperature for 5 to 10 minutes if your family prefers less cold breakfasts.
Notes
Don’t use quick oats—they get too mushy. Measure oats correctly by spooning them into the cup and leveling off. Let peanut butter come to room temperature before stirring in the morning for easier mixing. Make a double batch on Sunday for the whole week. These oats keep in the fridge for up to 5 days.
Nutrition
- Serving Size: 1 jar
- Calories: 420
- Sugar: 148
- Fat: 16
- Saturated Fat: 5
- Carbohydrates: 45
- Fiber: 6
- Protein: 28
Keywords: overnight oats, peanut butter, protein, kid-friendly, easy breakfast, make-ahead, healthy breakfast


