Love this? Save it for later!
Share the inspiration with your friends
My sister asked why I couldn’t just mix everything in one bowl instead of dirtying three. I started to explain why that wouldn’t work—something about the order of wet and dry ingredients, the importance of aerating flour, the science of it all. Then I stopped. Honestly, I had no good reason except that’s how I’d always done it.
So I gave it a shot, half expecting a dense, sad loaf. The bananas were already turning that shade of brown that makes you feel guilty, and I had a half-empty tub of sour cream taking up space in the fridge. I figured if it flopped, I’d just call it a “learning experience” and move on.
Well, let me tell you—that one-bowl banana bread came out so tender and moist I actually laughed out loud. The sour cream did something magical, keeping every slice perfectly soft without being the least bit gummy. I kept sneaking back to the counter to cut “just one more thin slice” until half the loaf was gone.
You know that feeling when you accidentally stumble onto something better than your carefully planned version? That was this bread. I’ve made it every week since, and I honestly don’t think I’ll ever go back to the multi-bowl method. It’s simpler, it’s faster, and somehow—against all my instincts—it’s actually better.
Why You’ll Love This Recipe
This isn’t just another banana bread recipe taking up space in your bookmarks. I’ve tested this one more times than I care to admit, tweaking the sour cream ratio and the mixing method until everything clicked. Here’s what makes it worth your time:
- One Bowl, No Fuss : Everything goes into a single bowl—no separate mixing of dry and wet ingredients. You’ll have less cleanup and more time to actually enjoy the bread.
- Unbelievably Moist Texture : The sour cream is the secret weapon here. It adds richness and tenderness without making the bread heavy or greasy. Every bite practically melts.
- Perfectly Balanced Sweetness : Not too sweet, not too plain. The natural banana flavor shines through, with just enough sugar to make it feel like a treat.
- Pantry-Friendly Ingredients : You probably have everything you need right now. Overripe bananas, sour cream, butter, flour, sugar, eggs—that’s it.
- Forgiving and Foolproof : This batter is incredibly forgiving. Overmix it a little? No problem. Use slightly different banana sizes? Still works. It’s the kind of recipe that builds confidence.
- Family-Approved : I’ve brought this to brunches, potlucks, and quiet Sunday mornings. It disappears every single time, and people always ask for the recipe.
This bread is the kind that makes you close your eyes after the first bite. It’s comfort food reimagined—simpler, faster, but with the same soul-soothing satisfaction. Perfect for using up those spotty bananas on your counter, or for turning an ordinary morning into something special.
What Ingredients You Will Need
This recipe relies on simple, everyday ingredients that work together to create something truly special. Most of these are probably already in your kitchen, which is exactly how I like it.
- Ripe Bananas (about 3 medium, mashed to yield 1 ½ cups / 340g): The riper the better. Look for bananas with plenty of brown spots—they’re sweeter and easier to mash. If your bananas aren’t quite ready, you can speed things up by roasting them in their skins at 300°F for 15 minutes.
- Sour Cream (½ cup / 120g, at room temperature): This is the star player. Full-fat sour cream gives the best texture, but light sour cream works too. For a dairy-free version, try plain coconut yogurt or a thick plant-based sour cream.
- Unsalted Butter (½ cup / 113g, melted and slightly cooled): I recommend using a good-quality butter like Kerrygold for the richest flavor. If you only have salted butter, just reduce the added salt to ¼ teaspoon.
- Granulated Sugar (¾ cup / 150g): Regular white sugar keeps the bread light and tender. You can substitute coconut sugar for a deeper flavor, but the texture will be slightly denser.
- Large Eggs (2, at room temperature): Room-temperature eggs blend more evenly into the batter. If you’re in a hurry, place them in a bowl of warm water for 5 minutes.
- Vanilla Extract (1 teaspoon): Pure vanilla extract adds warmth and depth. If you only have imitation vanilla, it’ll still work fine—just use a slightly heaping teaspoon.
- All-Purpose Flour (1 ¾ cups / 220g): Spoon and level your flour for the most accurate measurement. Scooping directly from the bag can pack in too much flour and make the bread dry.
- Baking Soda (1 teaspoon): This is the primary leavener. Make sure it’s fresh—test it by dropping a pinch into vinegar; if it fizzes vigorously, it’s good to go.
- Salt (½ teaspoon): Fine sea salt or table salt works best. It balances the sweetness and enhances the banana flavor.
- Optional Mix-Ins : ½ cup chopped walnuts, pecans, or chocolate chips. I love adding dark chocolate chips for a little indulgence, but the bread is absolutely delicious on its own.
Equipment Needed
You don’t need fancy equipment for this recipe—just a few basics you probably already own:
- Large Mixing Bowl (at least 3-quart capacity): A glass or stainless steel bowl works great. I use my grandmother’s old ceramic bowl, but anything large enough to hold all the ingredients without splashing will do.
- Wooden Spoon or Rubber Spatula : A sturdy spoon for mixing, or a spatula for scraping the bowl clean. I prefer a silicone spatula because it gets every last bit of batter.
- 9×5-Inch Loaf Pan : This is the standard size. If you use an 8×4-inch pan, you’ll need to bake it a bit longer—start checking at 55 minutes. Glass or metal both work, but metal gives a nicer golden crust.
- Parchment Paper (optional but helpful): Lining the pan makes removal effortless. If you don’t have parchment, just grease the pan thoroughly with butter or non-stick spray.
- Cooling Rack : Essential for even cooling. If you don’t have one, you can use the inverted loaf pan to prop the bread up slightly.
- Fork or Potato Masher : For mashing the bananas. A fork works perfectly, but a potato masher is faster if you’re making multiple loaves.
Preparation Method
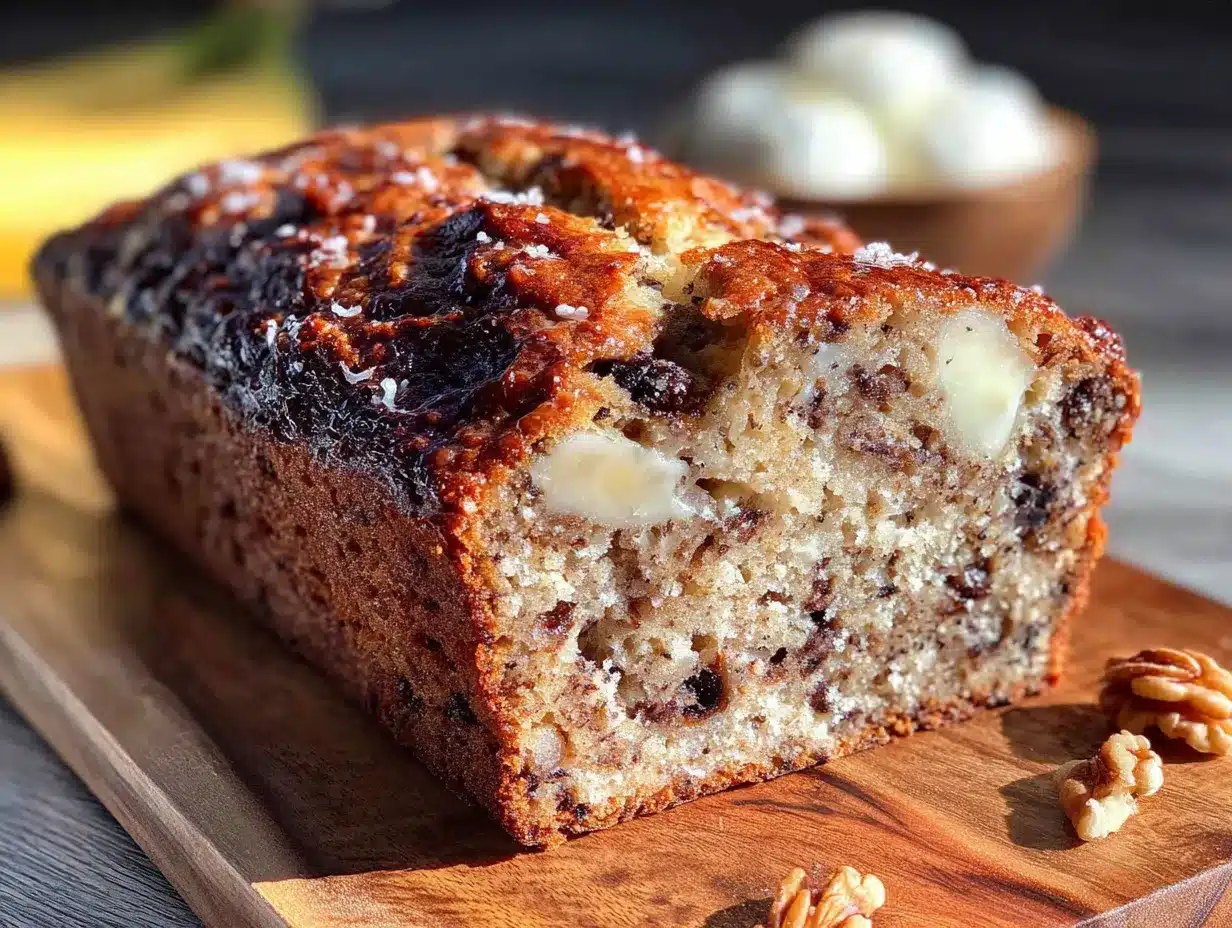
- Preheat and Prep (5 minutes): Preheat your oven to 350°F (175°C). Grease a 9×5-inch loaf pan with butter or non-stick spray, then line it with a strip of parchment paper that hangs over the two long sides. This creates handy “handles” for lifting the bread out later.
- Mash the Bananas (3 minutes): Peel your three ripe bananas and place them in your large mixing bowl. Mash them with a fork or potato masher until mostly smooth, with a few small lumps remaining for texture. You want about 1 ½ cups of mashed banana. If you have a little more or less, don’t stress—the bread is forgiving.
- Add the Wet Ingredients (3 minutes): To the mashed bananas, add the melted butter, sour cream, granulated sugar, eggs, and vanilla extract. Stir with your wooden spoon or spatula until everything is well combined. The mixture should look smooth and slightly glossy. Don’t worry if it looks a little separated at first—it will come together as you stir.
- Add the Dry Ingredients (2 minutes): Sprinkle the flour, baking soda, and salt evenly over the wet mixture. Stir gently, just until no streaks of flour remain. A few small lumps are perfectly fine—overmixing can make the bread tough. If you’re adding nuts or chocolate chips, fold them in at this point with just a few strokes.
- Fill the Pan (1 minute): Pour the batter into your prepared loaf pan and spread it evenly with your spatula. The batter will be thick and slightly fluffy—that’s exactly what you want. Give the pan a gentle tap on the counter to release any air bubbles.
- Bake (50-60 minutes): Place the pan in the center of the preheated oven and bake for 50-60 minutes. At the 30-minute mark, check the bread—if the top is browning too quickly, loosely tent it with aluminum foil. The bread is done when a toothpick inserted into the center comes out clean or with just a few moist crumbs. The top should be golden brown and spring back when lightly touched.
- Cool (10 minutes in pan, then completely on rack): Let the bread cool in the pan for 10 minutes. Then, using the parchment handles, lift it out and transfer it to a wire rack to cool completely. Resist the urge to slice it while it’s warm—it needs time to set, and you’ll get cleaner slices if you wait.
Cooking Tips & Techniques
I’ve made this banana bread more times than I can count, and I’ve learned a few things along the way—some from success, some from spectacular failure. Here’s what I wish someone had told me:
Room Temperature Ingredients Matter : I know, I know—it’s tempting to use cold eggs straight from the fridge. But room-temperature ingredients blend more smoothly and create a better emulsion, which means a more tender crumb. Take the eggs and sour cream out 30 minutes before you start, or warm the eggs in a bowl of warm water for 5 minutes.
Don’t Overmix : This is the most common mistake. Once you add the flour, stir just until it disappears. Overmixing develops the gluten and can make your bread tough and dense. A few streaks of flour are better than a tough loaf.
Check for Doneness Properly : A toothpick test is reliable, but also look for the edges pulling away from the pan and a cracked, golden top. If the toothpick comes out with wet batter, give it 5 more minutes and check again. If it comes out clean, it’s done—don’t overbake or it will dry out.
Adapt to Your Oven : All ovens run differently. If yours runs hot, start checking at 45 minutes. If it runs cool, you might need the full 60 minutes. Getting to know your oven’s quirks is half the battle in baking.
One Mistake I Made : I once used baking powder instead of baking soda because I grabbed the wrong container. The bread rose beautifully in the oven, then collapsed into a dense, sunken mess. Baking soda is the right choice here—it reacts with the acidity of the sour cream and bananas to create a light, tender texture. Double-check your leavener before you start.
Variations & Adaptations
This recipe is wonderfully flexible. Here are a few ways to make it your own:
- Chocolate Chip Banana Bread : Fold in ½ cup of semi-sweet or dark chocolate chips along with the flour. The warm, melty pockets of chocolate are absolutely irresistible. I’ve also tried white chocolate chips, and that works beautifully too.
- Nutty Banana Bread : Add ½ cup of toasted walnuts or pecans, roughly chopped. Toasting the nuts first brings out their flavor and keeps them crunchy in the finished bread. Just spread them on a baking sheet and toast at 350°F for 5-7 minutes.
- Gluten-Free Version : Substitute the all-purpose flour with a 1:1 gluten-free baking blend that contains xanthan gum. I’ve had great results with King Arthur’s Measure for Measure flour. The texture will be slightly more delicate, so let it cool completely before slicing.
- Dairy-Free Adaptation : Use a plant-based butter substitute and replace the sour cream with an equal amount of full-fat coconut yogurt or a dairy-free sour cream alternative. The flavor will be slightly different, but the texture stays remarkably close to the original.
- Spiced Banana Bread : Add 1 teaspoon of cinnamon, ½ teaspoon of nutmeg, and ¼ teaspoon of ground ginger along with the flour. This gives the bread a warm, cozy flavor that’s perfect for fall mornings.
Serving & Storage Suggestions
This banana bread is wonderful in so many ways. Here’s how to enjoy it at its best:
Serving : Serve slices at room temperature or lightly toasted. Toasting brings out the butteriness and adds a slight crunch to the edges. A pat of salted butter on a warm slice is pure heaven. For a special treat, serve it with a drizzle of honey or a dollop of whipped cream.
Pairings : This bread pairs beautifully with a hot cup of coffee, a chai latte, or a glass of cold milk. For brunch, serve it alongside scrambled eggs and fresh fruit for a complete meal.
Storage : Wrap the cooled loaf tightly in plastic wrap or aluminum foil and store at room temperature for up to 4 days. The sour cream keeps it moist longer than traditional banana bread. If your kitchen is warm, you can store it in the refrigerator, but bring slices to room temperature before serving for the best texture.
Freezing : This bread freezes beautifully. Wrap the entire loaf or individual slices tightly in plastic wrap, then place in a freezer-safe bag or container. It will keep for up to 3 months. To thaw, leave it at room temperature for a few hours, or pop a frozen slice in the toaster for a quick treat.
Flavor Development : Honestly, this bread tastes even better on the second day. The flavors meld together and the texture becomes even more moist. If you can resist eating it all on day one, you’re in for a real treat on day two.
Nutritional Information & Benefits
Here’s an approximate nutritional breakdown for one slice (based on 10 slices per loaf, without mix-ins):
- Calories : 285
- Total Fat : 13g
- Saturated Fat : 8g
- Carbohydrates : 38g
- Fiber : 2g
- Sugar : 18g
- Protein : 5g
Bananas are a great source of potassium, vitamin B6, and vitamin C. They also provide natural sweetness, which allows us to use less refined sugar. Sour cream adds calcium and a touch of protein, plus it keeps the bread incredibly moist without needing excessive butter or oil.
This recipe is vegetarian-friendly and can easily be adapted for gluten-free or dairy-free diets. It contains wheat, dairy, and eggs, so it’s not suitable for those with allergies to these ingredients. If you’re watching your sugar intake, you can reduce the granulated sugar to ½ cup—the bananas provide plenty of sweetness on their own.
I love that this bread feels like a treat but uses real, whole-food ingredients. It’s the kind of thing you can feel good about eating for breakfast or sneaking as an afternoon snack.
FAQs
Can I use frozen bananas for this recipe?
Absolutely! Frozen bananas work perfectly. Thaw them completely, then drain off any excess liquid before mashing. The thawed bananas will be very soft and almost liquid—that’s fine. Just mash them well and proceed with the recipe. The flavor is actually more concentrated in frozen bananas, which is a bonus.
Why did my banana bread sink in the middle?
A sunken middle usually means the bread was underbaked or the oven temperature was too low. Make sure your oven is properly preheated to 350°F and that you’re using an oven thermometer to check accuracy. Also, avoid opening the oven door during the first 30 minutes of baking—the rush of cold air can cause the bread to collapse.
Can I make this recipe into muffins instead of a loaf?
Yes, you can! Grease a 12-cup muffin tin or line it with paper liners. Divide the batter evenly among the cups, filling each about ¾ full. Bake at 350°F for 18-22 minutes, or until a toothpick inserted into the center of a muffin comes out clean. You’ll get about 12 standard-sized muffins.
How do I know when my bananas are ripe enough?
Look for bananas with plenty of brown spots on the peel—the more spots, the sweeter and more flavorful they’ll be. The peel should be mostly yellow with brown patches, and the banana should feel soft when gently squeezed. If your bananas are still mostly green or yellow without spots, they’re not ready yet. You can speed up ripening by placing them in a paper bag with an apple overnight.
Can I add other fruits or flavors to this bread?
Definitely! You can fold in ½ cup of fresh or frozen blueberries, diced strawberries, or even shredded zucchini (squeeze out the excess moisture first). For flavor variations, try adding 1 teaspoon of cinnamon, ½ cup of shredded coconut, or the zest of one orange. Just keep the total volume of add-ins to about ½ cup to avoid overwhelming the batter.
Conclusion
This one-bowl banana bread with sour cream has become my go-to recipe for good reason. It’s simple enough for a Tuesday morning, special enough for a holiday brunch, and forgiving enough for a beginner baker. The sour cream makes it impossibly moist, the one-bowl method makes it practically effortless, and the banana flavor is exactly what you want from a classic banana bread.
I hope you give this recipe a try, and I hope it becomes a staple in your kitchen the way it has in mine. Feel free to customize it with your favorite mix-ins—that’s the beauty of a good base recipe. And if you come up with a variation you love, I’d love to hear about it in the comments below.
Happy baking, friends. Your kitchen is about to smell absolutely amazing.
Pin This Recipe!
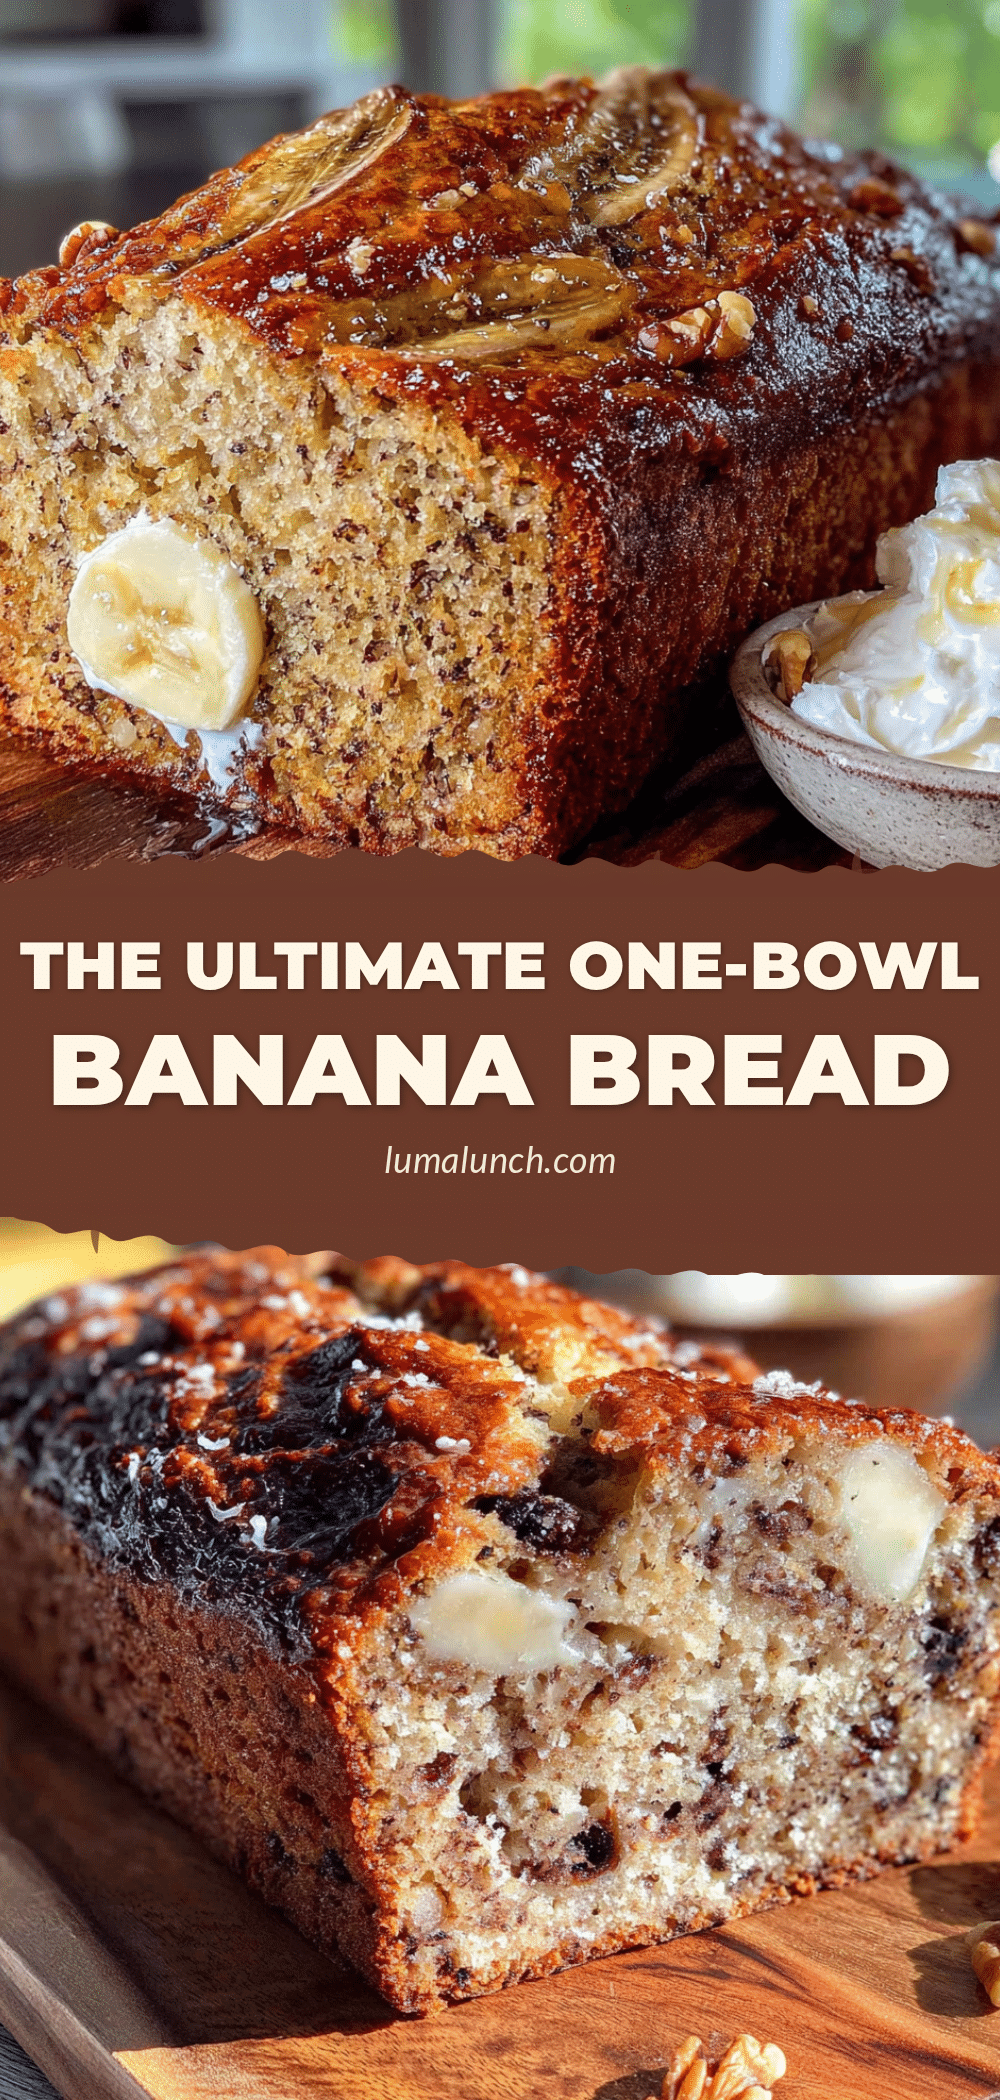
Perfect One-Bowl Banana Bread with Sour Cream Recipe
This incredibly moist and tender banana bread comes together in just one bowl, thanks to the magic of sour cream. It’s a foolproof, family-approved recipe that’s perfect for using up overripe bananas and requires minimal cleanup.
- Prep Time: 15 minutes
- Cook Time: 55 minutes
- Total Time: 1 hour 10 minutes
- Yield: 10 servings 1x
- Category: Dessert
- Cuisine: American
Ingredients
- 3 medium ripe bananas (mashed to yield 1 ½ cups / 340g)
- ½ cup sour cream (120g, at room temperature)
- ½ cup unsalted butter (113g, melted and slightly cooled)
- ¾ cup granulated sugar (150g)
- 2 large eggs (at room temperature)
- 1 teaspoon vanilla extract
- 1 ¾ cups all-purpose flour (220g)
- 1 teaspoon baking soda
- ½ teaspoon salt
- ½ cup chopped walnuts, pecans, or chocolate chips (optional)
Instructions
- Preheat your oven to 350°F (175°C). Grease a 9×5-inch loaf pan with butter or non-stick spray, then line it with a strip of parchment paper that hangs over the two long sides.
- Peel the ripe bananas and place them in a large mixing bowl. Mash them with a fork or potato masher until mostly smooth, with a few small lumps remaining. You should have about 1 ½ cups of mashed banana.
- Add the melted butter, sour cream, granulated sugar, eggs, and vanilla extract to the mashed bananas. Stir with a wooden spoon or rubber spatula until well combined and smooth.
- Sprinkle the flour, baking soda, and salt evenly over the wet mixture. Stir gently just until no streaks of flour remain. A few small lumps are fine. If using nuts or chocolate chips, fold them in at this point.
- Pour the batter into the prepared loaf pan and spread it evenly. Tap the pan gently on the counter to release any air bubbles.
- Bake for 50-60 minutes. At the 30-minute mark, check the bread; if the top is browning too quickly, loosely tent it with aluminum foil. The bread is done when a toothpick inserted into the center comes out clean or with a few moist crumbs.
- Let the bread cool in the pan for 10 minutes. Then, using the parchment handles, lift it out and transfer it to a wire rack to cool completely before slicing.
Notes
Room temperature ingredients blend more smoothly. Don’t overmix once flour is added. Check for doneness with a toothpick. The bread tastes even better on the second day. For muffins, bake at 350°F for 18-22 minutes.
Nutrition
- Serving Size: 1 slice
- Calories: 285
- Sugar: 18
- Fat: 13
- Saturated Fat: 8
- Carbohydrates: 38
- Fiber: 2
- Protein: 5
Keywords: banana bread, sour cream banana bread, one bowl banana bread, moist banana bread, easy banana bread, homemade banana bread


