Love this? Save it for later!
Share the inspiration with your friends
A friend asked why I couldn’t just bake the cheesecake filling directly in the mini muffin pan without a crust. I started to explain why that wouldn’t work—then stopped. Honestly, I had no good reason. I’d just always done it the traditional way, with a graham cracker crust pressed into every single tiny cup.
So I tried it. I poured the pumpkin cheesecake batter straight into the greased pan, skipped the crust entirely, and crossed my fingers. The power went out halfway through baking—a classic Tuesday, right?—and I had to finish them in a borrowed neighbor’s oven. Let me tell you, those mini pumpkin cheesecake bites came out perfect. Creamy, set, and absolutely delicious. I mean, I was genuinely shocked. I’ve been making cheesecake for years, and this beginner’s shortcut taught me something I should have figured out ages ago. Maybe you’ve been there, too—stuck in your own cooking habits when the simpler way was right in front of you.
These perfect mini pumpkin cheesecake bites have become my go-to fall dessert. They’re the kind of recipe that makes you close your eyes after the first bite. No water bath, no crust, no fuss. Just pure pumpkin cheesecake goodness in a two-bite package. I keep making them because they prove that sometimes the best recipes come from letting go of what you think you know.
Why You’ll Love This Recipe
Let me tell you why these perfect mini pumpkin cheesecake bites have earned a permanent spot in my fall baking rotation. I’ve tested this recipe at least a dozen times—through burnt edges, cracked tops, and one memorable batch where I forgot the sugar entirely. Trust me, this version is the winner.
- Quick & Easy: Comes together in under 30 minutes, with only 10 minutes of hands-on prep. Perfect for busy weeknights or last-minute Thanksgiving contributions.
- Simple Ingredients: No fancy grocery trips needed. You likely already have cream cheese, pumpkin puree, and eggs in your kitchen right now.
- Perfect for Fall Gatherings: Great for Halloween parties, Friendsgiving, or cozy Sunday afternoons when you want something sweet without the commitment of a full cheesecake.
- Crowd-Pleaser: Always gets rave reviews from kids and adults alike. I’ve watched people eat four in a row without blinking.
- Unbelievably Delicious: The texture is next-level creamy—like pumpkin pie and cheesecake had a perfect little baby. The flavor combo of warm spices and tangy cream cheese is pure comfort.
What makes this recipe different from the rest? It’s the technique. By skipping the crust and baking at a lower temperature, you get a silky-smooth texture that doesn’t crack or sink. I’ve tested this with full-fat and low-fat cream cheese, and I can tell you with confidence—this is my best version. It’s comfort food reimagined: healthier, faster, but with the same soul-soothing satisfaction. Perfect for impressing guests without stress, or turning a simple Tuesday into something memorable.
What Ingredients You Will Need
This recipe uses simple, wholesome ingredients to deliver bold pumpkin flavor and satisfying creaminess without the fuss. Most of these are pantry staples, especially during fall baking season.
- Cream cheese: 16 ounces, softened to room temperature. I recommend Philadelphia for the creamiest texture. (Don’t use whipped or spreadable cream cheese—it changes the consistency.)
- Pumpkin puree: 1 cup (not pumpkin pie filling). Libby’s is my go-to brand for consistent results. Make sure it’s 100% pure pumpkin.
- Granulated sugar: ½ cup (adds sweetness and helps with texture)
- Light brown sugar: ¼ cup, packed (adds depth and moisture)
- Large eggs: 2, room temperature (helps create a smooth, creamy texture)
- Vanilla extract: 1 teaspoon (use pure vanilla extract for best flavor)
- Pumpkin pie spice: 1½ teaspoons (or make your own with cinnamon, nutmeg, ginger, and cloves)
- Ground cinnamon: ½ teaspoon (for extra warmth)
- Salt: ¼ teaspoon (balances sweetness and enhances flavor)
- Optional for topping: Whipped cream, caramel sauce, or a sprinkle of cinnamon sugar
For the cream cheese, let it sit on the counter for at least 30 minutes before starting. Cold cream cheese creates lumps that are nearly impossible to smooth out. I learned this the hard way during a rushed baking session—my mini pumpkin cheesecake bites had tiny white specks throughout. Still tasty, but not as pretty.
If you’re using homemade pumpkin puree, strain it through a cheesecloth or coffee filter first. Store-bought puree is thicker, which gives these bites their perfect dense-but-creamy texture. For a dairy-free option, use a high-quality vegan cream cheese alternative—just make sure it’s the block style, not the spreadable kind.
Equipment Needed
You don’t need much to make these perfect mini pumpkin cheesecake bites, which is part of their charm.
- Mini muffin pan: 24-cup size. I use a non-stick Wilton pan and it works beautifully.
- Electric mixer: Handheld or stand mixer. A whisk and strong arm work too, but the mixer gives you that silky-smooth texture.
- Mixing bowls: One medium, one small
- Rubber spatula: For scraping down the bowl and getting every last bit of batter
- Measuring cups and spoons: For accurate ingredient portions
- Mini muffin liners: Optional, but they make cleanup easier. I like the foil ones for a prettier presentation.
- Cookie scoop: A 1-tablespoon scoop makes filling the cups mess-free. Trust me on this one.
- Cooling rack: For even cooling without soggy bottoms
If you don’t have a mini muffin pan, you can use a regular muffin pan and bake for 18-20 minutes instead. The texture will be slightly different—more muffin-like—but still delicious. I’ve done this when my mini pan was in use for another recipe, and honestly, no one complained.
Preparation Method
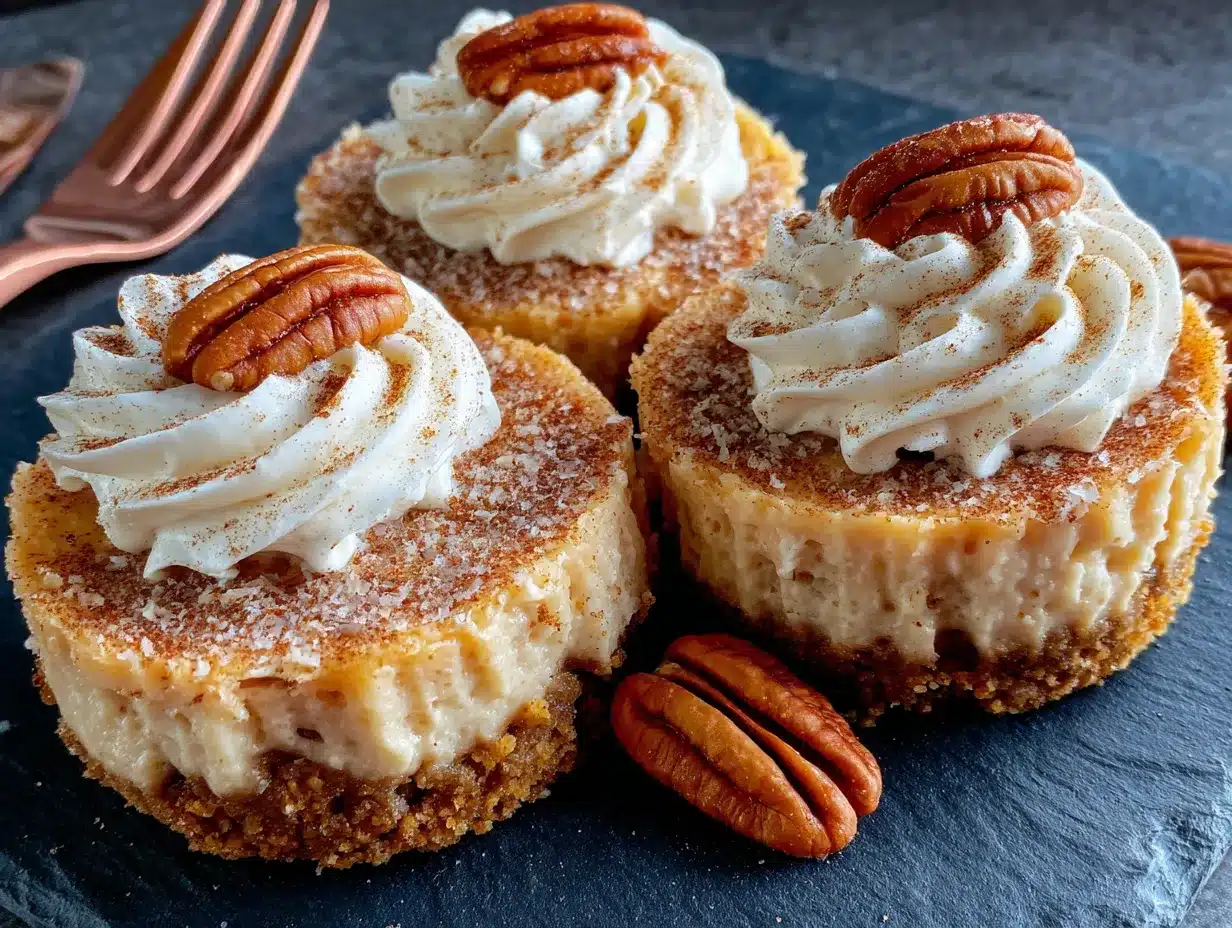
Here’s how to make these perfect mini pumpkin cheesecake bites. I’ve included every detail I wish someone had told me the first time I made them.
- Preheat your oven to 325°F (163°C). This lower temperature is key—it prevents the cheesecake from cracking or puffing up too much. While the oven heats, grease your mini muffin pan generously with butter or non-stick spray. If using liners, place them in each cup now.
- Beat the cream cheese until smooth. In a medium mixing bowl, beat the softened cream cheese with an electric mixer on medium speed for 2-3 minutes. Scrape down the sides and beaters with a rubber spatula. It should look glossy and completely lump-free. (This step matters more than you think—I once rushed it and ended up with lumpy bites.)
- Add the sugars. Add the granulated sugar and brown sugar to the cream cheese. Beat on medium speed for another 2 minutes until the mixture is light and fluffy. The brown sugar should be fully incorporated—no streaks of color remaining.
- Mix in the pumpkin and vanilla. Add the pumpkin puree and vanilla extract. Beat on low speed until just combined. Don’t overmix here, or the batter can become too thin. You want it thick and creamy, like a smoothie.
- Add the eggs one at a time. Crack the first egg into a small bowl (to catch any shell fragments), then add it to the batter. Beat on low speed until just incorporated. Repeat with the second egg. Overmixing at this stage adds too much air, which causes cracks during baking.
- Add the dry ingredients. Sprinkle the pumpkin pie spice, cinnamon, and salt over the batter. Fold them in gently with a rubber spatula until no streaks remain. The batter should be a beautiful orange color and smell like fall in a bowl.
- Fill the muffin cups. Use your cookie scoop or a small spoon to divide the batter evenly among the 24 mini muffin cups. Fill each cup about ¾ full—the bites won’t rise much, so you have room to fill generously. Tap the pan gently on the counter to release any air bubbles.
- Bake for 12-15 minutes. The edges should look set and slightly puffed, but the centers will still jiggle slightly when you shake the pan. That’s exactly what you want—they’ll continue setting as they cool. (I pulled my first batch out when the centers looked completely firm, and they came out dry. Learn from my mistake.)
- Cool completely in the pan. Place the pan on a cooling rack and let the bites cool for 30 minutes at room temperature. Then transfer the pan to the refrigerator and chill for at least 2 hours. This step is non-negotiable—the texture needs time to set properly.
- Remove from the pan. Once fully chilled, run a thin knife around the edges of each bite to loosen them. They should pop right out. If using liners, just lift them out gently.
The smell that fills your kitchen during baking is absolutely intoxicating—warm pumpkin, cinnamon, and vanilla all mingling together. It’s the kind of scent that makes everyone wander into the kitchen asking, “What’s for dessert?”
Cooking Tips & Techniques
After more batches of these perfect mini pumpkin cheesecake bites than I care to count, I’ve collected some hard-won wisdom.
Room temperature ingredients are your best friend. Cold cream cheese creates lumps. Cold eggs make the batter seize up. I set everything on the counter an hour before baking. If you’re in a rush, cut the cream cheese into small cubes and microwave it in 10-second bursts until soft but not melted.
Don’t overmix after adding the eggs. This was my biggest mistake early on. Overmixing incorporates too much air, which expands in the oven and then collapses, leaving you with cracked, sunken bites. Mix on low speed and stop as soon as the egg disappears into the batter.
The jiggle test is your guide. When you gently shake the pan, the centers should wobble like Jell-O, not slosh like liquid. If they look completely firm, they’re overbaked. Pull them out at the first sign of set edges with a slight jiggle in the middle.
Chill time matters more than you think. I know waiting is hard, especially when your kitchen smells amazing. But these bites need at least 2 hours in the fridge to develop that perfect creamy texture. I once served them after only an hour, and they were soft and almost runny. Patience pays off here.
Use a water bath alternative. Traditional cheesecake recipes use a water bath to prevent cracking. For these mini bites, I skip it entirely. The small size and low baking temperature do the job without the fuss. Just make sure your oven temperature is accurate—an oven thermometer is worth the investment.
One more thing: Let the bites come to room temperature for about 10 minutes before serving. Cold cheesecake can taste a bit flat. A few minutes on the counter lets the flavors bloom.
Variations & Adaptations
These perfect mini pumpkin cheesecake bites are wonderfully adaptable. Here are some variations I’ve tried and loved.
Gluten-Free Version: This recipe is naturally gluten-free since there’s no crust or flour involved. Just double-check your pumpkin pie spice blend—some brands add wheat starch as an anti-caking agent.
Dairy-Free Version: Use a high-quality dairy-free cream cheese alternative. I’ve had good results with the Kite Hill brand. The texture is slightly softer, so chill them for an extra 30 minutes before serving.
Maple Pumpkin Version: Replace the brown sugar with 3 tablespoons of pure maple syrup. Reduce the granulated sugar to ⅓ cup. The maple flavor pairs beautifully with the pumpkin—like autumn in a bite.
Chocolate Swirl Version: Melt ¼ cup of dark chocolate chips and drizzle it into the batter before filling the cups. Use a toothpick to swirl it gently. The chocolate and pumpkin combination is unexpectedly amazing.
Extra Spicy Version: Add ¼ teaspoon of ground ginger and a pinch of cayenne pepper to the spice mix. The subtle heat makes the pumpkin flavor pop even more.
Topping Variations: Top with a dollop of whipped cream and a sprinkle of cinnamon, a drizzle of caramel sauce, or a few toasted pecans. For a fancy presentation, add a tiny candied ginger piece on top.
I once made a batch with a gingersnap crust pressed into the bottom of each cup. It was delicious but honestly, the crustless version is simpler and just as satisfying. Sometimes less really is more.
Serving & Storage Suggestions
These perfect mini pumpkin cheesecake bites are best served chilled, straight from the refrigerator. Let them sit at room temperature for 5-10 minutes before serving to take the chill off and let the flavors open up.
For presentation, arrange them on a white platter or cake stand. The orange color pops beautifully against a neutral background. Sprinkle a little cinnamon or nutmeg over the top for a finished look. If you’re feeling fancy, add a tiny dollop of whipped cream and a dusting of cinnamon on each bite.
These pair wonderfully with a cup of hot coffee, spiced chai, or a glass of cold milk. For a dessert spread, serve them alongside apple cider donuts or a slice of pumpkin bread. They’re also perfect on a Thanksgiving dessert table—everyone loves having their own personal cheesecake.
Storage: Keep the bites in an airtight container in the refrigerator for up to 5 days. Place them in a single layer, or separate layers with wax paper to prevent sticking. The flavor actually improves after a day or two as the spices meld together.
Freezing: These freeze beautifully. Arrange the cooled bites on a baking sheet and freeze for 1 hour, then transfer to a freezer-safe container or zip-top bag. They’ll keep for up to 3 months. Thaw in the refrigerator overnight before serving. I always keep a stash in my freezer for unexpected guests or late-night cravings.
Reheating: I don’t recommend reheating these—they’re meant to be served cold. But if you prefer them slightly warm, microwave one bite for 5-7 seconds. Just don’t overdo it, or they’ll lose their creamy texture.
Nutritional Information & Benefits
Each perfect mini pumpkin cheesecake bite (based on 24 servings) contains approximately:
- Calories: 95
- Fat: 6g
- Carbohydrates: 8g
- Protein: 2g
- Sugar: 7g
- Sodium: 75mg
These values are estimates and will vary based on your specific ingredients and portion sizes.
Pumpkin is packed with vitamin A, which supports eye health and immune function. It’s also rich in fiber and antioxidants. The cream cheese provides calcium and protein, making these bites a slightly more balanced indulgence than your average dessert.
For a lower-sugar option, reduce the granulated sugar to ⅓ cup and use a sugar substitute like monk fruit or stevia for the remaining amount. The texture will be slightly less creamy, but still delicious.
These are naturally gluten-free and can be made dairy-free with simple substitutions. They’re also relatively low in carbohydrates compared to traditional cheesecake, thanks to the pumpkin puree replacing some of the sugar and fat.
I personally love that I can enjoy two or three of these without the guilt of a full slice of cheesecake. They satisfy my sweet tooth without sending my blood sugar on a roller coaster. Everything in moderation, right?
Conclusion
These perfect mini pumpkin cheesecake bites have become my most-requested recipe for fall gatherings, and for good reason. They’re simple enough for a beginner baker but impressive enough for a holiday dessert table. The creamy texture, warm spices, and two-bite size make them completely irresistible.
I love that this recipe proves you don’t need complicated techniques or fancy equipment to create something truly special. Sometimes the best recipes come from questioning your own assumptions—like skipping the crust entirely. It’s a lesson I carry into my cooking every day now.
I’d love to hear how these turn out for you! Try them with different spice blends, experiment with toppings, or make them your own. Drop a comment below and let me know what variations you tried. And if you share them on Pinterest, tag me—I love seeing your creations. Happy fall baking, friends!
Frequently Asked Questions
Can I use pumpkin pie filling instead of pumpkin puree?
No, please don’t. Pumpkin pie filling is already sweetened and spiced, which will throw off the balance of this recipe. Stick with 100% pure pumpkin puree for the best results.
Why did my mini cheesecake bites crack on top?
Cracks usually happen from overmixing the batter or overbaking. Mix on low speed after adding the eggs, and pull the bites out when the centers still jiggle slightly. The low oven temperature also helps prevent cracking.
Can I make these in advance for a party?
Absolutely! These are perfect make-ahead desserts. They actually taste better after a day or two in the fridge. Make them up to 3 days in advance and store them in an airtight container.
How do I know when they’re done baking?
The edges should look set and slightly puffed, but the centers will still jiggle when you shake the pan. That’s exactly what you want. They’ll continue setting as they cool in the pan.
Can I double this recipe?
Yes, this recipe doubles beautifully. Just make sure you have two mini muffin pans, or bake in batches. The batter can sit at room temperature for up to 30 minutes while you wait for the first batch to finish.
Pin This Recipe!
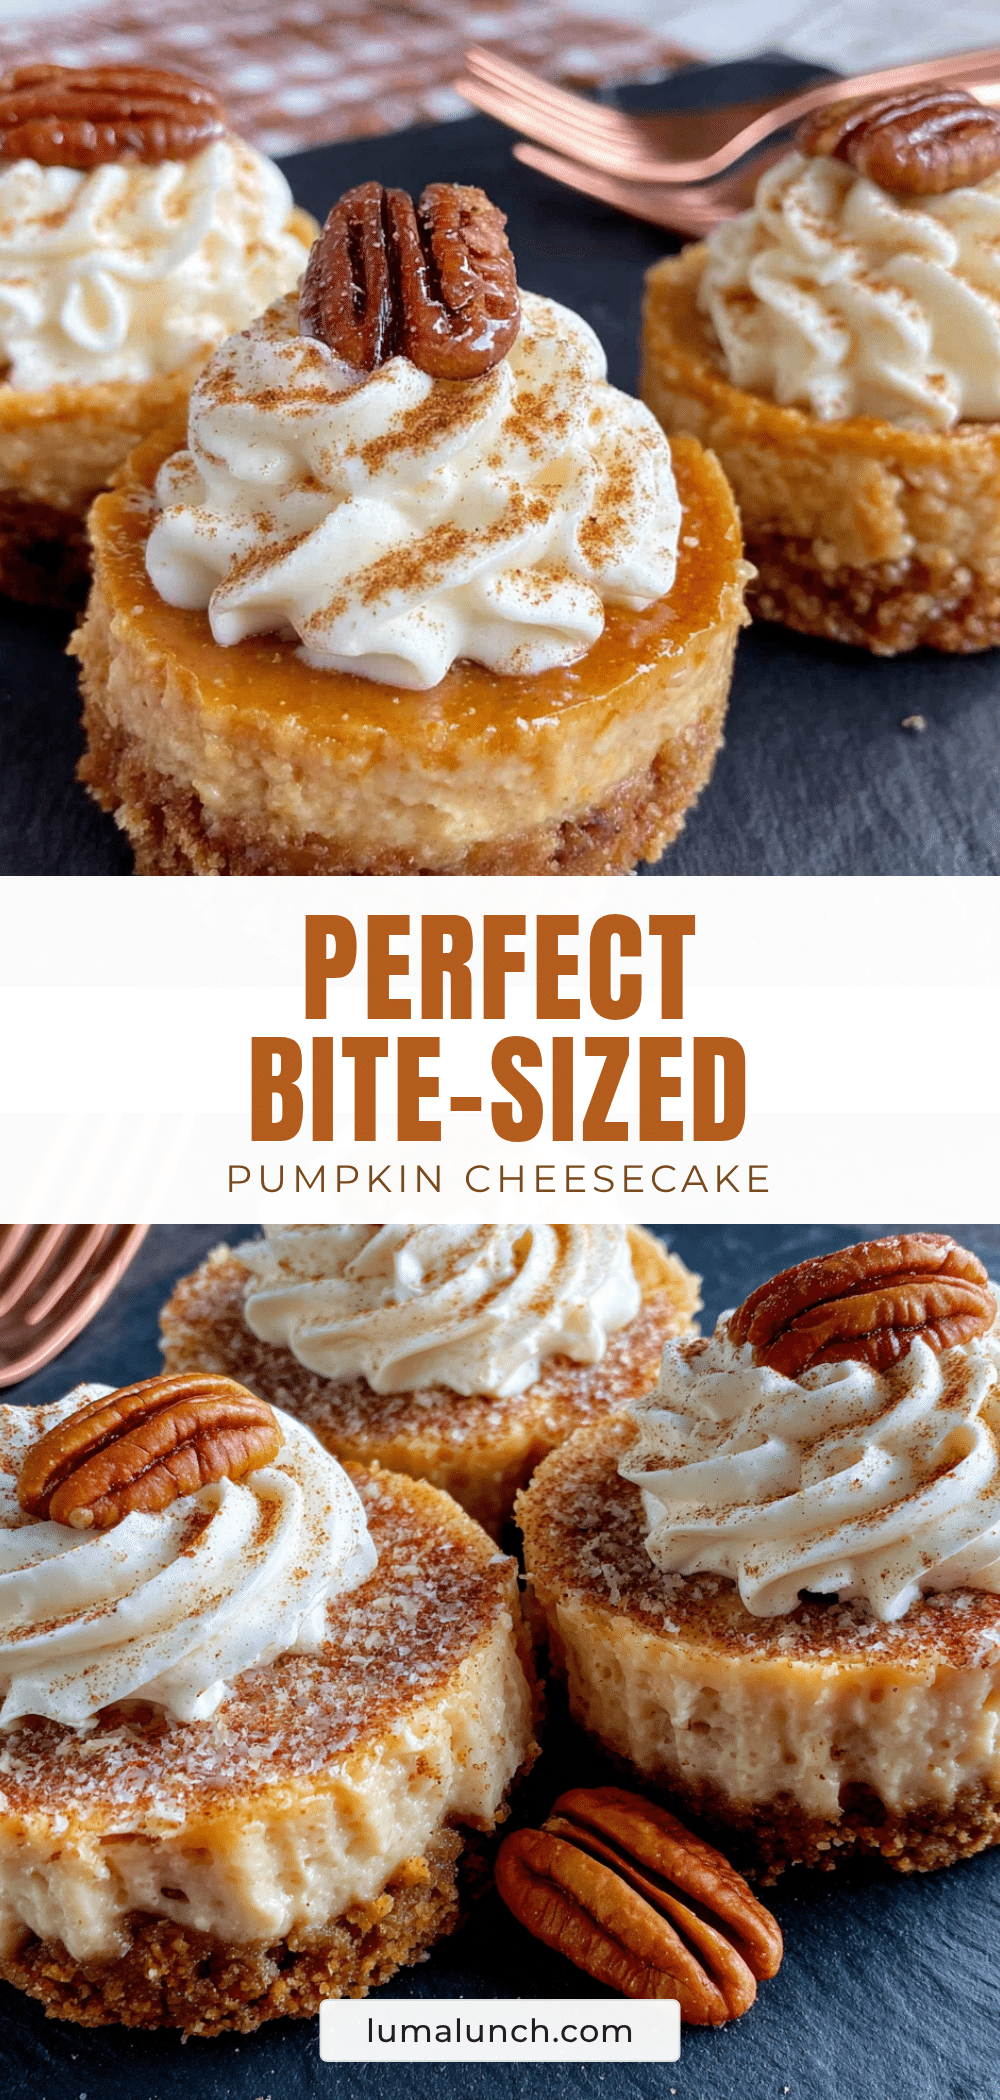
Perfect Mini Pumpkin Cheesecake Bites: Easy Fall Dessert
These perfect mini pumpkin cheesecake bites are a quick and easy fall dessert with no crust, no water bath, and no fuss. Creamy, spiced, and absolutely delicious, they come together in under 30 minutes and are perfect for gatherings.
- Prep Time: 10 minutes
- Cook Time: 15 minutes
- Total Time: 2 hours 25 minutes (includes chilling)
- Yield: 24 servings 1x
- Category: Dessert
- Cuisine: American
Ingredients
- 16 ounces cream cheese, softened to room temperature
- 1 cup pumpkin puree (not pumpkin pie filling)
- ½ cup granulated sugar
- ¼ cup light brown sugar, packed
- 2 large eggs, room temperature
- 1 teaspoon vanilla extract
- 1½ teaspoons pumpkin pie spice
- ½ teaspoon ground cinnamon
- ¼ teaspoon salt
- Optional for topping: Whipped cream, caramel sauce, or a sprinkle of cinnamon sugar
Instructions
- Preheat your oven to 325°F (163°C). Grease a 24-cup mini muffin pan generously with butter or non-stick spray. If using liners, place them in each cup now.
- In a medium mixing bowl, beat the softened cream cheese with an electric mixer on medium speed for 2-3 minutes until smooth and glossy. Scrape down the sides and beaters.
- Add the granulated sugar and brown sugar to the cream cheese. Beat on medium speed for another 2 minutes until light and fluffy.
- Add the pumpkin puree and vanilla extract. Beat on low speed until just combined. Do not overmix.
- Add the eggs one at a time, beating on low speed after each addition until just incorporated. Avoid overmixing.
- Sprinkle the pumpkin pie spice, cinnamon, and salt over the batter. Fold them in gently with a rubber spatula until no streaks remain.
- Use a cookie scoop or small spoon to divide the batter evenly among the 24 mini muffin cups, filling each about ¾ full. Tap the pan gently on the counter to release air bubbles.
- Bake for 12-15 minutes. The edges should look set and slightly puffed, but the centers will still jiggle slightly when you shake the pan.
- Cool the pan on a cooling rack for 30 minutes at room temperature. Then transfer the pan to the refrigerator and chill for at least 2 hours.
- Once fully chilled, run a thin knife around the edges of each bite to loosen them. Remove from the pan. If using liners, lift them out gently.
Notes
Room temperature ingredients are crucial for a smooth texture. Do not overmix after adding eggs to prevent cracks. The jiggle test is key: edges set but centers jiggle slightly. Chill for at least 2 hours for best texture. Let bites sit at room temperature for 10 minutes before serving for optimal flavor.
Nutrition
- Serving Size: 1 mini cheesecake bi
- Calories: 95
- Sugar: 7
- Sodium: 75
- Fat: 6
- Carbohydrates: 8
- Protein: 2
Keywords: mini pumpkin cheesecake bites, easy fall dessert, crustless cheesecake, pumpkin dessert, mini cheesecake, no-bake cheesecake, fall baking, Thanksgiving dessert


