Love this? Save it for later!
Share the inspiration with your friends
I was standing in line at the hardware store of all places, holding a bag of mulch I didn’t really need, when the woman behind me started talking about black velvet cake. She was maybe seventy, wearing a faded flannel shirt, and she looked like she’d rather be anywhere else. But when the cashier mentioned Halloween baking, she just lit up. “You want a showstopper?” she said, not really asking me. “You make black velvet cupcakes with spiderweb icing. The trick is the color—it’s got to look like midnight, not gray.” I mean, who expects cupcake wisdom from the paint aisle at a hardware store?
Honestly, I almost didn’t try her method. I figured I’d just add extra food coloring, you know, like everyone does. But something about the way she described the crumb—”velvet, not sponge”—stuck with me. So I went home, dug out my cocoa powder, and gave it a shot. That first batch was a mess, let me tell you. The color was off, the icing was too runny, and I ended up with frosting all over my counter. But I kept tweaking it, batch after batch, until I got it right. Now, these Perfect Black Velvet Halloween Cupcakes with Spiderweb Icing are my go-to for every spooky celebration.
Maybe you’ve been there—searching for that one Halloween dessert that actually looks impressive without requiring a pastry degree. These cupcakes are exactly that. They’re rich, moist, and that deep black color is genuinely dramatic. The spiderweb icing looks complicated, but it’s almost laughably easy once you know the trick. And let’s be real: watching someone’s face light up when they see that web pattern never gets old. That’s why this recipe stayed with me, and why I keep making it year after year.
Why You’ll Love This Recipe
These aren’t just another Halloween cupcake. I’ve tested this recipe more times than I care to count, tweaking the ratios and the technique until everything clicked. Here’s what makes them special:
- Quick & Easy: From start to finish, you’re looking at about 45 minutes. The batter comes together in one bowl, and the icing sets in minutes. Perfect for last-minute party prep or a fun weekend project with the kids.
- Simple Ingredients: No weird specialty items here. You probably have most of these in your pantry right now. The secret to that intense black color? A clever trick with cocoa powder and gel food coloring—no need for charcoal powder or anything sketchy.
- Perfect for Halloween Parties: These are the star of any spooky spread. They work for classroom treats, office parties, or just a cozy night in watching horror movies.
- Crowd-Pleaser: I’ve served these to kids, adults, and even picky relatives who “don’t like dark cake.” They disappear every single time. The texture is incredibly tender, and the flavor is just the right balance of rich chocolate and sweet vanilla.
- Unbelievably Delicious: The crumb is so soft it practically melts, and that spiderweb icing adds the perfect creamy finish. It’s next-level comfort food disguised as a spooky decoration.
What makes this recipe different from all the other black velvet recipes out there? It’s the technique. Instead of just dumping in food coloring and hoping for the best, we use a specific method that activates the cocoa powder’s natural pigments, giving you that deep, dark color without any bitter aftertaste. The icing uses a simple piping trick that anyone can master—no steady hands required. Honestly, it’s the kind of recipe that makes you close your eyes after the first bite and think, “Yeah, this is it.”
What Ingredients You Will Need
This recipe uses simple, everyday ingredients to create something that looks like it came from a fancy bakery. The magic is in how they work together, not in fancy ingredients.
For the Cupcakes
- 1 ½ cups all-purpose flour (spooned and leveled—don’t scoop directly from the bag or you’ll pack it too tight)
- 1 cup granulated sugar
- ½ cup unsweetened cocoa powder (I prefer Hershey’s Special Dark for a deeper color, but regular works fine)
- 1 teaspoon baking soda
- ½ teaspoon baking powder
- ½ teaspoon salt
- 1 cup buttermilk, room temperature (adds tenderness and helps activate the baking soda)
- ½ cup vegetable oil (keeps the crumb moist—don’t substitute melted butter here, it changes the texture)
- 2 large eggs, room temperature
- 2 teaspoons vanilla extract
- 1 tablespoon black gel food coloring (liquid won’t work—you need the concentrated gel for that true black color)
- 1 teaspoon white vinegar (reacts with the baking soda for extra lift)
For the Spiderweb Icing
- 1 cup unsalted butter, softened (I use Land O’Lakes—it has the right fat content for stable frosting)
- 3 ½ cups powdered sugar, sifted
- 2 tablespoons heavy cream (or whole milk in a pinch)
- 2 teaspoons vanilla extract
- Pinch of salt
- White gel food coloring (optional, for a brighter white web)
Ingredient Tips & Substitutions: If you don’t have buttermilk, you can make a quick substitute by adding 1 tablespoon of lemon juice or white vinegar to a cup of regular milk and letting it sit for 5 minutes. For a dairy-free version, use almond milk with the same lemon trick and swap the butter in the icing for a good-quality vegan butter. The black gel food coloring is non-negotiable for that dramatic color—skip the liquid stuff, it’ll just give you gray cupcakes. I’ve tried it, and it’s disappointing.
Equipment Needed
You don’t need a professional bakery setup for these. Here’s what you’ll actually use:
- 12-cup muffin tin (standard size)
- Paper cupcake liners (black or orange ones look amazing, but any color works)
- Two mixing bowls (one medium, one large)
- Whisk (for dry ingredients)
- Electric hand mixer or stand mixer (you can do this by hand, but your arm will thank you for the mixer)
- Rubber spatula (for scraping the bowl—don’t waste a drop of that batter)
- Ice cream scoop or measuring cup (for even batter distribution)
- Wire cooling rack
- Piping bag with a small round tip (or a zip-top bag with the corner snipped off)
- Toothpick or skewer (for creating the spiderweb pattern)
If you don’t have a piping bag, honestly, a sturdy zip-top bag works just fine. Just snip a tiny corner off and you’re in business. I’ve done it that way more times than I can count. For the muffin tin, a non-stick one is great, but if yours is older, just give the liners a quick spray of non-stick cooking spray to prevent sticking.
Preparation Method
Let’s walk through this step by step. I’ll tell you exactly what to look for at each stage so you know you’re on the right track.
Step 1: Preheat and Prep
Preheat your oven to 350°F (175°C). Line your muffin tin with 12 paper liners. This is one of those steps where doing it now saves you a frantic scramble later. Set the tin aside.
Step 2: Mix the Dry Ingredients
In a medium bowl, whisk together the flour, sugar, cocoa powder, baking soda, baking powder, and salt. Whisk for about 30 seconds—this aerates the flour and breaks up any lumps in the cocoa powder. You should see an even, dark brown mixture with no streaks of white flour. Set this aside.
Step 3: Combine the Wet Ingredients
In a large bowl, whisk together the buttermilk, vegetable oil, eggs, and vanilla extract. Whisk until the eggs are fully incorporated and the mixture looks smooth and slightly frothy. This takes about a minute. Now add the black gel food coloring and whisk again. The mixture will look like a dark, moody gray at this point—that’s normal. It’ll darken up once the dry ingredients are added.
Step 4: Combine Wet and Dry
Pour the dry ingredients into the wet ingredients. Use a rubber spatula to fold everything together gently. You want to mix until just combined—about 15 to 20 strokes. A few small lumps are totally fine. Overmixing will make the cupcakes tough, so resist the urge to keep stirring. Finally, add the white vinegar and give it one last gentle fold. You’ll see the batter bubble slightly—that’s the vinegar reacting with the baking soda, creating lift.
Step 5: Fill the Liners
Use your ice cream scoop or a measuring cup to divide the batter evenly among the 12 liners. Fill each about two-thirds full. The batter will be fairly thin—that’s okay, it’s supposed to be. If you have a kitchen scale, each liner should have about 60 grams of batter. If not, just eyeball it. Tap the tin gently on the counter a couple of times to release any air bubbles.
Step 6: Bake
Bake for 18 to 22 minutes. At the 18-minute mark, start checking. Insert a toothpick into the center of a cupcake—if it comes out clean or with just a few moist crumbs, they’re done. The tops should spring back when lightly touched. Don’t overbake, or they’ll be dry. Let them cool in the tin for 5 minutes, then transfer to a wire rack to cool completely. This is crucial—warm cupcakes will melt your icing into a puddle.
Step 7: Make the Icing
While the cupcakes cool, make the spiderweb icing. In a large bowl, beat the softened butter with an electric mixer on medium speed until it’s smooth and creamy—about 2 minutes. Add the sifted powdered sugar one cup at a time, beating on low speed after each addition. Scrape down the bowl as needed. Add the heavy cream, vanilla extract, and salt. Beat on medium-high speed for 3 to 4 minutes until the frosting is light, fluffy, and spreadable. If you want a brighter white web, add a tiny drop of white gel food coloring and beat until combined.
Step 8: Frost and Create the Web
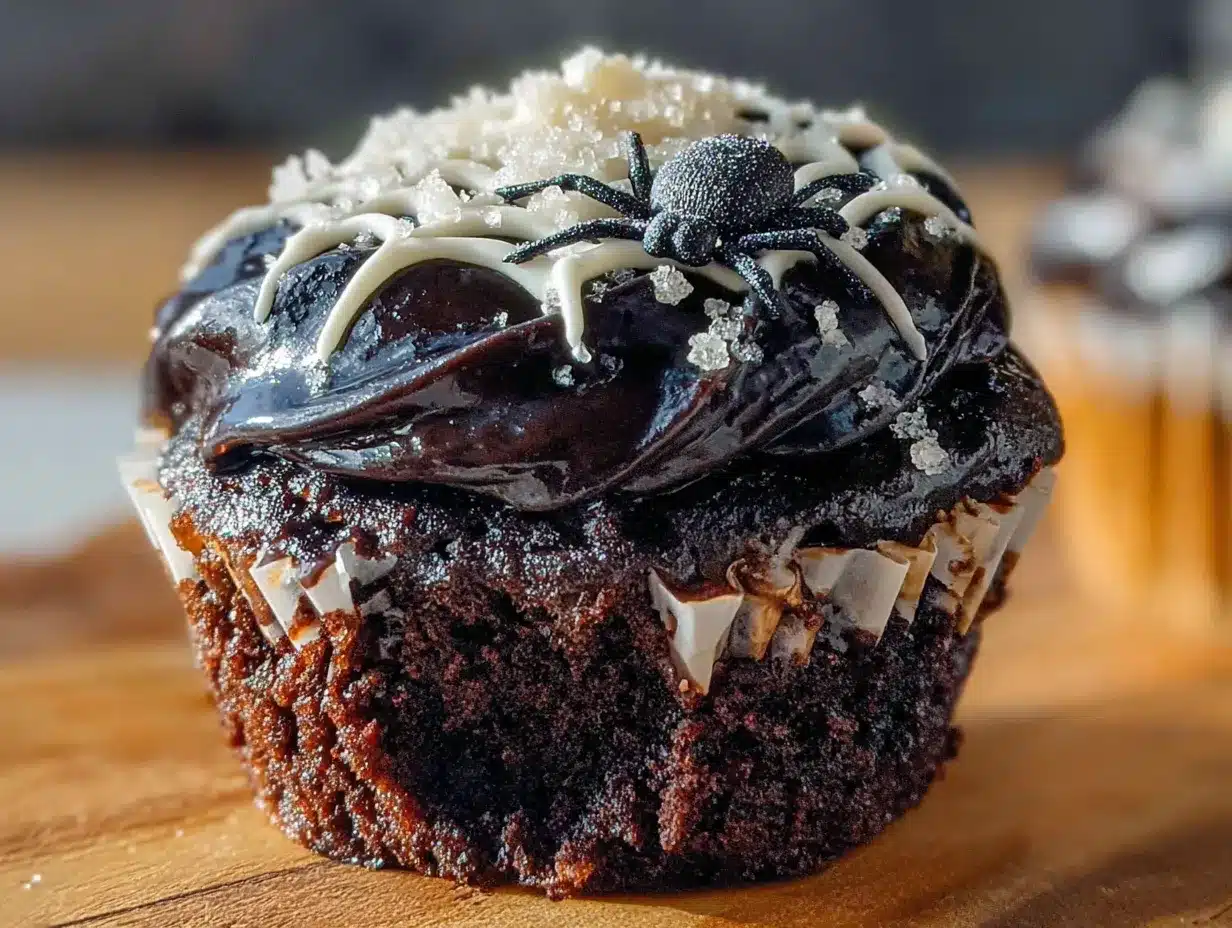
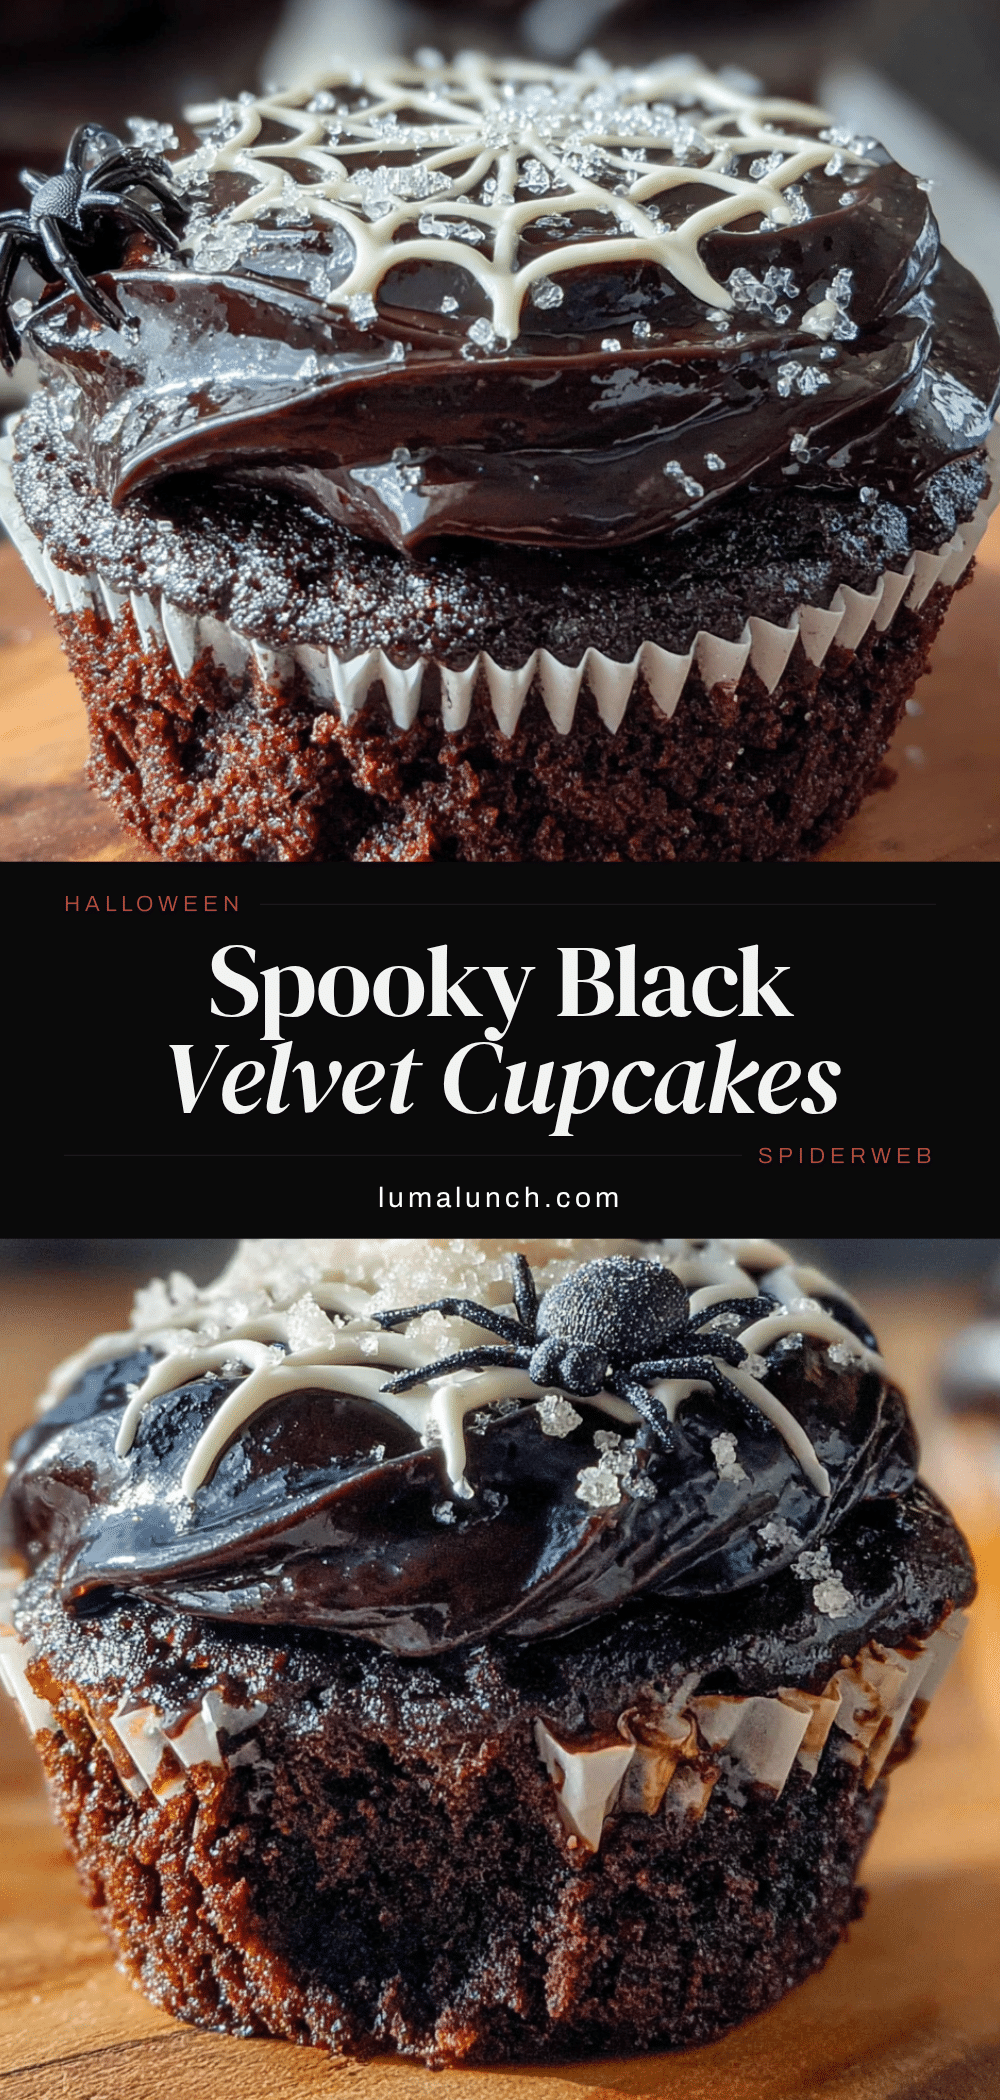
Fit your piping bag with the small round tip and fill it with the white icing. Pipe a generous swirl of icing onto each cooled cupcake. You can go for a tall swirl or a flat, smooth layer—both work. Now for the spiderweb: Starting from the center of the cupcake, pipe a small circle of icing. Then pipe a larger circle around it, and another, until you reach the edge. You should have 3 or 4 concentric circles. Working quickly while the icing is still soft, drag a toothpick or skewer from the center outward through all the circles. Repeat this 6 to 8 times around the cupcake, spacing the lines evenly. You’ll see the web pattern appear instantly. Wipe the toothpick clean between drags for the cleanest lines.
Cooking Tips & Techniques
I’ve made these cupcakes more times than I can count, and I’ve learned a few things the hard way. Here’s what I wish someone had told me:
The color trick. The reason these cupcakes turn out truly black instead of dark gray is the combination of dark cocoa powder and gel food coloring. The cocoa powder already has a deep color, so you need less artificial coloring. If you use regular cocoa powder, you might need an extra half tablespoon of gel color. I learned this after a batch that looked more charcoal than black—still tasty, but not the dramatic effect I wanted.
Room temperature ingredients matter. I know, it’s annoying to wait for eggs and buttermilk to come to room temperature. But cold ingredients don’t emulsify properly, which means your batter will be lumpy and your cupcakes will be dense. Trust me, I’ve made that mistake on a rushed Tuesday night. Just take everything out of the fridge 30 minutes before you start.
The vinegar isn’t optional. I know it sounds weird, but that teaspoon of white vinegar makes a real difference. It reacts with the baking soda to create extra lift, giving you a lighter, more tender crumb. I forgot it once, and the cupcakes came out flat and dense. Don’t skip it.
Don’t overmix the batter. This is the most common mistake. Once you add the dry ingredients to the wet, mix just until you don’t see any more flour streaks. Overmixing develops the gluten, and you’ll end up with tough, rubbery cupcakes instead of tender, velvety ones.
For the cleanest spiderweb pattern, work with one cupcake at a time. Pipe the circles, then immediately drag the toothpick through. If you pipe all the circles on every cupcake first, the icing will start to set, and the web lines won’t be as clean. I learned this the hard way during a particularly ambitious Halloween party prep session.
Multitasking tip: While the cupcakes are baking and cooling, make the icing. That way, by the time the cupcakes are cool, the icing is ready to go. It saves you about 10 minutes of waiting around.
Variations & Adaptations
One of the best things about this recipe is how easy it is to customize. Here are some variations I’ve tried and loved:
Gluten-Free Version: Substitute the all-purpose flour with a 1:1 gluten-free baking flour blend. I’ve used Bob’s Red Mill with great results. Just make sure the blend contains xanthan gum for structure. The texture will be slightly more delicate, but the flavor is spot-on.
Dairy-Free Version: Use almond milk mixed with lemon juice for the buttermilk substitute. For the icing, swap the butter for a good-quality vegan butter and use coconut cream instead of heavy cream. I’ve made this version for a friend with dairy allergies, and honestly, I couldn’t tell the difference.
Spooky Spider Variation: After creating the spiderweb pattern, place a small chocolate spider (you can find these at candy shops or online) on top of each cupcake. It adds a fun, creepy touch that kids absolutely love.
Ghostly White Version: Skip the black food coloring and make these as white velvet cupcakes. Use clear vanilla extract and white gel food coloring to keep the batter pure white. The spiderweb pattern on white cupcakes is subtle but stunning—like a ghostly web.
Flavor Twist: Add 1 teaspoon of instant espresso powder to the dry ingredients. It doesn’t make the cupcakes taste like coffee—it just deepens the chocolate flavor. I tried this on a whim one afternoon, and now I do it every time.
Mini Cupcake Version: Use a mini muffin tin and bake for 10 to 12 minutes. You’ll get about 36 mini cupcakes. These are perfect for classroom parties or dessert buffets.
Serving & Storage Suggestions
These cupcakes are best served at room temperature. The icing is perfectly creamy, and the crumb is at its most tender. If you’ve refrigerated them, let them sit out for about 20 minutes before serving.
Presentation Ideas: Arrange the cupcakes on a black or dark purple platter for maximum Halloween drama. Sprinkle some edible glitter or black sanding sugar around the edges of the platter. For a party, I like to place them on a cake stand with a few fake spiderwebs draped around the base. It’s a simple touch that makes the whole display feel intentional.
What to Serve With Them: These cupcakes pair beautifully with a glass of cold milk or a warm cup of coffee. For a Halloween party spread, serve them alongside a bowl of fresh fruit or some salty snacks like pretzels to balance the sweetness. I’ve also served them with a scoop of vanilla ice cream for an extra indulgent dessert.
Storage Instructions: Store the cupcakes in an airtight container at room temperature for up to 3 days. If you need to keep them longer, refrigerate them for up to 5 days. Just bring them back to room temperature before serving for the best texture.
Freezing Instructions: You can freeze the unfrosted cupcakes for up to 3 months. Wrap each one tightly in plastic wrap, then place them in a freezer-safe bag. When you’re ready to serve, thaw them at room temperature and frost them fresh. The spiderweb icing doesn’t freeze well, so always make it fresh.
Flavor Development: Honestly, these cupcakes taste even better the day after baking. The flavors meld together overnight, and the crumb becomes even more moist. So if you can, make them a day ahead and frost them the morning of your event. Your future self will thank you.
Nutritional Information & Benefits
Here’s the estimated nutritional breakdown for one cupcake (based on 12 servings):
- Calories: 385
- Fat: 22g
- Saturated Fat: 11g
- Carbohydrates: 46g
- Sugar: 34g
- Protein: 4g
- Fiber: 1g
- Sodium: 220mg
Health Benefits of Key Ingredients: Cocoa powder is rich in antioxidants called flavonoids, which can help reduce inflammation and support heart health. Buttermilk provides calcium and probiotics, which are good for digestive health. And while these are definitely a treat, the ingredients offer more nutritional value than a typical store-bought cupcake.
Dietary Considerations: This recipe contains gluten, dairy, and eggs. For gluten-free and dairy-free options, check the variations section above. The cupcakes are nut-free as written, making them a good option for school parties where nut allergies are a concern.
Personal Perspective: I’m all for balance. These cupcakes are a celebration food, not an everyday snack. But when you do indulge, it’s worth making them count. These are rich, satisfying, and made with real ingredients—no artificial flavors or preservatives. That’s a win in my book.
Conclusion
These Perfect Black Velvet Halloween Cupcakes with Spiderweb Icing are everything you want in a Halloween dessert: dramatic, delicious, and surprisingly easy to make. The deep black color and that intricate-looking web pattern will have everyone thinking you spent hours on them. But you and I will know the truth—they come together in under an hour with simple ingredients and a few clever tricks.
I love these cupcakes because they capture the spirit of Halloween without being overly complicated. They’re fun to make, fun to decorate, and even more fun to eat. Whether you’re hosting a costume party, bringing treats to a school event, or just want to make a cozy October afternoon special, these cupcakes deliver every time.
Now I want to hear from you! Have you tried making spiderweb icing before? Do you have a favorite Halloween baking tradition? Drop a comment below and share your creations. And if you give these cupcakes a try, tag me in your photos—I love seeing your spooky masterpieces. Happy Halloween, and happy baking!
Frequently Asked Questions
Can I use liquid food coloring instead of gel?
I wouldn’t recommend it. Liquid food coloring is too thin to achieve that deep, true black color. You’d need to add so much that it would alter the texture of the batter and the taste of the cupcakes. Gel food coloring is concentrated, so a small amount gives you intense color without affecting the recipe. You can find it at most grocery stores or online.
Why did my cupcakes turn out gray instead of black?
This usually happens for one of two reasons: either you didn’t use enough gel food coloring, or you used regular cocoa powder instead of dark cocoa powder. Dark cocoa powder has a naturally deeper color, so it needs less artificial coloring. If you’re using regular cocoa powder, try adding an extra half tablespoon of gel color. Also, make sure you’re mixing the color in thoroughly—streaks of lighter batter can make the overall color look gray.
Can I make the spiderweb icing ahead of time?
Absolutely! You can make the icing up to 3 days in advance. Store it in an airtight container in the refrigerator. When you’re ready to use it, let it come to room temperature and then give it a quick whip with your mixer for about 30 seconds to restore its fluffy texture. Don’t try to pipe it when it’s cold—it’ll be too stiff to create clean web lines.
How do I get clean spiderweb lines?
The key is working quickly while the icing is still soft. Pipe the concentric circles, then immediately drag your toothpick through them. If you wait too long, the icing will start to set, and the lines will be messy instead of clean. Also, wipe the toothpick clean between each drag—this prevents dragging icing from one circle into another, which blurs the pattern.
Can I freeze these cupcakes?
Yes, but only the unfrosted ones. Freeze them in an airtight container for up to 3 months. When you’re ready to serve, thaw them at room temperature and make the spiderweb icing fresh. The icing doesn’t freeze well because the butter can separate and become grainy when thawed. But the unfrosted cupcakes freeze beautifully, so you can always have a batch ready for last-minute Halloween celebrations.
Pin This Recipe!
Perfect Black Velvet Halloween Cupcakes with Easy Spiderweb Icing
Rich, moist black velvet cupcakes with a dramatic deep black color and an easy spiderweb icing that looks impressive without requiring a pastry degree. Perfect for Halloween parties, classroom treats, or a cozy night in.
- Prep Time: 15 minutes
- Cook Time: 20 minutes
- Total Time: 45 minutes
- Yield: 12 servings 1x
- Category: Dessert
- Cuisine: American
Ingredients
- 1 ½ cups all-purpose flour (spooned and leveled)
- 1 cup granulated sugar
- ½ cup unsweetened cocoa powder (preferably Hershey’s Special Dark)
- 1 teaspoon baking soda
- ½ teaspoon baking powder
- ½ teaspoon salt
- 1 cup buttermilk, room temperature
- ½ cup vegetable oil
- 2 large eggs, room temperature
- 2 teaspoons vanilla extract
- 1 tablespoon black gel food coloring
- 1 teaspoon white vinegar
- 1 cup unsalted butter, softened
- 3 ½ cups powdered sugar, sifted
- 2 tablespoons heavy cream (or whole milk)
- 2 teaspoons vanilla extract
- Pinch of salt
- White gel food coloring (optional, for brighter white web)
Instructions
- Preheat oven to 350°F (175°C). Line a 12-cup muffin tin with paper liners.
- In a medium bowl, whisk together flour, sugar, cocoa powder, baking soda, baking powder, and salt for about 30 seconds.
- In a large bowl, whisk together buttermilk, vegetable oil, eggs, and vanilla extract until smooth and slightly frothy. Add black gel food coloring and whisk until combined.
- Pour dry ingredients into wet ingredients. Fold gently with a rubber spatula until just combined (15-20 strokes). Add white vinegar and fold once more.
- Divide batter evenly among the 12 liners, filling each about two-thirds full. Tap the tin gently to release air bubbles.
- Bake for 18-22 minutes, until a toothpick inserted in the center comes out clean or with a few moist crumbs. Cool in the tin for 5 minutes, then transfer to a wire rack to cool completely.
- For the icing: In a large bowl, beat softened butter with an electric mixer on medium speed until smooth and creamy (about 2 minutes). Add sifted powdered sugar one cup at a time, beating on low after each addition. Add heavy cream, vanilla extract, and salt. Beat on medium-high speed for 3-4 minutes until light and fluffy. Add a tiny drop of white gel food coloring if desired.
- Fit a piping bag with a small round tip and fill with icing. Pipe a generous swirl onto each cooled cupcake. For the spiderweb: pipe a small circle in the center, then larger concentric circles until reaching the edge. Working quickly, drag a toothpick from the center outward through all circles, repeating 6-8 times around the cupcake. Wipe toothpick clean between drags.
Notes
For the deepest black color, use dark cocoa powder and gel food coloring. Room temperature ingredients are crucial for proper emulsification. Do not overmix the batter. The vinegar is not optional—it reacts with baking soda for extra lift. For cleanest spiderweb pattern, work with one cupcake at a time. Cupcakes taste even better the day after baking.
Nutrition
- Serving Size: 1 cupcake
- Calories: 385
- Sugar: 34
- Sodium: 220
- Fat: 22
- Saturated Fat: 11
- Carbohydrates: 46
- Fiber: 1
- Protein: 4
Keywords: Halloween cupcakes, black velvet cupcakes, spiderweb icing, Halloween dessert, black cupcakes, easy Halloween recipe


