Love this? Save it for later!
Share the inspiration with your friends
I wasn’t expecting to find a recipe worth keeping at a tire shop, but there I was, waiting for an oil change to finish, when the guy behind the counter started talking about pumpkin banana bread. Not just any pumpkin banana bread—the kind he made every fall for his church potluck, the one people asked for by name. He was maybe sixty, with grease-stained hands and a calm confidence, and he described the texture like he was describing a memory. “You want it moist,” he said, like it was the most important thing in the world. “Not wet. Moist. There’s a difference.”
I scribbled his instructions on the back of a receipt because, honestly, that’s the kind of thing you do when a stranger hands you gold. I made it the next day, and I’ve made it every fall since. This moist one-bowl pumpkin banana bread is the recipe that came out of that conversation—a loaf that’s tender, fragrant, and so easy you’ll wonder why you ever made two separate breads. It’s the kind of bread that makes your kitchen smell like cinnamon and cloves, the kind that disappears before it’s even cooled all the way.
Maybe you’ve been there—staring at a sad bunch of bananas and a can of pumpkin, wondering if they could possibly work together. They can. They absolutely can. And this recipe is proof.
Why You’ll Love This Recipe
This isn’t just another pumpkin bread or another banana bread. It’s the best of both worlds, and it’s been tested in my kitchen more times than I can count. I’ve brought it to brunches, to holiday dinners, and to lazy Sunday mornings, and it never disappoints.
- One-Bowl Wonder: No need to dirty a mixer or a separate bowl for dry ingredients. Everything comes together in a single bowl, which means less cleanup and more time enjoying that first slice.
- Perfectly Moist Every Time: The combination of pumpkin puree and ripe bananas creates a texture that’s incredibly tender and moist—never dry or dense. The tire shop guy would approve.
- Simple Pantry Ingredients: You likely already have everything you need. No obscure flours or hard-to-find extracts. Just staples you probably stock for fall baking.
- Fall Flavors Without the Fuss: Cinnamon, nutmeg, ginger, and cloves warm up every bite. It tastes like autumn in a loaf, but it comes together in under 15 minutes of prep.
- Crowd-Pleasing Comfort: Whether you serve it for breakfast, as a snack, or for dessert, it gets rave reviews. Kids love it, adults love it, and it travels beautifully for potlucks or gifts.
What makes this recipe different? It’s the ratio. I’ve adjusted the pumpkin-to-banana balance so neither flavor overpowers the other. The banana adds natural sweetness and moisture, while the pumpkin brings that earthy, cozy depth. It’s a marriage made in baking heaven.
What Ingredients You Will Need
This recipe uses simple, wholesome ingredients to deliver bold flavor and satisfying texture without the fuss. Most are pantry staples, and the few fresh items are easy to find year-round.
- Ripe Bananas (3 medium, mashed): The riper the better. Look for bananas with plenty of brown spots—they’re sweeter and easier to mash. About 1 to 1.5 cups mashed.
- Pumpkin Puree (1 cup): Use 100% pure pumpkin puree, not pumpkin pie filling. I prefer Libby’s for its consistent texture and flavor.
- Granulated Sugar (¾ cup): Adds sweetness and helps create a tender crumb. You can reduce to ½ cup if your bananas are very ripe.
- Brown Sugar (¼ cup, packed): Adds depth and a hint of molasses flavor. Light or dark brown sugar both work well.
- Vegetable Oil (½ cup): Keeps the bread incredibly moist. You can substitute melted coconut oil or a neutral-flavored oil like avocado oil.
- Large Eggs (2, room temperature): Help bind the ingredients and add structure. Room temperature eggs incorporate more evenly.
- Vanilla Extract (1 teaspoon): Enhances the overall flavor. Pure vanilla extract is best, but imitation works in a pinch.
- All-Purpose Flour (1 ¾ cups): Provides the structure. For a gluten-free version, use a 1:1 gluten-free baking flour blend.
- Baking Soda (1 teaspoon): Helps the bread rise and stay tender. Make sure it’s fresh for best results.
- Baking Powder (½ teaspoon): Adds extra lift.
- Salt (½ teaspoon): Balances the sweetness and enhances all the flavors.
- Ground Cinnamon (1 ½ teaspoons): The star spice in this blend. Use a good-quality cinnamon like Saigon or Ceylon for the best flavor.
- Ground Nutmeg (½ teaspoon): Adds warmth. Freshly grated nutmeg is even better if you have it.
- Ground Ginger (½ teaspoon): Brings a gentle heat that complements the pumpkin.
- Ground Cloves (¼ teaspoon): A little goes a long way. Use sparingly to avoid overwhelming the other spices.
- Optional Mix-Ins: ½ cup chopped walnuts, pecans, or chocolate chips. I love adding dark chocolate chips for a sweet surprise in every bite.
Equipment Needed
You don’t need a fancy kitchen to make this bread. Here’s what you’ll need:
- Large Mixing Bowl: A standard 4-quart bowl works perfectly. I use a glass or ceramic bowl because they’re easy to clean and don’t retain odors.
- Whisk or Wooden Spoon: A whisk helps break up any lumps in the pumpkin and bananas, but a sturdy wooden spoon works just fine.
- 9×5-Inch Loaf Pan: This is the standard size for most quick breads. If you use an 8×4-inch pan, you’ll need to bake it a few minutes longer.
- Parchment Paper: Lining the pan makes lifting the bread out effortless. I always leave a little overhang on the long sides.
- Cooling Rack: Essential for even cooling. If you don’t have one, you can let the bread cool in the pan for 10 minutes, then transfer it to a plate.
- Measuring Cups and Spoons: For accurate measurements. I recommend using dry measuring cups for flour and sugar, and a liquid measuring cup for the oil and pumpkin.
- Potato Masher or Fork: For mashing the bananas. A fork works in a pinch, but a potato masher is faster and gives you a smoother consistency.
I’ve made this bread with a $5 thrift store loaf pan and a high-end one, and honestly, the results are the same. Don’t overthink the equipment—just use what you have.
Preparation Method
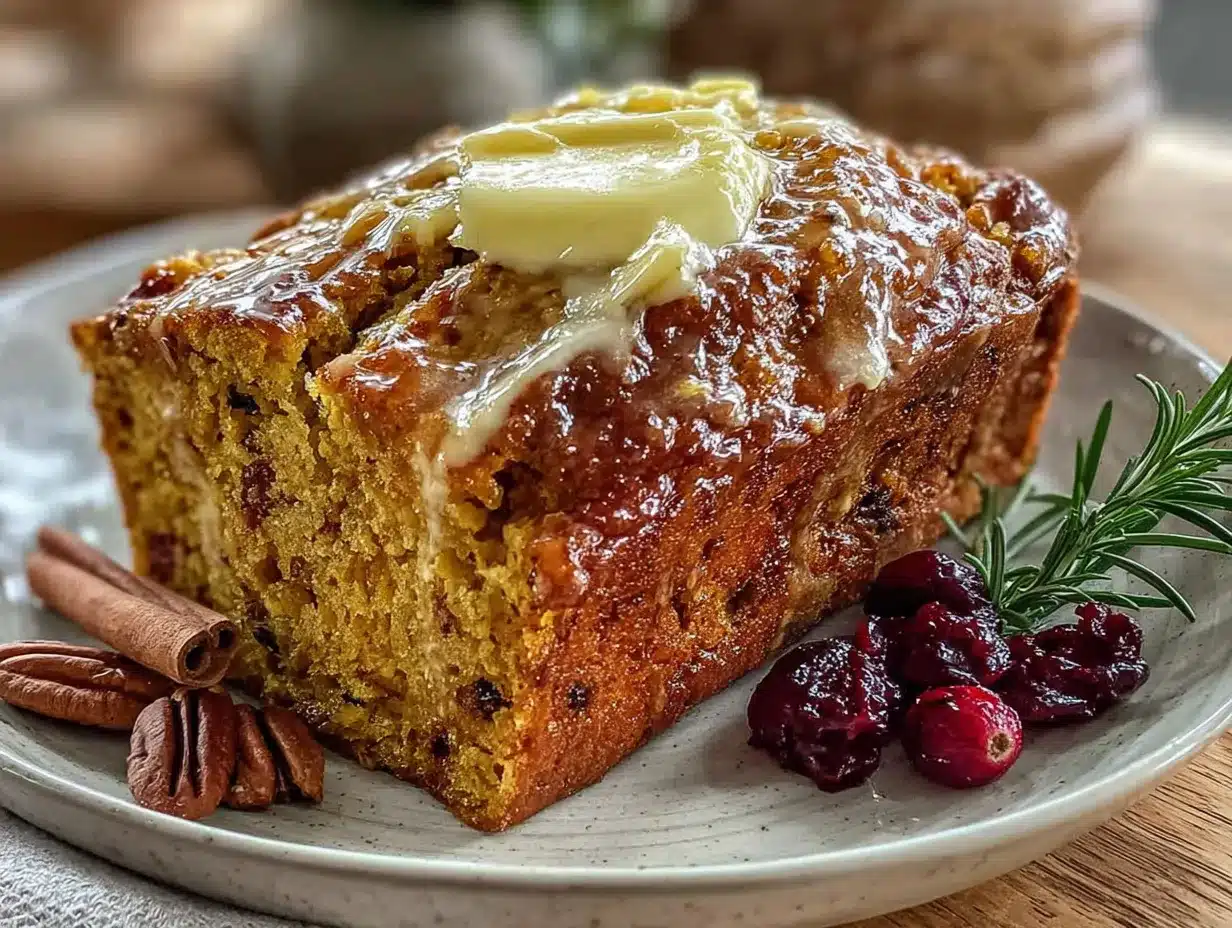
This recipe comes together in one bowl, but there’s a specific order to follow for the best texture. Trust the process, and you’ll be rewarded with a perfect loaf every time.
- Preheat your oven to 350°F (175°C). Position the rack in the center of the oven. Line a 9×5-inch loaf pan with parchment paper, leaving some overhang on the long sides. Lightly grease the exposed sides with non-stick spray or a little oil.
- Mash the bananas in your large mixing bowl. Use a potato masher or fork until they’re mostly smooth with a few small lumps. You want about 1 cup of mashed banana. Don’t over-mash—a little texture is fine.
- Add the wet ingredients to the bowl: the pumpkin puree, granulated sugar, brown sugar, vegetable oil, eggs, and vanilla extract. Whisk everything together until smooth and well combined. The mixture should be glossy and uniform. If you see streaks of egg, keep whisking.
- Add the dry ingredients directly on top of the wet mixture: the flour, baking soda, baking powder, salt, cinnamon, nutmeg, ginger, and cloves. Use a spatula or wooden spoon to fold everything together gently. Stir just until no streaks of flour remain. Overmixing will make the bread tough, so stop as soon as it comes together. The batter will be thick and slightly lumpy—that’s perfect.
- Fold in any mix-ins if you’re using them. I usually add ½ cup of dark chocolate chips or chopped walnuts. Fold them in gently with a few swift strokes. Don’t overmix here either.
- Pour the batter into your prepared loaf pan. Use the spatula to spread it evenly into the corners. Tap the pan gently on the counter a few times to release any air bubbles.
- Bake for 55 to 65 minutes, or until a toothpick inserted into the center comes out clean or with a few moist crumbs. Start checking at 50 minutes. The top should be golden brown and cracked. If the top is browning too quickly (around the 40-minute mark), tent the pan loosely with aluminum foil.
- Cool in the pan on a wire rack for 15 minutes. Then lift the bread out using the parchment paper overhang and transfer it directly to the rack to cool completely. This step is important—cooling in the pan too long can make the bottom soggy.
- Slice and serve once completely cool. For the cleanest slices, use a serrated knife and a gentle sawing motion. The bread is even better the next day, if you can wait that long.
Cooking Tips & Techniques
I’ve made this bread more times than I can count, and I’ve learned a few things along the way. Here are my best tips for success:
- Don’t overmix the batter. This is the number one mistake I see with quick breads. Mix just until the flour disappears. Overmixing develops gluten, which makes the bread dense and tough instead of tender.
- Use room temperature ingredients. Cold eggs and cold bananas can make the batter seize up. Let your eggs sit out for 30 minutes, and use bananas that are at room temperature. If you forgot to take them out, place the eggs in a bowl of warm water for 5 minutes.
- Check for doneness with a toothpick. Insert it into the center of the loaf—it should come out clean or with just a few moist crumbs. If it’s wet with batter, bake for another 5 minutes and check again. If the top is getting too dark, tent it with foil.
- Let it cool completely before slicing. I know it’s tempting to cut into it warm, but the bread needs time to set. Slicing too early can result in a gummy, crumbly texture. Patience pays off.
- Use a kitchen scale for accuracy. If you have one, weigh your flour (about 220 grams) for the most consistent results. Scooping flour with a measuring cup can lead to too much flour, which dries out the bread.
I once forgot to add the sugar to a batch. I realized it halfway through baking, and honestly, it was still edible—just not very sweet. So if you make a mistake, don’t panic. Bread is forgiving.
Variations & Adaptations
This recipe is a fantastic base for experimentation. Here are some of my favorite variations:
- Gluten-Free Version: Substitute the all-purpose flour with a 1:1 gluten-free baking blend that contains xanthan gum. I’ve used Bob’s Red Mill 1-to-1 Baking Flour with great results. The texture is slightly more crumbly, but still delicious.
- Dairy-Free Option: This recipe is already dairy-free if you use vegetable oil. Just make sure any mix-ins (like chocolate chips) are dairy-free as well.
- Vegan Adaptation: Replace the eggs with flax eggs (2 tablespoons ground flaxseed mixed with 6 tablespoons water, let sit for 5 minutes). The bread will be a bit denser, but still moist and flavorful.
- Spice It Up: Add ¼ teaspoon of cardamom or allspice for a different warm spice profile. I sometimes add a pinch of black pepper, which oddly enhances the pumpkin flavor.
- Add a Streusel Topping: Mix ¼ cup flour, ¼ cup brown sugar, 2 tablespoons cold butter, and ½ teaspoon cinnamon. Sprinkle over the batter before baking for a crunchy, sweet crust.
- Make It Muffins: Divide the batter into a greased muffin tin (about ¾ full) and bake at 350°F for 18-22 minutes. Perfect for grab-and-go breakfasts.
My personal favorite variation is adding a handful of dried cranberries and white chocolate chips. The tartness of the cranberries cuts through the sweetness beautifully, and the white chocolate adds little pockets of creamy sweetness.
Serving & Storage Suggestions
This bread is incredibly versatile when it comes to serving and storing.
Serving: Serve at room temperature or slightly warmed. For an extra treat, spread a slice with softened butter, cream cheese, or a drizzle of honey. It’s perfect for breakfast with a cup of coffee, as an afternoon snack with tea, or even as a light dessert with a dollop of whipped cream.
Storage: Store the bread in an airtight container at room temperature for up to 4 days. The moisture actually improves over the first day or two, making it even more tender. If your kitchen is very warm, you can store it in the refrigerator, but bring slices to room temperature before serving for the best texture.
Freezing: This bread freezes beautifully. Wrap the completely cooled loaf tightly in plastic wrap, then in a layer of aluminum foil. Freeze for up to 3 months. To thaw, leave it at room temperature for a few hours or overnight in the refrigerator. You can also freeze individual slices for quick breakfasts—just pop them in the toaster to warm up.
Reheating: For a just-baked experience, warm a slice in the microwave for 10-15 seconds, or in a 300°F oven for 5-7 minutes. The oven method gives you a slightly crisper exterior.
The flavors really develop after a day or two. I actually prefer this bread on day two—the spices meld together, and the texture becomes even more moist and cohesive.
Nutritional Information & Benefits
Here’s an approximate nutritional breakdown per slice (based on 10 slices, without mix-ins):
| Nutrient | Amount per Slice |
|---|---|
| Calories | 290 |
| Total Fat | 13g |
| Saturated Fat | 2g |
| Cholesterol | 37mg |
| Sodium | 280mg |
| Total Carbohydrates | 41g |
| Dietary Fiber | 2g |
| Sugars | 22g |
| Protein | 4g |
| Vitamin A | 45% DV |
| Vitamin C | 4% DV |
| Potassium | 200mg |
This bread offers some surprising health benefits. Pumpkin is packed with vitamin A, which supports eye health and immune function. Bananas provide potassium, which is essential for heart health and muscle function. The spices—cinnamon, ginger, and cloves—are rich in antioxidants and have anti-inflammatory properties.
For a lower-sugar option, you can reduce the granulated sugar to ½ cup. The bananas add enough natural sweetness to keep the bread flavorful. If you’re watching your fat intake, you can substitute half the oil with unsweetened applesauce, though the texture will be slightly less tender.
This bread contains gluten, eggs, and (if using) nuts. Always check your mix-ins for potential allergens.
Conclusion
This moist one-bowl pumpkin banana bread is the recipe I keep coming back to, fall after fall. It’s the one I bring to gatherings, the one I make when I need comfort, the one I share with anyone who asks for a good quick bread. It’s forgiving, it’s flexible, and it’s genuinely delicious.
I love that it came from an unexpected place—a tire shop, of all things—and that it reminds me to keep an open mind about where good recipes can come from. Maybe you’ll find your own version of that story. Maybe you’ll tweak the spices, add your favorite mix-ins, or pass it along to someone who needs a little comfort.
I’d love to hear how yours turns out. Did you add chocolate chips? Walnuts? Did you make it for a special occasion or just because? Drop a comment below and let me know. And if you share it on social media, tag me—I want to see your beautiful loaves. Happy baking!
Frequently Asked Questions
Can I use frozen bananas for this recipe?
Absolutely. Thaw them completely, then drain off any excess liquid before mashing. Frozen bananas are actually sweeter and easier to mash, making them perfect for this bread.
Can I use pumpkin pie spice instead of individual spices?
Yes! Substitute 2 teaspoons of pumpkin pie spice for the cinnamon, nutmeg, ginger, and cloves. The flavor will be slightly different but still delicious.
Why did my bread sink in the middle?
This usually happens if the bread is underbaked or if the oven door was opened too early. Make sure your oven is fully preheated, and don’t open the door for the first 45 minutes of baking.
Can I make this recipe without eggs?
Yes, you can use flax eggs or a commercial egg replacer. The texture will be slightly denser, but the flavor will still be wonderful.
How do I know when the bread is done baking?
Insert a toothpick into the center of the loaf. If it comes out clean or with a few moist crumbs, it’s done. If it’s wet with batter, bake for another 5-10 minutes and test again.
Pin This Recipe!
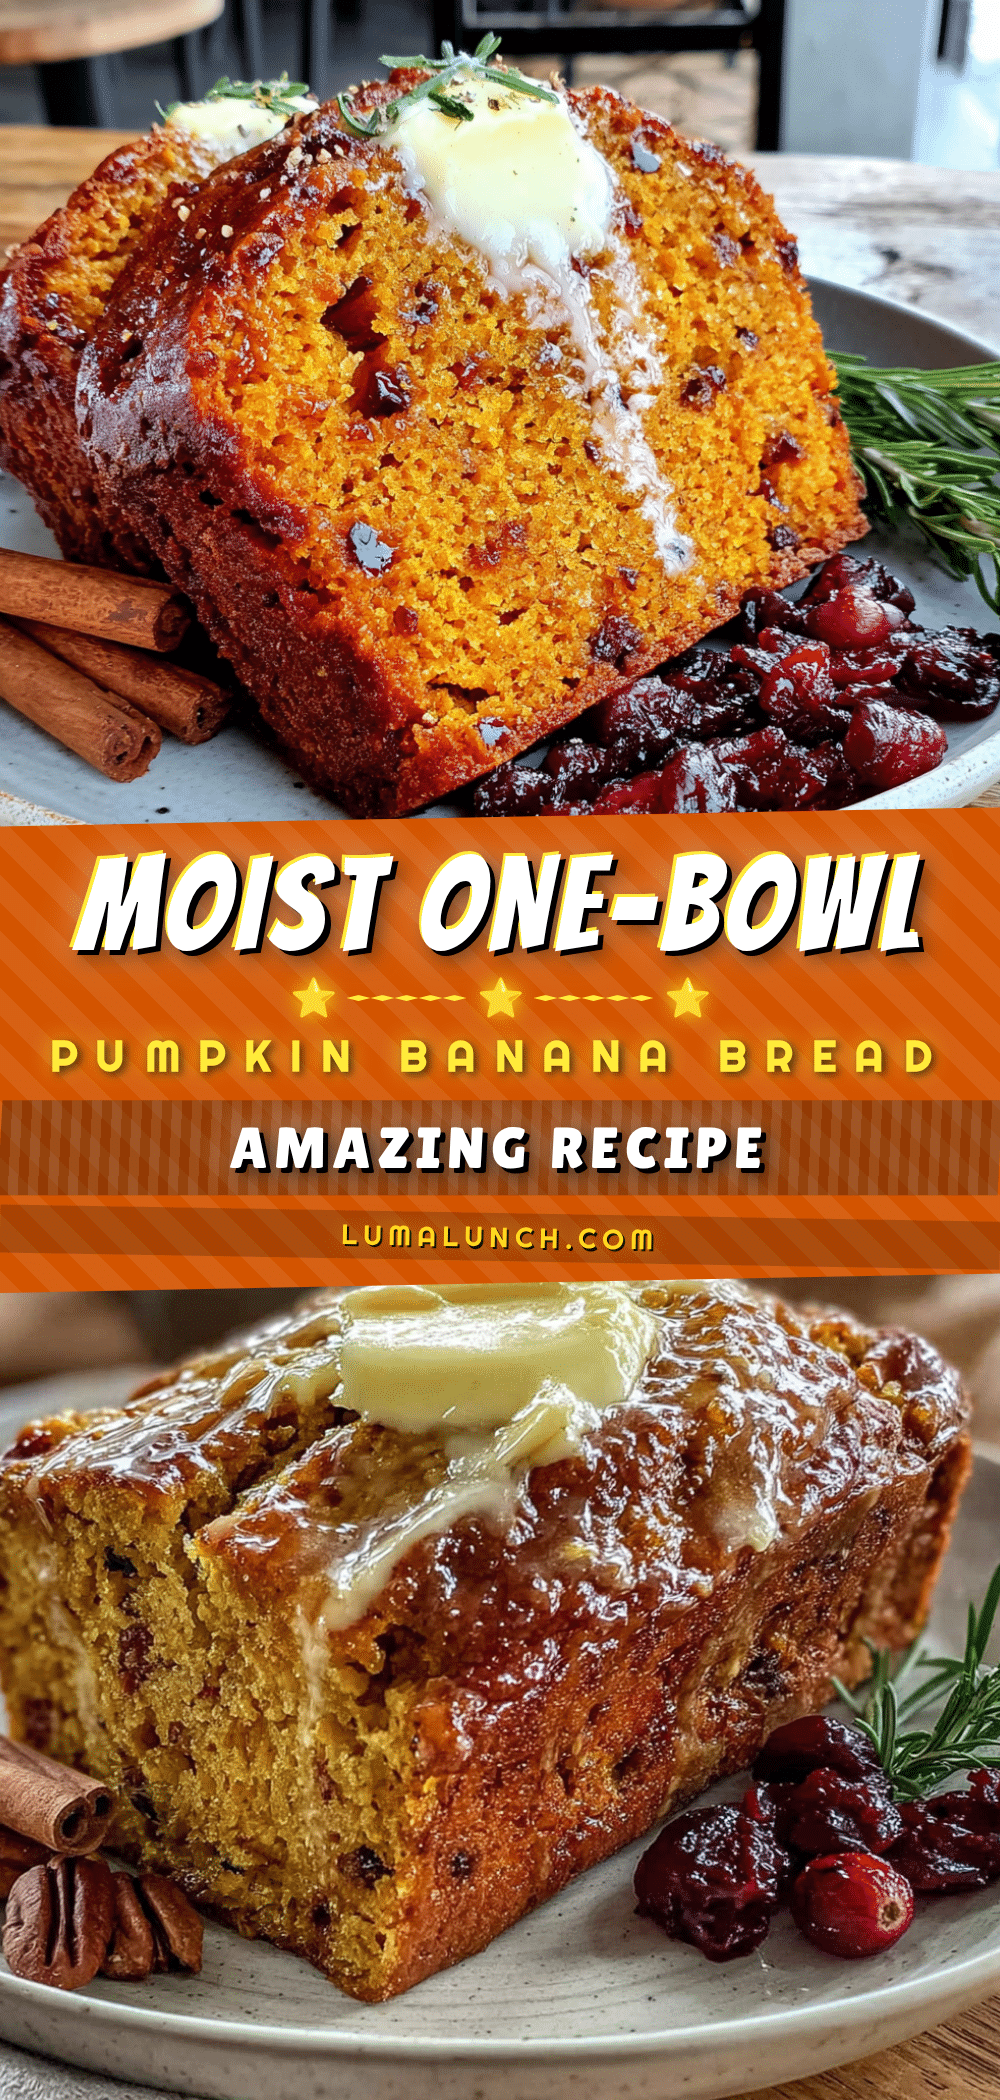
Moist One-Bowl Pumpkin Banana Bread (Easy Fall Recipe)
This moist one-bowl pumpkin banana bread is tender, fragrant, and so easy you’ll wonder why you ever made two separate breads. It’s the kind of bread that makes your kitchen smell like cinnamon and cloves, the kind that disappears before it’s even cooled all the way.
- Prep Time: 15 minutes
- Cook Time: 55-65 minutes
- Total Time: 1 hour 10-20 minutes
- Yield: 10 servings 1x
- Category: Quick Bread
- Cuisine: American
Ingredients
- 3 medium ripe bananas, mashed (about 1 to 1.5 cups)
- 1 cup pumpkin puree (100% pure, not pumpkin pie filling)
- ¾ cup granulated sugar
- ¼ cup brown sugar, packed
- ½ cup vegetable oil
- 2 large eggs, room temperature
- 1 teaspoon vanilla extract
- 1 ¾ cups all-purpose flour
- 1 teaspoon baking soda
- ½ teaspoon baking powder
- ½ teaspoon salt
- 1 ½ teaspoons ground cinnamon
- ½ teaspoon ground nutmeg
- ½ teaspoon ground ginger
- ¼ teaspoon ground cloves
- ½ cup chopped walnuts, pecans, or chocolate chips (optional)
Instructions
- Preheat your oven to 350°F (175°C). Position the rack in the center of the oven. Line a 9×5-inch loaf pan with parchment paper, leaving some overhang on the long sides. Lightly grease the exposed sides with non-stick spray or a little oil.
- Mash the bananas in your large mixing bowl using a potato masher or fork until mostly smooth with a few small lumps. You want about 1 cup of mashed banana.
- Add the wet ingredients to the bowl: pumpkin puree, granulated sugar, brown sugar, vegetable oil, eggs, and vanilla extract. Whisk until smooth and well combined.
- Add the dry ingredients directly on top of the wet mixture: flour, baking soda, baking powder, salt, cinnamon, nutmeg, ginger, and cloves. Fold together gently with a spatula or wooden spoon just until no streaks of flour remain. Do not overmix.
- Fold in any optional mix-ins (e.g., chocolate chips or nuts) gently with a few swift strokes.
- Pour the batter into the prepared loaf pan and spread evenly. Tap the pan gently on the counter a few times to release air bubbles.
- Bake for 55 to 65 minutes, or until a toothpick inserted into the center comes out clean or with a few moist crumbs. Start checking at 50 minutes. If the top browns too quickly, tent loosely with aluminum foil.
- Cool in the pan on a wire rack for 15 minutes. Then lift the bread out using the parchment paper overhang and transfer to the rack to cool completely.
- Slice and serve once completely cool. Use a serrated knife for clean slices.
Notes
Don’t overmix the batter to avoid dense bread. Use room temperature ingredients for best results. Let the bread cool completely before slicing to prevent a gummy texture. For a gluten-free version, use a 1:1 gluten-free baking flour blend. For a dairy-free option, ensure mix-ins are dairy-free. For a vegan adaptation, replace eggs with flax eggs (2 tablespoons ground flaxseed mixed with 6 tablespoons water). The bread can be stored in an airtight container at room temperature for up to 4 days or frozen for up to 3 months.
Nutrition
- Serving Size: 1 slice
- Calories: 290
- Sugar: 22
- Sodium: 280
- Fat: 13
- Saturated Fat: 2
- Carbohydrates: 41
- Fiber: 2
- Protein: 4
Keywords: pumpkin banana bread, one-bowl recipe, fall baking, moist bread, easy quick bread


