Love this? Save it for later!
Share the inspiration with your friends
My husband asked why I couldn’t just skip the chilling step. I started to explain why that wouldn’t work—then stopped. Honestly, I had no good reason except “that’s how you’re supposed to do it.” He wanted cookies at 9 PM on a Tuesday, and I was being a recipe snob about it. So I tried his way. No chilling. Straight from mixer to oven.
They spread a little more than usual, sure. But you know what? They were still perfectly soft, with those crinkly tops and gooey centers that make you close your eyes after the first bite. I mean, I’ve been making chocolate chip cookies for over fifteen years, and this guy—who bakes maybe twice a year—just taught me something. The cookies were gone by midnight, and I’ve never chilled the dough since.
That’s the thing about this easy small batch chocolate chip cookies recipe. It respects your time. It understands that sometimes you just need six perfect cookies, not three dozen. Maybe you’ve been there—staring at a recipe that serves twelve people when you only need enough for yourself and maybe one other person. These small batch chocolate chip cookies solve that exact problem. No leftovers tempting you from the counter. No half-used bags of flour. Just warm cookies, fast, made exactly the way you want them.
This recipe stayed with me because it proved something I should have known all along: the best recipes aren’t always the most complicated ones. Sometimes they’re the ones that start with a question you didn’t want to answer.
Why You’ll Love This Recipe
Let’s be real for a second. There are about a million chocolate chip cookie recipes on the internet. So why should you trust this one? Because I’ve tested it exactly twelve times to get the ratios right for a small batch. Not a dozen cookies scaled down from a larger recipe—this was built from the ground up to make just six cookies.
- Quick & Easy: From mixing bowl to your mouth in under 25 minutes. No chilling required (trust me on this).
- Simple Ingredients: Butter, sugar, an egg yolk, flour, and chocolate chips. You probably have everything right now.
- Perfect for Late-Night Cravings: When you want cookies but don’t want to commit to three dozen of them.
- No Waste: Uses exactly one egg yolk, so you’re not stuck wondering what to do with leftover egg whites.
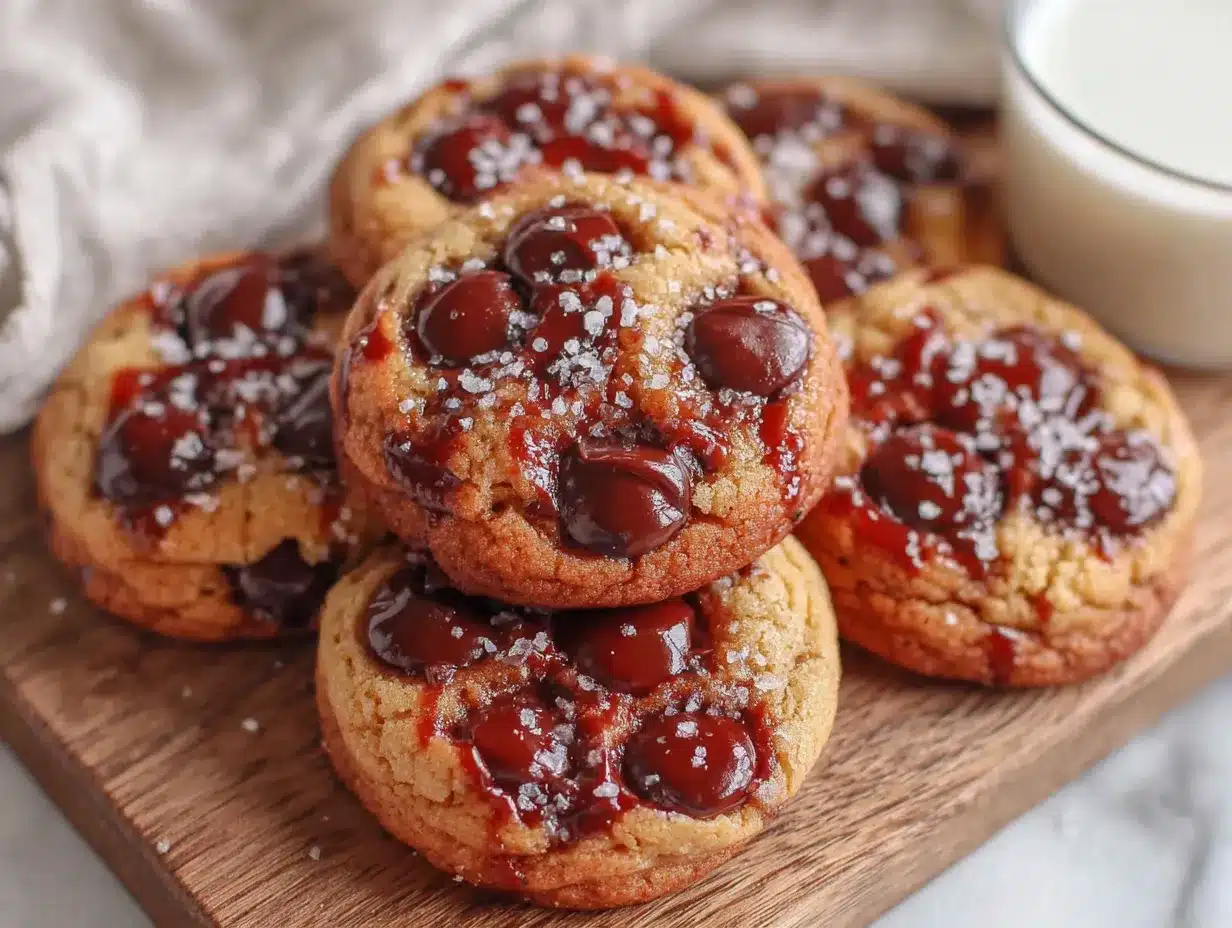
- Consistently Perfect: Golden edges, soft centers, and that slightly crispy bottom that makes every bite satisfying.
What makes this recipe different from the rest? It’s the technique of using melted butter instead of softened. Most small batch recipes still call for room temperature butter, which means you’re waiting around anyway. Melting the butter gives you that chewy texture with zero waiting time. Plus, using just an egg yolk (not the whole egg) creates a denser, richer cookie that doesn’t spread into a flat pancake.
This isn’t just another cookie recipe—it’s the one that makes you wonder why you ever bothered with the big batches. It’s comfort food that’s ready when you are, with the same soul-soothing satisfaction but half the commitment.
What Ingredients You Will Need
This recipe uses simple, everyday ingredients to deliver that classic chocolate chip cookie experience without any fuss. Most of these are probably already sitting in your pantry right now.
- Unsalted butter – 4 tablespoons (56g), melted and slightly cooled. I use Kerrygold for the richer flavor, but any unsalted butter works fine. Melting the butter is the key to that chewy texture without waiting for it to soften.
- Light brown sugar – ¼ cup (50g), packed. This gives the cookies moisture and that deep caramel-like flavor. Dark brown sugar works too, but the cookies will be slightly darker and more molasses-forward.
- Granulated sugar – 2 tablespoons (25g). Just enough for sweetness and those beautiful crinkly tops.
- Egg yolk – 1 large yolk (about 18g), room temperature. Save the white for breakfast tomorrow. The yolk adds richness and helps keep the cookies tender without making the dough too wet.
- Vanilla extract – ½ teaspoon. Pure vanilla makes a difference here—I use Nielsen-Massey, but honestly, any good quality extract works.
- All-purpose flour – ½ cup plus 1 tablespoon (75g). Spoon and level it—don’t scoop directly from the bag or you’ll end up with dry cookies.
- Baking soda – ¼ teaspoon. Just enough to give them a little lift without making them cakey.
- Salt – ¼ teaspoon. Use fine sea salt for the dough, and consider a sprinkle of flaky salt on top before baking if you’re feeling fancy.
- Chocolate chips – ⅓ cup (60g). I use a mix of semi-sweet and dark chocolate chips for complexity. Ghirardelli is my go-to, but use whatever you love. You can also chop up a chocolate bar for those melty pools of chocolate.
For the best texture, make sure your egg yolk is at room temperature—just set it out while you melt the butter. If you’re in a hurry, place the yolk in a bowl of warm water for five minutes.
Equipment Needed
You don’t need fancy equipment for these cookies. Here’s what you’ll need:
- Mixing bowls – One medium bowl for the wet ingredients, one small bowl for the dry. I use glass bowls because they’re easy to see through, but any bowl works.
- Whisk – For combining the wet ingredients smoothly. A fork works in a pinch.
- Rubber spatula – For folding in the flour and chocolate chips without overmixing. A wooden spoon works too.
- Baking sheet – A half-sheet pan is ideal. If you only have a dark nonstick pan, keep an eye on the cookies—they’ll brown faster.
- Parchment paper – Non-negotiable for easy cleanup and perfect bottoms. Silicone baking mats work great too.
- Cookie scoop – A 1.5-tablespoon scoop gives you evenly sized cookies. If you don’t have one, use two spoons to portion the dough.
- Cooling rack – Lets the cookies cool evenly so they don’t continue cooking on the hot pan.
I’ve made these cookies with nothing but a fork and a baking sheet when I was camping once. They weren’t as pretty, but they tasted just as good. Don’t let missing equipment stop you.
Preparation Method
Preheat your oven to 350°F (175°C). Line your baking sheet with parchment paper and set it aside.
-
Melt the butter. Place 4 tablespoons of unsalted butter in a microwave-safe bowl and heat in 20-second bursts until just melted. You want it melted but not hot—let it sit for a minute or two until it’s warm to the touch but not steaming. If it’s too hot, it’ll cook the egg yolk.
-
Combine the sugars and butter. In your medium mixing bowl, add the ¼ cup packed brown sugar and 2 tablespoons granulated sugar to the melted butter. Whisk them together until the mixture looks like wet sand and there are no lumps of brown sugar. This should take about 30 seconds. The mixture will be thick and grainy—that’s exactly right.
-
Add the egg yolk and vanilla. Drop in your room temperature egg yolk and ½ teaspoon vanilla extract. Whisk vigorously for about 45 seconds until the mixture becomes lighter in color and slightly thickened. You’ll notice it looks almost like caramel sauce. This step is important—it’s where you’re incorporating air into the dough, which gives the cookies their tender texture.
-
Mix the dry ingredients separately. In your small bowl, whisk together ½ cup plus 1 tablespoon all-purpose flour, ¼ teaspoon baking soda, and ¼ teaspoon salt. Make sure the baking soda is evenly distributed—nobody wants a pocket of baking soda in their cookie.
-
Combine wet and dry ingredients. Pour the flour mixture into the butter mixture. Use your rubber spatula to fold everything together gently. Stop as soon as you no longer see streaks of flour. Overmixing at this stage develops gluten, which makes tough cookies. You want to see a few floury bits still—they’ll incorporate as you fold in the chocolate chips.
-
Fold in the chocolate chips. Add your ⅓ cup chocolate chips and fold them in with 4 or 5 gentle strokes. Make sure they’re evenly distributed throughout the dough. The dough will be soft and slightly sticky—that’s perfect.
-
Portion the dough. Use your cookie scoop or two spoons to scoop 6 equal portions of dough onto the prepared baking sheet. Space them about 2 inches apart—they’ll spread, but not dramatically. If you want bakery-style cookies, roll each portion into a tall cylinder shape rather than a perfect ball. Taller dough = thicker cookies.
-
Optional: top with extra chips. Press a few extra chocolate chips onto the tops of each dough portion. This makes them look prettier and ensures every bite has chocolate right at the surface.
-
Bake for 10-12 minutes. Place the baking sheet on the center rack. At 10 minutes, the edges should be golden brown and the centers should still look slightly underdone and puffy. That’s when you pull them out. If you prefer crispier cookies, give them 11-12 minutes, but watch them carefully—they go from perfect to overdone fast.
-
Cool on the baking sheet. Let the cookies rest on the hot baking sheet for 5 minutes. This is crucial—they continue cooking from the residual heat, and trying to move them too early will result in broken cookies. After 5 minutes, transfer them to a cooling rack. Or just eat one warm. I won’t tell anyone.
Cooking Tips & Techniques
Here’s what I’ve learned from making these cookies more times than I care to admit.
The melted butter trick. I used to think creaming softened butter and sugar was the only way to make good cookies. Then I tried melting the butter, and honestly, I haven’t gone back. Melted butter gives you that chewy, dense texture that feels almost like a bakery cookie. The trick is letting it cool slightly before adding the egg yolk—if it’s too hot, you’ll end up with scrambled egg in your cookie dough. I learned this the hard way and had to start over.
Don’t skip the whisking. When you add the egg yolk and vanilla to the butter-sugar mixture, whisk it for a full 45 seconds. Set a timer if you have to. This is where you’re dissolving the sugar and creating that shiny, thick consistency that makes the cookies crackle on top. If you rush this step, your cookies will be flatter and less tender.
The flour measuring mistake. Most home bakers use too much flour without realizing it. Scooping directly from the bag packs the flour down, and suddenly your cookies are dry and cakey. Spoon the flour into your measuring cup, then level it off with a knife. It takes an extra five seconds and makes a massive difference.
Watch the oven, not the clock. Every oven runs differently. My friend’s oven bakes these cookies in exactly 9 minutes; mine takes 11. Start checking at 9 minutes, and pull them out when the edges are golden but the centers still look slightly underdone. They’ll set up perfectly as they cool on the pan.
The five-minute wait. I know it’s hard. The cookies smell amazing, and you want one immediately. But moving them too early is the number one mistake people make. Those five minutes on the hot baking sheet are when the centers finish cooking and the structure sets. Trust me, I’ve ruined plenty of cookies by being impatient.
Variations & Adaptations
One of the best things about this recipe is how easy it is to change up. Here are some variations I’ve tried and loved:
Chocolate chunk version. Instead of chocolate chips, chop up 2 ounces of your favorite chocolate bar. I use a dark chocolate bar with sea salt—the chunks melt into puddles that create these incredible pockets of chocolate. It’s a completely different experience from uniform chips.
Add nuts. Fold in ¼ cup of toasted walnuts or pecans along with the chocolate chips. Toast them first in a dry pan for 3-4 minutes until fragrant—it brings out their oils and makes them crunchier. I added walnuts once when I was out of chocolate chips entirely, and honestly, those were some of the best cookies I’ve ever made.
Gluten-free option. Substitute the all-purpose flour with a 1:1 gluten-free baking flour blend. I’ve used Bob’s Red Mill with great results. The texture will be slightly more delicate, so let them cool an extra minute or two before moving them. Don’t try this with almond flour or coconut flour—they behave completely differently.
Double chocolate. Replace 1 tablespoon of the flour with 1 tablespoon of unsweetened cocoa powder. Use white chocolate chips instead of semi-sweet for a cookies-and-cream vibe. My niece requests these for every family gathering.
Brown butter version. For an extra layer of flavor, brown the butter before using it. Melt the butter in a small saucepan over medium heat, swirling occasionally until it turns golden brown and smells nutty—about 4-5 minutes. Let it cool completely before using. The cookies will have this deep, almost toffee-like flavor that’s absolutely incredible.
Serving & Storage Suggestions
These cookies are best served warm, about 10 minutes after they come out of the oven. The edges are crisp, the centers are soft, and the chocolate is still slightly melty. That’s peak cookie experience right there.
For a next-level presentation, serve them with a glass of cold milk or a scoop of vanilla ice cream sandwiched between two cookies. I’ve also crumbled them over vanilla yogurt for a quick dessert parfait that looks way fancier than it is.
Storage: Keep leftover cookies in an airtight container at room temperature for up to 3 days. Place a slice of bread in the container—it absorbs excess air and keeps the cookies soft. Replace the bread slice every day if you’re storing them longer. I learned this trick from my grandmother, and it works like magic.
Freezing: These cookies freeze beautifully. You can freeze the baked cookies for up to 3 months in a freezer-safe bag. To reheat, pop one in the microwave for 10 seconds or in a 300°F oven for 5 minutes. Better yet, freeze the portioned dough balls on a baking sheet, then transfer them to a freezer bag. When you want cookies, bake them straight from frozen—just add 2 minutes to the baking time.
The flavors actually develop more after a day or two. I’ve noticed the cookies taste even better on day two—the brown sugar flavor deepens, and the texture evens out. If you can resist eating them all immediately, you’re in for a treat.
Nutritional Information & Benefits
Per cookie (based on 6 cookies): approximately 210 calories, 11g fat, 28g carbohydrates, 3g protein, 16g sugar, and 1g fiber. These are estimates and will vary based on your specific ingredients and chocolate brand.
While these aren’t health food by any stretch, there’s something to be said for the portion control aspect. Making just six cookies means you’re not faced with a giant container tempting you for days. It’s easier to enjoy a couple and move on with your evening.
The butter provides a small amount of vitamin A, and dark chocolate (if you use it) contains antioxidants and minerals like iron and magnesium. The brown sugar gives you a quick energy boost, which is perfect for an afternoon pick-me-up or a post-dinner treat.
For those with dietary restrictions, this recipe can be adapted. Use dairy-free butter and dairy-free chocolate chips for a lactose-free version. The gluten-free option works well too. Just note that the texture will vary slightly with substitutions.
Conclusion
These easy small batch chocolate chip cookies have become my go-to for those moments when I need something sweet without committing to a full batch. They’re quick, they’re forgiving, and they taste like the cookies you remember from childhood—only better because you made them yourself in under half an hour.
What I love most about this recipe is how adaptable it is. You can switch up the chocolate, add nuts, or experiment with brown butter. It’s a base that welcomes your personal touch. I’ve made these cookies for late-night cravings, for unexpected guests, and for quiet Sunday afternoons when I just want to bake something simple.
Try them this week. See if you don’t end up making them again the next night. And if you come up with your own variation, I’d love to hear about it. Drop a comment below and share what you did differently—that’s how recipes evolve, after all.
Happy baking, friends. May your cookies always be warm and your chocolate always melty.
Frequently Asked Questions
Can I use salted butter instead of unsalted?
Yes, you can. Just reduce the added salt in the recipe to ⅛ teaspoon. The cookies will turn out perfectly fine—maybe even slightly more flavorful.
Why did my cookies spread too much?
This usually happens if the butter was too warm or if you used too little flour. Make sure your melted butter has cooled slightly before mixing, and always spoon and level your flour rather than scooping directly from the bag.
Can I double this recipe?
Absolutely. Simply double every ingredient. Use one whole egg instead of two yolks if you prefer, though the texture will be slightly less dense. The baking time stays the same.
How do I get bakery-style thick cookies?
Roll your dough portions into tall cylinders rather than round balls. The taller the dough, the thicker the cookie will be as it spreads. You can also chill the dough for 30 minutes if you want even less spread.
Can I make these cookies vegan?
Yes, with some adjustments. Use vegan butter (I recommend Miyoko’s for the best flavor), replace the egg yolk with 1 tablespoon of aquafaba (chickpea water) mixed with 1 teaspoon of cornstarch, and use vegan chocolate chips. The texture will be slightly different but still delicious.
Pin This Recipe!
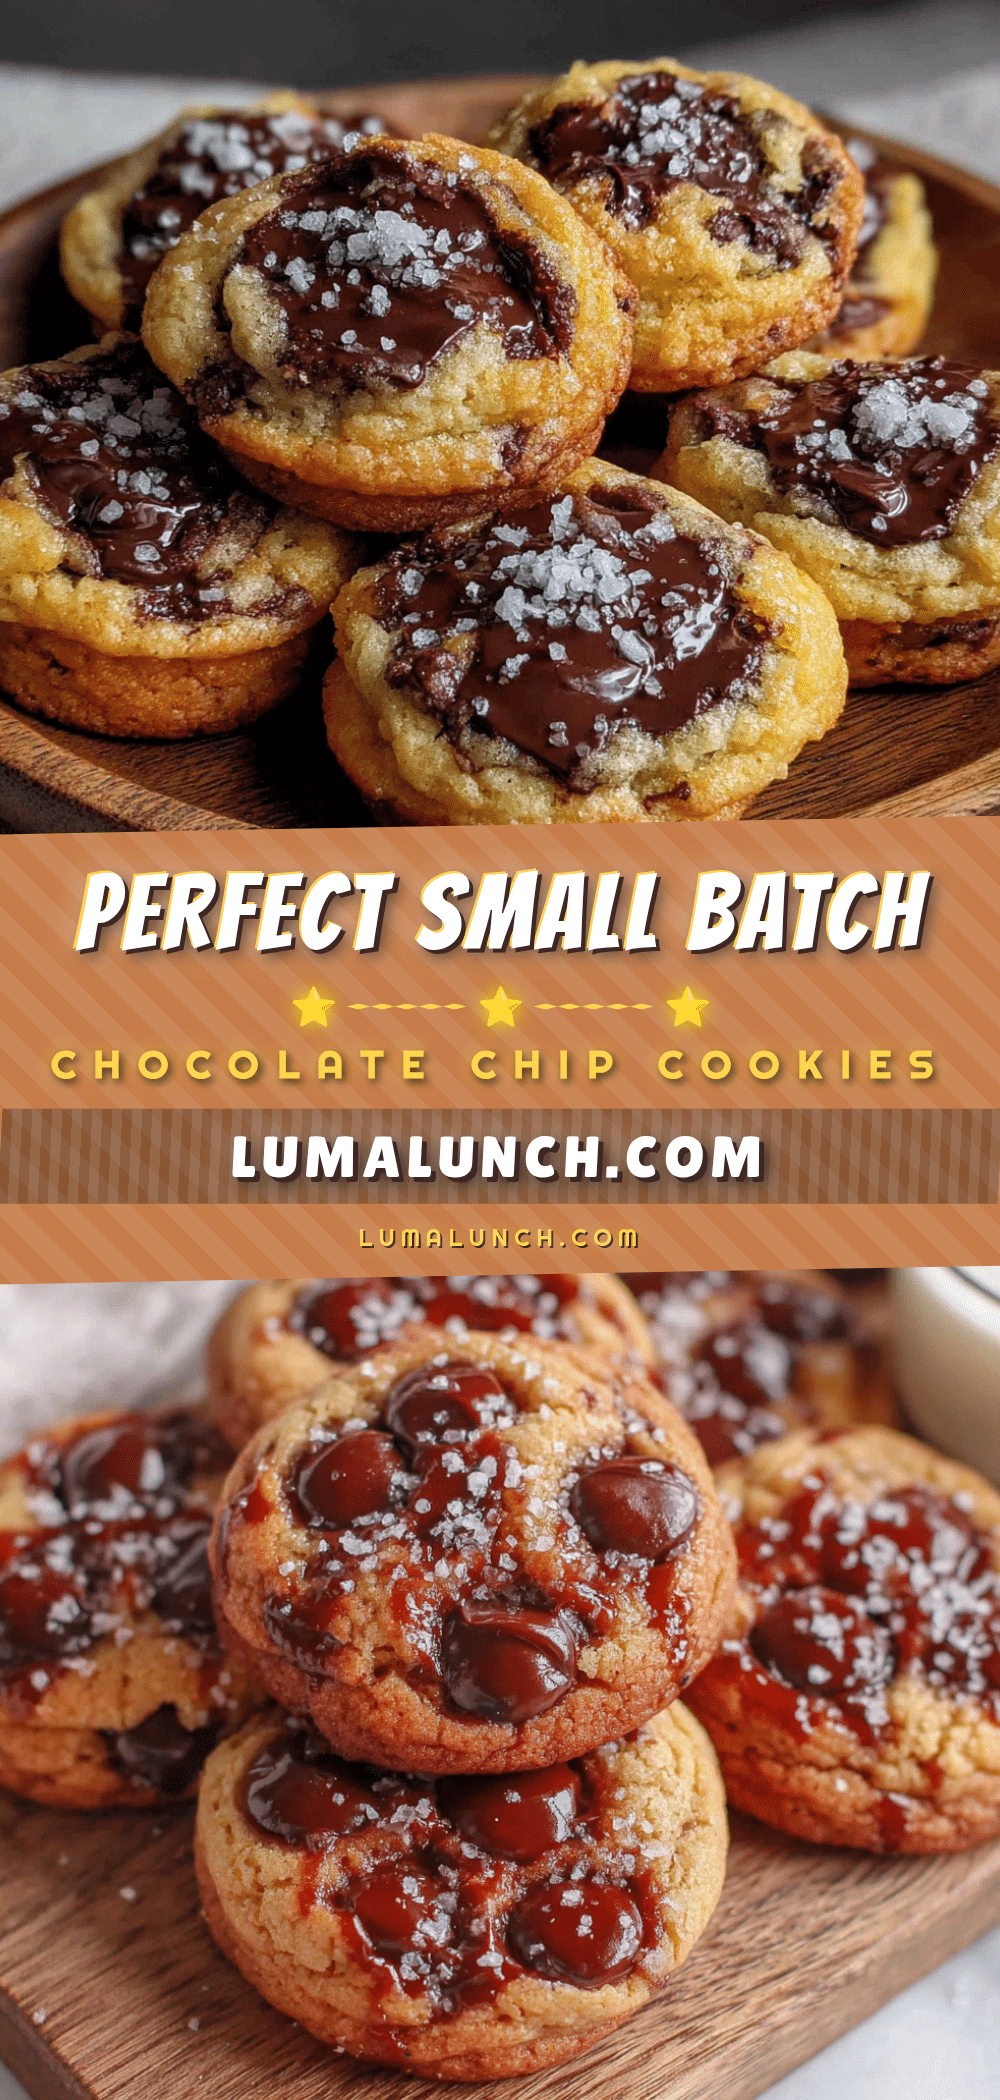
Easy Small Batch Chocolate Chip Cookies Perfected

These easy small batch chocolate chip cookies are quick, forgiving, and taste like the cookies you remember from childhood—only better because you made them yourself in under half an hour. No chilling required, just six perfect cookies.
- Prep Time: 10 minutes
- Cook Time: 10-12 minutes
- Total Time: 25 minutes
- Yield: 6 cookies 1x
- Category: Dessert
- Cuisine: American
Ingredients
- 4 tablespoons (56g) unsalted butter, melted and slightly cooled
- 1/4 cup (50g) light brown sugar, packed
- 2 tablespoons (25g) granulated sugar
- 1 large egg yolk (about 18g), room temperature
- 1/2 teaspoon vanilla extract
- 1/2 cup plus 1 tablespoon (75g) all-purpose flour, spooned and leveled
- 1/4 teaspoon baking soda
- 1/4 teaspoon fine sea salt
- 1/3 cup (60g) chocolate chips (semi-sweet or dark)
Instructions
- Preheat your oven to 350°F (175°C). Line your baking sheet with parchment paper and set it aside.
- Melt the butter: Place 4 tablespoons of unsalted butter in a microwave-safe bowl and heat in 20-second bursts until just melted. Let it sit for a minute or two until warm to the touch but not steaming.
- Combine the sugars and butter: In a medium mixing bowl, add the 1/4 cup packed brown sugar and 2 tablespoons granulated sugar to the melted butter. Whisk together until the mixture looks like wet sand and there are no lumps of brown sugar, about 30 seconds.
- Add the egg yolk and vanilla: Drop in the room temperature egg yolk and 1/2 teaspoon vanilla extract. Whisk vigorously for about 45 seconds until the mixture becomes lighter in color and slightly thickened.
- Mix the dry ingredients separately: In a small bowl, whisk together 1/2 cup plus 1 tablespoon all-purpose flour, 1/4 teaspoon baking soda, and 1/4 teaspoon salt.
- Combine wet and dry ingredients: Pour the flour mixture into the butter mixture. Use a rubber spatula to fold everything together gently. Stop as soon as you no longer see streaks of flour.
- Fold in the chocolate chips: Add 1/3 cup chocolate chips and fold them in with 4 or 5 gentle strokes until evenly distributed.
- Portion the dough: Use a cookie scoop or two spoons to scoop 6 equal portions of dough onto the prepared baking sheet, spacing them about 2 inches apart. For thicker cookies, roll each portion into a tall cylinder shape.
- Optional: Press a few extra chocolate chips onto the tops of each dough portion.
- Bake for 10-12 minutes: Place the baking sheet on the center rack. At 10 minutes, the edges should be golden brown and the centers should still look slightly underdone and puffy. Pull them out at that point.
- Cool on the baking sheet: Let the cookies rest on the hot baking sheet for 5 minutes. After 5 minutes, transfer them to a cooling rack.
Notes
For best results, use room temperature egg yolk. Melted butter should be warm but not hot to avoid cooking the egg. Spoon and level flour to avoid dry cookies. Let cookies rest on baking sheet for 5 minutes before moving. For thicker cookies, roll dough into tall cylinders. For crispier cookies, bake 11-12 minutes. Store in an airtight container with a slice of bread to keep soft.
Nutrition
- Serving Size: 1 cookie
- Calories: 210
- Sugar: 16
- Sodium: 150
- Fat: 11
- Saturated Fat: 7
- Carbohydrates: 28
- Fiber: 1
- Protein: 3
Keywords: small batch chocolate chip cookies, easy chocolate chip cookies, no chill cookies, quick cookies, 6 cookies