Love this? Save it for later!
Share the inspiration with your friends
The PTA Halloween party was in six hours and I’d completely forgotten. My son had reminded me that morning — “Mom, you signed up for the treat table, remember?” — and I’d nodded along while packing lunches, letting it slip right out of my brain. Now it was 2 PM, I had a bag of marshmallows, a box of cereal, and absolutely no time to run to the store. Everyone else would be bringing elaborate cupcakes with fondant spiders and those fancy cake pops that take three days to perfect. I had a buttered casserole dish and a prayer.
Let me tell you, desperation is a powerful motivator. I started rummaging through my pantry hoping for some kind of miracle, and there they were — those big marshmallows I’d bought for s’mores last summer and forgotten about. And the box of crispy rice cereal I’d grabbed on a whim. I mean, I’ve made regular Rice Krispie treats a million times, but this was Halloween. They needed to look like something. My neighbor Karen had mentioned she makes these cute pumpkin-shaped ones for her grandkids, and honestly, it sounded too simple to work. But I was out of options.
Twenty minutes later, I was walking into that school gym with a plate of these little orange pumpkins, still a bit warm, and I felt ridiculous next to the professionally decorated spread. But you know what? They were the first thing to disappear. Kids grabbed them, parents smiled, and someone actually asked for the recipe. Maybe you’ve been there — that moment when the simplest thing somehow wins the day. That’s why I keep making these Easy Halloween Rice Krispie Jack-o’-Lanterns year after year. They’re not fancy, they’re not complicated, but they’ve got this charm that store-bought treats just can’t match.
Why You’ll Love This Recipe
Let me tell you why these little pumpkin treats have become my secret weapon for every Halloween gathering. After testing this recipe at three different parties (and one very chaotic classroom celebration), I can promise you they deliver every single time.
- Quick & Easy: From start to finish, you’re looking at about 20 minutes. That’s less time than it takes to watch a single episode of your favorite show. Perfect for those last-minute school events or unexpected guests.
- Simple Ingredients: You probably have everything in your kitchen right now. Marshmallows, butter, cereal, and orange food coloring. No special baking supplies or trips to the craft store needed.
- Perfect for Halloween Parties: Whether it’s a classroom celebration, office potluck, or neighborhood gathering, these little guys fit right in. They’re portable, they don’t melt, and they make people smile.
- Crowd-Pleaser: I’ve watched kids who swear they don’t like Rice Krispie treats grab two of these. Adults too. There’s something about the pumpkin shape that makes them irresistible.
- Unbelievably Delicious: The marshmallow-to-cereal ratio is spot on — not too hard, not too sticky. The orange coloring adds zero flavor, so you get that classic buttery marshmallow taste you remember from childhood.
What makes these different from every other Halloween treat out there? It’s the texture, honestly. Most shaped Rice Krispie treats end up dense and hard because you have to press them so firmly into molds. But this recipe uses a slightly higher butter-to-marshmallow ratio that keeps them soft and chewy, even after they’ve set. I learned that trick after my first batch came out like edible rocks.
These aren’t just another holiday recipe. They’re the kind that makes you look like a hero with zero effort. The kind your kids will ask for every October. The kind that doesn’t require you to own a single Halloween-themed cookie cutter. Just your hands, some orange food coloring, and twenty minutes of your time.
What Ingredients You Will Need
This recipe uses simple, everyday ingredients to create something that feels special. Most of these are probably sitting in your pantry right now, which is exactly how I like my recipes to work.
- 3 tablespoons unsalted butter (plus extra for greasing your hands and the pan)
- 1 package (10 ounces) regular marshmallows (or 4 cups mini marshmallows — either works fine)
- 6 cups crispy rice cereal (I prefer Kellogg’s Rice Krispies for that perfect snap, but generic works too)
- Orange gel food coloring (the gel kind is important — liquid food coloring makes the mixture too wet and sticky)
- Green candy melts or green fruit roll-ups (for the stems — you can also use green Twizzlers or green licorice)
- Black decorating gel or melted chocolate chips (for the jack-o’-lantern faces)
- Optional: 1/2 teaspoon vanilla extract (adds a lovely warmth to the marshmallow flavor)
- Optional: 1/4 cup mini chocolate chips (for extra texture inside the treats)
A few notes on ingredient selection. I’ve tried this with both salted and unsalted butter, and unsalted gives you more control over the final taste. If you only have salted butter on hand, just skip adding any extra salt. For the marshmallows, fresh ones matter — stale marshmallows won’t melt as smoothly and can leave your treats with a weird grainy texture.
The orange gel food coloring is non-negotiable in my book. I’ve made the mistake of using liquid food coloring before, and it turned my marshmallow mixture into a sticky, watery mess that refused to hold its shape. Americolor and Wilton both make excellent gel colors that you can find at any craft store or online. A little goes a long way — you only need about 1/4 teaspoon to get that perfect pumpkin orange.
For the stems, I’ve used everything from broken pretzel sticks dipped in green candy coating to actual pumpkin stems from my garden. The green fruit roll-ups are the easiest option because you can just snip them into little stem shapes. If you’re feeling fancy, green candy melts give a more polished look.
Equipment Needed
You don’t need any special Halloween-themed kitchen gadgets for this recipe, which is honestly my favorite part. Here’s what you’ll need:
- Large microwave-safe bowl (or a large saucepan if you’re doing this on the stovetop)
- Rubber spatula (a silicone one works best — the marshmallow mixture is incredibly sticky)
- 9×13-inch baking pan (for the initial spreading — though you could use any large rimmed baking sheet)
- Parchment paper or wax paper (absolutely essential for preventing sticking)
- Small offset spatula or butter knife (for spreading the mixture)
- Sharp knife or kitchen scissors (for cutting the treats into pumpkin shapes)
- Piping bag or small zip-top bag (for the jack-o’-lantern faces)
I’ve made these without a proper 9×13 pan before — just used a large cutting board covered in parchment paper. It worked fine, though the treats were a bit uneven in thickness. If you’re in a real pinch, you can even shape them freehand without pressing them into a pan first. The key is having your hands well-buttered so nothing sticks.
One tip I learned the hard way: avoid using nonstick cooking spray on your hands. It creates this weird slick that doesn’t actually prevent the marshmallow from sticking. Butter is your friend here. Keep a stick of it handy and reapply as needed.
Preparation Method
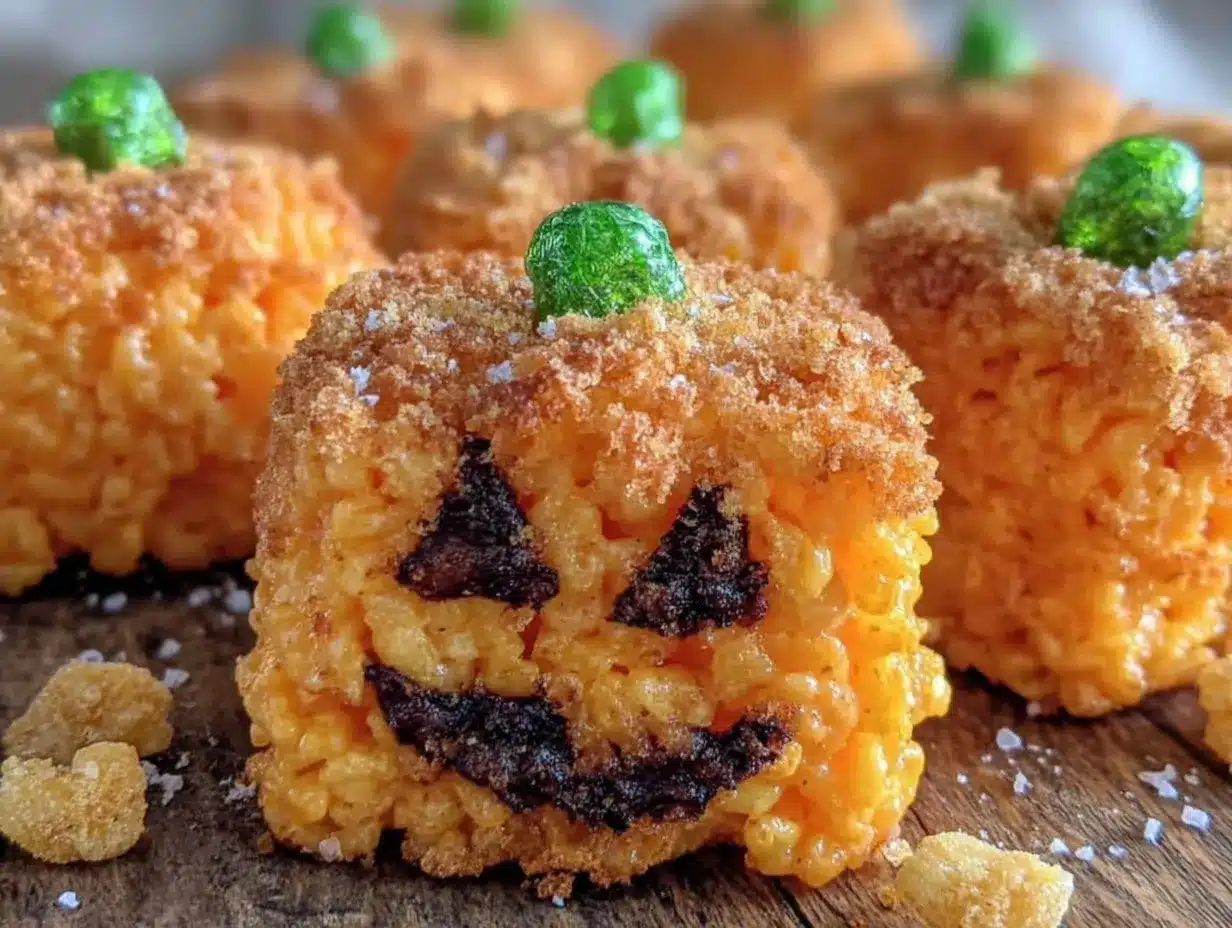
Alright, let’s make these little pumpkin guys. I’ve broken this down into steps that even a novice cook can follow without any trouble.
- Prepare your work surface. Line your 9×13-inch baking pan with parchment paper, leaving some overhang on the sides. This makes lifting the whole block out later so much easier. Lightly butter the parchment paper too — trust me on this.
- Melt the butter and marshmallows. In your large microwave-safe bowl, combine the 3 tablespoons of butter and the entire package of marshmallows. Microwave on high for 1 minute, then stir. The mixture will look separated and weird at first — that’s normal. Microwave for another 30 seconds, then stir again. If needed, go for one more 30-second burst. You want the mixture to be completely smooth and glossy, with no lumps of unmelted marshmallow.
- Add the orange color. This is where you need to work fast. Add about 1/4 teaspoon of orange gel food coloring to the hot marshmallow mixture. Stir vigorously until the color is evenly distributed. The mixture should be a bright, cheerful orange — think pumpkin, not traffic cone. If it looks too pale, add a tiny bit more coloring. Remember, the color will lighten slightly when you add the cereal.
- Fold in the cereal. Pour the 6 cups of crispy rice cereal into the colored marshmallow mixture. Fold gently with your rubber spatula, scraping from the bottom. This is not the time for aggressive stirring — you want to coat every piece of cereal without crushing it. The mixture should look evenly orange with no white patches of marshmallow. If you’re adding the optional vanilla extract, stir it in now.
- Press into the pan. Transfer the mixture to your prepared pan. Here’s the trick: butter your hands generously. Like, really butter them. Then press the mixture into an even layer. Don’t press too hard — you want it compact enough to hold together but not so dense that it becomes rock hard. Aim for about 3/4-inch thickness.
- Let it set. Allow the mixture to cool at room temperature for about 15-20 minutes. Don’t put it in the refrigerator — that can make the texture weird and grainy. You want it firm enough to cut but still slightly warm.
- Cut into pumpkin shapes. Using the parchment paper, lift the entire block out of the pan and onto a cutting board. Use a sharp knife to cut out pumpkin shapes. I usually go for triangles with rounded bottoms — about 2 inches wide at the base and 2.5 inches tall. Don’t stress about perfection. Real pumpkins aren’t perfectly round either. You can also use a round cookie cutter if you want uniform circles, but I like the hand-cut look.
- Add the stems. While the treats are still slightly warm, press a small piece of green fruit roll-up or a green candy melt into the top of each pumpkin. If using candy melts, you might need a tiny dab of melted chocolate to make them stick.
- Draw the faces. Once the treats are completely cool, it’s face time. Use black decorating gel or melted chocolate in a piping bag to draw jack-o’-lantern faces. Simple triangles for eyes, a zigzag mouth, maybe a little nose. You can also use mini chocolate chips for the eyes if that’s easier.
- Let the faces set. Give the decorating gel or chocolate about 10 minutes to harden before you start stacking or serving these guys. Otherwise, you’ll end up with smeared faces and sad pumpkins.
A quick sensory check: when you press the mixture into the pan, it should feel warm and pliable but not hot. The marshmallow should stretch slightly as you pull your fingers away. If it feels too sticky to work with, let it cool for just a minute or two longer.
Cooking Tips & Techniques
After making these pumpkin treats probably a dozen times, I’ve collected some hard-won wisdom. Let me save you from my mistakes.
The marshmallow melting method matters. I’ve tried stovetop, microwave, and even oven methods. The microwave is fastest, but you have to watch it like a hawk. Marshmallows go from perfectly melted to burnt and rubbery in about 15 seconds. If using the stovetop, keep the heat on low and stir constantly. My worst batch happened when I walked away from a pot on medium heat — came back to a brown, smoky disaster that smelled like burnt sugar for days.
Temperature is everything. If your marshmallow mixture gets too cool before you add the cereal, you’ll end up with a crumbly mess that won’t hold together. Work quickly once the marshmallows are melted. If the mixture starts setting before you’re done shaping, pop it back in the microwave for 10 seconds to soften it up again.
Butter your tools, not just your hands. I keep a stick of butter on the counter and rub it on my spatula, the knife, even the cutting board. This little habit has saved me from so much frustration. The marshmallow mixture sticks to everything, and I mean everything.
Don’t overwork the mixture. I used to stir and stir, trying to get every single piece of cereal perfectly coated. That’s how you end up with dense, hard treats. Gentle folding is the way to go. You want some air pockets in there — that’s what gives Rice Krispie treats their signature lightness.
Make extra for snacking. The scraps from cutting the pumpkin shapes are delicious. I never throw them away. They’re perfect for crumbling over ice cream or just eating as the cook’s treat while you work. My kids fight over the scrap bowl more than the actual pumpkins.
Variations & Adaptations
One of the best things about this recipe is how easy it is to change up. Here are some variations I’ve tried and loved.
Chocolate Pumpkin Spice: Add 1/4 cup cocoa powder to the marshmallow mixture along with 1 teaspoon pumpkin pie spice. The chocolate-orange combination is surprisingly good, and the spice gives it that fall feeling. I made these for a Halloween brunch and they disappeared in minutes.
Peanut Butter Pumpkins: Stir in 1/3 cup creamy peanut butter with the marshmallows. The peanut butter adds richness and makes the treats even more satisfying. Just be aware that peanut butter changes the texture slightly — they’ll be a bit softer and more tender. If you have nut allergies in your group, sunflower seed butter works great too.
Vegan Version: Use vegan marshmallows (Dandies brand works well) and substitute the butter with coconut oil or a plant-based butter. The texture will be slightly different — a bit chewier — but the taste is still fantastic. I made these for a friend who’s vegan and she couldn’t believe they weren’t the real thing.
Ghost Shapes Instead of Pumpkins: Skip the orange food coloring and shape the treats into ghost silhouettes. Use white candy melts for the bodies and black decorating gel for ghost faces. This is a great option if you can’t find orange food coloring or just want variety on your treat table.
Spider Web Decoration: Instead of jack-o’-lantern faces, drizzle white candy melts over the orange pumpkins in a web pattern. Add a plastic spider on top for a creepy-crawly effect. My nephew’s class went crazy for these.
Mini Pumpkin Bites: Instead of cutting shapes from a pan, roll the slightly cooled mixture into 1-inch balls, then flatten them slightly and add stems and faces. These are perfect for younger kids who might struggle with a full-sized treat.
Serving & Storage Suggestions
These Halloween Rice Krispie Jack-o’-Lanterns are best served at room temperature. The texture is perfect — not too hard, not too soft — and the marshmallow flavor really shines when they’re not cold from the fridge.
For presentation, I like to arrange them on a white platter or cake stand. The orange color pops beautifully against a neutral background. You can scatter some candy corn or mini pumpkins around the plate for extra Halloween flair. If you’re bringing them to a party, arrange them in a single layer on a tray — stacking them can smush the faces.
These pair wonderfully with warm apple cider or hot chocolate. For an adult gathering, they’re great alongside a pumpkin spice latte or even a glass of cold milk. I’ve also served them with vanilla ice cream for a fun dessert combo that kids and adults both love.
Storage instructions: Store any leftovers in an airtight container at room temperature. They’ll stay fresh for up to 5 days, though honestly, they never last that long in my house. Do not refrigerate them — the cold makes them hard and stale-tasting. If your kitchen is very warm, you can store them in a cool pantry or basement.
Freezer instructions: These freeze beautifully! Place the undecorated treats in a single layer on a baking sheet and freeze until solid, about 1 hour. Then transfer them to a freezer-safe bag or container. They’ll keep for up to 3 months. When you’re ready to serve, thaw them at room temperature for about 30 minutes, then add the faces and stems. I always make a double batch and freeze half for last-minute Halloween emergencies.
Reheating tip: If your treats have gotten a bit hard, microwave them for 5-7 seconds. This softens them right up without melting the decorations. Just be careful not to overdo it, or you’ll end up with a puddle of orange marshmallow.
Nutritional Information & Benefits
Let’s be real — these are a treat, not a health food. But here’s the nutritional breakdown so you know what you’re working with.
Per serving (1 pumpkin treat):
- Calories: 145
- Fat: 4g
- Carbohydrates: 28g
- Sugar: 16g
- Protein: 1g
- Sodium: 135mg
Now, let’s talk about the silver lining. The crispy rice cereal does provide a small amount of iron and B vitamins, since it’s fortified. And the butter, while not exactly a health food, does help your body absorb fat-soluble vitamins from any other foods you’re eating alongside these treats. I mean, it’s a stretch, but it’s something!
For those with dietary concerns, please note that this recipe contains gluten (from the cereal), dairy (from the butter), and is processed in facilities that handle various allergens. If you need gluten-free options, look for certified gluten-free crispy rice cereal — several brands make them now. For dairy-free, use plant-based butter and check that your marshmallows are vegan.
My personal take? These are a once-a-year treat for us. Halloween comes around and we enjoy them without guilt. Life’s too short to worry about the nutritional content of a marshmallow treat that brings this much joy. Everything in moderation, right?
Conclusion
These Easy Halloween Rice Krispie Jack-o’-Lanterns have become a non-negotiable part of our October traditions. They’re the recipe I turn to when I need something that looks impressive but doesn’t require a culinary degree. The recipe that saves me when I’ve forgotten about the school party, the office celebration, or the neighborhood gathering.
What I love most about these little pumpkins is how forgiving they are. If your pumpkin shapes aren’t perfect, that’s fine — real pumpkins aren’t either. If the faces look a bit wonky, that just adds character. There’s no pressure with this recipe, and honestly, that’s what makes it so special. It’s not about perfection. It’s about making something fun and delicious with the people you love.
I’d love to hear how yours turn out! Did you try any of the variations? Did your kids help with the faces? Drop a comment below and let me know. And if you come up with your own twist on these pumpkin treats, please share it — I’m always looking for new ideas to try.
Here’s to a Halloween filled with laughter, sticky fingers, and way too many marshmallows. Happy haunting, friends!
Frequently Asked Questions
Can I make these Halloween Rice Krispie treats ahead of time?
Absolutely! You can make them up to 5 days in advance. Store them in an airtight container at room temperature. If you want to freeze them, leave off the faces and stems until after thawing for the best results.
Why did my Rice Krispie treats turn out hard?
This usually happens when the marshmallow mixture is overheated or when you press the treats too firmly into the pan. Keep your heat low and gentle, and use a light hand when pressing. The butter-to-marshmallow ratio in this recipe helps keep them soft too.
Can I use liquid food coloring instead of gel?
I really don’t recommend it. Liquid food coloring adds too much moisture to the marshmallow mixture, making it sticky and difficult to work with. Gel food coloring gives you vibrant color without changing the texture. If liquid is all you have, use it sparingly and expect a stickier mixture.
How do I prevent the marshmallow mixture from sticking to my hands?
Butter is your best friend here. Generously butter your hands before touching the mixture, and reapply as needed. You can also lightly dampen your hands with water, but butter works better. Keep a stick of butter nearby while you work.
Can I make these without a 9×13 pan?
Yes! You can shape the mixture freehand into pumpkin shapes on a parchment-lined baking sheet. The shapes won’t be as uniform, but they’ll still taste great. You can also use a silicone pumpkin mold if you have one — just press the mixture in firmly and pop them out once set.
Pin This Recipe!
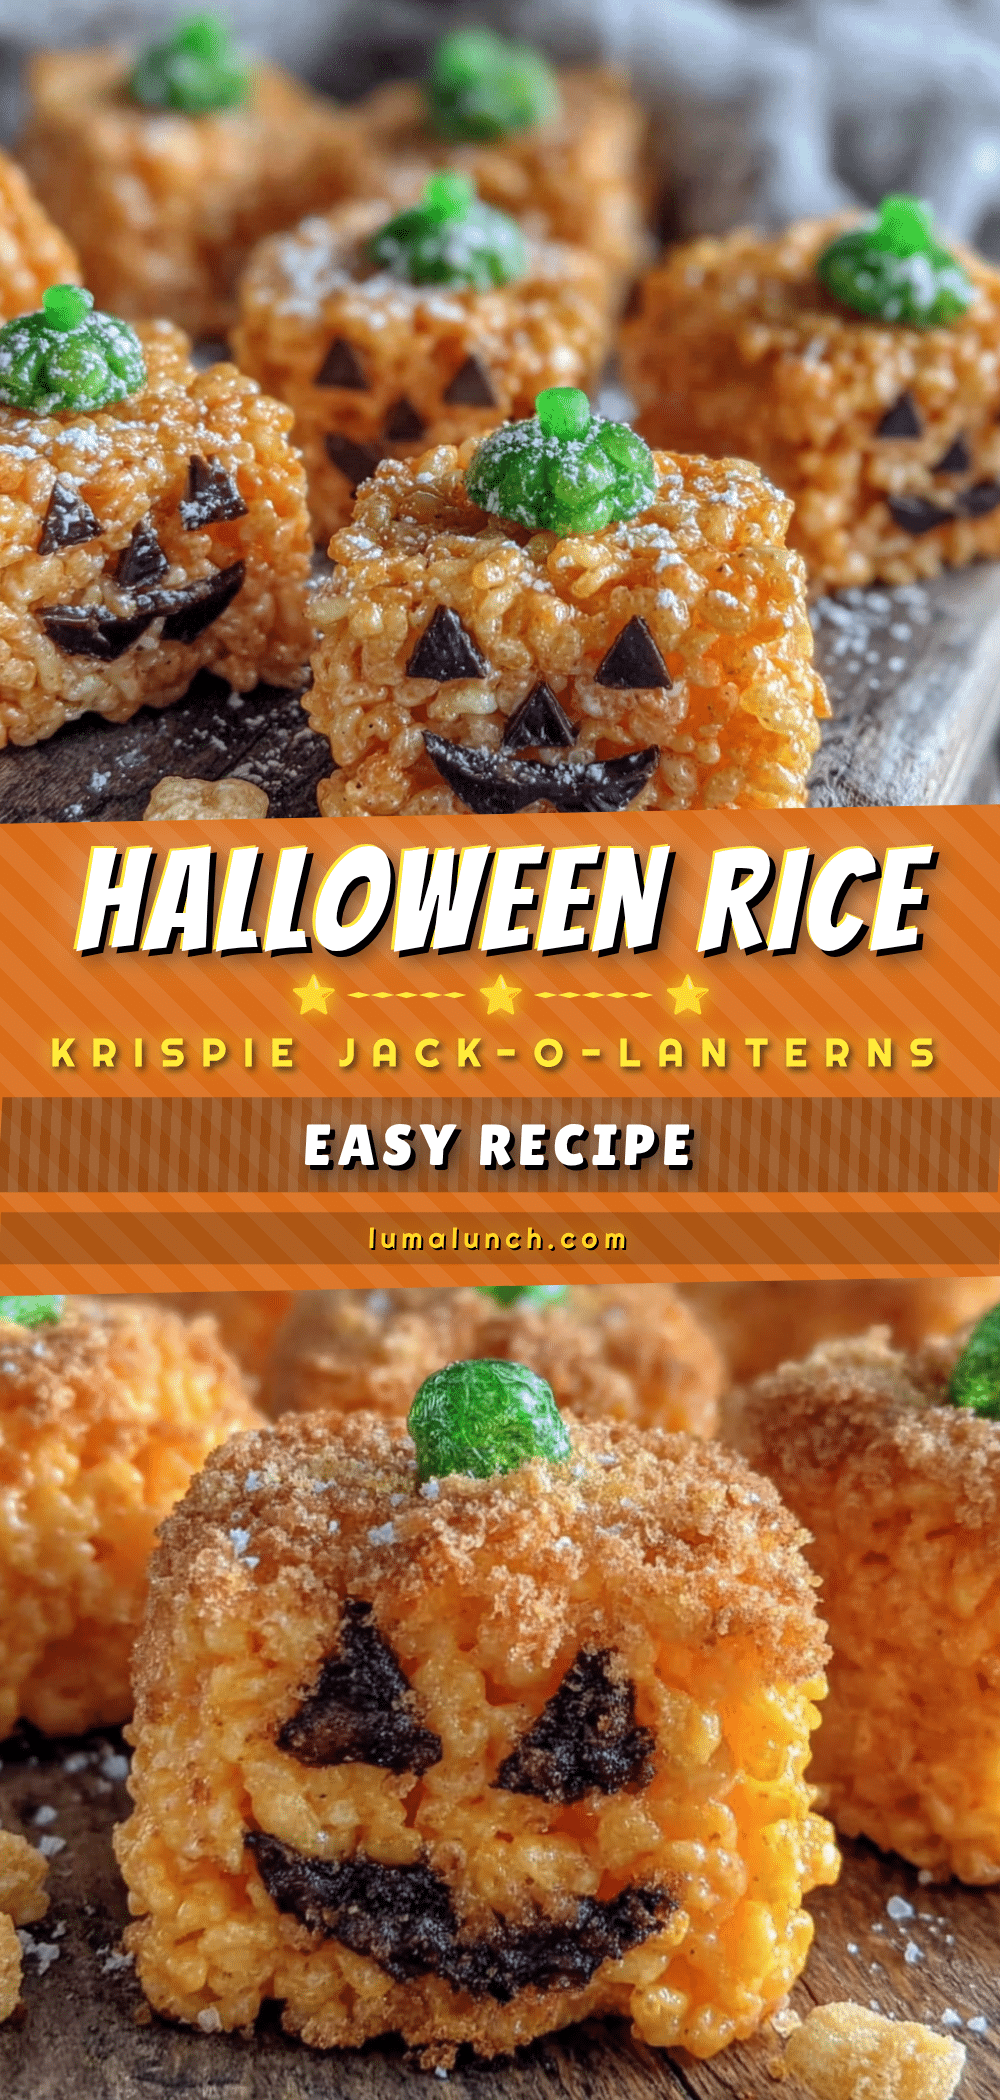
Easy Halloween Rice Krispie Jack-o’-Lanterns: Best 20-Minute Treat
These quick and easy Halloween Rice Krispie Jack-o’-Lanterns are a 20-minute treat made with simple ingredients. Perfect for last-minute parties, they’re soft, chewy, and decorated with cute jack-o’-lantern faces.
- Prep Time: 10 minutes
- Cook Time: 10 minutes
- Total Time: 20 minutes
- Yield: 12 servings 1x
- Category: Dessert
- Cuisine: American
Ingredients
- 3 tablespoons unsalted butter (plus extra for greasing)
- 1 package (10 ounces) regular marshmallows (or 4 cups mini marshmallows)
- 6 cups crispy rice cereal (preferably Kellogg’s Rice Krispies)
- Orange gel food coloring (about 1/4 teaspoon)
- Green candy melts or green fruit roll-ups (for stems)
- Black decorating gel or melted chocolate chips (for faces)
- Optional: 1/2 teaspoon vanilla extract
- Optional: 1/4 cup mini chocolate chips
Instructions
- Line a 9×13-inch baking pan with parchment paper, leaving overhang. Lightly butter the parchment.
- In a large microwave-safe bowl, combine 3 tablespoons butter and the marshmallows. Microwave on high for 1 minute, stir, then microwave in 30-second bursts until smooth and glossy.
- Stir in about 1/4 teaspoon orange gel food coloring until evenly distributed.
- Pour in 6 cups crispy rice cereal and fold gently with a rubber spatula until all cereal is coated.
- Butter your hands generously. Transfer the mixture to the prepared pan and press into an even layer about 3/4-inch thick. Do not press too hard.
- Let cool at room temperature for 15-20 minutes until firm but still slightly warm.
- Lift the block out using the parchment. Cut into pumpkin shapes (about 2 inches wide at base, 2.5 inches tall) with a sharp knife.
- While still slightly warm, press a small piece of green fruit roll-up or a green candy melt into the top of each pumpkin for a stem.
- Once completely cool, use black decorating gel or melted chocolate to draw jack-o’-lantern faces (triangular eyes, zigzag mouth).
- Let the faces set for about 10 minutes before serving or stacking.
Notes
Use gel food coloring, not liquid, to avoid a sticky mixture. Butter your hands and tools generously to prevent sticking. Do not refrigerate; store in an airtight container at room temperature for up to 5 days. For freezing, leave off faces and stems until after thawing.
Nutrition
- Serving Size: 1 pumpkin treat
- Calories: 145
- Sugar: 16
- Sodium: 135
- Fat: 4
- Saturated Fat: 2
- Carbohydrates: 28
- Protein: 1
Keywords: Halloween treats, Rice Krispie treats, jack-o-lantern, pumpkin treats, easy dessert, no-bake, kid-friendly, party food


