Love this? Save it for later!
Share the inspiration with your friends
It was 11:47 PM on a rainy Tuesday, and I was staring into the fridge like it owed me money. The craving hit me out of nowhere – not for a snack, not for something sweet, but for that specific, soul-warming comfort that only a pot pie can deliver. I didn’t have a proper recipe in mind, and honestly, I was too tired to follow one anyway. But I had a container of shredded turkey from Sunday’s dinner, a half-used bag of frozen mixed vegetables, and a stick of butter that was practically begging to be used.
The idea arrived in that weird, half-delirious state you get when you should be sleeping but your stomach has other plans. What if I just… made it up as I went along? I grabbed a cast iron skillet I’d picked up at a garage sale last summer (the one with the slightly wobbly handle that I keep meaning to fix), and something about the late hour made me bold. I wasn’t following rules anymore. I was following my gut.
There’s something about cooking alone at night that strips away all the pressure. No one’s watching, no one’s judging, and you can lick the spoon without anyone raising an eyebrow. I started browning some butter, and the smell alone made me feel like I was onto something. Maybe you’ve been there – that moment when you’re not sure if you’re making dinner or making a memory, but either way, it feels right. This pot pie wasn’t planned, it wasn’t perfect, and honestly, I forgot to add thyme. But that first bite? Pure, unapologetic comfort. And that’s why I keep making it, even when the sun is still up.
Why You’ll Love This Recipe
Let me tell you, I’ve tested this one more times than I care to admit. The first version was a little too soupy. The second one had a crust that was more like cardboard than pastry. But by version three, I knew I had something special. This isn’t just another way to use up leftovers – it’s the reason you’ll start cooking extra turkey on purpose.
- Quick & Easy: From fridge to table in under 45 minutes. Perfect for those nights when you want comfort food but don’t want to spend all evening in the kitchen.
- Simple Ingredients: You probably have most of this stuff already. No fancy grocery trips required – just pantry staples and that leftover turkey waiting in your fridge.
- Perfect for Cozy Nights: Cold weather, rainy evenings, or just one of those days that needs fixing. This pot pie is basically a hug in a dish.
- Crowd-Pleaser: I’ve served this to picky kids, foodie friends, and my neighbor who claims he doesn’t like turkey. Everyone goes back for seconds.
- Unbelievably Delicious: The filling is creamy without being heavy, the crust is golden and flaky, and every bite tastes like home.
What makes this recipe different? It’s the technique. Instead of a complicated double crust, we’re using a simple drop biscuit topping that’s impossible to mess up. It’s lighter than traditional pie crust but just as satisfying. And the filling? I’ve perfected the ratio of broth to cream so you get that rich, velvety texture without it turning into soup. This is the kind of meal that makes you close your eyes after the first bite – comfort food reimagined, faster and easier, but with the same soul-soothing satisfaction.
What Ingredients You Will Need
This recipe uses simple, wholesome ingredients to deliver bold flavor and satisfying texture without the fuss. Most of these are pantry staples, and I’ve included substitution notes where they actually work.
For the Filling
- 3 tablespoons unsalted butter (I prefer Kerrygold for the richness)
- 1 medium yellow onion, diced (about 1 cup)
- 2 medium carrots, peeled and diced (about 1 cup)
- 2 celery stalks, diced (about 1/2 cup)
- 3 cloves garlic, minced
- 1/3 cup all-purpose flour (use gluten-free 1:1 blend if needed)
- 2 cups low-sodium chicken or turkey broth
- 1 cup whole milk (or half-and-half for extra richness)
- 3 cups cooked turkey, shredded or cubed (dark meat works best, but use what you have)
- 1 cup frozen peas (no need to thaw)
- 1 teaspoon dried thyme (or 1 tablespoon fresh)
- 1/2 teaspoon dried sage (adds that classic poultry seasoning vibe)
- Salt and black pepper to taste
- Optional: 1/4 cup dry white wine (adds depth, but skip if you don’t have it)
For the Drop Biscuit Topping
- 1 1/2 cups all-purpose flour
- 1 1/2 teaspoons baking powder
- 1/2 teaspoon baking soda
- 1/2 teaspoon salt
- 1/4 teaspoon garlic powder (trust me on this)
- 1/2 cup cold unsalted butter, cut into small cubes
- 2/3 cup buttermilk (or regular milk with 1 teaspoon lemon juice, let sit 5 minutes)
- 1 tablespoon fresh parsley, chopped (for garnish, optional but pretty)
A few notes from my kitchen to yours: I’ve tested this with both store-bought rotisserie chicken and leftover Thanksgiving turkey, and both work beautifully. If you’re using frozen turkey from the holidays, make sure it’s fully thawed and patted dry – extra moisture will make the filling watery. For the broth, I really recommend low-sodium so you can control the salt level. And if you’re dairy-free, use a good quality plant-based butter and unsweetened oat milk – I’ve done it, and it works, though the texture is slightly less rich.
Equipment Needed
You don’t need a fancy kitchen for this recipe. Here’s what you’ll actually use:
- Large oven-safe skillet or Dutch oven: I use a 12-inch cast iron skillet. If you don’t have one, any oven-safe pan works – just make sure it’s at least 2 inches deep.
- Mixing bowls: One medium bowl for the biscuit topping, one small bowl for any prepped ingredients.
- Wooden spoon or silicone spatula: For stirring the filling without scratching your pan.
- Measuring cups and spoons: Because eyeballing flour never ends well.
- Pastry cutter or two forks: For cutting butter into the flour mixture. You can also use your hands if they’re cold.
- Chef’s knife and cutting board: For dicing those veggies.
I bought my cast iron skillet at a thrift store for eight bucks, and it’s honestly my favorite kitchen tool. If you’re using a regular skillet, just make sure it’s oven-safe – check the handle! I learned that the hard way with a plastic-handled pan that melted in the oven. Not my proudest moment.
Preparation Method
Let’s get cooking. Preheat your oven to 400°F (200°C) and get everything prepped before you start – this comes together fast once you get going.
- Start the filling base: Place your oven-safe skillet over medium heat and add the butter. Let it melt and get a little foamy – about 2 minutes. Add the diced onion, carrots, and celery. Cook for 5-7 minutes, stirring occasionally, until the vegetables soften and the onions turn translucent. You should smell that sweet, savory aroma starting to fill your kitchen.
- Add the garlic and flour: Toss in the minced garlic and cook for 30 seconds until fragrant – don’t let it burn or it’ll get bitter. Sprinkle the flour over the vegetables and stir constantly for 1-2 minutes. This cooks out the raw flour taste and creates a roux that will thicken your filling. It’ll look like a thick paste clinging to the veggies – that’s exactly what you want.
- Pour in the liquids: Slowly pour in the broth while stirring continuously. Then add the milk (or half-and-half) and keep stirring. If you’re using wine, add it before the broth and let it cook down for a minute. Bring the mixture to a gentle simmer – you’ll see small bubbles around the edges. Let it cook for 3-4 minutes, stirring often, until it thickens enough to coat the back of your spoon.
- Add the turkey and seasonings: Stir in the shredded turkey, frozen peas, thyme, sage, and a generous pinch of salt and pepper. Reduce the heat to low and let everything warm through for 2-3 minutes. Taste it – this is your chance to adjust the seasoning. I always add a little extra pepper at this stage. Remove the skillet from the heat and set it aside while you make the topping.
- Make the drop biscuit topping: In a medium bowl, whisk together the flour, baking powder, baking soda, salt, and garlic powder. Add the cold butter cubes and use a pastry cutter or two forks to cut the butter into the flour until it resembles coarse meal with some pea-sized butter pieces remaining. (Cold butter = flaky biscuits. Warm butter = dense biscuits. Keep it cold.)
- Add the buttermilk: Pour the buttermilk into the flour mixture and stir with a fork until just combined. The dough will be shaggy and sticky – don’t overmix or the biscuits will be tough. A few streaks of flour are totally fine.
- Assemble and bake: Drop spoonfuls of the biscuit dough over the turkey filling, spacing them about an inch apart. You should have 8-10 biscuits. Don’t worry if they look messy – rustic is the goal here. Place the skillet in the preheated oven and bake for 20-25 minutes, until the biscuits are golden brown and the filling is bubbling up around the edges. Let it cool for 5 minutes before serving – that filling is lava hot.
Cooking Tips & Techniques
I’ve made this recipe at least a dozen times, and I’ve made every mistake in the book so you don’t have to. Here’s what I’ve learned:
Don’t skip the roux step. I know it’s tempting to just dump everything in and hope for the best, but cooking the flour with the butter for that full 2 minutes is non-negotiable. It eliminates that raw flour taste and ensures your filling thickens properly. One time I rushed this step, and my pot pie turned out more like turkey soup with biscuits floating on top. Still edible, but not what we’re going for.
Keep that butter cold. For the biscuit topping, cold butter is your best friend. If your kitchen is warm, pop the butter cubes in the freezer for 10 minutes before cutting them into the flour. The little pockets of butter melt in the oven and create steam, which gives you those flaky layers. Warm butter just gets absorbed into the flour, and you end up with dense, sad biscuits.
Let it rest before serving. I know it’s hard to wait when your kitchen smells amazing, but letting the pot pie sit for 5 minutes after baking does two things: it lets the filling set so it doesn’t run all over your plate, and it cools down enough that you won’t burn your mouth. Trust me on this – I’ve burned my tongue more times than I’d like to admit.
Multitasking tip: While the filling simmers, mix your biscuit dough. That way, everything is ready to go into the oven at once. This recipe moves fast, so having all your ingredients measured and ready makes the whole process smoother.
Variations & Adaptations
This recipe is flexible, and I love playing around with different versions. Here are some of my favorites:
Chicken Pot Pie: Swap the turkey for shredded rotisserie chicken. It works perfectly and is a great way to use up leftover roast chicken from earlier in the week. I actually make the chicken version more often than turkey, just because chicken is more available year-round.
Vegetarian Version: Replace the turkey with two cans of drained chickpeas or a bag of frozen mixed vegetables (add an extra cup). Use vegetable broth instead of chicken broth. The chickpeas add a nice heartiness, and honestly, the biscuit topping is so good you won’t miss the meat.
Gluten-Free Adaptation: Use a 1:1 gluten-free flour blend in both the filling and the biscuit topping. I’ve tested this with Bob’s Red Mill, and it works surprisingly well. Just note that the biscuits will be a little more tender and less flaky, but still delicious.
Herb Swap: Not a fan of sage? Use rosemary or tarragon instead. I once made this with fresh dill because that’s what I had, and it was unexpectedly amazing. Don’t be afraid to use what’s in your garden or fridge.
Cheesy Twist: Stir in 1/2 cup of shredded cheddar cheese into the filling just before adding the biscuit topping. It adds a whole new layer of richness. I did this on a whim one night, and my husband asked me to write down the recipe so I wouldn’t forget.
Serving & Storage Suggestions
This pot pie is best served warm, straight from the skillet. I like to scoop it into shallow bowls so the filling pools around the biscuits. A sprinkle of fresh parsley on top adds a nice pop of color, but it’s totally optional.
What to serve with it: A simple green salad with a lemon vinaigrette cuts through the richness beautifully. Or go full comfort mode and serve it with roasted green beans or steamed broccoli. If you’re feeding a crowd, a side of crusty bread is never a bad idea – you’ll want something to soak up every last bit of that creamy filling.
Storage: Leftovers keep in the refrigerator for up to 4 days in an airtight container. The biscuits will soften a bit, but the flavor actually gets better as it sits. To reheat, pop individual portions in the microwave for 2-3 minutes, or reheat the whole thing in a 350°F oven for 15-20 minutes until warmed through.
Freezing: You can freeze the assembled but unbaked pot pie. Just prepare everything up to step 7, cover the skillet tightly with foil, and freeze for up to 3 months. To bake, add about 15 minutes to the cooking time – bake covered for the first 20 minutes, then uncover and bake until golden. I’ve done this for meal prep, and it’s a lifesaver on busy weeks.
Nutritional Information & Benefits
Here’s the approximate nutritional breakdown per serving (based on 6 servings):
| Nutrient | Amount |
|---|---|
| Calories | 485 |
| Protein | 32g |
| Fat | 22g |
| Carbohydrates | 38g |
| Fiber | 4g |
| Sodium | 720mg |
This recipe is a great source of lean protein from the turkey, which helps keep you full and satisfied. The carrots and peas add fiber and vitamins A and C. If you’re watching your sodium, use low-sodium broth and skip the added salt until the end – that way you can control exactly how much goes in. For a lighter version, swap the whole milk for unsweetened almond milk and use half the butter in the biscuit topping. It won’t be quite as rich, but it’ll still hit that comfort food spot.
Conclusion
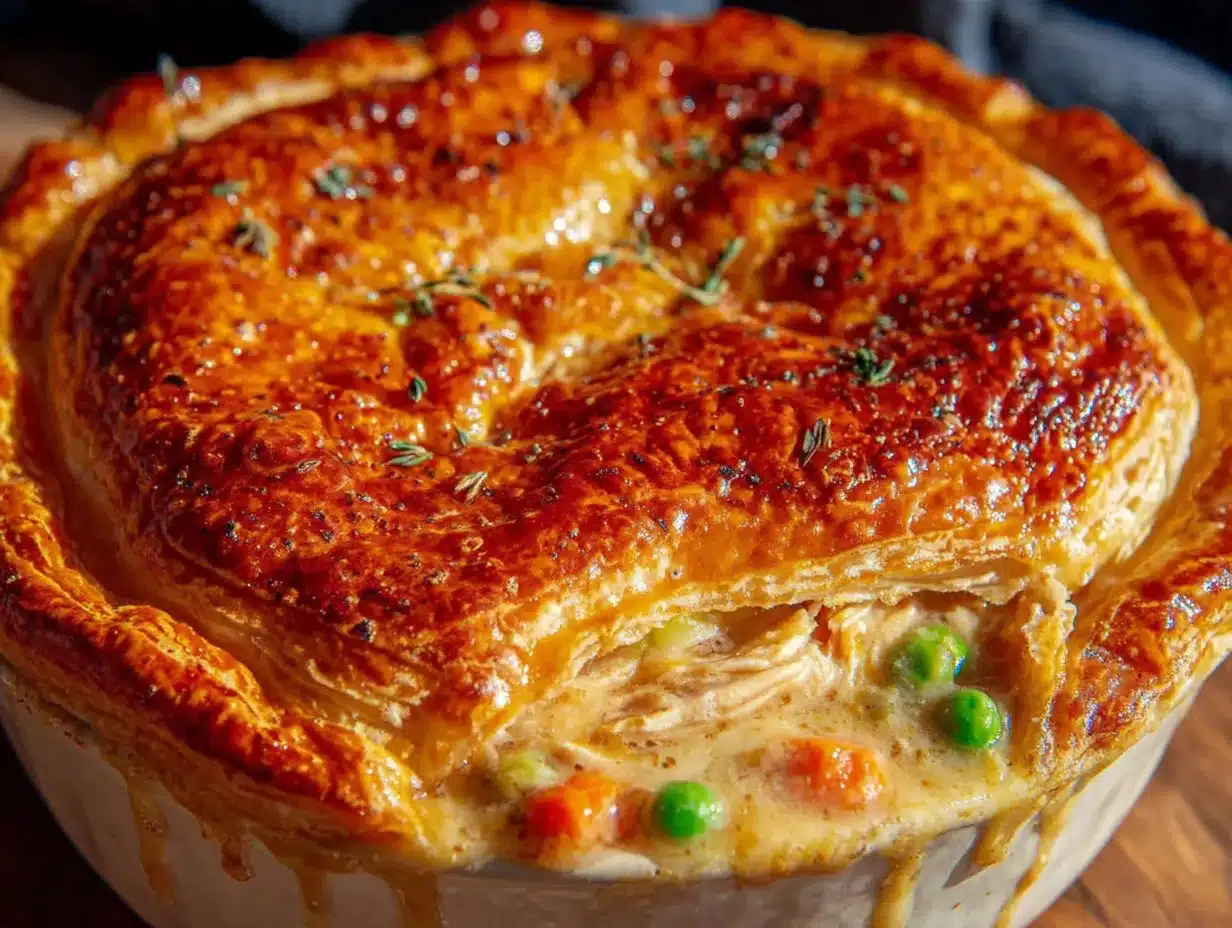
This leftover turkey pot pie has become my go-to for those nights when I need something warm, comforting, and completely unpretentious. It’s not fancy, it’s not complicated, and it doesn’t pretend to be anything other than what it is – a big, cozy hug in a skillet. The best recipes are often the ones born from necessity, made with whatever’s in the fridge and a little bit of late-night creativity.
I hope you give this one a try. Make it your own – add extra vegetables, swap in different herbs, or double the biscuit topping if you’re a crust lover like me. There are no rules here, just good food. And if you make it, I’d love to hear how it turned out. Drop a comment below, tag me in your photos, or tell me what twist you added. That’s the beauty of cooking – every pot pie tells a different story.
Now go heat up that oven. Your cozy dinner is waiting.
Frequently Asked Questions
Can I use a store-bought pie crust instead of the drop biscuits?
Absolutely. If you’re short on time or just prefer a traditional crust, use a refrigerated pie crust or a sheet of puff pastry. Just roll it out, place it over the filling, cut a few slits for steam to escape, and bake as directed. The cooking time might be slightly shorter, so keep an eye on it.
Can I make this in a regular baking dish instead of a skillet?
Yes. If you don’t have an oven-safe skillet, cook the filling in a regular pan, then transfer it to a 9×13-inch baking dish before adding the biscuit topping. Just make sure to grease the dish first. The baking time should be about the same.
How do I prevent the biscuit topping from getting soggy?
Make sure your filling is thick enough before adding the biscuits. If it’s too thin, the biscuits will absorb the liquid and turn mushy. Also, don’t overcrowd the biscuits – leave a little space between them so they can crisp up. And whatever you do, don’t stir the biscuits into the filling. Drop them on top and leave them there.
Can I use leftover dark meat turkey?
Dark meat is actually my preference for this recipe. It’s more flavorful and stays moist during cooking. White meat works too, but it can dry out if you’re not careful. If using white meat, add it later in the process – just warm it through without overcooking.
How can I thicken the filling if it’s too thin?
If your filling looks runny after simmering, mix 1 tablespoon of cornstarch with 2 tablespoons of cold water to make a slurry. Stir it into the filling and let it simmer for another 2-3 minutes. It should thicken up nicely. Alternatively, you can let it cook a few minutes longer to reduce the liquid.
Pin This Recipe!

Cozy Leftover Turkey Pot Pie: Easy One-Pot Dinner

A quick and easy one-pot turkey pot pie with a drop biscuit topping, perfect for using up leftover turkey. Creamy, comforting, and ready in under 45 minutes.
- Prep Time: 15 minutes
- Cook Time: 30 minutes
- Total Time: 45 minutes
- Yield: 6 servings 1x
- Category: Main Course
- Cuisine: American
Ingredients
- 3 tablespoons unsalted butter
- 1 medium yellow onion, diced (about 1 cup)
- 2 medium carrots, peeled and diced (about 1 cup)
- 2 celery stalks, diced (about 1/2 cup)
- 3 cloves garlic, minced
- 1/3 cup all-purpose flour
- 2 cups low-sodium chicken or turkey broth
- 1 cup whole milk
- 3 cups cooked turkey, shredded or cubed
- 1 cup frozen peas
- 1 teaspoon dried thyme
- 1/2 teaspoon dried sage
- Salt and black pepper to taste
- Optional: 1/4 cup dry white wine
- 1 1/2 cups all-purpose flour
- 1 1/2 teaspoons baking powder
- 1/2 teaspoon baking soda
- 1/2 teaspoon salt
- 1/4 teaspoon garlic powder
- 1/2 cup cold unsalted butter, cut into small cubes
- 2/3 cup buttermilk
- 1 tablespoon fresh parsley, chopped (optional)
Instructions
- Preheat oven to 400°F (200°C).
- Start the filling base: Place an oven-safe skillet over medium heat and add the butter. Let it melt and get foamy, about 2 minutes. Add diced onion, carrots, and celery. Cook for 5-7 minutes, stirring occasionally, until vegetables soften and onions are translucent.
- Add the garlic and flour: Toss in minced garlic and cook for 30 seconds until fragrant. Sprinkle flour over vegetables and stir constantly for 1-2 minutes to create a roux.
- Pour in the liquids: Slowly pour in broth while stirring continuously. Add milk (or half-and-half) and keep stirring. If using wine, add it before the broth and let it cook down for a minute. Bring to a gentle simmer and cook for 3-4 minutes, stirring often, until thickened.
- Add the turkey and seasonings: Stir in shredded turkey, frozen peas, thyme, sage, and a generous pinch of salt and pepper. Reduce heat to low and let warm through for 2-3 minutes. Taste and adjust seasoning. Remove from heat.
- Make the drop biscuit topping: In a medium bowl, whisk together flour, baking powder, baking soda, salt, and garlic powder. Add cold butter cubes and cut into flour until mixture resembles coarse meal with pea-sized butter pieces.
- Add the buttermilk: Pour buttermilk into flour mixture and stir with a fork until just combined. Dough will be shaggy and sticky; do not overmix.
- Assemble and bake: Drop spoonfuls of biscuit dough over the turkey filling, spacing about an inch apart. Bake for 20-25 minutes, until biscuits are golden brown and filling is bubbling. Let cool for 5 minutes before serving.
Notes
Don’t skip the roux step; cook flour with butter for full 2 minutes. Keep butter cold for flaky biscuits. Let pot pie rest 5 minutes before serving. For gluten-free, use 1:1 gluten-free flour blend. For vegetarian, replace turkey with chickpeas and use vegetable broth.
Nutrition
- Serving Size: 1 serving (1/6 of re
- Calories: 485
- Sugar: 6
- Sodium: 720
- Fat: 22
- Saturated Fat: 12
- Carbohydrates: 38
- Fiber: 4
- Protein: 32
Keywords: leftover turkey, pot pie, one-pot dinner, comfort food, easy dinner, turkey recipe, drop biscuit