Love this? Save it for later!
Share the inspiration with your friends
This was supposed to be a pumpkin pie. A classic, traditional, no-fuss pumpkin pie for a Friendsgiving gathering I was oddly nervous about. I had the crust recipe memorized, the filling ratios double-checked, and a brand-new pie dish I’d been saving for a special occasion. But somewhere between toasting the spices and realizing I was out of granulated sugar, the plan fell apart. I grabbed a box of brown sugar instead, and in a moment of pure distraction, I melted the butter a little too long on the stove. It turned nutty and amber, filling my tiny kitchen with a smell I didn’t immediately recognize. I was already running late, the pie dish was still in the sink, and I had a sinking feeling this was going to be a complete disaster.
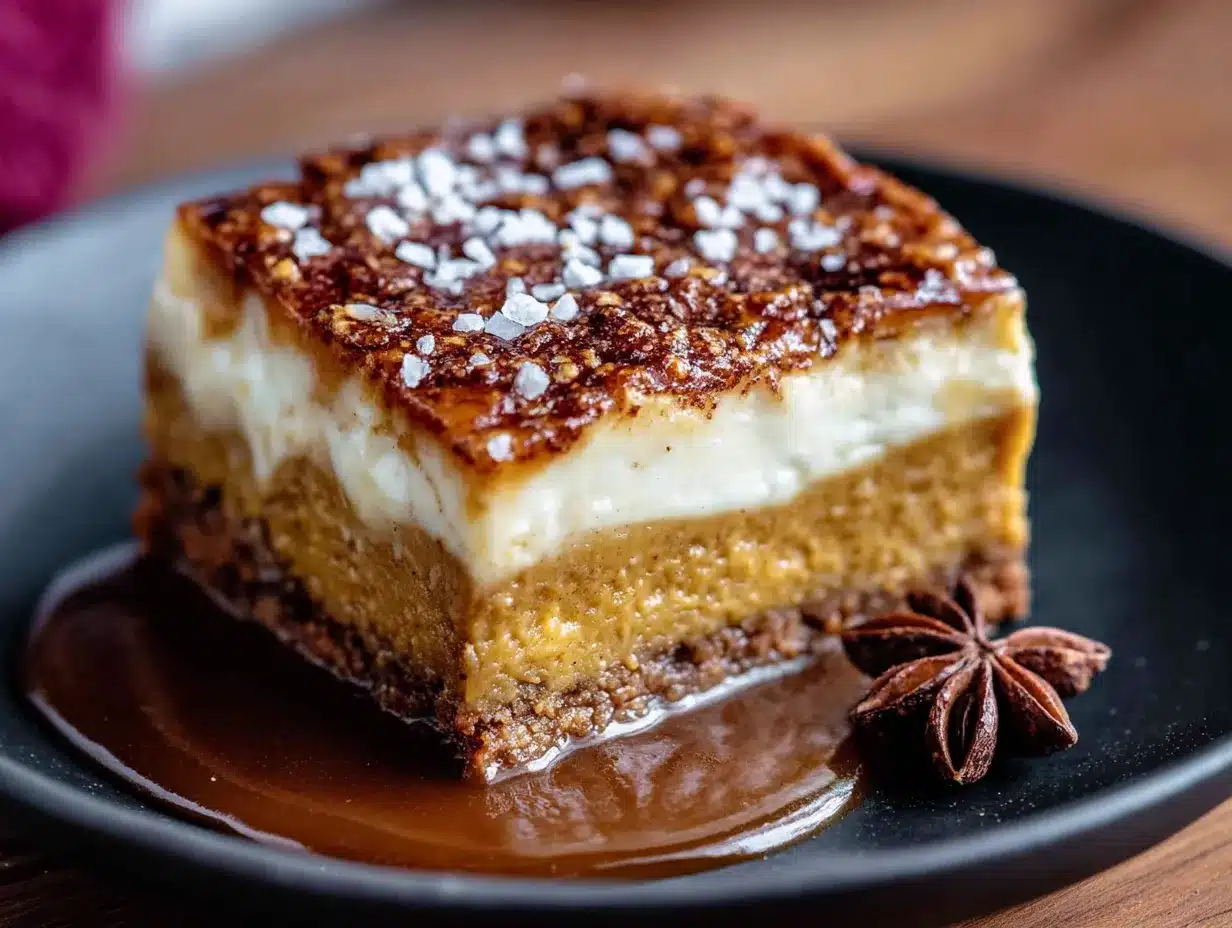
Honestly, I almost scrapped the whole thing. But I had guests coming, so I pivoted. I crushed up a bag of gingersnaps I’d bought for snacking, mixed them with that gloriously browned butter, and pressed the crumbs into a square pan instead of a pie plate. I poured the slightly darker, richer pumpkin filling on top and baked it, fully expecting a mediocre bar that would be politely nibbled. What came out was nothing like the plan—and better. The crust had a deep, spicy crunch, and the filling had a caramelized, almost buttery depth that a standard pie has never achieved. I mean, I stood there in the kitchen, eating a corner piece straight from the pan, completely baffled by my own luck. Maybe you’ve been there—when a mistake turns out to be the best thing you’ve made all year. These brown butter pumpkin pie bars with gingersnap crust are that happy accident I keep coming back to, and honestly, I’m not sure I’ll ever make a regular pie again.
Why You’ll Love This Recipe
Let’s face it, pumpkin desserts can sometimes be a little one-note. But these bars? They’re a whole different story. The combination of nutty brown butter and spicy gingersnaps creates a flavor profile that feels both cozy and sophisticated. I’ve tested this recipe four times to get the texture just right—firm enough to slice cleanly, but creamy enough to melt in your mouth.
- Quick & Easy: While the flavors taste complex, the process is surprisingly simple. The bars come together in about 45 minutes of active time, and the oven does the rest. Perfect for a busy week when you need a showstopper for a fall gathering.
- Simple Ingredients: No fancy extracts or hard-to-find spices here. You likely have everything in your pantry right now, minus maybe the fresh pumpkin puree.
- Perfect for Fall Gatherings: Whether it’s a Friendsgiving, a Halloween party, or a cozy Sunday dessert, these bars are portable, easy to serve, and always the first thing to disappear from the dessert table.
- Crowd-Pleaser: I’ve served these to kids, grandparents, and self-proclaimed pumpkin haters. They all went back for seconds. The texture is that good.
- Unbelievably Delicious: That first bite is a moment. The crust shatters slightly, the filling is silky, and the brown butter flavor lingers in the best way possible. It’s next-level comfort food.
What makes these bars different from the endless pumpkin recipes out there is the technique. Browning the butter isn’t just a fancy step—it fundamentally changes the flavor of the filling, adding a toasty, caramelized note that pairs perfectly with the warm spices. And the gingersnap crust? It’s not just a crust; it’s a flavor anchor that keeps every bite interesting. This isn’t just another version of pumpkin bars—it’s my best version, born from a mistake and perfected through testing.
What Ingredients You Will Need
This recipe relies on a handful of simple, wholesome ingredients to build layers of flavor. Most of these are pantry staples, which makes these bars an easy last-minute dessert option.
For the Gingersnap Crust
- Gingersnap cookies: 2 cups (about 200g) finely crushed. I prefer Nabisco brand for their consistent spice level. You can use a food processor or a zip-top bag and a rolling pin.
- Unsalted butter: 6 tablespoons (85g), browned and still warm. This is the star of the crust, adding that nutty depth.
- Light brown sugar: 2 tablespoons (25g), packed. It helps bind the crust and adds a touch of molasses sweetness.
- Pinch of salt: Just a tiny one, to balance the sweetness.
For the Brown Butter Pumpkin Filling
- Unsalted butter: 4 tablespoons (57g), for browning.
- Pumpkin puree: 1 can (15 ounces or 425g). Make sure you get pure pumpkin puree, not pumpkin pie filling. I’ve used both Libby’s and store brands with good results.
- Large eggs: 2, at room temperature. They help the filling set properly.
- Granulated sugar: ½ cup (100g).
- Light brown sugar: ¼ cup (50g), packed. This adds moisture and a deeper flavor.
- Heavy cream: ½ cup (120ml). You can substitute half-and-half for a slightly less rich filling.
- Vanilla extract: 1 teaspoon (5ml). Pure vanilla is best here.
- Pumpkin pie spice: 1 ½ teaspoons. If you don’t have a blend, use ½ teaspoon cinnamon, ¼ teaspoon ginger, ¼ teaspoon nutmeg, and a pinch of cloves.
- Salt: ¼ teaspoon, to brighten the flavors.
Equipment Needed
You don’t need a professional kitchen to make these bars, but a few key tools make the process smoother. I’ve learned the hard way that using the wrong pan can ruin the texture.
- 8×8-inch square baking pan: This is the perfect size for getting thick, satisfying bars. A 9×9 pan will work, but your bars will be thinner and may bake faster.
- Parchment paper: Non-negotiable for easy removal. Leave an overhang on two sides to create “handles.”
- Light-colored saucepan: A stainless steel or light-colored pan is crucial for browning butter. Dark pans make it hard to see the milk solids turning amber, which means you’re more likely to burn it.
- Food processor or zip-top bag: For crushing the gingersnaps. A food processor gives you a more even crumb, but a bag and a rolling pin work in a pinch.
- Mixing bowls: One large, one medium.
- Whisk: For combining the filling smoothly.
- Spatula: For spreading the crust evenly.
If you don’t have a food processor, don’t worry. Place the cookies in a sturdy zip-top bag, seal it, and go to town with a rolling pin. It’s a great way to release some frustration, honestly.
Preparation Method
Follow these steps carefully, and you’ll have perfect bars every time. I’ve included the little visual cues I’ve learned to watch for.
- Preheat and Prep: Preheat your oven to 350°F (175°C). Line your 8×8 baking pan with parchment paper, leaving a 2-inch overhang on two opposite sides. This will be your lifeline for lifting the bars out later.
- Brown the Butter for the Crust: Place 6 tablespoons of unsalted butter in your light-colored saucepan over medium heat. Stir it constantly with a spatula or wooden spoon. The butter will melt, then foam, then start to crackle. After about 4-5 minutes, the foam will subside, and you’ll see tiny golden specks forming at the bottom of the pan. The butter will smell nutty and amazing. As soon as it turns a light amber color, remove it from the heat immediately and pour it into a heat-safe bowl to stop the cooking. Do not walk away during this step—burnt butter is a tragedy.
- Make the Crust: In a medium bowl, combine the crushed gingersnap cookies, 2 tablespoons of packed brown sugar, and a pinch of salt. Pour the still-warm browned butter over the mixture and stir until every crumb is coated. The mixture should look like wet sand and clump together when pressed.
- Press the Crust: Transfer the crust mixture to your prepared pan. Use the bottom of a measuring cup or a flat glass to press it down firmly and evenly. This is important—a loose crust will fall apart when you cut the bars. Bake the crust for 10 minutes, then set it aside to cool slightly while you make the filling.
- Brown the Butter for the Filling: In the same saucepan (wiped clean), add 4 tablespoons of unsalted butter. Repeat the browning process from step 2. This time, you’re looking for that same amber color and nutty aroma. Pour it into a large mixing bowl and let it cool for 2 minutes.
- Mix the Wet Ingredients: To the bowl with the browned butter, add the granulated sugar and brown sugar. Whisk vigorously for about 30 seconds—this helps dissolve the sugar slightly. Add the 2 eggs, one at a time, whisking well after each addition. The mixture should look smooth and glossy.
- Add the Pumpkin and Cream: Whisk in the pumpkin puree, heavy cream, and vanilla extract until everything is fully combined. The mixture will be a beautiful, deep orange color.
- Add the Dry Spices: Sprinkle the pumpkin pie spice and salt over the wet mixture. Whisk gently until no streaks remain. Be careful not to over-whisk, as you don’t want to incorporate too much air into the filling.
- Pour and Bake: Pour the filling over the pre-baked crust. Gently tilt the pan to spread it evenly. Bake at 350°F for 35-40 minutes. The edges should be set, but the center will still have a slight jiggle when you gently shake the pan. That’s okay—it will set as it cools. The top might develop a few small cracks, which is perfectly normal.
- Cool Completely: This is the hardest part. Place the pan on a wire rack and let it cool to room temperature. Then, transfer it to the refrigerator and chill for at least 4 hours, or overnight. Chilling is essential for clean slices. Do not rush this step.
- Slice and Serve: Once fully chilled, use the parchment overhang to lift the entire block of bars out of the pan. Place it on a cutting board and use a sharp knife to slice into 16 squares. Wipe the knife clean between cuts for the neatest edges.
Cooking Tips & Techniques
I’ve made these bars enough times to have a few mishaps, and I’m happy to share what I’ve learned so you can avoid them.
- The Butter is the Boss: Browning butter is a game-changer, but it’s easy to mess up. Use a light-colored pan so you can actually see the color change. The second you see amber specks, pull it off the heat. I once got distracted by a phone call, and the butter went from nutty to black in about 15 seconds. The whole batch had to be tossed.
- Don’t Skip the Chill: I know you want to eat these immediately. I’ve been there. But if you try to cut them while they’re still warm, you’ll get a gooey, messy situation. The filling needs time to fully set. Four hours in the fridge is the minimum. Overnight is better.
- Crush Evenly: For the crust, you want a consistent crumb. If you have large chunks of cookie, the crust won’t hold together. Pulse the cookies in a food processor until they look like coarse sand. If you’re using a bag, make sure to really crush the stubborn pieces.
- Room Temperature Eggs: Cold eggs can seize the browned butter, creating a lumpy filling. Let your eggs sit on the counter for 30 minutes before you start, or place them in a bowl of warm water for 5 minutes.
- Watch the Jiggle: Ovens vary wildly. Start checking your bars at the 30-minute mark. The center should jiggle like Jell-O, not like a liquid. If it’s still sloshing, give it 5 more minutes. Over-baking will make the filling dry and crack significantly.
Variations & Adaptations
One of the best things about this recipe is how flexible it is. I’ve played around with it quite a bit, and these variations have all been winners.
- Gluten-Free Version: Swap the gingersnap cookies for a gluten-free brand. Most major grocery stores carry them now. The rest of the ingredients are naturally gluten-free, so you’re good to go. Just make sure your pumpkin pie spice is certified gluten-free if you’re sensitive.
- Dairy-Free Adaptation: Use a high-quality vegan butter for browning (I like Miyoko’s or Earth Balance). Replace the heavy cream with full-fat canned coconut milk. The texture will be slightly less creamy, but the flavor is still fantastic.
- Spice It Up: For a chai-inspired version, add ½ teaspoon of cardamom and ¼ teaspoon of black pepper to the filling. It gives the bars a warm, almost exotic kick that pairs beautifully with the brown butter.
- Nutty Crunch: Add ½ cup of toasted pecans or walnuts to the crust mixture. Chop them finely so they don’t disrupt the texture. I tried this for a Thanksgiving potluck, and it added a lovely crunch.
- Pumpkin Cheesecake Swirl: Before baking, drop 4 ounces of softened cream cheese mixed with 2 tablespoons of sugar by the spoonful onto the filling. Use a knife to swirl it gently. It creates a marbled effect that’s absolutely stunning.
Serving & Storage Suggestions
These bars are fantastic on their own, but a little extra effort takes them from great to unforgettable.
Serving: Serve the bars chilled or at room temperature. I prefer them straight from the fridge because the texture is firmer. A dollop of lightly sweetened whipped cream is the classic pairing, but a scoop of vanilla bean ice cream works beautifully too. For a more decadent touch, drizzle a little salted caramel sauce over the top right before serving.
Storage: Place leftover bars in an airtight container, separating layers with parchment paper. They will keep in the refrigerator for up to 5 days. The flavor actually deepens after a day or two—the spices meld together even more.
Freezing: These bars freeze like a dream. Once they are fully chilled and sliced, place the individual bars on a baking sheet and freeze for 1 hour. Then transfer them to a freezer-safe bag or container. They will keep for up to 3 months. To serve, thaw them in the refrigerator overnight. Do not microwave them to thaw—it ruins the texture of the crust.
Reheating: If you prefer a warm bar, place it on a microwave-safe plate and heat for 10-15 seconds. The crust will soften slightly, and the filling will become a bit more luscious. For a larger batch, reheat in a 300°F oven for 5-7 minutes.
Nutritional Information & Benefits
While these bars are definitely a treat, they do offer a few nutritional bright spots thanks to the pumpkin.
Estimated Nutritional Values (per bar, based on 16 servings):
- Calories: 245
- Fat: 14g
- Carbohydrates: 28g
- Fiber: 2g
- Sugar: 18g
- Protein: 3g
Health Highlights: Pumpkin is packed with vitamin A, which is great for your eyes and immune system. It’s also a good source of fiber, which helps keep you full. The gingersnaps provide a small amount of ginger, which has anti-inflammatory properties. I’m not saying these are health food, but they’re not empty calories either. It’s a dessert that feels a little bit virtuous, you know?
Dietary Considerations: This recipe contains dairy, eggs, and gluten. For a dairy-free option, see the variations section. For a gluten-free option, use certified gluten-free gingersnaps.
Frequently Asked Questions
Can I use homemade pumpkin puree instead of canned?
Yes, you can, but it will change the texture slightly. Homemade puree tends to be more watery than canned. To compensate, you’ll need to strain it through cheesecloth or a clean kitchen towel for at least an hour to remove excess moisture. Otherwise, your filling might be too soft.
Why did my crust fall apart when I cut the bars?
This usually happens if the crust wasn’t pressed firmly enough into the pan, or if it wasn’t baked long enough. Make sure you’re using a flat-bottomed glass to really compact the crumbs. Also, letting the bars chill completely is crucial—the cold helps the butter in the crust solidify and hold everything together.
Can I use a different type of cookie for the crust?
Absolutely. While gingersnaps are my favorite for their spice, you can use graham crackers, shortbread cookies, or even vanilla wafers. Just keep in mind that the flavor profile will change. If you use a less-spicy cookie, you might want to add ½ teaspoon of cinnamon and ginger to the crust mixture.
How do I know when the bars are done baking?
The edges should be set and slightly puffed, but the center should still have a gentle jiggle when you shake the pan. A toothpick inserted near the center should come out with a few moist crumbs, not wet batter. If the toothpick comes out clean, you’ve over-baked them.
Can I make these bars ahead of time for a party?
Yes, and I actually recommend it! These bars taste better after a day or two in the fridge. You can make them up to 2 days in advance. Keep them covered in the refrigerator, and add any whipped cream or caramel sauce just before serving.
Conclusion
These brown butter pumpkin pie bars with gingersnap crust are proof that the best recipes often come from happy accidents. They have the familiar, comforting flavors of fall, but with a depth and richness that will surprise anyone who takes a bite. The nutty brown butter, the spicy, crunchy crust, and the silky pumpkin filling come together in a way that feels both nostalgic and new. I love that they’re forgiving enough for a beginner baker but impressive enough to serve at a holiday table. I hope you give them a try and make them your own—maybe add a pinch of extra nutmeg or swap in a different cookie. Let me know how they turn out in the comments below. And if you make a mistake along the way, don’t panic. It might just be your new favorite recipe.
Pin This Recipe!
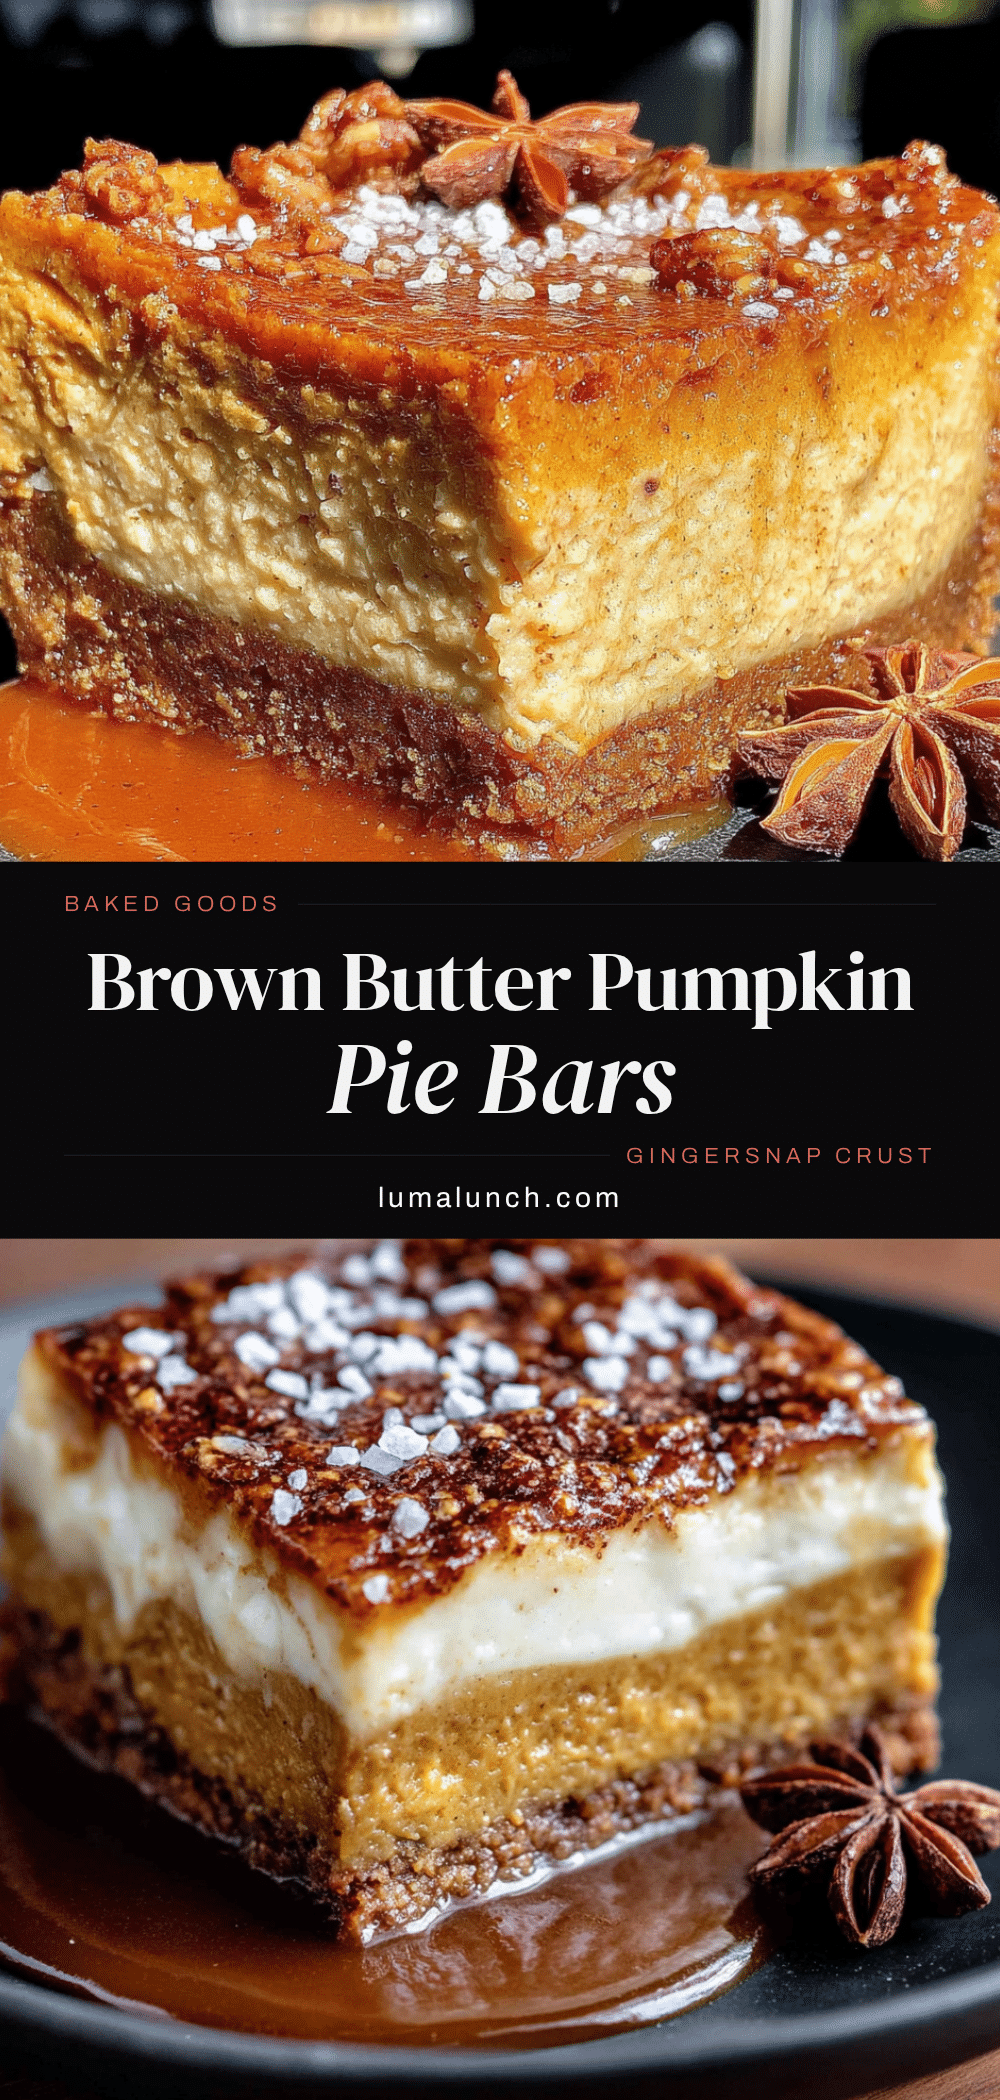
Brown Butter Pumpkin Pie Bars Recipe with Gingersnap Crust
These brown butter pumpkin pie bars feature a nutty, spicy gingersnap crust and a silky, caramelized pumpkin filling. Born from a happy accident, they’re a crowd-pleasing fall dessert that’s easier than a traditional pie.
- Prep Time: 45 minutes
- Cook Time: 40 minutes
- Total Time: 5 hours 25 minutes (includes chilling)
- Yield: 16 bars 1x
- Category: Dessert
- Cuisine: American
Ingredients
- 2 cups (about 200g) finely crushed gingersnap cookies (preferably Nabisco)
- 6 tablespoons (85g) unsalted butter, browned and still warm (for crust)
- 2 tablespoons (25g) packed light brown sugar (for crust)
- Pinch of salt (for crust)
- 4 tablespoons (57g) unsalted butter (for filling, browned)
- 1 can (15 ounces or 425g) pure pumpkin puree (not pumpkin pie filling)
- 2 large eggs, at room temperature
- ½ cup (100g) granulated sugar
- ¼ cup (50g) packed light brown sugar
- ½ cup (120ml) heavy cream
- 1 teaspoon (5ml) vanilla extract
- 1½ teaspoons pumpkin pie spice (or ½ tsp cinnamon, ¼ tsp ginger, ¼ tsp nutmeg, pinch cloves)
- ¼ teaspoon salt
Instructions
- Preheat oven to 350°F (175°C). Line an 8×8-inch baking pan with parchment paper, leaving a 2-inch overhang on two opposite sides.
- Brown the butter for the crust: In a light-colored saucepan over medium heat, melt 6 tablespoons unsalted butter, stirring constantly. After 4-5 minutes, when the butter turns light amber and smells nutty, remove from heat and pour into a heat-safe bowl.
- Make the crust: In a medium bowl, combine crushed gingersnaps, 2 tablespoons packed brown sugar, and a pinch of salt. Pour in the warm browned butter and stir until every crumb is coated (mixture should look like wet sand).
- Press the crust into the prepared pan firmly and evenly using the bottom of a measuring cup. Bake for 10 minutes, then set aside to cool slightly.
- Brown the butter for the filling: In the same saucepan (wiped clean), melt 4 tablespoons unsalted butter over medium heat until amber and nutty. Pour into a large mixing bowl and let cool for 2 minutes.
- To the bowl with browned butter, add granulated sugar and brown sugar. Whisk vigorously for 30 seconds. Add eggs one at a time, whisking well after each addition until smooth and glossy.
- Whisk in pumpkin puree, heavy cream, and vanilla extract until fully combined.
- Sprinkle pumpkin pie spice and salt over the mixture and whisk gently until no streaks remain.
- Pour the filling over the pre-baked crust. Gently tilt the pan to spread evenly.
- Bake at 350°F for 35-40 minutes, until edges are set but center still jiggles slightly. Cool on a wire rack to room temperature, then refrigerate for at least 4 hours or overnight.
- Once fully chilled, use parchment overhang to lift the bars out of the pan. Slice into 16 squares with a sharp knife, wiping the blade clean between cuts.
Notes
Browning butter is key—use a light-colored pan to monitor color change. Do not skip the chilling step; it ensures clean slices. For best results, chill overnight. Bars can be made up to 2 days ahead and stored in the refrigerator.
Nutrition
- Serving Size: 1 bar
- Calories: 245
- Sugar: 18
- Sodium: 180
- Fat: 14
- Saturated Fat: 8
- Carbohydrates: 28
- Fiber: 2
- Protein: 3
Keywords: pumpkin pie bars, brown butter, gingersnap crust, fall dessert, Thanksgiving, pumpkin bars, easy pumpkin dessert


