Love this? Save it for later!
Share the inspiration with your friends
I swore I hated pumpkin desserts. For years. A solid decade of avoiding them at every bake sale and potluck, claiming they tasted like sweetened potting soil. Then last October, I made this easy small-batch pumpkin snickerdoodle cookies recipe just for myself—a little experiment while the kids were napping. I found my husband standing at the kitchen counter, halfway through a cookie, with this look of pure betrayal on his face. Caught red-handed, and honestly, I couldn’t blame him.
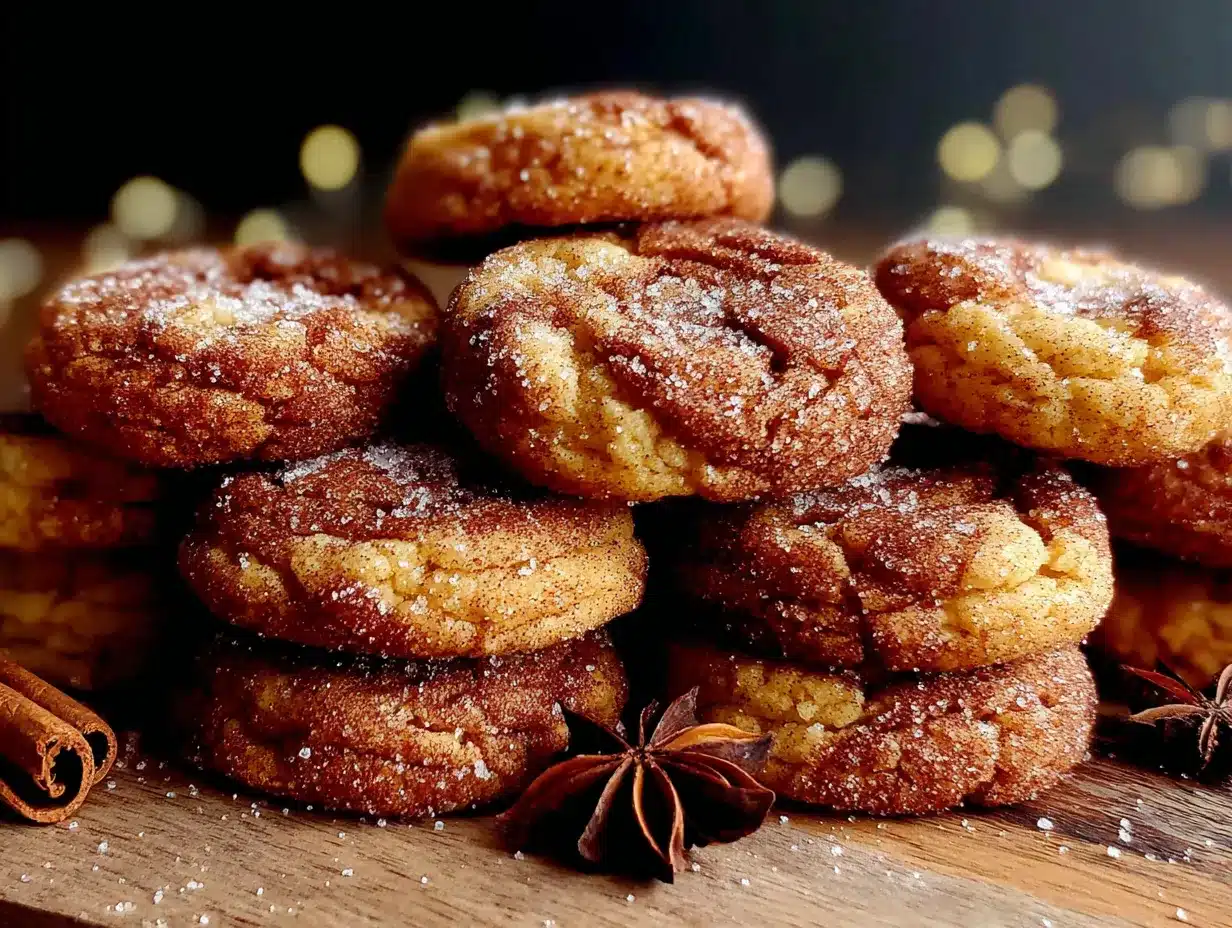
The thing is, most pumpkin cookies are a letdown. They’re either cakey and dry or so wet they fall apart before you can get them to a plate. But these? They’ve got that perfect snickerdoodle chew with just enough pumpkin to make them soft without turning into a mess. The cinnamon-sugar coating gives them that classic crackled top, and the pumpkin flavor is there—warm and subtle—but it doesn’t scream at you. I mean, maybe you’ve been there, watching a batch of cookies disappear before they’ve even cooled completely.
I’ll be honest—I wasn’t trying to convert anyone that day. But something about that first batch clicked. The texture was right, the spice level was balanced, and the kids actually asked for more. Not the polite “these are good, Mom” kind of ask, but the “can I have another one before dinner” kind. That’s when I knew this recipe had staying power. Now it’s the one I make every fall when the craving hits but I don’t want a mountain of cookies sitting around. Because let’s face it—sometimes you just want a small batch of something perfect without the commitment of a full recipe.
Why You’ll Love This Recipe
This isn’t just another pumpkin cookie recipe—it’s the one that actually works for real families on real budgets. I’ve tested this more times than I care to admit, and here’s what makes it stand out:
- Small Batch, No Waste: Makes exactly 12 cookies—perfect for a Tuesday night treat without leftovers that go stale.
- Budget-Friendly Ingredients: Uses pantry staples you probably already have. No fancy extracts or specialty flours required.
- Kid-Approved Texture: Soft in the middle with that signature snickerdoodle chew around the edges. Picky eaters actually eat these.
- Quick to Make: From mixing bowl to cooling rack in under 30 minutes. Seriously—that’s faster than a trip to the store.
- Freezes Beautifully: The dough freezes flat, so you can bake off just a few at a time whenever the mood strikes.
What makes this recipe different from the dozens of pumpkin cookie recipes out there? It’s the technique. Instead of dumping in a whole can of pumpkin and ending up with gummy, underbaked cookies, I use just enough to get that fall flavor without wrecking the texture. The cream of tartar gives them that classic snickerdoodle tang, and the pumpkin spice blend is balanced so nothing overpowers anything else.
This is the kind of cookie that makes you close your eyes after the first bite—not because it’s fancy, but because it’s exactly right. It’s comfort food that doesn’t cost a fortune or take all afternoon. Perfect for those evenings when you want to make something special without making a big production out of it.
What Ingredients You Will Need
This recipe uses simple, honest ingredients to deliver that perfect pumpkin snickerdoodle experience. Nothing weird, nothing expensive—just good baking basics that work together beautifully.
- All-purpose flour, 1 ½ cups (180g)—standard white flour works best here. I’ve tried whole wheat pastry flour in a pinch, and it works, but the texture is slightly denser.
- Unsalted butter, ½ cup (113g), softened to room temperature—don’t microwave it. Trust me on this. Let it sit out for about 30 minutes.
- Granulated sugar, ½ cup (100g)—regular white sugar. No need for anything fancy.
- Pumpkin puree, ¼ cup (60g)—not pumpkin pie filling. Just plain pumpkin. I usually open a small 15-ounce can and use what I need, then freeze the rest in tablespoon portions for later.
- Large egg yolk, 1—save the white for breakfast or freeze it. The yolk adds richness without making the dough too wet.
- Vanilla extract, 1 teaspoon—pure vanilla if you’ve got it, but imitation works fine for this recipe.
- Baking powder, ½ teaspoon—helps them puff up just enough.
- Cream of tartar, ½ teaspoon—this is the secret to that classic snickerdoodle tang. Don’t skip it.
- Baking soda, ¼ teaspoon—works with the cream of tartar for the perfect spread.
- Salt, ¼ teaspoon—balances the sweetness and brings out the pumpkin flavor.
- Pumpkin pie spice, 1 teaspoon—store-bought is fine, or make your own with cinnamon, nutmeg, ginger, and cloves.
- Cinnamon, ½ teaspoon—adds warmth without overpowering.
For the coating:
- Granulated sugar, 3 tablespoons (36g)—for rolling.
- Cinnamon, 1 tablespoon—go generous here. It’s the signature snickerdoodle look.
Ingredient tip: If you’re out of cream of tartar, you can substitute with 1 teaspoon of lemon juice or white vinegar mixed into the wet ingredients. But honestly, cream of tartar is cheap and lasts forever in your pantry—worth having on hand.
Equipment Needed
You don’t need a fancy kitchen to make these cookies. Here’s what you’ll actually use:
- Mixing bowls—one medium, one small. Nothing special needed.
- Electric hand mixer or stand mixer—a hand mixer works perfectly. I’ve made these with a wooden spoon too, and it’s doable, just takes a bit more elbow grease.
- Baking sheet—standard half-sheet pan works great. No need for nonstick, just use parchment paper.
- Parchment paper—highly recommended. Silicone baking mats work too, but parchment gives the crispiest edges.
- Cookie scoop or tablespoon—a 1.5-tablespoon scoop makes uniform cookies. If you don’t have one, just use a regular spoon and eyeball it.
- Cooling rack—helps them set up properly. If you don’t have one, let them cool on the baking sheet for a few extra minutes.
- Small bowl—for the cinnamon-sugar coating.
- Measuring cups and spoons—standard set. I prefer metal measuring cups for dry ingredients.
Budget-friendly tip: I bought my cookie scoop at a dollar store three years ago, and it’s still going strong. You don’t need expensive equipment—just reliable basics.
Preparation Method
Let me walk you through this step by step. I’ve made this recipe at least two dozen times, so I know where things can go wrong and how to fix them.
- Preheat and prep. Set your oven to 350°F (175°C). Line your baking sheet with parchment paper. This isn’t optional—parchment paper prevents sticking and helps the cookies bake evenly.
- Cream the butter and sugar. In your medium mixing bowl, beat the softened butter and ½ cup granulated sugar together until light and fluffy. This takes about 2-3 minutes with a hand mixer. You’re looking for a pale, creamy texture. Don’t rush this step—proper creaming adds air that makes cookies tender.
- Add the wet ingredients. Mix in the pumpkin puree, egg yolk, and vanilla extract. Beat until combined. The mixture might look a little separated at this point—that’s normal. Don’t panic.
- Whisk the dry ingredients. In a separate small bowl, whisk together the flour, baking powder, cream of tartar, baking soda, salt, pumpkin pie spice, and cinnamon. Whisking ensures everything is evenly distributed. I learned this the hard way after biting into a pocket of baking powder once.
- Combine wet and dry. Gradually add the dry ingredients to the wet mixture, mixing on low speed until just combined. Stop when you can’t see any more flour streaks. Overmixing develops gluten and makes cookies tough. A few lumps are fine.
- Make the coating. In your small bowl, mix together the 3 tablespoons of sugar and 1 tablespoon of cinnamon. Set aside.
- Shape the cookies. Using your cookie scoop or a tablespoon, portion out rounded tablespoons of dough. Roll each portion into a smooth ball between your palms. The dough will be slightly sticky—that’s okay. If it’s too sticky to handle, refrigerate it for 10 minutes.
- Coat generously. Roll each dough ball in the cinnamon-sugar mixture until completely covered. Place them on the prepared baking sheet about 2 inches apart. These cookies spread, so give them room.
- Bake. Bake for 10-12 minutes, or until the edges are set and the tops look slightly cracked. The centers will still look soft and puffy—that’s perfect. They’ll continue baking on the hot sheet after you pull them out.
- Cool properly. Let the cookies rest on the baking sheet for 5 minutes. This is crucial—they’re too fragile to move right away. After 5 minutes, transfer them to a cooling rack to finish cooling. Or, you know, eat one warm. I won’t judge.
Visual cue: When they’re done, the edges should be lightly golden and the tops should have that classic snickerdoodle crackle. The centers will look slightly underdone—that’s exactly what you want.
Cooking Tips & Techniques
After a few batches that didn’t turn out quite right, I figured out what makes these cookies work consistently. Here’s what I wish someone had told me:
Don’t overdo the pumpkin. I know it’s tempting to add extra pumpkin because it’s the star ingredient. But more pumpkin means more moisture, and more moisture means flat, gummy cookies. Stick to the ¼ cup—it’s the sweet spot.
Room temperature butter matters. Cold butter won’t cream properly, and melted butter changes the texture completely. Leave your butter on the counter for 30-40 minutes before starting. If you forget, cut it into small cubes and let it sit for 15 minutes—that usually does the trick.
Chill if needed. If your kitchen is warm or the dough feels overly sticky, pop it in the fridge for 10-15 minutes before rolling. Chilled dough holds its shape better and gives you thicker cookies. I do this on humid days without fail.
Watch the bake time. Ovens vary wildly. My old oven took exactly 11 minutes; my new one does it in 10. Start checking at 9 minutes. The cookies should be set around the edges but still soft in the center. They’ll firm up as they cool.
Use a cookie scoop for uniformity. Same-sized cookies bake evenly. If you’re scooping by hand, try to make them all about the same size. I’ve had batches where some were done and others were raw in the middle—not a good look.
Let them rest. That 5-minute rest on the baking sheet isn’t just for convenience. It allows the cookies to finish setting up without overbaking. Moving them too early can cause them to fall apart.
Variations & Adaptations
This recipe is forgiving, and I’ve tried a few twists over the years. Here are some that actually worked:
Gluten-free version: Substitute the all-purpose flour with a 1:1 gluten-free baking flour. I’ve used Bob’s Red Mill and King Arthur brands with good results. The texture is slightly more tender, but the flavor is spot on.
Dairy-free option: Use vegan butter sticks—not margarine, but the stick-style vegan butter. I like Earth Balance or Miyoko’s. The cookies spread a bit more, so chill the dough for 15 minutes before baking.
Extra spice kick: Add ¼ teaspoon of ground ginger and a pinch of cloves to the dough. This gives them a warmer, more complex flavor that’s perfect for holiday baking.
Chocolate drizzle: Melt ¼ cup of dark chocolate chips with a teaspoon of coconut oil and drizzle over cooled cookies. My kids go crazy for this version. It turns a simple cookie into something that looks bakery-bought.
Maple glaze: Whisk together ½ cup powdered sugar, 1 tablespoon maple syrup, and enough milk to make a thin glaze. Drizzle over cooled cookies. The maple-pumpkin combination is honestly incredible.
Pumpkin chocolate chip: Fold in ¼ cup of mini chocolate chips after mixing the dough. The chocolate adds richness without overwhelming the pumpkin flavor. Use mini chips so they distribute evenly.
My personal favorite variation? The maple glaze version. I made it for a fall potluck last year, and three people asked for the recipe before I’d even put the container away.
Serving & Storage Suggestions
These cookies are best served slightly warm or at room temperature. The texture is soft and tender, with just a little chew around the edges. They’re perfect on their own, but here are some ideas:
Serving ideas: Pair them with a cold glass of milk for the classic experience. For a cozy fall treat, serve alongside a mug of hot apple cider or a warm chai latte. They’re also great crumbled over vanilla ice cream for an impromptu dessert.
Room temperature storage: Keep them in an airtight container at room temperature for up to 4 days. Layer them with parchment paper between stacks to prevent sticking. They actually get softer and more flavorful on day two—the pumpkin flavor really develops overnight.
Freezing baked cookies: Freeze cooled cookies in a single layer on a baking sheet, then transfer to a freezer bag. They’ll keep for up to 3 months. Thaw at room temperature for about 20 minutes, or pop them in a 300°F oven for 5 minutes to refresh.
Freezing raw dough: Scoop the dough into balls, roll in cinnamon sugar, and freeze on a baking sheet. Once solid, transfer to a freezer bag. Bake from frozen—just add 2-3 minutes to the baking time. This is my favorite trick for having fresh cookies whenever the craving hits.
Reheating tip: Microwave a single cookie for 10 seconds to get that just-baked warmth. It revives the texture beautifully without making them soggy.
Nutritional Information & Benefits
Here’s the approximate nutritional breakdown per cookie (based on 12 cookies):
| Nutrient | Amount |
|---|---|
| Calories | 165 |
| Total Fat | 8g |
| Saturated Fat | 5g |
| Carbohydrates | 22g |
| Sugar | 12g |
| Protein | 2g |
| Fiber | 1g |
These cookies aren’t health food, but they’re not terrible either. The pumpkin adds a small amount of vitamin A and fiber, and the portion-controlled batch size means you’re not tempted by dozens of leftovers. If you’re watching your sugar intake, you can reduce the sugar in the dough to ⅓ cup—the cookies will still taste sweet, just less so.
For those with dietary concerns: This recipe contains gluten, dairy, and eggs. For gluten-free and dairy-free options, see the variations section above. The cookies are nut-free as written, making them safe for school lunches.
Conclusion
These easy small-batch pumpkin snickerdoodle cookies have become my go-to fall recipe for a reason. They’re simple enough for a random Tuesday night but special enough to share with company. The ingredients are cheap, the process is straightforward, and the results are consistently good. No fuss, no stress—just really good cookies.
I love that this recipe doesn’t pretend to be something it’s not. It’s not a fancy bakery cookie or a complicated project. It’s a humble, honest cookie that tastes like fall without trying too hard. The kind of cookie that makes you remember why baking is supposed to be fun in the first place.
Try them as written, or throw in your own twist—maybe some chopped pecans or a pinch of cardamom. That’s the beauty of a simple recipe. It leaves room for you to make it your own.
I’d love to hear how they turn out for you. Drop a comment below and let me know if your family loved them as much as mine does. Happy baking!
Frequently Asked Questions
Can I use pumpkin pie filling instead of pumpkin puree?
No, don’t do that. Pumpkin pie filling has added sugar and spices that will throw off the recipe completely. Stick with plain pumpkin puree—it’s usually found right next to the pie filling in the baking aisle.
Why did my cookies turn out flat?
Flat cookies usually mean the butter was too soft or the dough wasn’t chilled enough. Make sure your butter is softened but still cool to the touch, and if your kitchen is warm, refrigerate the dough for 15 minutes before baking. Also check that your baking powder and cream of tartar aren’t expired.
Can I double this recipe?
Absolutely. Just double all the ingredients and bake in batches. The bake time stays the same—just make sure your oven isn’t overcrowded. Bake one sheet at a time for the best results.
How do I know when the cookies are done?
Look for set edges and slightly cracked tops. The centers will look soft and puffy—that’s normal. If you insert a toothpick, it should come out with a few moist crumbs, not wet batter. Remember, they continue baking on the hot sheet for 5 minutes after you pull them out.
Can I make these cookies vegan?
I haven’t tested a vegan version yet, but you could try substituting the butter with vegan butter and the egg yolk with a flax egg (1 tablespoon ground flaxseed mixed with 3 tablespoons water, let sit for 5 minutes). The texture might be slightly different, but the flavor should still be good. Let me know if you try it!
Pin This Recipe!
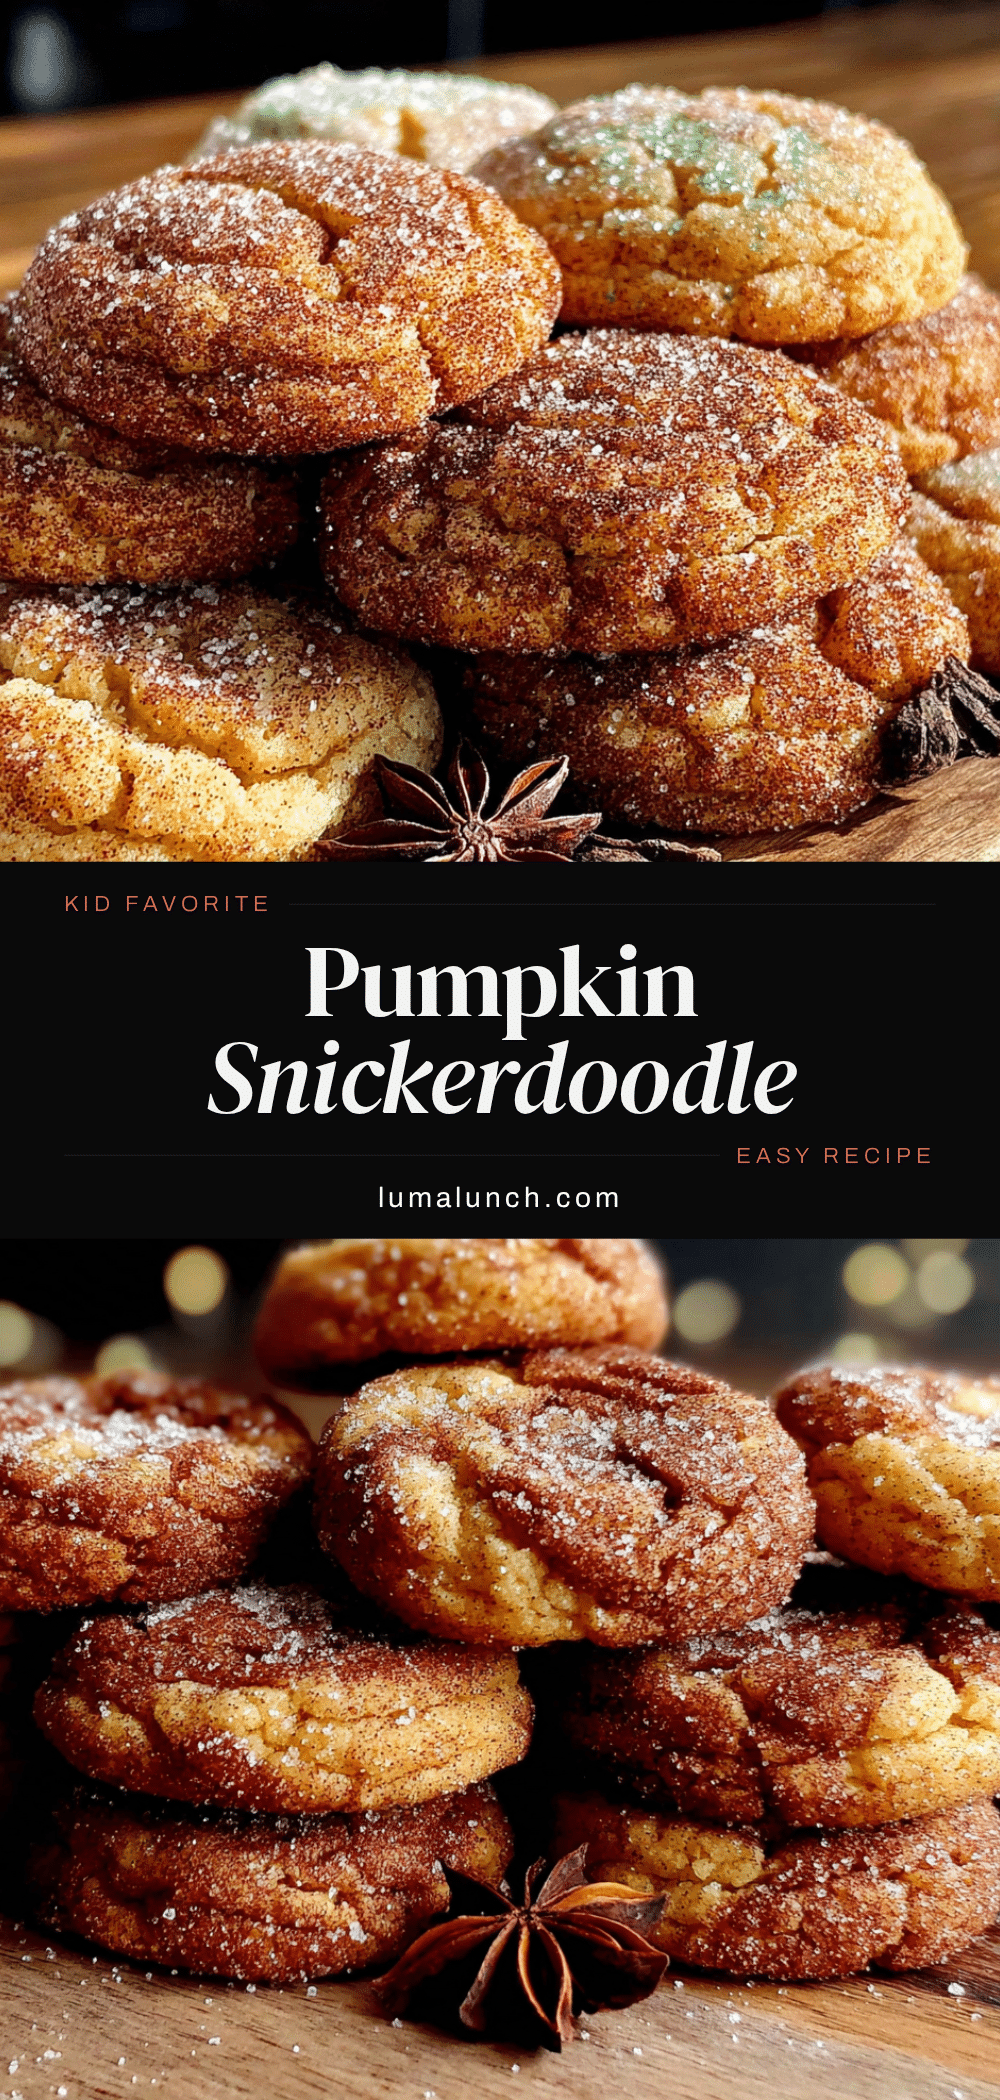
Easy Small-Batch Pumpkin Snickerdoodle Cookies
These easy small-batch pumpkin snickerdoodle cookies have the perfect snickerdoodle chew with just enough pumpkin to make them soft without turning into a mess. The cinnamon-sugar coating gives them that classic crackled top, and the pumpkin flavor is warm and subtle.
- Prep Time: 15 minutes
- Cook Time: 12 minutes
- Total Time: 27 minutes
- Yield: 12 cookies 1x
- Category: Dessert
- Cuisine: American
Ingredients
- 1 ½ cups (180g) all-purpose flour
- ½ cup (113g) unsalted butter, softened to room temperature
- ½ cup (100g) granulated sugar
- ¼ cup (60g) pumpkin puree (not pumpkin pie filling)
- 1 large egg yolk
- 1 teaspoon vanilla extract
- ½ teaspoon baking powder
- ½ teaspoon cream of tartar
- ¼ teaspoon baking soda
- ¼ teaspoon salt
- 1 teaspoon pumpkin pie spice
- ½ teaspoon cinnamon
- For the coating:
- 3 tablespoons (36g) granulated sugar
- 1 tablespoon cinnamon
Instructions
- Preheat oven to 350°F (175°C). Line a baking sheet with parchment paper.
- In a medium mixing bowl, beat the softened butter and ½ cup granulated sugar together until light and fluffy, about 2-3 minutes.
- Mix in the pumpkin puree, egg yolk, and vanilla extract until combined.
- In a separate small bowl, whisk together the flour, baking powder, cream of tartar, baking soda, salt, pumpkin pie spice, and cinnamon.
- Gradually add the dry ingredients to the wet mixture, mixing on low speed until just combined. Do not overmix.
- In a small bowl, mix together the 3 tablespoons of sugar and 1 tablespoon of cinnamon for the coating.
- Using a cookie scoop or tablespoon, portion out rounded tablespoons of dough. Roll each portion into a smooth ball.
- Roll each dough ball in the cinnamon-sugar mixture until completely covered. Place on the prepared baking sheet about 2 inches apart.
- Bake for 10-12 minutes, or until the edges are set and the tops look slightly cracked. The centers will still look soft and puffy.
- Let the cookies rest on the baking sheet for 5 minutes, then transfer to a cooling rack to cool completely.
Notes
Don’t overdo the pumpkin—stick to ¼ cup for the best texture. Room temperature butter is crucial for proper creaming. If dough is too sticky, refrigerate for 10-15 minutes before rolling. Start checking cookies at 9 minutes as ovens vary. The 5-minute rest on the baking sheet is essential for the cookies to set properly.
Nutrition
- Serving Size: 1 cookie
- Calories: 165
- Sugar: 12
- Sodium: 95
- Fat: 8
- Saturated Fat: 5
- Carbohydrates: 22
- Fiber: 1
- Protein: 2
Keywords: pumpkin snickerdoodle cookies, small batch cookies, pumpkin cookies, snickerdoodle, fall cookies, easy cookie recipe