Love this? Save it for later!
Share the inspiration with your friends
This was supposed to be pumpkin pie. I mean, I had the recipe bookmarked, the crust chilling in the fridge, and a whole can of pumpkin puree ready to go. But somewhere between wrestling a toddler into pajamas and answering three emails that couldn’t wait, the afternoon slipped away. By the time I got back to the kitchen, it was 8 PM, the pie crust had been sitting out too long, and I was way too tired to roll dough. I stared at the clock, then at a bag of sugar cookie mix I’d stashed for emergencies, and then at my kid who was suddenly very interested in what I was doing. “Can we make hand turkeys?” she asked. And honestly? I almost said no. But I grabbed the cookie mix, some candy corn left over from Halloween, and figured we’d just see what happened. What came out was nothing like the plan—and better. Those cookies were done in twenty minutes flat, the kids decorated them without any help from me, and they actually looked adorable. I kept making them every year since, not because they were a happy accident, but because sometimes the best traditions start when you let go of the perfect plan.
You know that feeling when you want to do something fun with the kids but the thought of a complicated recipe makes you want to hide in the pantry? That was me that night. But here’s the thing—these quick Thanksgiving hand turkey sugar cookies aren’t just a backup plan. They’re the kind of recipe that saves your sanity on a busy weeknight and still makes everyone feel like you pulled off something special. Maybe you’ve been there, standing in the kitchen with a tired kid and a half-baked idea, wondering if it’s worth the mess. Let me tell you, it is. These cookies have become our official pre-Thanksgiving tradition, and they’re so simple I almost feel guilty calling it a recipe.
Why You’ll Love This Recipe
Let me be honest with you—I’ve tested a lot of holiday cookie recipes over the years, and most of them require more patience than I have on a Tuesday night. These quick Thanksgiving hand turkey sugar cookies are different. They’re the ones I actually look forward to making, and here’s why they work so well for busy families like ours.
- Quick & Easy: From start to finish, these cookies are ready in under 30 minutes. No chilling dough, no complicated piping—just mix, bake, and decorate. Perfect for those evenings when you promised the kids a fun activity but forgot to plan ahead.
- Simple Ingredients: You probably already have sugar cookie mix or flour, butter, and eggs in your kitchen. The decorations are flexible too—use whatever candy you have on hand. No special grocery trips required.
- Perfect for Weeknights: This isn’t a weekend project. It’s a Tuesday night kind of recipe that turns a regular evening into something memorable. Great for after-school snacks, pre-Thanksgiving prep days, or when you need a quick classroom treat.
- Crowd-Pleaser: Kids love decorating their own turkeys, and adults can’t resist grabbing one with their coffee. I’ve brought these to playdates and school events, and they always disappear first.
- Unbelievably Delicious: The texture is soft in the middle with slightly crispy edges—exactly what a good sugar cookie should be. And the combination of sweet frosting with salty pretzel sticks and chewy candy corn? It’s a flavor party in every bite.
What makes this recipe different from every other turkey cookie out there is the method. Instead of cutting out complicated turkey shapes, you use your handprint as the template. It’s genius because every cookie turns out unique, and the kids can actually do most of the work themselves. I’ve tried the cookie cutter versions, and they never have the same charm. There’s something about seeing your own handprint turned into a cookie that makes it special.
This recipe isn’t just good—it’s the kind that makes you close your eyes after the first bite. It’s comfort food reimagined for busy lives: faster, simpler, but with the same soul-soothing satisfaction. Perfect for impressing your kids without stress, or turning a simple weeknight into something you’ll all remember.
What Ingredients You Will Need
This recipe uses simple, pantry-friendly ingredients to deliver those classic sugar cookies with a festive twist. Most of these are things you probably already have, and the decorations are totally flexible based on what’s in your candy stash.
For the Cookie Dough
- 1 cup unsalted butter, softened (I use Land O’Lakes—it gives the best texture)
- 1 cup granulated sugar
- 1 large egg, room temperature
- 1 teaspoon vanilla extract (pure vanilla makes a difference, but imitation works fine)
- 2 ½ cups all-purpose flour (spoon and level for accurate measuring)
- ½ teaspoon baking powder
- ½ teaspoon salt
For the Hand Turkey Design
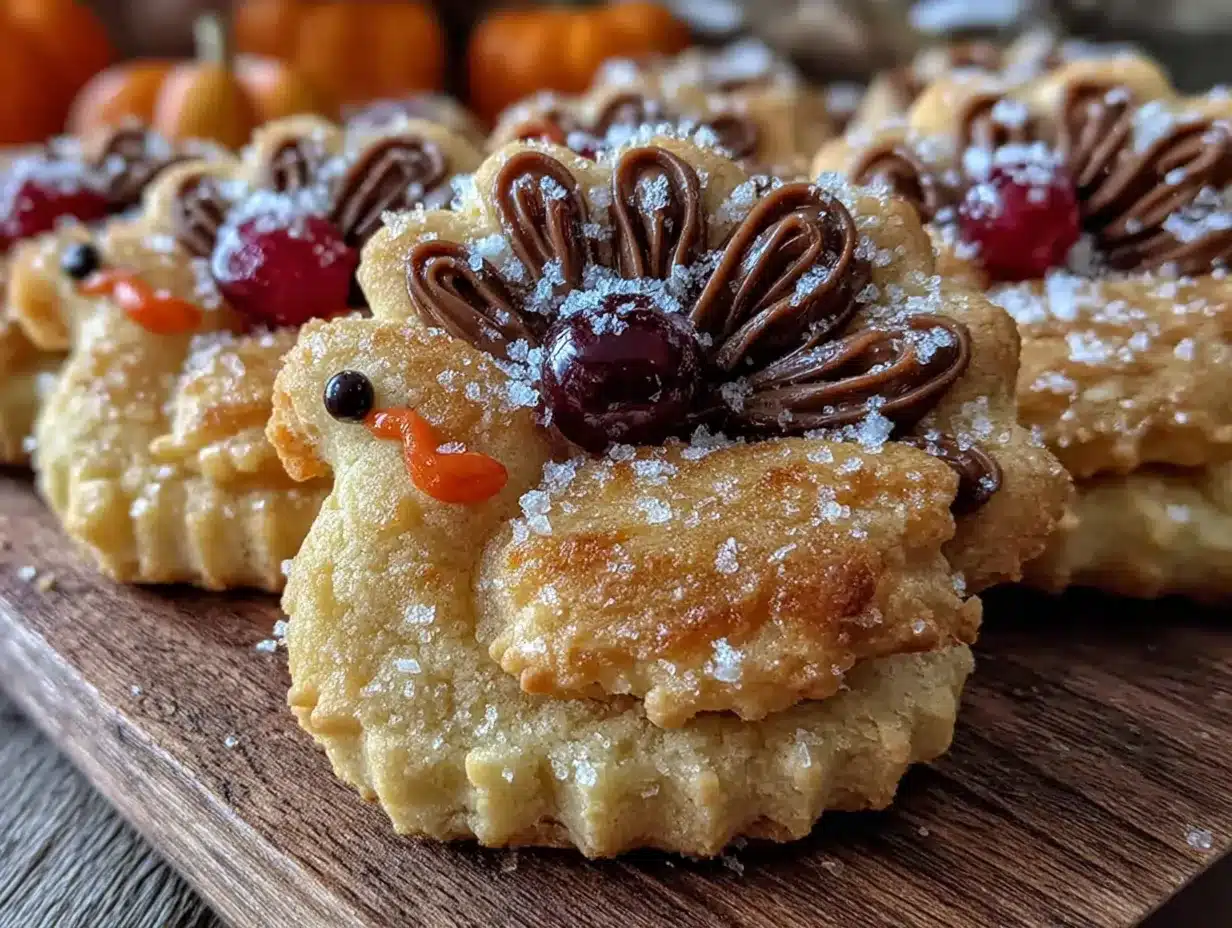
- 1 cup powdered sugar
- 2-3 tablespoons milk (start with 2, add more if needed)
- ½ teaspoon vanilla extract
- Food coloring (brown or orange for the body, any color for feathers—I like using natural food dyes)
- Candy corn (for feathers and beak)
- Mini chocolate chips (for eyes)
- Pretzel sticks (for legs—break them in half)
- Red M&M’s or red hots (for the snood—that’s the red dangly bit on a turkey’s beak)
Ingredient Selection Tips: For the best texture, make sure your butter is truly softened—not melted, but soft enough that your finger leaves an indent. I leave mine out on the counter for about 30 minutes before starting. If you’re in a hurry, cut the butter into small cubes and let it sit for 10 minutes. For the flour, I recommend Gold Medal or King Arthur for consistent results. Avoid using self-rising flour, as the baking powder and salt are already balanced here.
Substitution Guidance: If you’re dairy-free, you can use plant-based butter sticks (not the spreadable kind in a tub) and oat milk or almond milk in the frosting. For a gluten-free version, swap the all-purpose flour with a 1:1 gluten-free baking flour blend—I’ve had good luck with Bob’s Red Mill. The cookies might spread slightly more, so chill the dough for 10 minutes before baking. If you don’t have candy corn, try using small colored candies or even sliced almonds for the feathers. The beauty of these cookies is that they’re totally customizable.
Make-Ahead Note: You can prep the dry ingredients (flour, baking powder, salt) in a ziplock bag up to a week ahead. The cookie dough itself can be made and refrigerated for up to 3 days, or frozen for up to 3 months. Just let it come to room temperature before rolling.
Equipment Needed
You don’t need fancy equipment for these cookies—that’s part of what makes them so great. Here’s what you’ll need:
- Baking sheets (I use two so I can bake all the cookies at once)
- Parchment paper or silicone baking mats (silicone mats give the most even browning)
- Mixing bowls (one large for dough, one small for frosting)
- Electric mixer (hand mixer works great, stand mixer is even easier)
- Rolling pin (or a wine bottle in a pinch—I’ve done it)
- Sharp knife or pizza cutter (for cutting around the handprint)
- Spatula (for transferring cookies)
- Cooling rack (speeds up the cooling process)
- Small piping bags or zip-top bags (for frosting)
- Cookie cutters (optional, if you want to make other shapes with leftover dough)
Budget-Friendly Options: If you don’t have a rolling pin, a clean wine bottle or even a smooth water bottle works perfectly. No piping bags? Just snip the corner off a zip-top bag. I’ve been doing that for years and it works just as well. For the baking sheets, any rimmed baking sheet will do—just make sure it’s not warped or the cookies will spread unevenly.
Maintenance Tip: If you use silicone baking mats, wash them with warm soapy water and let them air dry completely before storing. They can get sticky if you stack them while damp. Parchment paper is disposable, so no cleanup needed—my personal favorite.
Preparation Method
This is where the magic happens. I’ll walk you through every step so your cookies turn out perfect, even if it’s your first time making hand turkey cookies.
- Preheat your oven to 375°F (190°C). Line two baking sheets with parchment paper or silicone mats. This ensures the cookies won’t stick and makes cleanup a breeze.
- Make the cookie dough. In a large mixing bowl, beat the softened butter and granulated sugar together until light and fluffy—about 2-3 minutes with an electric mixer on medium speed. You want it to look pale and creamy. Scrape down the sides of the bowl once during mixing.
- Add the wet ingredients. Beat in the egg and vanilla extract until fully combined. The mixture might look slightly curdled at this point—don’t panic, that’s normal. It will come together once you add the flour.
- Mix the dry ingredients. In a separate bowl, whisk together the flour, baking powder, and salt. Gradually add this to the wet mixture, mixing on low speed until just combined. Stop as soon as you don’t see any more streaks of flour. Overmixing makes cookies tough, so resist the urge to keep going.
- Chill the dough (optional but helpful). If your dough feels too sticky to roll, wrap it in plastic wrap and pop it in the fridge for 15-20 minutes. This step is especially useful if your kitchen is warm or if you’re using a gluten-free flour blend. For regular dough, you can skip this if you’re in a hurry.
- Roll out the dough. On a lightly floured surface, roll the dough to about ¼-inch thickness. Don’t roll it too thin or the cookies will be too delicate to decorate. I use a light dusting of flour on my rolling pin to prevent sticking.
- Create the handprint shapes. Here’s the fun part. Have your child (or yourself) press their hand firmly into the dough to create an imprint. Then, using a sharp knife or pizza cutter, carefully cut around the handprint, leaving about ½ inch of space around the fingers. You can also use a small cookie cutter to make a round body in the center of the palm for a cleaner look. Transfer the handprint shapes to the prepared baking sheets, spacing them about 2 inches apart.
- Bake the cookies. Bake for 8-10 minutes, or until the edges are just barely golden brown. The centers will still look slightly soft—that’s perfect. They’ll continue to set as they cool. Let the cookies cool on the baking sheet for 5 minutes, then transfer to a cooling rack to cool completely before decorating.
- Make the frosting. While the cookies cool, whisk together the powdered sugar, 2 tablespoons of milk, and vanilla extract in a small bowl. Add more milk a teaspoon at a time until you reach a smooth, spreadable consistency. Divide the frosting into small bowls and tint with food coloring as desired. I usually make one batch of brown or orange for the turkey body, and leave some white for the feathers.
- Decorate the turkeys. Once the cookies are completely cool, it’s time to decorate. Spread a thin layer of frosting over the palm area for the turkey’s body. Use candy corn to create feather patterns along the fingers—place them point-side down for a fan effect. Add two mini chocolate chips for eyes, a candy corn for the beak (pointing down), and a red M&M or red hot for the snood. Break pretzel sticks in half and press two into the bottom of the palm for legs.
- Let the frosting set. Allow the decorated cookies to sit at room temperature for about 15-20 minutes so the frosting firms up. This makes them easier to handle and store.
Sensory Cues: When you cream the butter and sugar, listen for the change in sound—it goes from a rough scraping to a soft, fluffy whisper. The dough should feel smooth and pliable, not sticky or dry. When the cookies are done baking, the kitchen will smell like vanilla and butter, and the edges will have a faint golden halo. The frosting should be thick enough to hold its shape but thin enough to spread easily—think of the consistency of honey.
Prep Note for Efficiency: If you’re making these with young kids, I recommend rolling out the dough and cutting the handprints ahead of time. Let the kids handle the decorating part—it’s where the real fun is and they’ll feel proud of their creations.
Cooking Tips & Techniques
After making these cookies more times than I can count, I’ve learned a few tricks that make the process smoother and the results better. Let me share what works.
Don’t overwork the dough. I learned this the hard way after making a batch of cookies that came out tough and flat. Sugar cookie dough is forgiving, but if you keep mixing and kneading, the gluten develops and your cookies will spread too much. Mix until just combined, and handle the dough as little as possible when rolling and cutting.
Use a light hand with flour. When rolling out the dough, use just enough flour to prevent sticking. Too much flour on the surface gets incorporated into the dough, making the cookies dry and crumbly. I keep a small bowl of flour nearby and dust my rolling pin and surface lightly between each roll.
Chill the cut-out shapes. If you have time, pop the cut-out handprint cookies in the fridge for 10 minutes before baking. This helps them hold their shape and prevents spreading. I do this especially when my kitchen is warm or if the dough feels soft.
Bake in batches. Don’t crowd the baking sheet. Leave at least 2 inches between cookies so they have room to spread. If you’re making a large batch, rotate the baking sheets halfway through baking—swap the top rack and bottom rack positions for even browning.
Let cookies cool completely. I know it’s tempting to start decorating right away, but warm cookies will melt the frosting into a puddle. Trust me, I’ve ruined a batch this way. Wait until they’re completely cool to the touch—about 20-30 minutes on a cooling rack.
Make decorating a station. Set up a little assembly line with bowls of candy corn, chocolate chips, pretzel sticks, and frosting. This keeps things organized and lets everyone decorate at their own pace. For younger kids, I pre-snip the corner of a zip-top bag filled with frosting so they can squeeze it out themselves.
One mistake I still make: Forgetting to check the expiration date on my baking powder. Old baking powder won’t give the cookies enough lift, and they’ll come out flat and dense. If you’re not sure yours is fresh, test it by dropping a teaspoon into hot water—it should bubble vigorously.
Variations & Adaptations
One of the best things about these quick Thanksgiving hand turkey sugar cookies is how adaptable they are. Here are some variations I’ve tried and loved.
Dietary Variations
Gluten-Free: Substitute the all-purpose flour with a 1:1 gluten-free baking flour blend. I’ve used Bob’s Red Mill and King Arthur with great results. Add ¼ teaspoon of xanthan gum if your blend doesn’t already include it. The dough will be slightly more delicate, so chill it for 15 minutes before rolling.
Dairy-Free: Use plant-based butter sticks (like Earth Balance) and oat milk or almond milk in the frosting. The cookies will taste slightly different but still delicious. Avoid using margarine spreads in a tub—they have too much water content and will make the cookies spread.
Egg-Free: Replace the egg with a flax egg (1 tablespoon ground flaxseed mixed with 3 tablespoons water, let sit for 5 minutes). The cookies will be a bit more tender, so handle them gently when transferring.
Flavor Variations
Spiced Sugar Cookies: Add 1 teaspoon of cinnamon, ½ teaspoon of nutmeg, and ¼ teaspoon of cloves to the dry ingredients. This gives the cookies a warm, holiday flavor that pairs beautifully with the candy corn.
Chocolate Hand Turkeys: Replace ¼ cup of the flour with unsweetened cocoa powder. Use white frosting for the feathers to create a nice contrast against the dark cookie.
Lemon or Orange: Add 1 tablespoon of lemon or orange zest to the dough along with the vanilla. Use a citrus-flavored frosting for a bright, fresh twist.
Decoration Variations
Feather Alternatives: Instead of candy corn, try using colored fruit loops, small jelly beans, or even sliced almonds dyed with food coloring. For a healthier option, use thinly sliced apples or dried cranberries.
Turkey Face Options: Use small candy eyes (available at craft stores) instead of chocolate chips. For the beak, a small triangle of fruit leather works great. The snood can be a small dot of red frosting instead of a candy.
Different Hand Sizes: Make a whole family of turkeys using different hand sizes. Baby hands make adorable mini turkeys, and adult hands create impressive centerpiece cookies. I love seeing the progression of hand sizes from year to year.
Cooking Method Variations
No-Bake Option: If you don’t want to turn on the oven, use store-bought sugar cookies or even graham crackers as the base. Just skip the baking step and go straight to decorating. It’s not quite the same, but it works in a pinch.
Cookie Cutter Shortcut: If hand-cutting feels too tedious, use a large turkey-shaped cookie cutter. You won’t get the handprint effect, but the decorating process is the same and the cookies are more uniform.
Serving & Storage Suggestions
These cookies are best enjoyed within a day or two of decorating, but they store well with a little care. Here’s how to serve and store them.
Serving Temperature and Presentation: Serve these cookies at room temperature. Arrange them on a platter with the turkey “feet” pointing inward for a cute presentation. For a Thanksgiving party, place them on a tiered stand or arrange them in a circle on a large plate. Kids love seeing their own handprint cookies on display—it makes them feel proud.
Complementary Dishes and Beverages: These cookies pair beautifully with a warm cup of apple cider, hot chocolate, or coffee for the adults. For a complete Thanksgiving dessert spread, serve them alongside pumpkin pie, pecan bars, or a simple vanilla ice cream. They’re also perfect for school Thanksgiving feasts or classroom parties—easy to transport and always a hit.
Storage Instructions: Store decorated cookies in a single layer in an airtight container at room temperature. If you need to stack them, place a sheet of wax paper or parchment between layers to prevent the frosting from smudging. They’ll stay fresh for up to 5 days, though the candy corn may soften slightly after day 3.
Freezer Instructions: You can freeze the undecorated baked cookies for up to 3 months. Place them in a single layer on a baking sheet and freeze until solid, then transfer to a freezer-safe bag or container. When you’re ready to decorate, let them thaw at room temperature for about 30 minutes, then frost and decorate as usual. I do this often when I want to prepare ahead for a party.
Reheating Tips: These cookies are meant to be eaten at room temperature, but if you want a warm cookie, pop one in the microwave for about 10 seconds. Be careful—the candy corn might get sticky. For a crispier texture, warm them in a 300°F oven for 3-4 minutes.
Flavor Development: The cookies actually taste better the next day. The flavors meld together, and the texture softens slightly. If you can resist eating them all on day one, you’ll be rewarded with an even better cookie on day two.
Nutritional Information & Benefits
Let’s be real—these are sugar cookies with candy decorations, so they’re a treat, not a health food. But here’s the nutritional breakdown so you can plan accordingly.
Estimated Nutritional Values (per cookie, based on 24 cookies):
- Calories: 180
- Total Fat: 8g
- Saturated Fat: 5g
- Carbohydrates: 26g
- Sugar: 16g
- Protein: 2g
- Sodium: 95mg
Health Benefits of Key Ingredients: The butter provides a small amount of vitamin A, and the eggs add protein and choline, which is good for brain health. The vanilla extract contains small amounts of antioxidants. And honestly? The biggest benefit here is the joy of creating something with your kids—that’s good for the soul.
Dietary Considerations: These cookies contain wheat, dairy, and eggs. For allergen-friendly versions, check the variations section above. They’re not suitable for low-carb or keto diets due to the sugar content, but you can reduce the sugar in the dough by ¼ cup without affecting the texture too much.
Potential Allergens: This recipe contains wheat (gluten), dairy (butter, milk), and eggs. The decorations may contain additional allergens—check candy labels for common allergens like soy, corn, and artificial colors.
Personal Wellness Perspective: I believe in balance. These cookies are a special treat for a special time of year. We don’t eat them every day, but on a November evening when the whole family is in the kitchen together, they’re exactly what we need. Sometimes the best thing for your health is a moment of connection, even if it comes with a side of sugar.
Conclusion
These quick Thanksgiving hand turkey sugar cookies have become more than just a recipe in our house—they’re a tradition. They remind me that the best moments don’t come from perfect planning, but from being flexible enough to make something wonderful out of what you have. That night I abandoned the pumpkin pie, I could have given up and ordered takeout. Instead, I ended up with a memory that’s lasted years.
I hope you’ll give these cookies a try, whether it’s for a classroom party, a playdate, or just a random Tuesday in November. Don’t worry about making them perfect—the charm is in the imperfections. Let your kids go wild with the decorations. Use whatever candy you have in the pantry. Make a mess. Laugh at the cookies that look more like aliens than turkeys. Those are the ones you’ll remember.
If you make these, I’d love to hear about it. Drop a comment below and tell me about your hand turkey creations—especially the funny ones. Share a photo on social media and tag me so I can see your family’s turkeys. And if you have a variation that works great, please share it. The best recipes are the ones we pass around and make our own.
Now go grab some cookie mix and candy corn. Your weeknight just got a whole lot more fun.
Frequently Asked Questions
Can I use store-bought sugar cookie dough instead of making it from scratch?
Absolutely! Store-bought refrigerated sugar cookie dough works perfectly for this recipe. Just roll it out, cut the handprints, and bake according to the package directions. It saves even more time on busy nights. I’ve done this many times when I’m short on energy.
How do I keep the cookies from spreading too much?
Make sure your butter is softened but not melted, and chill the cut-out cookies for 10 minutes before baking. Also, don’t skip the parchment paper or silicone mat—it helps the cookies hold their shape. If your dough feels very soft, pop it in the fridge for 15 minutes before rolling.
Can I make these cookies ahead of time for a party?
Yes! You can bake the cookies up to 3 days ahead and store them in an airtight container. Decorate them the day of your event for the freshest look. Or freeze the undecorated baked cookies for up to 3 months—just thaw and decorate when you’re ready.
My kids have food allergies—can we still make these?
Definitely. Check the variations section for gluten-free, dairy-free, and egg-free options. For nut allergies, skip the pretzel sticks and use licorice strings for legs instead. Always double-check candy labels for allergens, as ingredients can vary by brand.
What can I use instead of candy corn for the feathers?
So many options! Try fruit loops, small jelly beans, sliced almonds, dried cranberries, or even small pieces of fruit leather cut into feather shapes. For a healthier twist, use thinly sliced apples brushed with lemon juice to prevent browning. The possibilities are endless.
Pin This Recipe!
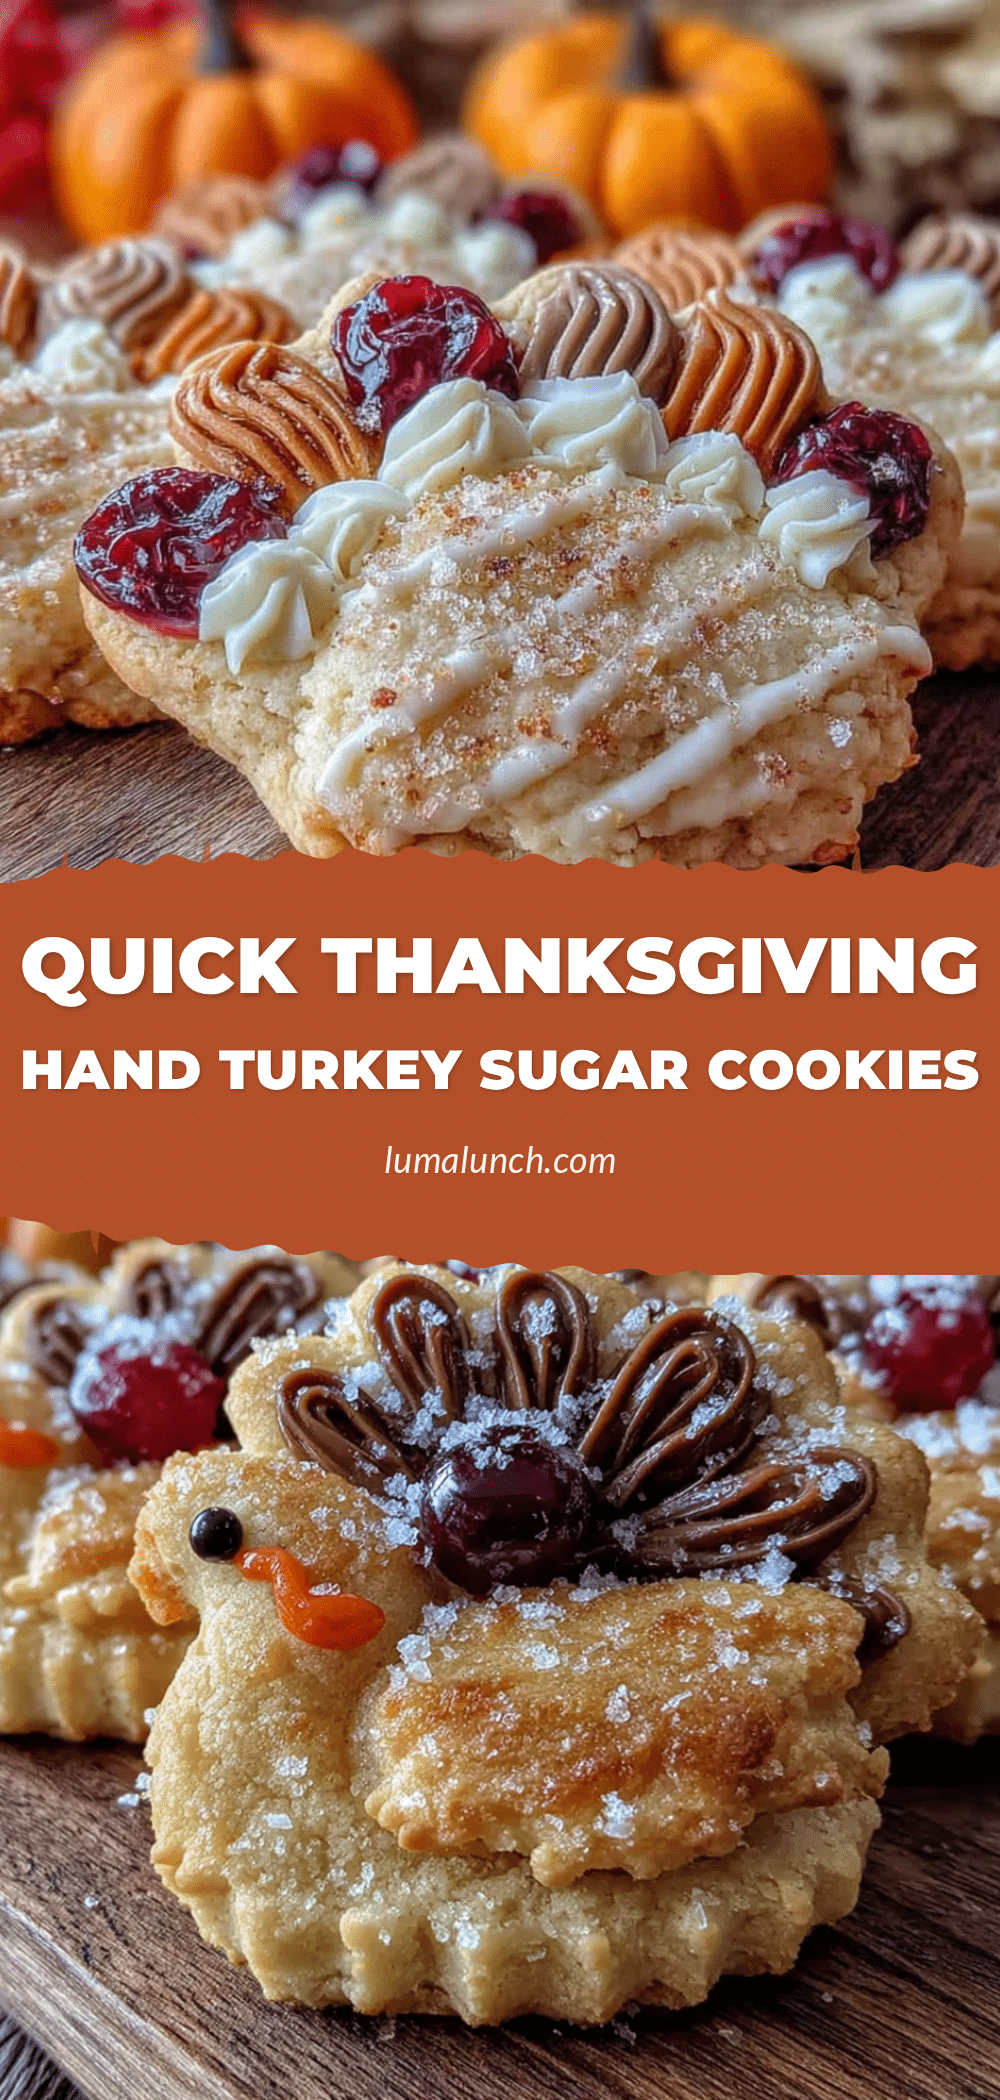
Quick Thanksgiving Hand Turkey Sugar Cookies

These quick and easy hand turkey sugar cookies are a fun, kid-friendly Thanksgiving tradition. Made with simple ingredients and ready in under 30 minutes, they’re perfect for busy weeknights and classroom parties.
- Prep Time: 15 minutes
- Cook Time: 10 minutes
- Total Time: 25 minutes
- Yield: 24 servings 1x
- Category: Dessert
- Cuisine: American
Ingredients
- 1 cup unsalted butter, softened
- 1 cup granulated sugar
- 1 large egg, room temperature
- 1 teaspoon vanilla extract
- 2 ½ cups all-purpose flour
- ½ teaspoon baking powder
- ½ teaspoon salt
- 1 cup powdered sugar
- 2–3 tablespoons milk
- ½ teaspoon vanilla extract
- Food coloring (brown or orange for body, any color for feathers)
- Candy corn (for feathers and beak)
- Mini chocolate chips (for eyes)
- Pretzel sticks (for legs, broken in half)
- Red M&M’s or red hots (for snood)
Instructions
- Preheat oven to 375°F (190°C). Line two baking sheets with parchment paper or silicone mats.
- In a large mixing bowl, beat softened butter and granulated sugar together until light and fluffy, about 2-3 minutes.
- Beat in egg and vanilla extract until fully combined.
- In a separate bowl, whisk together flour, baking powder, and salt. Gradually add to wet mixture, mixing on low until just combined.
- If dough is too sticky, wrap in plastic wrap and chill for 15-20 minutes.
- On a lightly floured surface, roll dough to ¼-inch thickness.
- Press a hand firmly into the dough to create an imprint. Using a sharp knife or pizza cutter, cut around the handprint, leaving about ½ inch of space around fingers. Transfer to prepared baking sheets, spacing 2 inches apart.
- Bake for 8-10 minutes, until edges are just barely golden brown. Cool on baking sheet for 5 minutes, then transfer to a cooling rack to cool completely.
- While cookies cool, whisk together powdered sugar, 2 tablespoons milk, and vanilla extract. Add more milk a teaspoon at a time until smooth and spreadable. Divide and tint with food coloring as desired.
- Once cookies are completely cool, spread a thin layer of frosting over the palm area for the turkey’s body. Use candy corn to create feather patterns along the fingers. Add two mini chocolate chips for eyes, a candy corn for the beak (pointing down), and a red M&M or red hot for the snood. Press two pretzel stick halves into the bottom of the palm for legs.
- Let decorated cookies sit at room temperature for 15-20 minutes for frosting to set.
Notes
For best results, use truly softened butter (not melted). If using gluten-free flour, chill dough for 10 minutes before baking. Cookies can be frozen undecorated for up to 3 months. Decorated cookies stay fresh in an airtight container at room temperature for up to 5 days.
Nutrition
- Serving Size: 1 cookie
- Calories: 180
- Sugar: 16
- Sodium: 95
- Fat: 8
- Saturated Fat: 5
- Carbohydrates: 26
- Protein: 2
Keywords: Thanksgiving cookies, hand turkey cookies, sugar cookies, kid-friendly, easy Thanksgiving dessert, handprint cookies, turkey cookies