Love this? Save it for later!
Share the inspiration with your friends
“You know that feeling when the sun’s blazing, the grill’s fired up, and everyone’s gathered on the porch—but the last thing you want is to slave over a hot oven?” That was me last Fourth of July weekend, juggling a messy picnic basket, a cooler full of drinks, and a very impatient golden retriever named Milo. I had promised to bring a festive dessert, but honestly, the heat wave was brutal and the thought of turning on the oven made me break out in a sweat. So I threw together a few easy no-bake red white blue desserts that not only saved the day but also stole the show.
It all started with a scribbled recipe on a crumpled piece of paper that I found wedged in between cookbooks at a local flea market. The handwriting was shaky but the idea was clear—quick, colorful, and absolutely fuss-free treats perfect for summer celebrations. I tweaked it, tested it, and honestly, these desserts have become my go-to for every patriotic party since. I mean, no one ever complains about dessert when it’s this easy and this pretty, right?
Maybe you’ve been there too—trying to juggle hosting duties while keeping things casual and fun. These no-bake red white blue desserts fit right in because they don’t demand a lot of time or fancy ingredients, yet they bring the perfect pop of color and sweetness to your table. Plus, no oven means less mess, less heat, and more time to enjoy with your guests (and your dog, if you have one like Milo). Let me tell you, this recipe collection has made me look like a magician more than once, and I’m excited to share it with you!
Why You’ll Love This Recipe
I’ve tried so many variations of patriotic desserts over the years, but these easy no-bake red white blue desserts stand out because they are just that—easy, fun, and downright delicious. Here’s why they’re sure to become a staple in your summertime celebrations:
- Quick & Easy: Ready in under 20 minutes, perfect for last-minute gatherings or when you’re running low on time.
- Simple Ingredients: Mostly pantry staples and fresh berries—no complicated or expensive ingredients needed.
- Perfect for Summer: No oven heat means these treats keep your kitchen cool, ideal for hot days and outdoor parties.
- Crowd-Pleaser: Kids adore the bright colors and adults love the balance of sweet and fresh flavors.
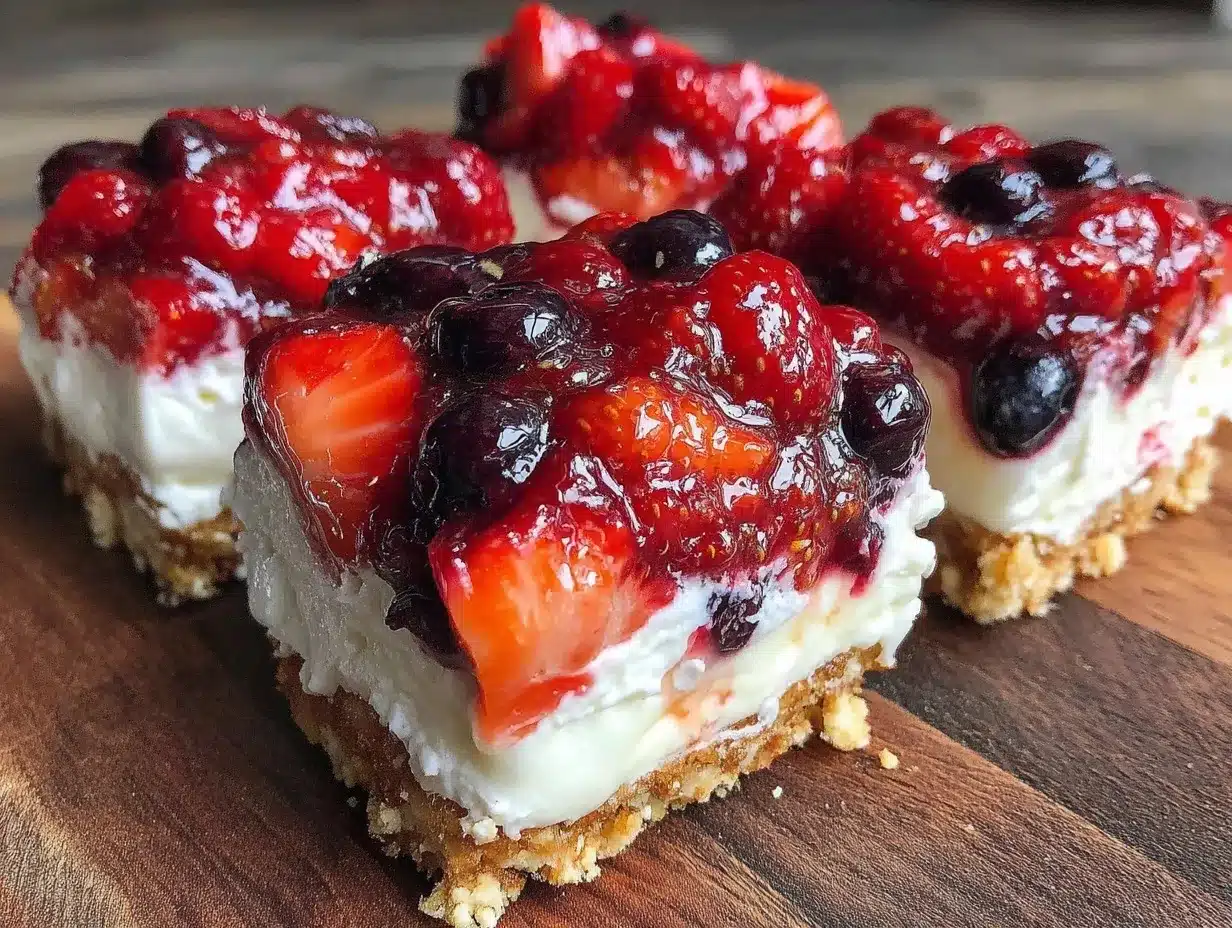
- Unbelievably Delicious: The combination of creamy layers, crunchy textures, and fresh berries creates a delightful bite every time.
What makes this collection different from others you might find? Honestly, it’s the little tricks I’ve learned from testing—like blending cream cheese with a touch of vanilla for a luscious white layer, or using store-bought graham cracker crumbs to save time but still get that perfect crunch. Plus, throwing in fresh blueberries and strawberries not only brings the color but adds a burst of freshness that balances the sweetness so well. This isn’t just another patriotic dessert—it’s a recipe that feels both nostalgic and new, perfect for making memories with friends and family.
What Ingredients You Will Need
This recipe lineup uses simple, wholesome ingredients to create bold flavors and satisfying textures without any fuss. Most of these you probably have on hand or can easily grab at your local market.
- For the Base & Creamy Layer:
- Graham cracker crumbs (about 1 1/2 cups; I like Honey Maid for its sweet crunch)
- Unsalted butter, melted (6 tablespoons; adds richness and holds the crust together)
- Cream cheese, softened (8 ounces; room temperature for easy blending)
- Powdered sugar (1 cup; for smooth sweetness)
- Vanilla extract (1 teaspoon; enhances flavor)
- Heavy cream or whipped topping (1 cup; for fluffy texture)
- For the Red Layer:
- Fresh strawberries (1 1/2 cups, hulled and sliced; ripe and sweet ones really shine here)
- Sugar (2 tablespoons; optional, depending on berry sweetness)
- Lemon juice (1 teaspoon; brightens the flavor)
- For the Blue Layer:
- Fresh blueberries (1 1/2 cups; look for plump, firm berries for best texture)
- Sugar (1 tablespoon; optional)
- Lemon zest (a pinch; adds a subtle zing)
- Optional Toppings & Garnishes:
- Mini marshmallows (adds a playful texture)
- Fresh mint leaves (for a pop of green and freshness)
- Red and blue sprinkles (for extra party vibes)
For those who want to keep it dairy-free, swapping cream cheese with a plant-based alternative and using coconut whipped cream works surprisingly well. And if you want a gluten-free version, almond flour or gluten-free graham crackers are great substitutes for the crust. Oh, and a quick tip—if fresh berries aren’t in season, frozen works fine, just thaw and drain them well to avoid sogginess.
Equipment Needed
- Mixing bowls (medium and large)
- Electric mixer or sturdy whisk (an electric hand mixer makes blending cream cheese and cream a breeze)
- Measuring cups and spoons (for precise ingredients)
- Spatula (for folding ingredients gently)
- 8×8 inch baking dish or individual dessert cups (clear glass ones are fun to show off the layers)
- Food processor or rolling pin (to crush graham crackers, but store-bought crumbs save time)
Honestly, I’ve made these desserts with just a couple of bowls and a whisk when I was in a pinch. No fancy gadgets required! If you’re using an electric mixer, keep an eye on the cream—it whips fast and can easily turn to butter if you’re not careful. Also, I keep a small brush handy to clean crumbs off counters quickly, because, well, graham cracker crumbs have a sneaky way of spreading everywhere.
Preparation Method
- Prepare the crust: In a medium bowl, combine 1 1/2 cups graham cracker crumbs with 6 tablespoons melted butter. Stir well until crumbs are evenly coated and look like wet sand. Press this mixture firmly into the bottom of your 8×8 inch dish or individual cups. This should take about 5 minutes. Tip: Use the back of a spoon or a flat-bottomed glass to press down for an even crust.
- Make the creamy layer: In a large bowl, beat 8 ounces softened cream cheese with 1 cup powdered sugar and 1 teaspoon vanilla extract until smooth and creamy (about 3-4 minutes). Slowly add 1 cup whipped topping or heavy cream and gently fold until fully combined and fluffy. This step takes around 5 minutes. Watch out for lumps—if you see any, keep mixing until silky smooth.
- Spread the creamy layer: Spoon the cream cheese mixture evenly over the graham cracker crust, smoothing the top with a spatula. Chill in the fridge for 15 minutes to set slightly—it helps the layers stay neat.
- Prepare the red berry layer: In a small bowl, combine 1 1/2 cups sliced strawberries with 2 tablespoons sugar and 1 teaspoon lemon juice. Let it sit for 10 minutes to macerate and release juices. Then, mash half of the mixture gently with a fork for a saucy texture, leaving some whole slices for freshness.
- Add the red layer: Spread the strawberry mixture evenly over the creamy layer. Return to fridge for another 15 minutes.
- Prepare the blue layer: Toss 1 1/2 cups blueberries with 1 tablespoon sugar and a pinch of lemon zest. You can leave them whole or lightly crush half for variety. This should take about 5 minutes.
- Top with blueberries: Carefully layer the blueberries on top of the strawberries. If you’re feeling festive, sprinkle mini marshmallows or red and blue sprinkles now. Chill for at least 30 minutes before serving so flavors meld beautifully.
Pro tip: If you’re short on time, layering the berries right after mixing the creamy layer still works, but chilling between layers helps keep that clean, stunning look. Also, don’t skip the lemon juice in the berries—it brightens the flavor and balances the sweetness perfectly.
Cooking Tips & Techniques
Working with no-bake desserts is a bit of an art, and I learned a few things the hard way. Here are some tips that might save you from common pitfalls:
- Softened cream cheese is key: If the cream cheese is too cold, you’ll get lumps. Let it sit out for 30 minutes or microwave in 10-second bursts.
- Don’t over-whip the cream: When folding whipped cream into cream cheese, be gentle. Overmixing can deflate the fluffiness and make the texture heavy.
- Press the crust firmly: This helps avoid a crumbly base. If it’s too loose, the dessert falls apart when serving.
- Layer chilling: Chilling between layers isn’t mandatory but helps maintain clean stripes of red, white, and blue, especially if you’re serving in clear glasses.
- Freshness matters: Use fresh, ripe berries for the best taste and appearance. Frozen berries can get watery if not drained well.
Once, I forgot to chill the layers and ended up with a colorful mess instead of pretty stripes—lesson learned! Also, these desserts keep well, so making them a few hours ahead of time is a stress-reliever.
Variations & Adaptations
If you want to mix things up or cater to different tastes, here are some ideas:
- Vegan Version: Use plant-based cream cheese, coconut whipped cream, and gluten-free graham crackers for a tasty vegan option.
- Different Berries: Swap strawberries and blueberries for raspberries and blackberries for a twist on the classic colors.
- Chocolate Twist: Add a thin layer of melted dark chocolate or sprinkle mini chocolate chips between layers for an indulgent surprise.
- Layer in Jello: For a firmer dessert, fold in some gelatin or agar-agar to the creamy layer, turning it into a mousse-like texture.
- Personal Favorite Variation: Once, I added a splash of orange liqueur to the cream cheese mixture—just a little—to give a subtle citrus hint that paired wonderfully with the berries.
When you’re short on time, these desserts can be assembled in jars or cups for easy transport and serving at picnics. And if you want to take it further, try layering crushed nuts or toasted coconut flakes for extra texture.
Serving & Storage Suggestions
These easy no-bake red white blue desserts are best served chilled, straight from the fridge. The coolness complements the creamy texture and fresh berries beautifully.
For serving, clear glasses or small mason jars showcase the layers nicely and add a festive touch. Pair them with a cold lemonade or iced tea to keep the summer vibe going strong.
Leftovers can be stored in an airtight container in the refrigerator for up to 3 days. If you want to prep ahead, these desserts actually taste better after sitting overnight, as the flavors meld and the crust softens just right.
Reheat? Nah, these are best cold! But if you want to freshen them up, just stir gently before serving to redistribute any juices from the berries.
Nutritional Information & Benefits
Each serving of these no-bake red white blue desserts offers a delightful balance of indulgence and nutrition. The fresh berries provide antioxidants and vitamin C, while the cream cheese and whipped cream add protein and richness—perfect for a treat that feels special but not overdone.
Depending on ingredient choices, this dessert can be gluten-free (using gluten-free crumbs) and dairy-free (with plant-based substitutes). Just watch out for added sugars if you’re mindful of that.
From a wellness perspective, I appreciate that these treats incorporate real fruit rather than artificial flavorings, making them a better choice for family gatherings. Plus, the no-bake method keeps the recipes light and fuss-free, so you can enjoy summer without extra stress.
Conclusion
So, if you’re looking for easy no-bake red white blue desserts that bring flavor, color, and joy to your summer celebrations without the hassle of an oven, this recipe collection has got you covered. I love how these treats bring people together—whether it’s a casual backyard BBQ or a spirited holiday party.
Feel free to customize the layers or swap berries to suit your taste. Honestly, that’s part of the fun! I hope these desserts help you create sweet memories with your loved ones, with minimal effort and maximum smiles.
Give them a try and share your favorite twists—I’d love to hear how you make these recipes your own. After all, the best recipes are the ones that grow with your kitchen adventures!
Frequently Asked Questions
Can I make these desserts ahead of time?
Absolutely! They actually taste better after chilling for several hours or overnight. Just keep them covered and refrigerated until serving.
What can I use instead of graham cracker crumbs?
You can substitute crushed digestive biscuits, vanilla wafers, or gluten-free graham crackers if needed.
How do I keep the layers from mixing?
Chilling the creamy layer before adding berries helps keep the layers distinct. Also, gently spreading each layer prevents mixing.
Can I use frozen berries?
Yes, but thaw and drain them well to avoid watery layers. Fresh berries are best for texture and appearance.
Is there a dairy-free option for this recipe?
Yes! Use plant-based cream cheese and whipped coconut cream, plus gluten-free crumbs if needed, for a delicious dairy-free version.
For more fresh and easy summer recipes, you might enjoy my fresh summer salads or the classic crispy garlic chicken that always impresses at picnics.
Pin This Recipe!
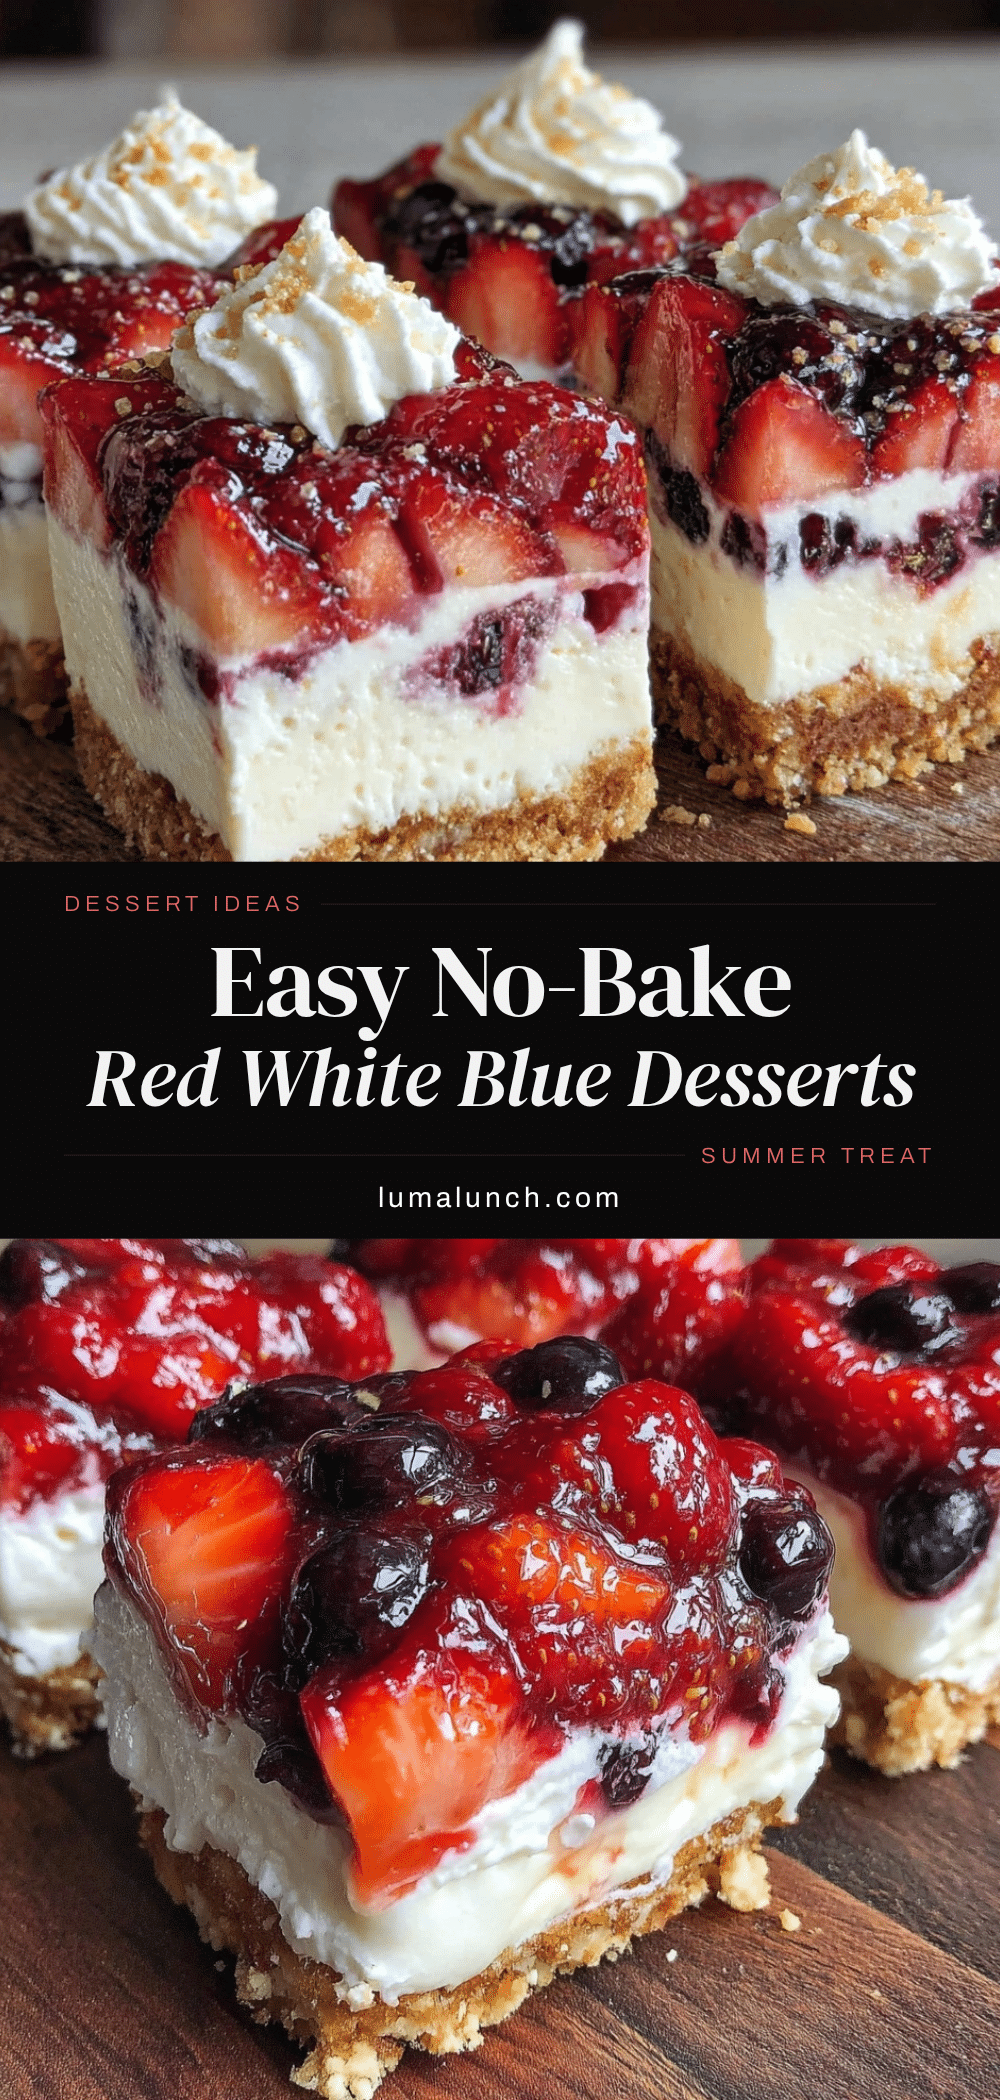
Easy No-Bake Red White Blue Desserts Perfect for Summer Celebrations 2024

These easy no-bake red white blue desserts are quick, colorful, and fuss-free treats perfect for summer celebrations, combining creamy layers, crunchy textures, and fresh berries for a delightful bite.
- Prep Time: 15 minutes
- Cook Time: 0 minutes
- Total Time: 1 hour 10 minutes
- Yield: 8 servings 1x
- Category: Dessert
- Cuisine: American
Ingredients
- 1 1/2 cups graham cracker crumbs
- 6 tablespoons unsalted butter, melted
- 8 ounces cream cheese, softened
- 1 cup powdered sugar
- 1 teaspoon vanilla extract
- 1 cup heavy cream or whipped topping
- 1 1/2 cups fresh strawberries, hulled and sliced
- 2 tablespoons sugar (optional)
- 1 teaspoon lemon juice
- 1 1/2 cups fresh blueberries
- 1 tablespoon sugar (optional)
- Pinch of lemon zest
- Mini marshmallows (optional)
- Fresh mint leaves (optional)
- Red and blue sprinkles (optional)
Instructions
- Prepare the crust: In a medium bowl, combine 1 1/2 cups graham cracker crumbs with 6 tablespoons melted butter. Stir well until crumbs are evenly coated and look like wet sand. Press this mixture firmly into the bottom of your 8×8 inch dish or individual cups. This should take about 5 minutes. Use the back of a spoon or a flat-bottomed glass to press down for an even crust.
- Make the creamy layer: In a large bowl, beat 8 ounces softened cream cheese with 1 cup powdered sugar and 1 teaspoon vanilla extract until smooth and creamy (about 3-4 minutes). Slowly add 1 cup whipped topping or heavy cream and gently fold until fully combined and fluffy. This step takes around 5 minutes. Watch out for lumps—if you see any, keep mixing until silky smooth.
- Spread the creamy layer evenly over the graham cracker crust, smoothing the top with a spatula. Chill in the fridge for 15 minutes to set slightly.
- Prepare the red berry layer: In a small bowl, combine 1 1/2 cups sliced strawberries with 2 tablespoons sugar and 1 teaspoon lemon juice. Let it sit for 10 minutes to macerate and release juices. Then, mash half of the mixture gently with a fork for a saucy texture, leaving some whole slices for freshness.
- Spread the strawberry mixture evenly over the creamy layer. Return to fridge for another 15 minutes.
- Prepare the blue layer: Toss 1 1/2 cups blueberries with 1 tablespoon sugar and a pinch of lemon zest. You can leave them whole or lightly crush half for variety. This should take about 5 minutes.
- Carefully layer the blueberries on top of the strawberries. If desired, sprinkle mini marshmallows or red and blue sprinkles now. Chill for at least 30 minutes before serving so flavors meld beautifully.
Notes
Use softened cream cheese to avoid lumps. Be gentle when folding whipped cream to keep fluffiness. Press crust firmly to avoid crumbling. Chilling between layers helps keep distinct layers and clean stripes. Fresh berries are best; if using frozen, thaw and drain well to avoid watery layers. Dairy-free and gluten-free substitutions are possible with plant-based cream cheese, coconut whipped cream, and gluten-free crumbs.
Nutrition
- Serving Size: 1 dessert cup or 1/8
- Calories: 280
- Sugar: 18
- Sodium: 150
- Fat: 18
- Saturated Fat: 10
- Carbohydrates: 25
- Fiber: 2
- Protein: 4
Keywords: no-bake dessert, red white blue dessert, summer dessert, patriotic dessert, easy dessert, berry dessert, no oven dessert