Love this? Save it for later!
Share the inspiration with your friends
There used to be a little bakery on the corner of Elm and 4th, right next to the dry cleaners that always smelled like steam and starch. They made these granola bars that were pure magic—chewy, packed with chocolate, and somehow not crumbly at all. When they closed suddenly two summers ago, I actually stood outside the locked door for a minute, staring at the “For Lease” sign. Pathetic, I know. But those bars had gotten me through some seriously hectic mornings.
After maybe a dozen attempts—some turned out like birdseed bricks, others fell apart before they even made it to the Tupperware—I finally cracked the code. Honestly, I was about to give up and accept that some bakery secrets just die with the business. Then, on a random Tuesday, it hit me while I was staring at a jar of peanut butter and thinking about texture. The trick wasn’t in the ingredients themselves, but in how you treated them. Let me tell you, the relief I felt when I bit into that first successful batch was ridiculous. I may have actually texted my sister a blurry photo with about fifteen exclamation points.
What I ended up with is this: an easy no-bake chocolate chip granola bars recipe that tastes exactly like those long-gone bakery bars, maybe even better. It uses just seven ingredients, takes about ten minutes of active work, and doesn’t require turning on the oven—which is a huge win when the kitchen already feels like a sauna. You know that feeling when you find a recipe that just works, no fuss, no drama? That’s this one. I keep a batch in my fridge at all times now, and honestly, they’ve saved me from skipping breakfast more times than I can count. Maybe you’ve been there, standing in front of an open fridge at 7 AM with zero time and a grumbling stomach.
Why You’ll Love This Recipe
Look, I’ve tested a lot of granola bar recipes over the years. Some are too dry, some crumble the second you look at them, and others taste more like cardboard than a snack. This easy no-bake chocolate chip granola bars recipe is different, and here is why it has earned a permanent spot in my kitchen:
- Only 7 Ingredients: No weird stuff you have to hunt down at a specialty store. Oats, peanut butter, honey, chocolate chips—you probably have most of this in your pantry right now.
- No Oven Required: Summer cooking is rough. Turning on the oven feels like a punishment. These bars come together on the stovetop, or honestly, you can even use the microwave for the sticky part.
- Completely Customizable: Don’t like chocolate chips? Swap in dried cranberries. Allergic to peanuts? Almond butter works beautifully. This recipe is a starting point, not a rigid rulebook.
- Meal Prep Hero: I make a batch on Sunday, and I have breakfast or snack options for the whole week. They actually get better after a day or two in the fridge—the flavors meld together somehow.
- Kid-Approved and Adult-Approved: My nephew calls them “cookie bars” and has no idea they’re relatively wholesome. I’ve also brought them to work meetings where they disappeared in minutes.
What really sets this recipe apart is the texture. Most no-bake bars end up either too hard or too sticky. Through trial and error—and one particularly disastrous batch that I had to chisel out of the pan—I figured out the perfect ratio of wet to dry ingredients. The result is a bar that holds together beautifully but still has that satisfying chewy bite. It’s the kind of snack that makes you close your eyes for a second after the first bite, even if you’re just standing in your kitchen in your pajamas.
What Ingredients You Will Need
This recipe relies on simple, pantry-friendly ingredients that come together to create something genuinely greater than the sum of their parts. No fancy health food store runs required—I promise. Here is what you will need:
- 2 cups old-fashioned rolled oats (not the instant kind—they get too mushy. I prefer Quaker or Bob’s Red Mill for consistent texture)
- 1 cup creamy peanut butter (natural peanut butter works, but you need to stir it really well first. The oil separation can mess with the binding)
- 1/2 cup honey (or maple syrup for a vegan version. Honey gives a slightly better stickiness, in my experience)
- 1/2 cup semi-sweet chocolate chips (I use Ghirardelli because they melt so smoothly, but any brand works. Dark chocolate chips add a nice bitterness if that’s your thing)
- 1 teaspoon vanilla extract (pure vanilla, not imitation, if you can swing it. The flavor difference is subtle but real)
- 1/4 teaspoon salt (just a pinch to balance the sweetness and make the chocolate pop. Sea salt or kosher salt both work fine)
- Optional: 1/4 cup flaxseed meal or chia seeds (I add this when I want extra fiber. Totally optional, but it gives a nice nutritional boost without changing the flavor much)
A few ingredient notes from someone who has made this recipe approximately forty-seven times: The type of oats matters more than you think. Quick oats absorb moisture too fast and turn your bars into a dense, gluey mess. Stick with old-fashioned rolled oats for that perfect chewy texture. Also, if you are using a natural peanut butter that has been sitting in your pantry for months, give it a really thorough stir before measuring. I learned this the hard way when I ended up with a batch that was simultaneously greasy and crumbly—not a good look.
For the chocolate chips, I like to reserve about a quarter cup to press into the top of the bars after they’re in the pan. It makes them look prettier, sure, but it also gives you those nice pockets of melted chocolate on the surface. Little things like that make a difference, you know?
Equipment Needed
The beauty of this recipe is that it doesn’t require any fancy equipment. Here is what you will need:
- 8×8-inch baking pan (or a 9×9 if that’s what you have—the bars will just be slightly thinner)
- Parchment paper (this is non-negotiable unless you enjoy scrubbing stuck-on peanut butter for twenty minutes)
- Medium saucepan (for melting the peanut butter and honey together)
- Large mixing bowl (for combining everything)
- Rubber spatula (for mixing and pressing the mixture into the pan)
- Measuring cups and spoons
- Sharp knife (for cutting clean bars—a dull knife will just smash them)
If you don’t have a saucepan, you can absolutely melt the peanut butter and honey in the microwave. Just do it in 30-second bursts, stirring in between, so it doesn’t burn. I’ve done this plenty of times when I didn’t feel like washing an extra pot. Also, if you don’t have an 8×8 pan, a loaf pan works in a pinch—your bars will just be thicker and you might need to adjust the chilling time slightly. I once used a pie dish out of desperation, and while the shape was weird, the taste was still spot on.
Preparation Method
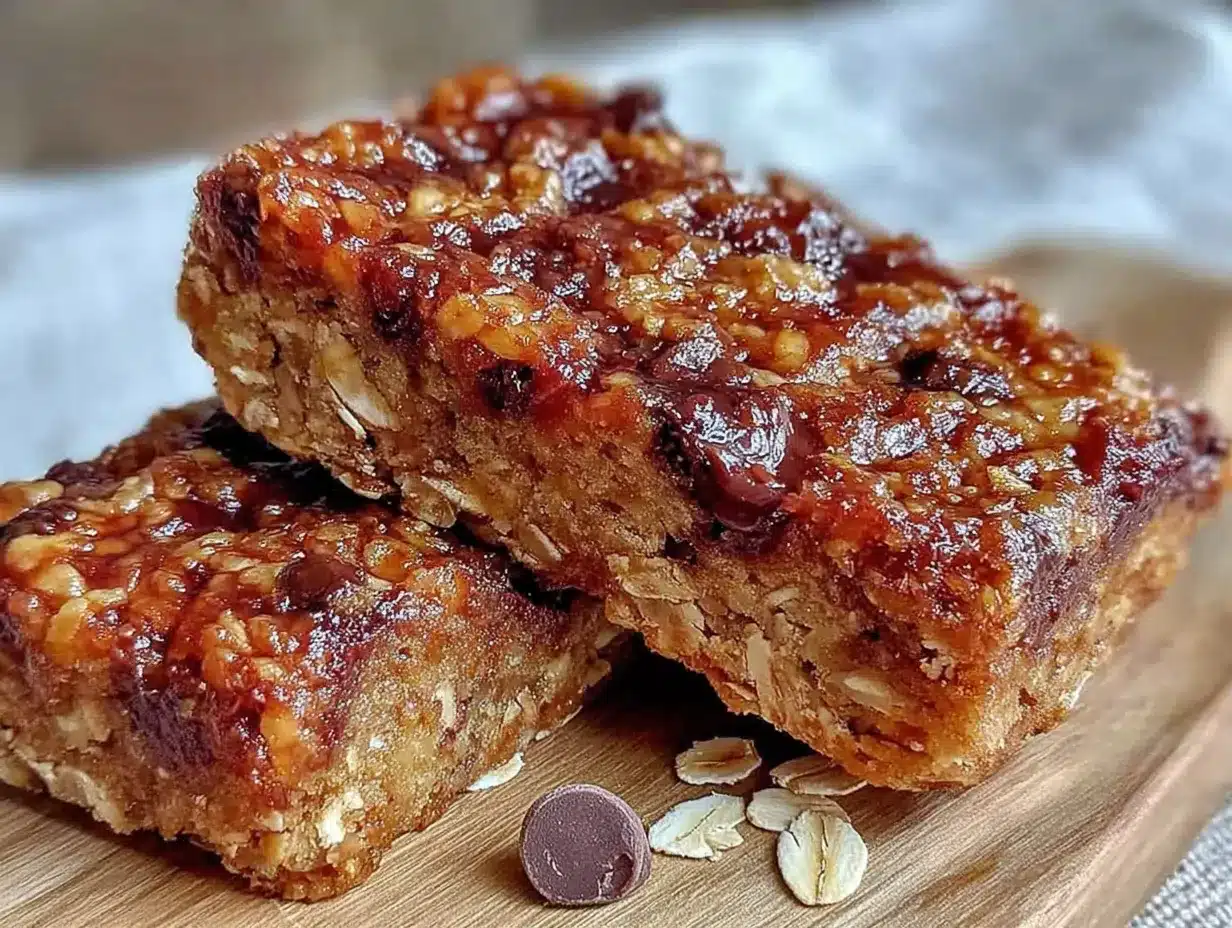
Alright, let’s get to the actual making part. This easy no-bake chocolate chip granola bars recipe comes together faster than you think, so it helps to have everything measured out before you start. Trust me on this—I once tried to measure honey while the peanut butter mixture was bubbling on the stove, and it was not my finest moment.
- Line your baking pan. Take a piece of parchment paper and press it into your 8×8 pan, leaving some overhang on two opposite sides. This creates little handles that let you lift the whole block of bars out later. Spray the paper lightly with cooking spray if you’re feeling extra cautious about sticking.
- Toast the oats (optional but recommended). Spread your 2 cups of rolled oats on a baking sheet and toast them in a 350°F oven for about 8-10 minutes, stirring halfway through. They should smell nutty and turn slightly golden. This step adds a depth of flavor that makes the bars taste almost baked, even though they aren’t. If you’re in a hurry, skip it—the bars will still be good, just not quite as complex.
- Melt the wet ingredients. In a medium saucepan over low heat, combine 1 cup peanut butter and 1/2 cup honey. Stir constantly with your rubber spatula until everything is smooth and fully combined. This usually takes about 2-3 minutes. Don’t walk away during this step—peanut butter can go from melted to scorched really fast. I speak from experience.
- Add the vanilla and salt. Remove the saucepan from the heat and stir in 1 teaspoon vanilla extract and 1/4 teaspoon salt. The mixture will look glossy and smell amazing at this point.
- Combine everything. Pour the warm peanut butter mixture over your oats in a large bowl. Fold everything together with your spatula until every single oat is coated. This takes a bit of arm work, but it’s worth it. If the mixture looks too dry, you can add a tablespoon more honey. If it looks too wet, add a tablespoon more oats. Adjust as needed based on how it feels.
- Add the chocolate chips. Stir in 1/4 cup of the chocolate chips, reserving the rest for the top. Fold gently so you don’t smash the chips, but make sure they’re distributed evenly.
- Press into the pan. Transfer the mixture to your lined pan. Here is the trick: wet your spatula slightly with water, then use it to press the mixture down firmly and evenly. The moisture keeps the mixture from sticking to the spatula. Press hard—you want these bars compact so they hold together. I usually spend a good minute really packing it down into the corners.
- Add the top chocolate chips. Sprinkle the remaining 1/4 cup chocolate chips over the top and press them in gently with your fingers or the spatula.
- Chill. Place the pan in the refrigerator for at least 2 hours, but overnight is better if you have the time. The longer they chill, the cleaner your cuts will be. I’ve made the mistake of cutting too early, and the bars just kind of squished apart.
- Cut and serve. Once fully chilled, lift the block out using the parchment handles. Place it on a cutting board and use a sharp knife to cut into 12 even bars. Wipe the knife clean between cuts for the neatest edges.
Cooking Tips & Techniques
After making this easy no-bake chocolate chip granola bars recipe more times than I care to count, I’ve picked up a few tricks that make a real difference. Let me share them so you don’t have to learn the hard way like I did.
Don’t overheat the peanut butter mixture. This was my biggest early mistake. If you cook the peanut butter and honey too long or on too high heat, the sugar in the honey can crystallize, and your bars will end up crumbly instead of chewy. Low and slow is the way to go. The mixture should be warm enough to combine easily, not bubbling like lava.
Pressing technique matters. Seriously, this is the difference between bars that hold together and bars that fall apart. I use the back of a measuring cup or a flat-bottomed glass to really compact the mixture. Think of it like making a sandcastle—you need that pressure to create structure. Spend a solid minute pressing down, focusing on the edges and corners.
Let them chill completely. I know it’s tempting to dig in after an hour, but patience pays off here. Two hours minimum, and honestly, overnight is ideal. The bars need time for the oats to absorb the moisture and for everything to set properly. I once cut into a batch after 90 minutes, and it was like trying to slice a pile of loose gravel.
Store them in the fridge. These bars are shelf-stable for about a day, but they hold up much better in the refrigerator. The cold keeps them firm and chewy. If you leave them out on the counter, they tend to soften and get a bit greasy, especially in warm weather.
Use room temperature ingredients. If your peanut butter has been sitting in the fridge, let it come to room temperature before you start. Cold peanut butter takes longer to melt, which increases the risk of burning the honey. Same goes for the honey—if it’s crystallized, warm it gently before measuring.
Variations & Adaptations
One of the best things about this easy no-bake chocolate chip granola bars recipe is how flexible it is. I’ve played around with different combinations, and honestly, most of them turned out great. Here are some variations to try:
- Nut-Free Version: Swap the peanut butter for sunflower seed butter or tahini. Sunflower seed butter works beautifully, though the bars will have a slightly greener tint (don’t worry, that’s normal). Tahini gives a more savory, sesame-forward flavor that pairs surprisingly well with chocolate.
- Vegan Option: Use maple syrup instead of honey, and make sure your chocolate chips are dairy-free. Many dark chocolate chips are naturally vegan, but check the label to be safe. I’ve used this version for friends with dietary restrictions, and no one noticed the difference.
- Fruit and Nut Combo: Replace the chocolate chips with equal parts dried cranberries, chopped dried apricots, and slivered almonds. This version is less sweet but has a lovely tartness and crunch. I made this for a hiking trip once, and it was perfect portable energy.
- Coconut Lover’s: Add 1/4 cup unsweetened shredded coconut to the oat mixture before adding the wet ingredients. Toast the coconut first for extra flavor—just watch it closely because it burns fast.
- Spiced Version: Add 1/2 teaspoon cinnamon and a pinch of nutmeg to the oat mixture. This gives the bars a cozy, almost snickerdoodle-like warmth. Great for fall or winter mornings.
- Crunchy Texture: Swap 1/2 cup of the oats for crispy rice cereal. This lightens the texture and adds a satisfying crunch. My nephew calls these “breakfast candy bars” and I honestly can’t argue with that.
I once tried a version with white chocolate chips and dried cherries, and it tasted like a fancy bakery item. The white chocolate is sweeter, so I reduced the honey slightly to balance it out. Experiment and see what you like—that’s half the fun.
Serving & Storage Suggestions
These easy no-bake chocolate chip granola bars are incredibly versatile when it comes to serving. I eat them straight from the fridge as a quick breakfast on busy mornings, but they work for so much more than that.
Serving Temperature: I prefer them cold and firm straight from the fridge. The texture is at its best that way—chewy but with a clean bite. If you like a softer bar, let them sit at room temperature for about 10 minutes before eating. For a treat, I sometimes warm one in the microwave for about 10 seconds, which softens the chocolate chips into little melty pockets. Dangerous territory, honestly.
Pairings: These bars pair beautifully with a hot cup of coffee or a glass of cold milk. For a more substantial breakfast, crumble one over a bowl of Greek yogurt with some fresh berries. I’ve also packed them in lunchboxes for years—they hold up well and don’t make a mess.
Storage Instructions: Store the bars in an airtight container in the refrigerator for up to 2 weeks. Layer them between sheets of parchment paper so they don’t stick together. If you’re stacking them, make sure they’re fully chilled first. For longer storage, you can freeze them for up to 3 months. Wrap each bar individually in plastic wrap, then place them in a freezer bag. They thaw in about 15 minutes at room temperature, so they’re great for grabbing on your way out the door.
Flavor Development: Here is something interesting—these bars actually taste better on day two or three. The flavors meld together as they sit, and the texture evens out. So don’t worry if they seem a bit loose right after you make them. Give them time in the fridge, and they’ll come together beautifully.
Nutritional Information & Benefits
I’m not a nutritionist, but I’ve done my homework on this recipe because I eat these bars so often. Here is a rough estimate of what you are getting per bar (based on 12 servings):
- Calories: Approximately 280-300
- Protein: 8-9 grams
- Fiber: 4-5 grams
- Healthy Fats: 12-14 grams (from the peanut butter and oats)
- Sugar: 16-18 grams (mostly from honey and chocolate chips)
The oats provide complex carbohydrates for sustained energy, while the peanut butter adds protein and healthy monounsaturated fats that keep you full. The flaxseed meal, if you add it, contributes omega-3 fatty acids and extra fiber. These bars are naturally dairy-free if you use dairy-free chocolate chips, and they can be made gluten-free by using certified gluten-free oats.
One thing I appreciate about this recipe is that it uses whole food ingredients without any preservatives or artificial additives. You control exactly what goes into them. Compared to store-bought granola bars, which often contain processed sugars and stabilizers, these feel like a genuinely better choice for everyday snacking. They give me steady energy without the crash I sometimes get from packaged snacks.
Conclusion
This easy no-bake chocolate chip granola bars recipe has become a staple in my kitchen, and I have a feeling it will become one in yours too. It’s the kind of recipe that solves real problems—what to eat for breakfast when you’re running late, what to pack for a snack that won’t get crushed in a bag, what to make when you want something homemade but don’t have the energy to turn on the oven. Seven ingredients, ten minutes of work, and you have a week’s worth of satisfying snacks ready to go.
I love that this recipe is a starting point, not a final destination. Add what you like, leave out what you don’t, make it your own. That’s the beauty of simple cooking—it leaves room for your personality to shine through. Whether you stick with the classic chocolate chip version or go wild with dried fruit and spices, I genuinely hope these bars bring a little more ease to your mornings.
Have you tried making these? I would love to hear how they turned out for you. Drop a comment below and let me know what variations you experimented with, or tag me in your photos if you share them online. Happy snacking, friends!
Frequently Asked Questions
Can I use quick oats instead of rolled oats?
I wouldn’t recommend it. Quick oats are more finely processed and absorb moisture differently, which can make your bars turn out dense and gluey. Rolled oats give the right chewy texture that makes these bars work.
Why are my bars falling apart?
This usually happens for one of two reasons: either you didn’t press the mixture firmly enough into the pan, or you didn’t let them chill long enough. Make sure you compact the mixture really well and refrigerate for at least 2 hours, preferably longer.
Can I use almond butter instead of peanut butter?
Absolutely. Almond butter works great, though it has a slightly different consistency. You might need to add an extra tablespoon of honey since almond butter is less sweet than peanut butter. Cashew butter also works beautifully here.
How long do these bars last at room temperature?
They are fine at room temperature for about a day, but they really do best in the fridge. In warm weather, the chocolate can melt and the bars can get soft. I always store mine in the refrigerator for the best texture.
Can I double this recipe?
Yes, easily. Just double all the ingredients and use a 9×13 pan instead of an 8×8. The chilling time might need to increase slightly since the block will be thicker. I’ve made a double batch for parties and it works perfectly.
Pin This Recipe!
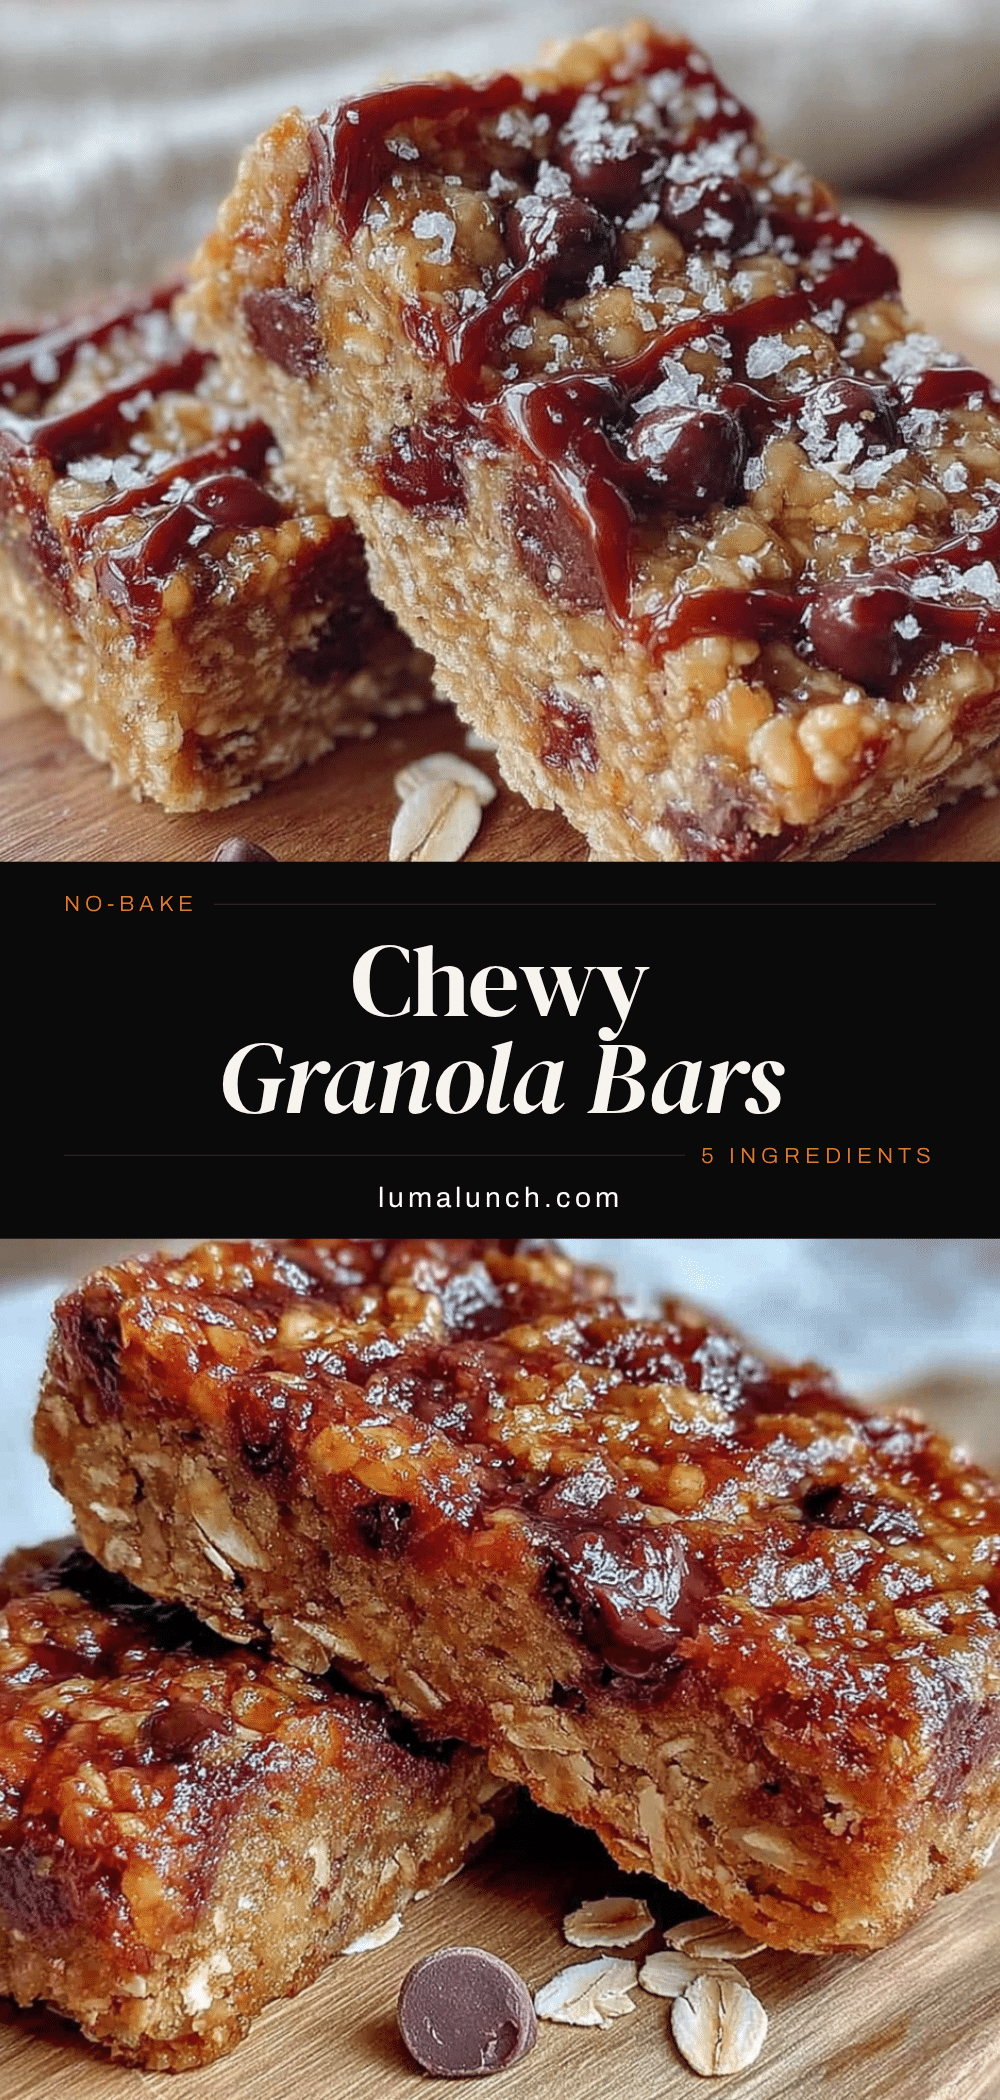
Easy No-Bake Chocolate Chip Granola Bars (7-Ingredient Recipe)
These easy no-bake chocolate chip granola bars are chewy, packed with chocolate, and made with just seven simple ingredients. They come together in about ten minutes of active work and require no oven, making them the perfect healthy snack or breakfast option for busy mornings.
- Prep Time: 10 minutes
- Cook Time: 10 minutes
- Total Time: 2 hours 20 minutes (includes chilling time)
- Yield: 12 bars 1x
- Category: Snack
- Cuisine: American
Ingredients
- 2 cups old-fashioned rolled oats
- 1 cup creamy peanut butter
- 1/2 cup honey
- 1/2 cup semi-sweet chocolate chips
- 1 teaspoon vanilla extract
- 1/4 teaspoon salt
- Optional: 1/4 cup flaxseed meal or chia seeds
Instructions
- Line your baking pan. Take a piece of parchment paper and press it into your 8×8 pan, leaving some overhang on two opposite sides. This creates little handles that let you lift the whole block of bars out later. Spray the paper lightly with cooking spray if you’re feeling extra cautious about sticking.
- Toast the oats (optional but recommended). Spread your 2 cups of rolled oats on a baking sheet and toast them in a 350°F oven for about 8-10 minutes, stirring halfway through. They should smell nutty and turn slightly golden. This step adds a depth of flavor that makes the bars taste almost baked, even though they aren’t. If you’re in a hurry, skip it—the bars will still be good, just not quite as complex.
- Melt the wet ingredients. In a medium saucepan over low heat, combine 1 cup peanut butter and 1/2 cup honey. Stir constantly with your rubber spatula until everything is smooth and fully combined. This usually takes about 2-3 minutes. Don’t walk away during this step—peanut butter can go from melted to scorched really fast.
- Add the vanilla and salt. Remove the saucepan from the heat and stir in 1 teaspoon vanilla extract and 1/4 teaspoon salt. The mixture will look glossy and smell amazing at this point.
- Combine everything. Pour the warm peanut butter mixture over your oats in a large bowl. Fold everything together with your spatula until every single oat is coated. This takes a bit of arm work, but it’s worth it. If the mixture looks too dry, you can add a tablespoon more honey. If it looks too wet, add a tablespoon more oats. Adjust as needed based on how it feels.
- Add the chocolate chips. Stir in 1/4 cup of the chocolate chips, reserving the rest for the top. Fold gently so you don’t smash the chips, but make sure they’re distributed evenly.
- Press into the pan. Transfer the mixture to your lined pan. Here is the trick: wet your spatula slightly with water, then use it to press the mixture down firmly and evenly. The moisture keeps the mixture from sticking to the spatula. Press hard—you want these bars compact so they hold together. I usually spend a good minute really packing it down into the corners.
- Add the top chocolate chips. Sprinkle the remaining 1/4 cup chocolate chips over the top and press them in gently with your fingers or the spatula.
- Chill. Place the pan in the refrigerator for at least 2 hours, but overnight is better if you have the time. The longer they chill, the cleaner your cuts will be.
- Cut and serve. Once fully chilled, lift the block out using the parchment handles. Place it on a cutting board and use a sharp knife to cut into 12 even bars. Wipe the knife clean between cuts for the neatest edges.
Notes
Don’t overheat the peanut butter mixture—low and slow is key. Press the mixture firmly into the pan for bars that hold together. Chill for at least 2 hours, preferably overnight, for clean cuts. Store in the refrigerator for up to 2 weeks or freeze for up to 3 months. The bars taste even better on day two or three as flavors meld.
Nutrition
- Serving Size: 1 bar
- Calories: 290
- Sugar: 17
- Sodium: 150
- Fat: 13
- Saturated Fat: 3
- Carbohydrates: 36
- Fiber: 4.5
- Protein: 8.5
Keywords: no-bake granola bars, chocolate chip granola bars, healthy snack, easy granola bars, 7-ingredient recipe, no-bake snack, homemade granola bars


