Love this? Save it for later!
Share the inspiration with your friends
This was supposed to be a massive batch of enchiladas. I had the tortillas, the sauce, the whole plan mapped out in my head. But somewhere between the grocery store and my kitchen counter on a sticky Sunday afternoon in late August, I grabbed a can of black beans instead of refried. I didn’t even notice until the turkey was browned, the onions were soft, and I was staring at a bowl of whole beans that had no business being rolled into an enchilada. The kids were already asking for snacks, the school supply lists were staring at me from the counter, and I was this close to just ordering pizza. Honestly, I almost did.
But I had already committed to the idea of filling my freezer before the chaos of September hit. You know that feeling when you just need something ready to go? I dumped the black beans into the turkey, added some cumin because it felt right, and started rolling everything into burritos instead. I mean, it was a total panic move. I didn’t even have sour cream or cilantro on hand. What came out of that frantic, slightly sweaty afternoon was nothing like the enchiladas I planned—and way better. My neighbor Karen (she’s the one who always knocks right at dinner time) happened to stop by and grabbed one hot off the skillet. She asked for the recipe before she even finished chewing.
These back-to-school freezer-friendly turkey and black bean burritos are now the thing I make every August without fail. They save my sanity on soccer nights, homework marathons, and those days when the bus is late and everyone is hungry and cranky. There is something deeply satisfying about pulling a foil-wrapped burrito from the freezer at 5:30 PM and having dinner on the table by 5:40. No stress. No drive-thru. Just warm, cheesy, protein-packed goodness that my whole family actually agrees on. If you have ever stared into your freezer hoping a meal would magically appear, let me tell you—this is the recipe you need.
Why You Will Love This Recipe
These are not just any burritos. I have tested this recipe at least a dozen times over two school years, adjusting the spice level, the cheese ratio, and the reheating method until everything was just right. Here is why they have become a non-negotiable part of our back-to-school routine:
- Freezer-Friendly: You can make a big batch on the weekend and have ready-to-go lunches or dinners for weeks. They freeze beautifully for up to three months.
- Quick & Easy: From start to finish, the active prep time is about 30 minutes. The oven does the rest of the work for the filling, and assembly is a breeze.
- Simple Ingredients: You probably have most of these in your pantry right now. No fancy shopping trips required—just ground turkey, canned beans, cheese, and tortillas.
- Perfect for Back-to-School: These are a lifesaver for busy weeknights, packed lunches, or even a quick breakfast on the go. They are portable, reheatable, and kid-approved.
- Crowd-Pleaser: I have served these to picky eaters, hungry teenagers, and adults who claim they don’t like turkey. Everyone goes back for seconds. The flavor is that good.
- Customizable: You can adjust the spice level, swap in different proteins, or load them up with extra veggies. This recipe is a flexible base that works with what you have.
What makes these burritos different from every other freezer burrito recipe out there is the way the filling comes together. I brown the turkey with onions and garlic first, then simmer everything with a touch of tomato paste and a blend of cumin, smoked paprika, and chili powder. The black beans get mashed just slightly before going in, which creates a creamier texture without needing any heavy dairy. The result is a filling that stays moist after freezing and reheating, never dry or crumbly. It is comfort food you can feel good about—lean protein, fiber-rich beans, and all the cheesy goodness your heart desires.
What Ingredients You Will Need
This recipe uses simple, wholesome ingredients to deliver bold flavor and satisfying texture without the fuss. Most of these are pantry staples or easy to find at any grocery store. Here is everything you need:
- For the Filling:
- 1 tablespoon olive oil
- 1 medium yellow onion, diced (about 1 cup)
- 3 cloves garlic, minced
- 1 pound lean ground turkey (93/7 works great)
- 1 teaspoon ground cumin
- 1 teaspoon smoked paprika
- 1/2 teaspoon chili powder (adjust to taste)
- 1/2 teaspoon salt
- 1/4 teaspoon black pepper
- 2 tablespoons tomato paste
- 1 can (15 ounces) black beans, drained and rinsed (I like Bush’s Best for consistent texture)
- 1/2 cup low-sodium chicken broth or water
- 1 cup shredded cheddar or Monterey Jack cheese (or a blend)
- 1/4 cup chopped fresh cilantro (optional, but recommended)
- For Assembly:
- 6 to 8 large flour tortillas (10-inch size works best; burrito-sized)
- 1/2 cup sour cream or Greek yogurt (optional, for serving)
- Salsa or hot sauce (optional, for serving)
Ingredient Tips: I recommend using 93/7 ground turkey because it has enough fat to stay moist without making the filling greasy. If you use extra-lean turkey (99/1), add an extra tablespoon of olive oil to prevent dryness. For the black beans, look for cans labeled “no salt added” so you can control the sodium level. If you prefer a spicier filling, use a full teaspoon of chili powder or add a pinch of cayenne pepper. The smoked paprika is non-negotiable in my kitchen—it adds a subtle smokiness that makes the turkey taste almost like it was cooked on a grill.
Substitution Guidance: You can swap the ground turkey for ground chicken, lean ground beef, or even crumbled tofu for a vegetarian version. Use dairy-free cheese and vegan sour cream if needed. For a gluten-free option, choose large gluten-free tortillas or use lettuce wraps for a low-carb version. The black beans can be replaced with pinto beans or kidney beans if that is what you have on hand. Just make sure to mash them slightly before adding to the skillet for that creamy texture.
Equipment Needed
You do not need any fancy tools for this recipe, which is part of the beauty. Here is what you will need:
- Large skillet or sauté pan (12-inch is ideal for even browning)
- Wooden spoon or spatula
- Cutting board and sharp knife
- Can opener
- Measuring spoons
- Large bowl for mixing filling
- Baking sheet (for freezing burritos before wrapping)
- Parchment paper or wax paper
- Aluminum foil or freezer-safe bags for storage
If you do not have a large skillet, a Dutch oven works perfectly. I have also used a deep non-stick pan in a pinch. For the freezing step, a rimmed baking sheet is helpful to keep the burritos flat while they freeze, but you can also place them directly on a plate or tray that fits in your freezer. I have made these burritos in a tiny apartment kitchen with just one pan and a butter knife to spread the filling. It works. Do not let the lack of fancy equipment stop you.
One tip: invest in good quality aluminum foil if you plan to freeze these for more than a month. The cheap stuff tears easily and can let freezer burn sneak in. I use Reynolds Wrap Heavy Duty Foil and have never had an issue.
Preparation Method
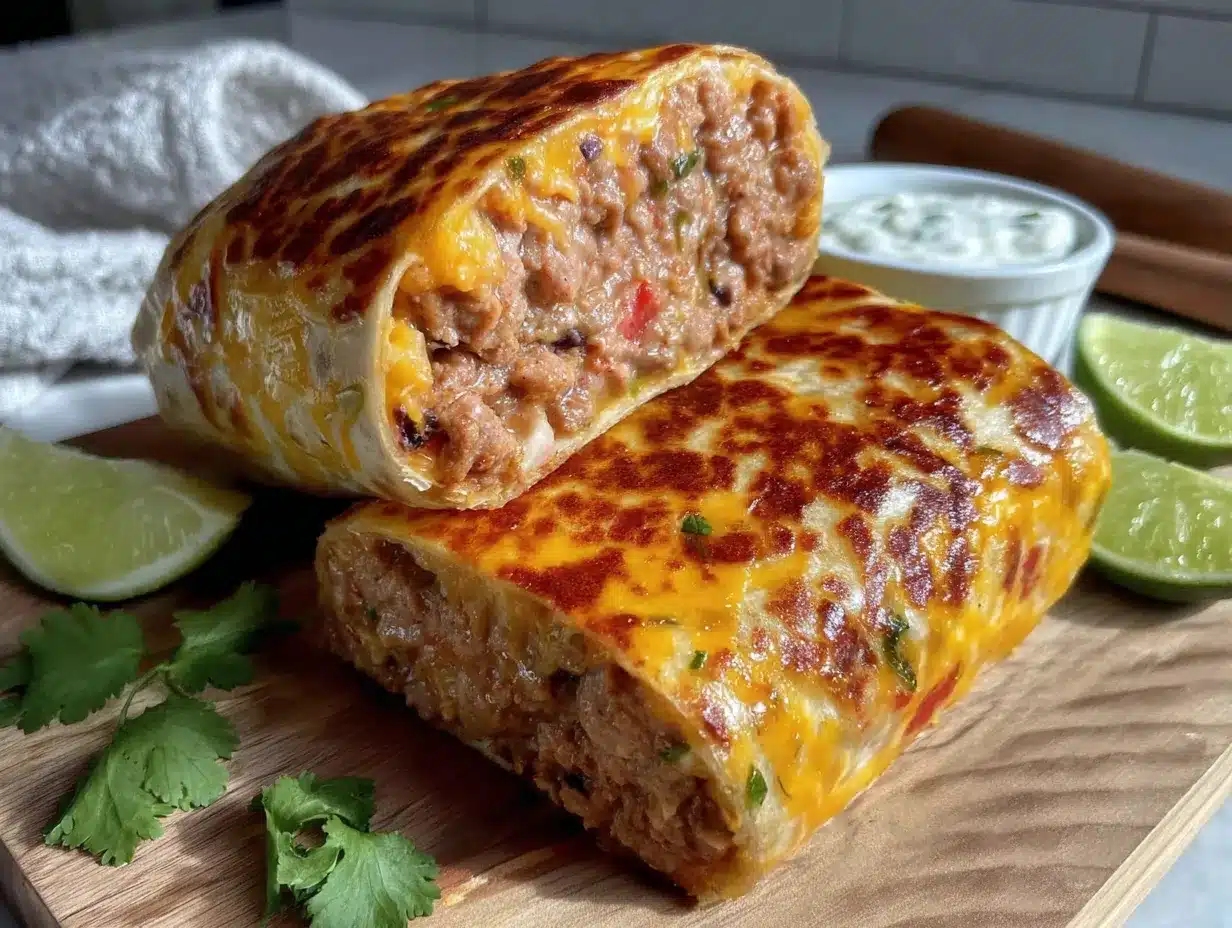
Follow these steps carefully, and you will have a freezer full of delicious burritos in no time. I have added time estimates and sensory cues so you know exactly what to look for at each stage.
- Cook the Aromatics (5 minutes): Heat the olive oil in a large skillet over medium heat. Add the diced onion and cook for 3 to 4 minutes, stirring occasionally, until it becomes translucent and fragrant. You should smell the sweetness of the onion starting to develop. Add the minced garlic and cook for another 30 seconds, just until you can smell it. Do not let the garlic brown or it will turn bitter.
- Brown the Turkey (6 to 8 minutes): Add the ground turkey to the skillet. Break it apart with your spoon and let it cook undisturbed for about 2 minutes to get a nice sear. Then start stirring and breaking it into smaller pieces. Cook until the turkey is no longer pink, about 5 to 6 minutes total. The meat should look golden brown in spots, not gray. If there is excess liquid in the pan, drain it off before moving to the next step.
- Season the Meat (2 minutes): Sprinkle the cumin, smoked paprika, chili powder, salt, and black pepper over the cooked turkey. Stir well to coat every piece. Let it cook for about 1 minute to toast the spices—this wakes up their flavor. You will smell the cumin and paprika becoming more intense. Add the tomato paste and stir it in completely, cooking for another minute. The paste will darken slightly and stick to the meat, which is exactly what you want.
- Add the Beans and Liquid (5 minutes): Reduce the heat to medium-low. Add the drained black beans to the skillet. Using the back of your spoon, gently mash about half of the beans right in the pan. This creates a creamier texture without needing to blend anything. Pour in the chicken broth or water and stir everything together. Let the mixture simmer for 3 to 4 minutes, stirring occasionally, until the liquid has mostly absorbed and the filling looks thick and cohesive. It should not be soupy or watery—just moist and bound together.
- Cool the Filling (10 minutes): Remove the skillet from the heat. Stir in the shredded cheese and chopped cilantro if using. The residual heat will melt the cheese into the filling. Transfer the mixture to a large bowl and let it cool for about 10 minutes. This step is important—if the filling is too hot when you assemble the burritos, the steam will make the tortillas soggy and they will not freeze as well.
- Assemble the Burritos (10 to 15 minutes): Lay a tortilla flat on your work surface. Spoon about 1/2 to 2/3 cup of the filling into the center of the tortilla, spreading it into a log shape. Fold the sides of the tortilla inward over the filling, then fold the bottom edge up and over the filling, tucking it tightly. Roll the burrito away from you, keeping the sides tucked in, until it is sealed. The tortilla should be snug but not stretched to the point of tearing. Repeat with the remaining tortillas and filling.
- Freeze the Burritos (1 to 2 hours): Place the assembled burritos on a baking sheet lined with parchment paper, making sure they are not touching each other. Put the sheet in the freezer for at least 1 hour, or until the burritos are firm to the touch. This flash-freezing step prevents them from sticking together when you wrap them for long-term storage.
- Wrap and Store (10 minutes): Once the burritos are frozen solid, wrap each one tightly in aluminum foil or place them in a freezer-safe zip-top bag. If using bags, squeeze out as much air as possible before sealing. Label each burrito with the date and contents. They will keep in the freezer for up to 3 months.
Cooking Tips & Techniques
I have made a lot of mistakes with freezer burritos over the years, so you do not have to. Here is what I have learned the hard way:
Do not overfill the tortillas. I know it is tempting to pack in as much filling as possible, but overstuffed burritos are impossible to roll tightly and tend to burst open during reheating. Stick to about 2/3 cup per large tortilla. If you have extra filling, just make another burrito or two. Trust me on this—I once had a burrito explode in the microwave and spent 20 minutes cleaning cheese off the ceiling.
Let the filling cool completely before assembling. This was my biggest lesson. Hot filling creates steam inside the tortilla, which makes it soggy and prone to tearing. It also leads to uneven freezing and weird cold spots when you reheat. I usually make the filling, let it sit for 15 minutes, and then start rolling. The cheese will still be melty enough to hold everything together.
Toast the tortillas briefly before rolling. If your tortillas are cold or stiff, warm them in a dry skillet for about 15 seconds per side. This makes them more pliable and less likely to crack. I do this even with fresh tortillas because it makes the rolling process so much smoother.
Use the right reheating method. For the best texture, thaw a frozen burrito in the refrigerator overnight, then reheat it in a skillet over medium heat for 3 to 4 minutes per side until crispy and hot through. If you are in a hurry, unwrap the burrito, place it on a microwave-safe plate, and microwave for 2 to 3 minutes, flipping halfway through. The microwave is faster but the skillet gives you that golden, crunchy exterior that makes these burritos truly satisfying.
Double the batch. If you are already taking the time to make these, make at least 12 burritos. The recipe scales up beautifully and the extra effort is minimal. I usually make 16 to 20 burritos in one go and we eat them for a month. It is the ultimate time-saving strategy for busy school nights.
Variations & Adaptations
One of the best things about this recipe is how flexible it is. Here are some variations I have tried and loved:
- Vegetarian Version: Skip the turkey and add an extra can of black beans plus a cup of cooked brown rice or quinoa. You can also add sautéed bell peppers and zucchini for more veggies. The texture is heartier than you would expect and it freezes just as well.
- Spicy Southwest Style: Add 1 diced jalapeño (seeds removed if you want less heat) along with the onion. Use pepper jack cheese instead of cheddar and add a tablespoon of chopped chipotle peppers in adobo sauce to the filling. The smoky heat is incredible.
- Breakfast Burrito Twist: Make the filling without cheese, then add scrambled eggs and cooked breakfast potatoes when you assemble the burritos. These are perfect for busy school mornings—just grab, reheat, and go.
- Low-Carb Option: Use large lettuce leaves or low-carb tortillas instead of flour tortillas. The filling itself is already low in carbs thanks to the turkey and beans. Just be aware that lettuce-wrapped burritos do not freeze well, so make these fresh.
- Cheesy Rice Addition: Add 1 cup of cooked Spanish rice or cilantro lime rice to the filling for extra bulk and flavor. This is great if you are feeding hungry teenagers who need more carbs. I do this when I know we have a long evening of activities ahead.
Serving & Storage Suggestions
These burritos are incredibly versatile when it comes to serving. Here is how I like to do it:
Serving: Serve the burritos hot, straight from the skillet or microwave. I like to top them with a dollop of sour cream or Greek yogurt, a spoonful of salsa, and a sprinkle of fresh cilantro. They are also amazing with a side of Mexican rice, a simple green salad, or tortilla chips and guacamole. For a quick lunch, I just grab one from the freezer, reheat it, and eat it at my desk. No mess, no fuss.
Storage: As mentioned, these burritos freeze beautifully for up to 3 months. Store them in a single layer in freezer-safe bags or wrapped tightly in aluminum foil. If you stack them, place a piece of parchment paper between each burrito to prevent sticking. I keep a stash in the freezer at all times during the school year—they are my emergency meal for those days when nothing goes according to plan.
Reheating: For best results, thaw the burrito in the refrigerator overnight. Then reheat in a skillet over medium heat for 3 to 4 minutes per side until golden and heated through. If you are short on time, microwave on high for 2 to 3 minutes, flipping halfway. The microwave will make the tortilla softer, while the skillet gives it a crispy exterior. Both methods work, so choose based on your schedule and preference.
Flavor Development: Honestly, these burritos taste even better after a week or two in the freezer. The flavors have time to meld together, and the filling becomes more cohesive. I have eaten them fresh and frozen, and I actually prefer the frozen ones. The texture is somehow creamier and the spices are more pronounced. It is one of those rare recipes that improves with time.
Nutritional Information & Benefits
Here is the approximate nutritional breakdown for one burrito (based on 8 burritos, using lean ground turkey, cheddar cheese, and standard flour tortillas):
- Calories: 380-420
- Protein: 28-32 grams
- Carbohydrates: 35-40 grams
- Fiber: 6-8 grams
- Fat: 14-18 grams
- Saturated Fat: 5-7 grams
- Sodium: 600-700 mg
Health Benefits: These burritos are packed with lean protein from the turkey, which helps keep you full and supports muscle health. The black beans add a hefty dose of fiber and plant-based protein, along with folate, iron, and magnesium. The combination of protein and fiber makes this a balanced meal that stabilizes blood sugar and provides sustained energy—perfect for busy school days. If you use whole wheat tortillas, you will get even more fiber and nutrients.
Dietary Considerations: This recipe is naturally dairy-free if you omit the cheese and sour cream. It can be made gluten-free by using certified gluten-free tortillas. For a lower-sodium version, use no-salt-added beans and reduce the added salt. The recipe is also nut-free and egg-free, making it suitable for many common allergies. Always check your ingredient labels to be sure.
Conclusion
These back-to-school freezer-friendly turkey and black bean burritos have become a staple in my kitchen for a reason. They are the result of a happy accident that turned into a tried-and-true recipe I rely on week after week. Whether you are a busy parent, a student juggling classes, or just someone who loves having homemade food ready to go, these burritos will save your sanity. They are simple to make, endlessly customizable, and absolutely delicious.
I encourage you to make a big batch this weekend. Customize them to your family’s taste—add extra spice, load up on veggies, or swap in your favorite cheese. Then stash them in the freezer and thank yourself later when dinner is ready in minutes. Trust me, future you will be so grateful.
Have you tried these burritos? I would love to hear how they turned out for you! Drop a comment below with your favorite variation or any tips you discovered along the way. And if you found this recipe helpful, please share it with a friend who needs a little freezer-friendly magic in their life. Happy cooking!
Frequently Asked Questions
Can I use ground beef instead of turkey?
Absolutely. Ground beef, ground chicken, or even ground pork all work well. Just drain any excess fat after browning to keep the filling from becoming greasy. Lean ground beef (85/15 or 90/10) is a great choice.
How long do these burritos last in the freezer?
Properly wrapped and stored, these burritos will stay fresh for up to 3 months. After that, they are still safe to eat but the texture and flavor may start to decline. I recommend labeling them with the date so you know exactly when you made them.
Can I make these burritos without cheese?
Yes, you can omit the cheese entirely or use a dairy-free alternative. The filling will still be creamy thanks to the mashed black beans. If you skip the cheese, consider adding a tablespoon of nutritional yeast for a cheesy flavor without the dairy.
What is the best way to reheat a frozen burrito?
For the best texture, thaw the burrito in the refrigerator overnight, then reheat in a skillet over medium heat for 3 to 4 minutes per side. If you are in a hurry, microwave on high for 2 to 3 minutes, flipping halfway. The skillet method gives you a crispy exterior, while the microwave is faster and softer.
Can I use smaller tortillas for these burritos?
You can use smaller tortillas, but you will need to adjust the amount of filling per burrito. For 8-inch tortillas, use about 1/3 to 1/2 cup of filling. For street taco-sized tortillas, use about 2 tablespoons per tortilla. Just keep in mind that smaller tortillas are harder to roll tightly and may not hold as much filling.
Pin This Recipe!
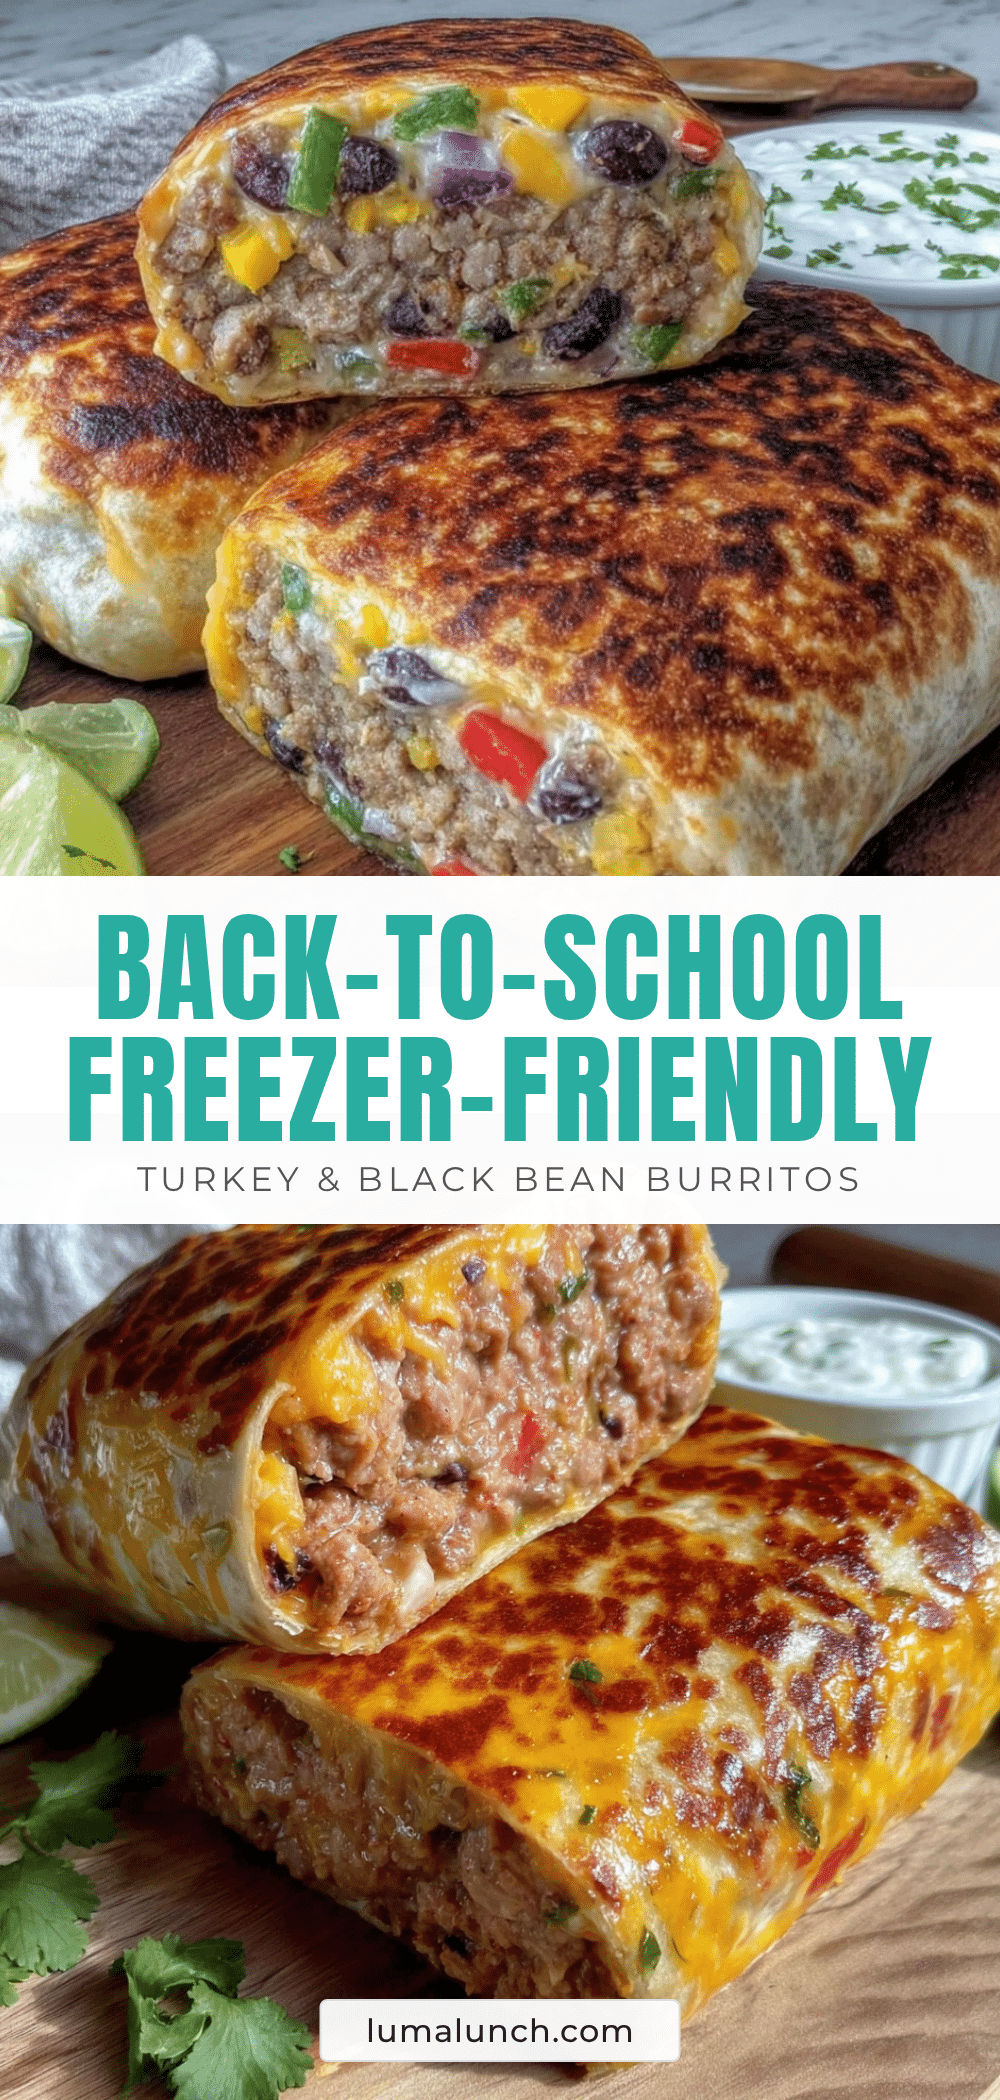
Easy Freezer Turkey Black Bean Burritos Back to School
These back-to-school freezer-friendly turkey and black bean burritos are a lifesaver for busy weeknights. Made with lean ground turkey, black beans, and cheese, they freeze beautifully for up to three months and reheat in minutes.
- Prep Time: 30 minutes
- Cook Time: 20 minutes
- Total Time: 50 minutes
- Yield: 8 servings 1x
- Category: Main Course
- Cuisine: Mexican
Ingredients
- 1 tablespoon olive oil
- 1 medium yellow onion, diced (about 1 cup)
- 3 cloves garlic, minced
- 1 pound lean ground turkey (93/7 works great)
- 1 teaspoon ground cumin
- 1 teaspoon smoked paprika
- 1/2 teaspoon chili powder (adjust to taste)
- 1/2 teaspoon salt
- 1/4 teaspoon black pepper
- 2 tablespoons tomato paste
- 1 can (15 ounces) black beans, drained and rinsed
- 1/2 cup low-sodium chicken broth or water
- 1 cup shredded cheddar or Monterey Jack cheese (or a blend)
- 1/4 cup chopped fresh cilantro (optional, but recommended)
- 6 to 8 large flour tortillas (10-inch size works best; burrito-sized)
- 1/2 cup sour cream or Greek yogurt (optional, for serving)
- Salsa or hot sauce (optional, for serving)
Instructions
- Cook the Aromatics (5 minutes): Heat the olive oil in a large skillet over medium heat. Add the diced onion and cook for 3 to 4 minutes, stirring occasionally, until it becomes translucent and fragrant. Add the minced garlic and cook for another 30 seconds, just until you can smell it. Do not let the garlic brown or it will turn bitter.
- Brown the Turkey (6 to 8 minutes): Add the ground turkey to the skillet. Break it apart with your spoon and let it cook undisturbed for about 2 minutes to get a nice sear. Then start stirring and breaking it into smaller pieces. Cook until the turkey is no longer pink, about 5 to 6 minutes total. The meat should look golden brown in spots, not gray. If there is excess liquid in the pan, drain it off before moving to the next step.
- Season the Meat (2 minutes): Sprinkle the cumin, smoked paprika, chili powder, salt, and black pepper over the cooked turkey. Stir well to coat every piece. Let it cook for about 1 minute to toast the spices—this wakes up their flavor. Add the tomato paste and stir it in completely, cooking for another minute. The paste will darken slightly and stick to the meat, which is exactly what you want.
- Add the Beans and Liquid (5 minutes): Reduce the heat to medium-low. Add the drained black beans to the skillet. Using the back of your spoon, gently mash about half of the beans right in the pan. This creates a creamier texture without needing to blend anything. Pour in the chicken broth or water and stir everything together. Let the mixture simmer for 3 to 4 minutes, stirring occasionally, until the liquid has mostly absorbed and the filling looks thick and cohesive. It should not be soupy or …
- Cool the Filling (10 minutes): Remove the skillet from the heat. Stir in the shredded cheese and chopped cilantro if using. The residual heat will melt the cheese into the filling. Transfer the mixture to a large bowl and let it cool for about 10 minutes. This step is important—if the filling is too hot when you assemble the burritos, the steam will make the tortillas soggy and they will not freeze as well.
- Assemble the Burritos (10 to 15 minutes): Lay a tortilla flat on your work surface. Spoon about 1/2 to 2/3 cup of the filling into the center of the tortilla, spreading it into a log shape. Fold the sides of the tortilla inward over the filling, then fold the bottom edge up and over the filling, tucking it tightly. Roll the burrito away from you, keeping the sides tucked in, until it is sealed. The tortilla should be snug but not stretched to the point of tearing. Repeat with the remaining torti…
- Freeze the Burritos (1 to 2 hours): Place the assembled burritos on a baking sheet lined with parchment paper, making sure they are not touching each other. Put the sheet in the freezer for at least 1 hour, or until the burritos are firm to the touch. This flash-freezing step prevents them from sticking together when you wrap them for long-term storage.
- Wrap and Store (10 minutes): Once the burritos are frozen solid, wrap each one tightly in aluminum foil or place them in a freezer-safe zip-top bag. If using bags, squeeze out as much air as possible before sealing. Label each burrito with the date and contents. They will keep in the freezer for up to 3 months.
Notes
Do not overfill the tortillas; stick to about 2/3 cup per large tortilla. Let the filling cool completely before assembling to prevent soggy tortillas. Toast the tortillas briefly before rolling if they are cold or stiff. For best reheating, thaw in the refrigerator overnight and reheat in a skillet for a crispy exterior. These burritos taste even better after a week or two in the freezer as flavors meld.
Nutrition
- Serving Size: 1 burrito
- Calories: 400
- Sugar: 3
- Sodium: 650
- Fat: 16
- Saturated Fat: 6
- Carbohydrates: 38
- Fiber: 7
- Protein: 30
Keywords: freezer burritos, turkey black bean burritos, back to school recipes, easy dinner, meal prep, freezer meals, healthy burritos