Love this? Save it for later!
Share the inspiration with your friends
My friend Jen asked why I couldn’t just shape the cheese ball like a football instead of rolling it in nuts. I started to explain why that wouldn’t work—then stopped. Honestly, I had no good reason. I’d been making the same tired cheese ball recipe for years, rolling it into a perfect little dome and covering it in chopped pecans because that’s what you’re supposed to do. Jen was hosting a Super Bowl party and wanted something that looked like actual food, not a fancy appetizer from a magazine. She wanted a football on her snack table.
I remember standing in my kitchen that Tuesday morning, staring at a block of cream cheese on the counter. The whole idea felt wrong to me. Cheese balls are round. That’s the rule, right? But I started shaping it anyway, pressing the sides into rough points, trying to make it look like something that belonged on a field instead of a cracker. I made a mess of my hands, got cream cheese under my nails, and honestly thought I was wasting good ingredients on a silly idea. But when I added those pretzel sticks for laces and stepped back, I actually laughed out loud. It looked ridiculous and perfect at the same time.
That cheese ball disappeared faster than anything else on the snack table that night. People kept walking by and grabbing a cracker, then another, then standing there eating it like they’d never seen food before. Jen texted me the next morning asking for the recipe. I had to admit I winged the whole thing. But that’s how this football-shaped cheese ball with pretzel laces was born—not from some grand plan, but from a friend asking the right question and me being brave enough to try something dumb. Maybe you’ve been there, too, making the same thing over and over until someone finally asks why you don’t just do it differently.
Why You’ll Love This Recipe
Look, I’ve made a lot of cheese balls in my day. I’ve tested them for parties, for holidays, for Tuesday night snacking when nobody’s watching. This one is different. It’s not just another appetizer you throw together because you have to bring something. This is the one people actually remember.
- Quick & Easy: Comes together in under 20 minutes of active prep time. You can make it the morning of your party and forget about it until guests arrive.
- Simple Ingredients: Cream cheese, cheddar, a few seasonings, and pretzels. That’s it. No weird grocery store trips or specialty items.
- Perfect for Game Day: It’s literally shaped like a football. Your snack table instantly becomes the star of the party without any effort.
- Crowd-Pleaser: I’ve watched kids pick around the pretzels to eat the cheese, and adults hover near the platter like they’re guarding it. Everyone loves it.
- Unbelievably Delicious: The combination of creamy cheese with that salty pretzel crunch is honestly addictive. I’m not exaggerating when I say I’ve eaten this for lunch.
What makes this recipe different from the hundreds of cheese ball recipes out there? It’s the texture. Most cheese balls are either too dense or too soft. This one hits that perfect balance where it spreads easily on a cracker but holds its shape like a champ. And those pretzel laces aren’t just for show—they add that salty crunch that makes every bite interesting. I’ve tested this with different cheese ratios, different seasoning blends, and different shaping techniques. This version is the one that works every single time.
This recipe isn’t just good—it’s the kind that makes you close your eyes after the first bite. It’s comfort food reimagined for game day, with the same soul-soothing satisfaction as your grandmother’s party dip but way more fun to look at. Perfect for impressing guests without stress, or turning a simple snack into something memorable.
What Ingredients You Will Need
This recipe uses simple, everyday ingredients to create something that looks like you spent way more effort than you actually did. Most of these are probably in your fridge and pantry right now.
- Cream Cheese (16 oz, softened): Two standard blocks. Make sure they’re at room temperature—cold cream cheese will leave you with lumpy mess and sore arms. I prefer Philadelphia brand for the smoothest texture, but any full-fat block cream cheese works well.
- Sharp Cheddar Cheese (2 cups, shredded): Shred it yourself from a block if you can. Pre-shredded cheese has anti-caking agents that make the texture grainy. I learned this the hard way after making a cheese ball that felt like sandpaper. Extra sharp cheddar gives the most flavor.
- Green Onions (3-4, thinly sliced): These add a mild onion bite and little flecks of green that make the cheese look homemade. Use both the white and green parts.
- Worcestershire Sauce (1 teaspoon): Just a little splash adds that savory depth that makes people ask what your secret ingredient is. Don’t skip it.
- Garlic Powder (½ teaspoon): Not garlic salt—we’re controlling the salt ourselves. Garlic powder gives that savory background note without being overpowering.
- Onion Powder (½ teaspoon): Pairs with the garlic powder to create that classic cheese ball flavor profile. Trust the combination.
- Salt (¼ teaspoon): Start with this and adjust at the end. Different cheddars have different salt levels.
- Black Pepper (¼ teaspoon, freshly ground): Fresh ground makes a difference here. The little specks of pepper add visual interest too.
- Pretzel Sticks (about 10-12): These become the laces on your football. Look for the thin, straight pretzel sticks, not the fat twists. Snyder’s of Hanover works perfectly.
- For Serving: Crackers, pretzel chips, celery sticks, or anything else you like to scoop cheese with.
Equipment Needed
Nothing fancy here—just basic kitchen tools you probably already own. If you don’t have a stand mixer, don’t worry. Your arm will get a workout, but it’ll work just fine.
- Mixing Bowl: A medium-sized bowl works best. Not too big that the cheese gets lost, not too small that you’re fighting for space.
- Hand Mixer or Stand Mixer: Makes the creaming process much faster. If you’re mixing by hand, make sure your cream cheese is really soft and be prepared to work those arm muscles.
- Rubber Spatula: For scraping down the bowl and getting every last bit of cheese. Don’t waste a single bite.
- Plastic Wrap: Essential for shaping and chilling. You’ll wrap the cheese ball tightly to help it hold its form.
- Baking Sheet or Plate: Something flat to place the wrapped cheese ball on while it chills in the fridge.
- Sharp Knife or Kitchen Shears: For trimming the pretzel sticks to the right length for laces.
Preparation Method
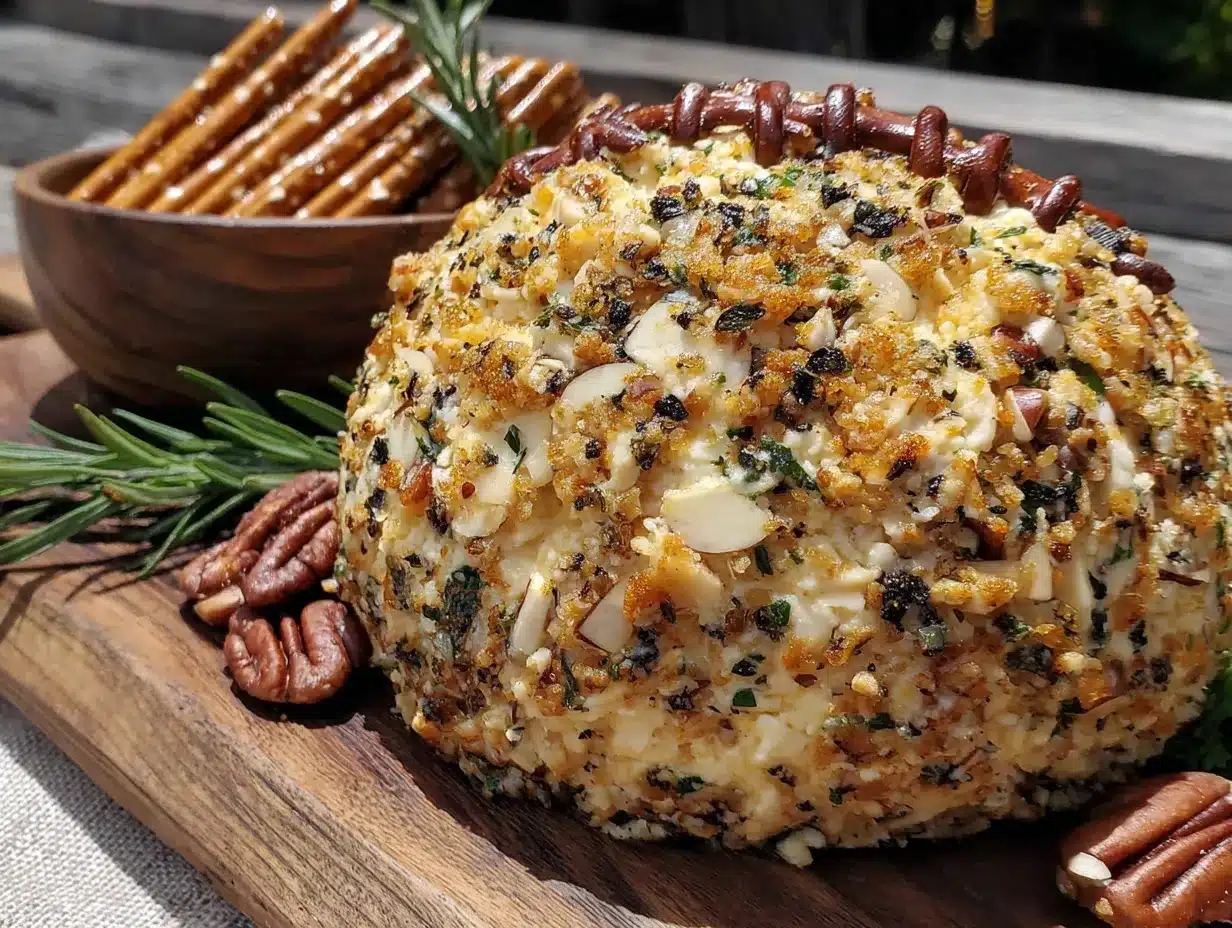
Let’s make this football-shaped cheese ball. I’ve broken it down into simple steps so you don’t miss anything. Take your time with the shaping—it’s the most important part for that game day look.
- Soften the cream cheese: Take your cream cheese out of the fridge at least 30 minutes before you start. If you’re in a hurry (I’ve been there), cut it into cubes and microwave it in 10-second bursts until it’s soft but not melted. You want it to give when you press it, not turn into a puddle.
- Mix the base: In your mixing bowl, beat the softened cream cheese with your hand mixer on medium speed until it’s smooth and fluffy—about 2 minutes. Scrape down the sides of the bowl with your spatula. You don’t want any lumpy pockets hiding in there.
- Add the flavor: Add the shredded cheddar, sliced green onions, Worcestershire sauce, garlic powder, onion powder, salt, and black pepper. Mix on low speed until everything is combined. Don’t overmix—you want some texture from the cheddar shreds. Scrape the bowl again to make sure everything’s incorporated.
- Taste and adjust: This is the fun part. Grab a cracker or just use your finger (no judgment here) and taste the cheese mixture. Need more salt? More garlic? Adjust now before it’s too late. I always add an extra pinch of pepper because I like the bite.
- Shape the football: Lay out a large piece of plastic wrap on your counter. Scoop the cheese mixture onto the center of the wrap. Use your hands (lightly oiled or damp so the cheese doesn’t stick) to form it into a rough football shape. Don’t worry about perfection yet—just get the basic oval with slightly pointed ends.
- Wrap and refine: Pull the plastic wrap up around the cheese ball and start shaping through the wrap. Use your palms to smooth the sides and your fingers to define the pointed ends. The plastic wrap lets you shape without getting cheese all over your hands. Twist the ends of the wrap to secure the shape.
- Chill thoroughly: Place the wrapped cheese ball on your baking sheet or plate and refrigerate for at least 2 hours. Overnight is even better. This step is non-negotiable—a warm cheese ball won’t hold its football shape and the pretzels will slide right off.
- Add the laces: When you’re ready to serve, unwrap the chilled cheese ball and place it on your serving platter. Take your pretzel sticks and arrange them on top of the cheese ball to look like football laces. I usually place 5-6 sticks parallel to each other down the center, then trim a few shorter pieces for the cross laces. Press them in gently so they stay put.
- Serve immediately or refrigerate: Once the pretzels are on, you can serve right away or keep it in the fridge for up to an hour before serving. Don’t leave it out longer than 2 hours at room temperature.
Cooking Tips & Techniques
I’ve made this cheese ball probably a dozen times now, and I’ve learned a few things the hard way. Let me save you the trouble.
Don’t skip the chilling time. I know it’s tempting to rush this step when you’re running late for a party. I tried it once—shaped the cheese ball, added the pretzels, and brought it straight to a friend’s house. By the time we sat down to eat, the cheese had softened so much that the pretzels had slid off and the football shape had turned into a sad oval blob. Learn from my mistake. Give it the full 2 hours minimum.
Wet your hands for smoother shaping. If you’re shaping the cheese ball without plastic wrap (or if the plastic wrap tears), dampen your hands with a little cold water. The moisture keeps the cheese from sticking to your skin and helps you get smoother edges. Just don’t use too much water or you’ll make the cheese soggy.
Use room temperature cream cheese for the smoothest texture. Cold cream cheese doesn’t mix well—you’ll end up with little white lumps throughout your cheese ball. If you forgot to take it out of the fridge, cut it into small cubes and let it sit on the counter for 15 minutes. That’s usually enough time to soften it up.
Shred your own cheese. I mentioned this before, but it’s worth repeating. Pre-shredded cheese has cellulose powder coating it to prevent clumping. That powder makes your cheese ball grainy and less creamy. Spend the extra 3 minutes shredding a block of cheddar—your taste buds will thank you.
Press the pretzels in at the last minute. If you add the pretzel laces too early, they’ll absorb moisture from the cheese and get soft. Nobody wants soggy pretzels. Add them right before serving for that satisfying crunch.
Variations & Adaptations
This recipe is super flexible. Here are some ways I’ve changed it up depending on what I have in the fridge or who’s coming over.
Spicy Football Cheese Ball: Add 1-2 tablespoons of finely chopped pickled jalapeños and a dash of cayenne pepper to the cheese mixture. The heat cuts through the richness beautifully. I made this version for a group of spice lovers and it was gone in 10 minutes flat.
Bacon Ranch Version: Mix in ⅓ cup of crumbled cooked bacon and 1 tablespoon of ranch seasoning mix. Omit the green onions and Worcestershire sauce. This version tastes like everything good about game day wrapped into one cheese ball. I’ve used turkey bacon before and it works fine—just make sure it’s really crispy so it doesn’t get chewy in the cheese.
Herb & Garlic Variation: Swap the green onions for 2 tablespoons of fresh chopped chives and add 1 teaspoon of dried dill. The fresh herbs make it feel lighter and more elegant. This version works great for spring parties or baby showers where you want something that looks a little fancier.
Dairy-Free Option: Use dairy-free cream cheese and shredded vegan cheddar. I’ve tested this with Kite Hill brand cream cheese and Violife cheddar shreds. The texture is slightly different—a bit softer—but the flavor is still great. Chill it for an extra 30 minutes to help it hold its shape better.
Nutty Coating: If you want to skip the pretzel laces entirely (or add them on top of a coating), roll the shaped cheese ball in chopped pecans, walnuts, or even crushed pretzel pieces before adding the laces. The coating adds texture and flavor. I’ve done a pecan coating with the bacon ranch version and it was incredible.
Serving & Storage Suggestions
This cheese ball is best served chilled, straight from the fridge. Let it sit at room temperature for about 10-15 minutes before serving so it softens slightly and becomes spreadable. Any longer than that and the shape starts to suffer.
What to serve with it: Classic buttery crackers are my go-to, but this cheese ball also works beautifully with pretzel chips, celery sticks, carrot sticks, bell pepper strips, or even apple slices for a sweet-savory combo. I’ve also spread it on bagel chips and mini toasts for a more substantial snack.
Storage: Leftover cheese ball (if you have any) can be wrapped tightly in plastic wrap and stored in the refrigerator for up to 5 days. The pretzels will get soft during storage, so if you’re saving leftovers, remove the pretzels first and add fresh ones when you serve it again.
Freezing: You can freeze the cheese ball (without pretzels) for up to 1 month. Wrap it tightly in plastic wrap, then in foil. Thaw it in the refrigerator overnight before serving. The texture might be slightly softer after freezing, but it’s still delicious. Add fresh pretzels after thawing.
Make ahead tip: This is the perfect make-ahead appetizer. Prepare the cheese ball up to 2 days in advance, keep it wrapped in the fridge, and add the pretzel laces right before serving. The flavors actually meld together and get better after a day in the fridge.
Transporting: If you’re bringing this to a party, keep the cheese ball wrapped in plastic wrap and transport the pretzels separately in a small bag. Assemble the laces when you arrive. This prevents the pretzels from breaking during travel and keeps them crunchy.
Nutritional Information & Benefits
Let’s be real—this is a cheese ball. It’s not health food. But it does have some redeeming qualities if you’re looking for them.
Per serving (based on 12 servings, about 2 tablespoons each): Approximately 180 calories, 16g fat, 4g protein, 4g carbohydrates. These are estimates and will vary based on your specific ingredients.
The good stuff: Cream cheese and cheddar provide calcium and protein. Green onions add a tiny bit of vitamin K and antioxidants. If you serve it with vegetables instead of crackers, you’re getting fiber and vitamins. I tell myself that counts for something.
Dietary considerations: This recipe is naturally low-carb and gluten-free if you skip the pretzels and serve it with vegetable dippers. For a gluten-free version, use gluten-free pretzel sticks (they exist and work perfectly). The recipe is vegetarian as written, but not vegan unless you use the dairy-free substitutions mentioned above.
Allergen note: Contains dairy and gluten (from pretzels). If you’re serving a crowd, I recommend labeling it clearly or having a separate gluten-free option available.
Look, I’m not here to pretend this is a health food. It’s a game day appetizer meant to be enjoyed in moderation. But knowing what’s in it helps you make informed choices about the rest of your meal. Balance, right?
Conclusion
This football-shaped cheese ball with pretzel laces has become my signature party dish, and I’m not even embarrassed to admit it. It’s the recipe that people ask for by name, the one that shows up at every Super Bowl party I attend, and the one that makes me look like I put in way more effort than I actually did.
What I love most about this recipe is how customizable it is. You can make it spicy, smoky, herby, or loaded with bacon. You can serve it with crackers, veggies, or pretzels. You can shape it into a football, a pumpkin for fall, or a heart for Valentine’s Day. The basic cheese ball recipe is so forgiving that you can really make it your own.
So give it a try. Let me know how it turns out for you. Did you add something unexpected? Did your guests fight over the last bite? I genuinely want to hear about it. Drop a comment below or tag me in your photos—I love seeing your creations. And if you’re looking for another easy game day appetizer, check out my crispy garlic chicken recipe for something completely different but equally crowd-pleasing.
Happy snacking, friends. Go make that cheese ball.
Frequently Asked Questions
Can I make this cheese ball ahead of time?
Absolutely. You can prepare the cheese ball up to 2 days in advance. Keep it wrapped tightly in plastic wrap in the refrigerator. Add the pretzel laces right before serving so they stay crunchy. The flavor actually improves after a day in the fridge as the seasonings meld together.
My cheese ball is too soft to shape. What did I do wrong?
Your cream cheese was probably too warm, or you added too much moisture from the green onions. Pop it back in the fridge for 30 minutes and try again. If it’s still too soft, you can mix in a little extra shredded cheddar to firm it up. The key is starting with properly softened cream cheese—soft but not melty.
Can I use low-fat cream cheese?
You can, but the texture will be different. Low-fat cream cheese has more water content, which makes the cheese ball softer and harder to shape. If you’re using low-fat, plan to chill it for an extra hour and expect a slightly looser texture. Full-fat cream cheese gives the best results for shaping and flavor.
How do I keep the pretzels from getting soggy?
Add them at the very last minute before serving. The moisture from the cheese will soften the pretzels over time, so don’t add them more than 30 minutes ahead. If you’re transporting the cheese ball, keep the pretzels in a separate bag and assemble them when you arrive.
Can I use a different shape for other occasions?
Definitely! This basic cheese ball recipe works for any shape. Try a pumpkin shape for fall (use a pretzel stick as the stem), a heart for Valentine’s Day, or a simple round ball rolled in nuts for a classic appetizer. Just adjust the shaping technique and decorations to match your theme.
Pin This Recipe!
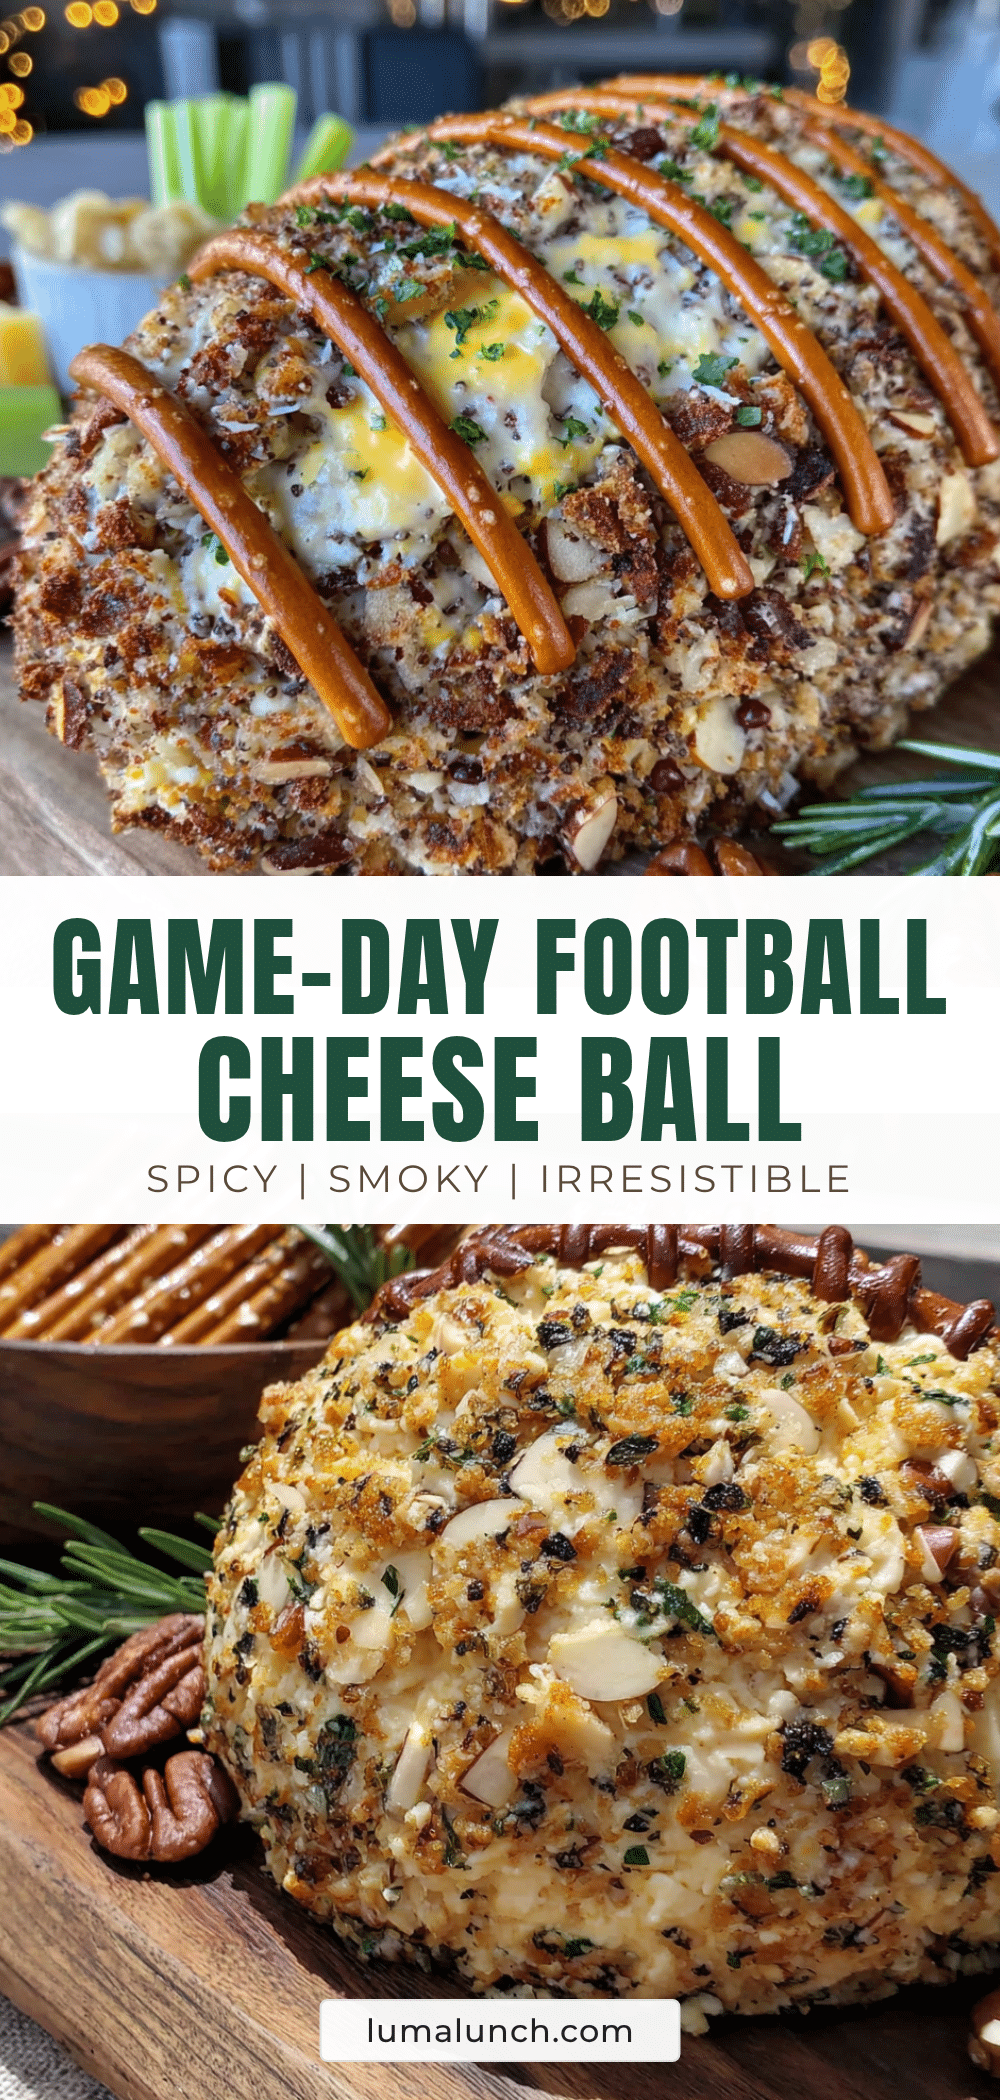
Easy Football-Shaped Cheese Ball with Pretzel Laces
This football-shaped cheese ball with pretzel laces is the ultimate game day appetizer. Creamy, savory, and fun to make, it’s a crowd-pleaser that disappears fast.
- Prep Time: 20 minutes
- Cook Time: 0 minutes
- Total Time: 2 hours 20 minutes (includes chilling)
- Yield: 12 servings 1x
- Category: Appetizer
- Cuisine: American
Ingredients
- 16 oz cream cheese, softened
- 2 cups sharp cheddar cheese, shredded
- 3–4 green onions, thinly sliced
- 1 teaspoon Worcestershire sauce
- ½ teaspoon garlic powder
- ½ teaspoon onion powder
- ¼ teaspoon salt
- ¼ teaspoon black pepper, freshly ground
- 10–12 pretzel sticks
- For serving: crackers, pretzel chips, celery sticks
Instructions
- Soften the cream cheese: Take cream cheese out of fridge at least 30 minutes before starting. If in a hurry, cut into cubes and microwave in 10-second bursts until soft but not melted.
- Mix the base: In a mixing bowl, beat softened cream cheese with a hand mixer on medium speed until smooth and fluffy, about 2 minutes. Scrape down sides of bowl.
- Add the flavor: Add shredded cheddar, sliced green onions, Worcestershire sauce, garlic powder, onion powder, salt, and black pepper. Mix on low speed until combined. Do not overmix.
- Taste and adjust: Taste the cheese mixture and adjust seasonings as needed.
- Shape the football: Lay out a large piece of plastic wrap on counter. Scoop cheese mixture onto center of wrap. Use lightly oiled or damp hands to form into a rough football shape with slightly pointed ends.
- Wrap and refine: Pull plastic wrap up around cheese ball and shape through the wrap using palms to smooth sides and fingers to define pointed ends. Twist ends of wrap to secure shape.
- Chill thoroughly: Place wrapped cheese ball on a baking sheet or plate and refrigerate for at least 2 hours, preferably overnight.
- Add the laces: When ready to serve, unwrap chilled cheese ball and place on serving platter. Arrange pretzel sticks on top to look like football laces—5-6 sticks parallel down center, with shorter pieces for cross laces. Press in gently.
- Serve immediately or refrigerate: Serve right away or keep in fridge for up to 1 hour before serving. Do not leave out longer than 2 hours at room temperature.
Notes
Don’t skip the chilling time—it’s essential for the cheese ball to hold its shape. Add pretzel laces at the last minute to keep them crunchy. Shred your own cheese for the smoothest texture. For a spicy version, add pickled jalapeños and cayenne. For a bacon ranch version, add crumbled bacon and ranch seasoning. Can be made up to 2 days ahead.
Nutrition
- Serving Size: 2 tablespoons
- Calories: 180
- Sugar: 1
- Sodium: 280
- Fat: 16
- Saturated Fat: 10
- Carbohydrates: 4
- Protein: 4
Keywords: cheese ball, football shaped, game day appetizer, Super Bowl snack, easy appetizer, party food, pretzel laces


