Love this? Save it for later!
Share the inspiration with your friends
There used to be a tiny candy shop tucked between a dry cleaner and a nail salon on the corner of Elm Street that made the most incredible white chocolate bark I’ve ever had. When they closed their doors three years ago—a “retirement” sign taped to the window—I honestly felt a little lost. That bark was my go-to for every Halloween party, every fall gathering, every “I need something impressive but I’m running late” moment. After twelve tries—twelve, let me tell you, with some batches ending up in the trash—I finally cracked the code. This Easy Candy Corn White Chocolate Bark is the exact replica of that beloved shop’s masterpiece, and it comes together in about five minutes of actual work.
I remember the first time I walked into that shop. The bell jingled, and the owner, a woman named Marge with silver hair and flour on her apron, handed me a sample without even saying hello. One bite of that candy-studded white chocolate, and I was hooked. The way the creamy sweetness played off the chewy, sugary candy corn—it was like autumn in a single bite. When Marge retired, I begged her for the recipe, but she just smiled and said, “Figure it out yourself, honey.” So I did. And honestly, this version might be even better because it’s made in my own kitchen, with my own hands, and I can tweak it however I want.
Maybe you’ve been there—standing in the candy aisle, staring at a bag of candy corn, wondering if there’s a way to make it feel special, not just a kid’s Halloween treat. Well, this bark is your answer. It’s the kind of thing that makes people say, “Wait, you made this?” with genuine surprise. And the best part? You absolutely can make it, even if you’ve never melted chocolate in your life. Let me show you how.
Why You’ll Love This Recipe
This Easy Candy Corn White Chocolate Bark isn’t just another dessert—it’s the dessert that will have everyone at your party asking for the recipe. Here’s why it’s become my secret weapon for every gathering:
- Five Minutes of Work : I’m not kidding. From unwrapping the chocolate to sprinkling the toppings, you’re looking at about five minutes of active time. The rest is just waiting for it to set. This is perfect for those “I need something now” moments when guests are about to walk through the door.
- Simple Ingredients : You probably have white chocolate chips in your pantry right now. Candy corn is everywhere in the fall—gas stations, grocery stores, even dollar stores. No fancy trips to specialty shops required.
- Perfect for Parties : This bark is a showstopper on any dessert table. It’s colorful, it’s festive, and it breaks into perfect little pieces that people can grab and go. No plates, no forks, no mess.
- Crowd-Pleaser : I’ve served this at Halloween parties, Thanksgiving dinners, and even a friend’s fall wedding shower. Kids love the sweet, candy-studded pieces. Adults love the nostalgic crunch. Everyone wins.
- Unbelievably Delicious : The combination of creamy white chocolate and chewy, slightly waxy candy corn is textural perfection. Add a sprinkle of sea salt, and you’ve got sweet-salty magic that keeps people coming back for “just one more piece.”
What makes this recipe different from every other bark out there? It’s the technique. Most recipes tell you to just melt the chocolate and dump the candy on top. But I’ve learned that gently folding some of the candy corn into the melted chocolate before spreading it creates pockets of chewy goodness throughout the bark. Plus, that final sprinkle of flaky sea salt? Game-changer. It cuts through the sweetness and makes every bite feel balanced, not cloying.
This is the kind of recipe that makes you look like a rockstar host without any of the stress. It’s the recipe you’ll turn to again and again, year after year, until it becomes your signature. Trust me, once you make this once, you’ll be making it for every occasion.
What Ingredients You Will Need
This recipe uses simple, everyday ingredients to create something truly special. The beauty of this bark is that you probably already have most of these items in your kitchen. Let me walk you through what you need and why each ingredient matters.
- White chocolate chips (12 ounces or 340 grams) : This is the foundation of your bark. I recommend using a high-quality brand like Ghirardelli or Guittard for the smoothest melt and creamiest texture. Avoid white melting wafers or candy melts if you can—they contain added oils that can leave a waxy feel on your tongue. Real white chocolate, with cocoa butter as the first ingredient, gives you that rich, buttery flavor that makes this bark irresistible. (Pro tip: if you can only find white chocolate bars, chop them into small, even pieces for even melting.)
- Candy corn (1 cup or about 180 grams) : The star of the show! Candy corn brings that iconic Halloween color and a chewy, honey-sweet texture that contrasts beautifully with the creamy chocolate. I’ve tested this with both classic Brach’s candy corn and the fancy organic stuff from Whole Foods, and honestly, the classic Brach’s works best. It holds its shape better and has that nostalgic flavor we all remember. You can also use autumn mix or harvest blend candy corn for extra color variety.
- Candy pumpkins or autumn sprinkles (½ cup, optional) : These add extra visual appeal and a fun texture contrast. The little candy pumpkins are soft and chewy, while sprinkles add a satisfying crunch. If you’re making this for a Halloween party, the pumpkins are a must—they make the bark look like a festive fall masterpiece.
- Flaky sea salt (½ teaspoon, or to taste) : This is my secret weapon. A light sprinkle of flaky salt like Maldon or fleur de sel cuts through the sweetness and makes the flavors pop. Don’t skip this! Even if you’re not usually a sweet-salty person, trust me on this one. The salt transforms this from “just another candy bark” into something sophisticated that adults will love.
- Coconut oil or shortening (1 teaspoon, optional) : If you’re worried about your chocolate seizing or not spreading smoothly, a tiny bit of coconut oil or shortening helps thin the melted chocolate and gives it a beautiful shine. I only use this if I’m working with a brand of white chocolate that tends to be thick. Most high-quality white chocolates don’t need it.
Substitution Guidance : If you’re dairy-free, look for vegan white chocolate chips made with cocoa butter alternatives. They melt beautifully and work just as well. For a nut-free version, skip any sprinkles that might contain nut oils and double-check your candy corn label (most are nut-free, but always verify). And if you can’t find candy corn—though honestly, where are you?—you can substitute with chopped candy pumpkins or even crushed peanut butter cups for a different flavor profile.
Equipment Needed
You don’t need a professional pastry kitchen to make this bark. In fact, you probably have everything you need sitting in your kitchen drawers right now. Here’s what you’ll need:
- Baking sheet (13×18 inches or similar) : This is where your bark will set up. A standard half-sheet pan works perfectly. If you don’t have one, any rimmed baking sheet will do—just make sure it fits in your fridge.
- Parchment paper or silicone baking mat : Absolutely essential. Without this, your bark will stick to the pan, and you’ll end up with a messy, broken mess. Parchment paper is cheap and easy to find. Silicone mats are reusable and work beautifully.
- Microwave-safe bowl or double boiler : For melting the chocolate. I prefer the microwave method because it’s faster and requires less cleanup. But if you’re nervous about burning chocolate, a double boiler gives you more control.
- Rubber spatula : For stirring and spreading the chocolate. A heat-resistant silicone spatula is ideal because it won’t melt and it scrapes the bowl clean.
- Small offset spatula (optional) : This makes spreading the chocolate into an even layer much easier. If you don’t have one, the back of a spoon works fine—it just takes a little more patience.
I’ve made this bark with everything from a fancy KitchenAid spatula to a wooden spoon I found in a thrift store. The results were the same every time. Don’t overthink the equipment. Just make sure you have parchment paper and a microwave, and you’re golden.
Preparation Method
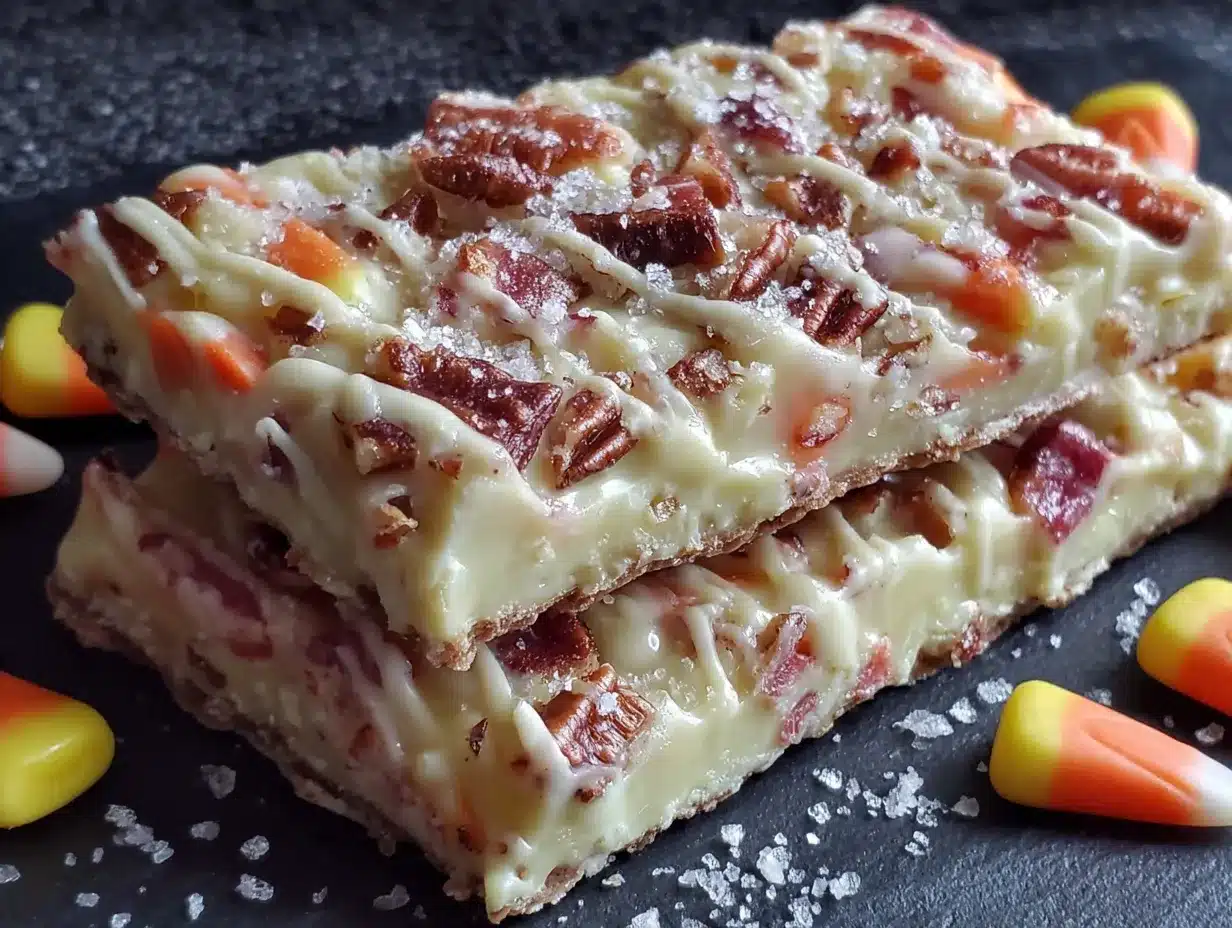
Let’s get to the fun part—making the bark! Follow these steps, and you’ll have a beautiful, crowd-pleasing treat in no time.
- Prepare your baking sheet. Line a 13×18-inch baking sheet with parchment paper or a silicone baking mat. Make sure the paper extends up the sides slightly—this will make it easier to lift the bark out later. Set the sheet aside while you prepare the chocolate.
- Melt the white chocolate. Place 12 ounces (340 grams) of white chocolate chips in a microwave-safe bowl. Microwave in 30-second intervals on 50% power, stirring thoroughly after each interval. White chocolate is delicate and can burn easily, so don’t rush this step. After about 2 to 3 minutes total, the chocolate should be mostly melted with a few small lumps remaining. Stir vigorously until the residual heat melts the last lumps and the chocolate is smooth and glossy. (If you’re using the optional 1 teaspoon of coconut oil, stir it in now.)
- Fold in some candy corn. Reserve about ¼ cup of candy corn for the top. Gently fold the remaining ¾ cup of candy corn into the melted white chocolate. Stir just until combined—you want the candy corn to be evenly distributed but not completely hidden. A few stirs is all it takes.
- Spread the chocolate. Pour the melted chocolate mixture onto the prepared baking sheet. Use a rubber spatula or offset spatula to spread it into an even layer about ¼-inch thick. Don’t worry about making it perfect—rustic edges and uneven spots give the bark character. Work quickly, because the chocolate will start to set as it cools.
- Add the toppings. While the chocolate is still wet, sprinkle the reserved candy corn evenly over the surface. Add the candy pumpkins or autumn sprinkles if you’re using them. Finally, give the whole thing a light sprinkle of flaky sea salt—about ½ teaspoon, or to your taste. Press the toppings gently into the chocolate with your fingers or the back of a spoon so they stick.
- Set the bark. Place the baking sheet in the refrigerator for at least 30 minutes, or until the chocolate is completely firm and set. If you’re in a hurry, you can pop it in the freezer for 15 minutes—just watch it closely so it doesn’t get too cold and brittle.
- Break into pieces. Once the bark is fully set, lift it out of the pan using the parchment paper. Place it on a cutting board and use your hands to break it into irregular pieces. Don’t use a knife—the jagged, organic edges are part of the charm. Aim for pieces that are about 2 to 3 inches across, but honestly, any size works.
Sensory cues to watch for : When the chocolate is fully melted, it should look like thick, glossy paint. When you spread it on the sheet, you should hear a faint “swoosh” sound as the spatula glides across. The finished bark should snap cleanly when you break it—if it bends or feels soft, it needs more time in the fridge.
Cooking Tips & Techniques
After making this bark more times than I care to count, I’ve picked up a few tricks that make the process smoother and the results more consistent. Here are my best tips:
- Don’t overheat the chocolate. White chocolate is more temperamental than dark or milk chocolate because it has a lower melting point. If you overheat it, it can seize—turning into a grainy, clumpy mess that’s impossible to salvage. Always use 50% power on your microwave and stir frequently. If you see any signs of scorching (brown spots or a burnt smell), stop immediately and transfer the chocolate to a cool bowl.
- Work at room temperature. If your kitchen is hot and humid, the chocolate might take longer to set. On the flip side, if it’s cold, the chocolate might start setting before you’ve finished spreading it. Aim for a comfortable room temperature—about 68°F to 72°F (20°C to 22°C)—for the best results.
- Use the “spread and tap” method. Instead of trying to spread the chocolate perfectly with a spatula, try this: pour the melted chocolate onto the center of the pan, then tilt the pan gently to let it flow toward the edges. Use the spatula to guide it where you want it, but let gravity do most of the work. This gives you a more even layer without overworking the chocolate.
- Chill thoroughly before breaking. I know it’s tempting to rush this step, but under-chilled bark will be sticky and messy. Give it the full 30 minutes in the fridge. If you’re making this ahead of time, you can leave it in the fridge overnight—just cover it loosely with plastic wrap once it’s fully set.
- Break with confidence. When you break the bark, use a quick, decisive motion. Hesitation leads to uneven, crumbly pieces. Hold the bark with both hands, find a natural crack or weak point, and snap it firmly. If a piece doesn’t break cleanly, just eat it—nobody’s judging.
I once tried to speed up the melting process by blasting the chocolate on high power for a full minute. Big mistake. The chocolate seized into a grainy, lumpy disaster that I had to throw away. Learn from my failure: patience is key with white chocolate.
Variations & Adaptations
One of the best things about this bark is how customizable it is. Once you’ve mastered the basic recipe, feel free to experiment with these variations:
- Chocolate Lover’s Twist : Swap the white chocolate for milk or dark chocolate. The rich, slightly bitter notes of dark chocolate balance the sweetness of the candy corn beautifully. Use 60% to 70% cacao dark chocolate for the best contrast.
- Fall Harvest Bark : Add ¼ cup of dried cranberries and ¼ cup of chopped pecans or walnuts along with the candy corn. The tartness of the cranberries and the crunch of the nuts add depth and texture. This version is perfect for Thanksgiving or Friendsgiving gatherings.
- Peppermint Bark Variation : Replace the candy corn with crushed peppermint candies or candy canes. This turns your bark into a Christmas treat that’s just as easy and just as crowd-pleasing. Add a drop of peppermint extract to the melted chocolate for extra flavor.
- Spicy-Sweet Version : Add ¼ teaspoon of cayenne pepper or a pinch of chili powder to the melted white chocolate before spreading. The heat sneaks up on you and plays beautifully with the sweet candy corn. This is a hit at adult parties where people want something unexpected.
- Dairy-Free and Vegan : Use vegan white chocolate chips (like Enjoy Life brand) and skip the optional coconut oil if your chocolate is already smooth. Most candy corn is accidentally vegan, but double-check the label to be sure. This version tastes just as indulgent as the original.
I tried the spicy-sweet version at a Halloween party last year, and it was the first thing to disappear from the dessert table. People kept coming back, saying, “Wait, is there chili in this? It’s amazing!” Don’t be afraid to get creative—this bark is forgiving and fun to play with.
Serving & Storage Suggestions
This bark is designed to be the star of your dessert table, but it also plays well with others. Here’s how to serve and store it for maximum impact.
Serving : Arrange the broken pieces on a large platter or cake stand. For a Halloween party, I like to scatter a few extra candy pumpkins and a handful of candy corn around the platter for a festive look. You can also stack the pieces in a clear glass jar or a decorative tin for a more casual, grab-and-go presentation. The bark is best served at room temperature—if it’s been in the fridge, let it sit out for 10 to 15 minutes before serving so the chocolate softens slightly and the flavors come through.
What to Serve Alongside : This bark pairs beautifully with hot apple cider, pumpkin spice lattes, or even a glass of cold milk. If you’re hosting a party, set out a bowl of fresh apple slices and a cheese board with sharp cheddar—the contrast between the sweet bark and the savory cheese is surprisingly wonderful.
Storage : Store the bark in an airtight container at room temperature for up to one week. If your kitchen is warm or humid, you can store it in the refrigerator, but let it come to room temperature before serving to avoid condensation. For longer storage, place the bark in a freezer-safe bag or container and freeze for up to three months. The bark thaws beautifully—just let it sit at room temperature for 15 minutes before breaking or serving.
Flavor Development : Here’s a secret: this bark actually gets better after a day or two. The flavors meld together, and the candy corn softens slightly, creating a more cohesive texture. If you can resist eating it all on day one, you’ll be rewarded with an even better treat on day two.
Nutritional Information & Benefits
Let’s be real—this is a treat, not a health food. But that doesn’t mean you can’t enjoy it mindfully. Here’s a rough breakdown per serving (about 2 ounces or 56 grams, which is a generous piece):
- Calories : Approximately 220-250
- Fat : 12-14 grams (mostly from the white chocolate)
- Carbohydrates : 28-32 grams
- Sugar : 24-28 grams
- Protein : 2-3 grams
- Calcium : 6-8% of the Daily Value (from the white chocolate)
Health Benefits : While this bark is indulgent, it’s not completely devoid of redeeming qualities. White chocolate contains calcium and small amounts of antioxidants (though less than dark chocolate). Candy corn, believe it or not, is fat-free and contains a tiny amount of protein from the gelatin. The sea salt adds electrolytes, and if you’re using the optional nuts in the fall harvest variation, you’ll get heart-healthy fats and fiber.
Dietary Considerations : This recipe is naturally vegetarian. For gluten-free, double-check your candy corn label—most brands are gluten-free, but always verify. As mentioned, a vegan version is easy to make with plant-based white chocolate. The bark contains dairy in the white chocolate, so it’s not suitable for those with milk allergies unless you use a dairy-free alternative.
I believe in balance. This bark is a treat for special occasions, and there’s nothing wrong with enjoying it in moderation. One or two pieces with a cup of tea is the perfect way to satisfy your sweet tooth without overdoing it.
Conclusion
This Easy Candy Corn White Chocolate Bark is more than just a recipe—it’s a memory in the making. Every time I make it, I think of Marge and her little candy shop, and I smile. This bark has become my signature party treat, the one that people request year after year. And now it can be yours too.
I encourage you to make this recipe your own. Try the spicy-sweet version for a grown-up twist, or go all out with the fall harvest variation for Thanksgiving. Customize the toppings to match your party theme or your personal taste. The beauty of this bark is that it’s endlessly adaptable and nearly impossible to mess up.
I’d love to hear how your bark turns out! Leave a comment below and let me know which variation you tried, or share a photo of your creation on social media. Tag me so I can see your beautiful bark in all its glory. And if you have any questions, don’t hesitate to ask—I’m here to help.
Now go ahead, grab that bag of candy corn, and make some magic. Your guests are going to love it. Happy hosting!
Frequently Asked Questions
Can I use white chocolate bars instead of chips?
Absolutely! Just chop the bars into small, even pieces before melting. This helps them melt evenly and prevents hot spots. I actually prefer using high-quality white chocolate bars like Lindt or Ghirardelli for an even creamier texture.
Why did my white chocolate seize and become grainy?
This usually happens when the chocolate gets too hot or when a tiny amount of water gets into the bowl. Always use a completely dry bowl and utensils, and microwave at 50% power in short bursts. If your chocolate does seize, you can sometimes save it by stirring in a teaspoon of coconut oil or heavy cream.
Can I make this bark ahead of time for a party?
Yes, and I actually recommend it! This bark stores beautifully at room temperature for up to a week. Make it a day or two in advance—the flavors meld together, and the texture becomes even better. Just keep it in an airtight container away from heat and sunlight.
How do I get clean, even pieces when breaking the bark?
For the cleanest breaks, make sure the bark is fully chilled and firm. Use a quick, confident snapping motion. If you want perfectly even pieces, you can score the bark with a sharp knife while it’s still slightly soft, then break along the scored lines after it’s fully set.
Can I add other mix-ins like pretzels or nuts?
Definitely! Pretzels add a wonderful salty crunch that balances the sweetness. Just crush them into small pieces and sprinkle them on top with the candy corn. Nuts like pecans, walnuts, or almonds also work beautifully. Just be mindful of allergies if you’re serving a crowd.
Pin This Recipe!
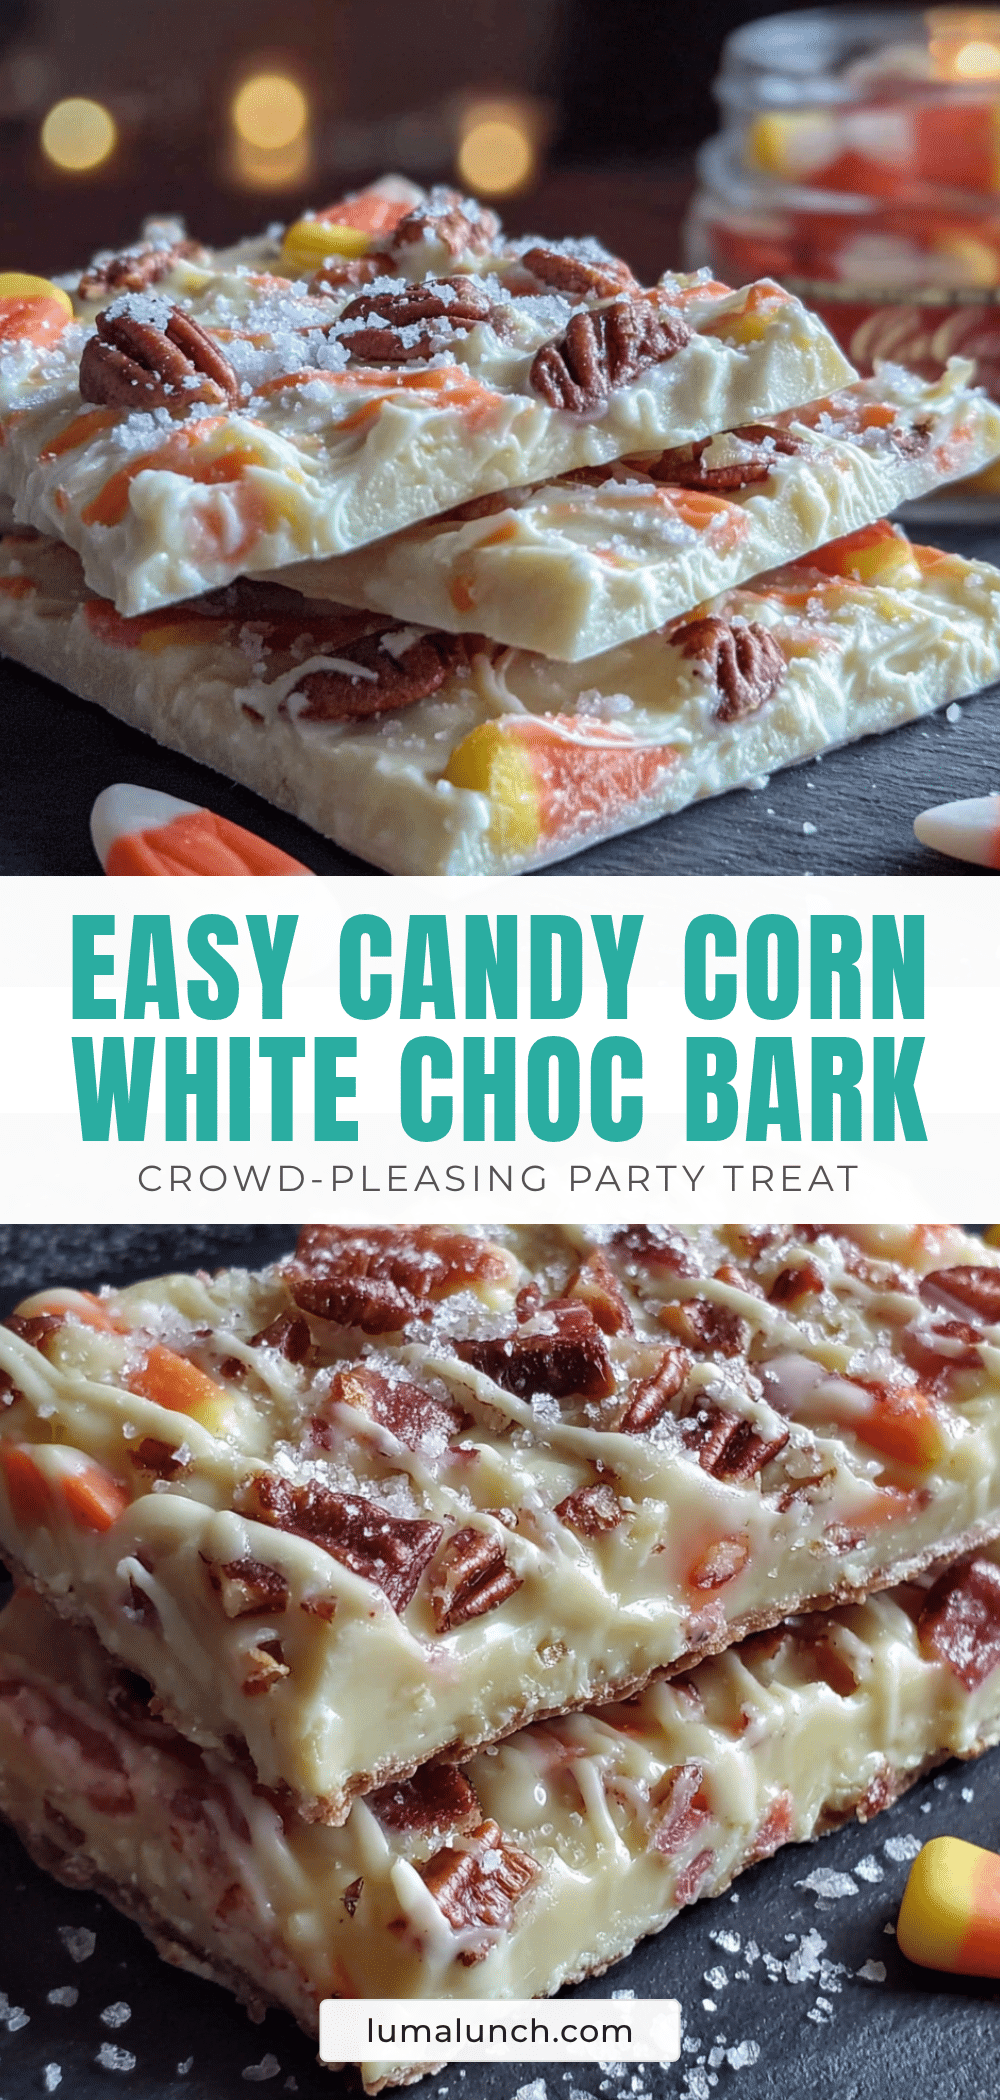
Easy Candy Corn White Chocolate Bark (5-Minute Party Treat)
This Easy Candy Corn White Chocolate Bark is a quick, crowd-pleasing treat that comes together in about five minutes of active work. Creamy white chocolate is studded with chewy candy corn and topped with a sprinkle of flaky sea salt for a sweet-salty masterpiece.
- Prep Time: 5 minutes
- Cook Time: 0 minutes
- Total Time: 35 minutes
- Yield: 12 servings 1x
- Category: Dessert
- Cuisine: American
Ingredients
- 12 ounces (340 grams) white chocolate chips
- 1 cup (about 180 grams) candy corn
- ½ cup candy pumpkins or autumn sprinkles (optional)
- ½ teaspoon flaky sea salt (or to taste)
- 1 teaspoon coconut oil or shortening (optional)
Instructions
- Line a 13×18-inch baking sheet with parchment paper or a silicone baking mat, letting the paper extend up the sides slightly. Set aside.
- Place 12 ounces (340 grams) of white chocolate chips in a microwave-safe bowl. Microwave in 30-second intervals on 50% power, stirring thoroughly after each interval, until mostly melted with a few small lumps. Stir vigorously until smooth and glossy. If using, stir in 1 teaspoon of coconut oil.
- Reserve about ¼ cup of candy corn for the top. Gently fold the remaining ¾ cup of candy corn into the melted white chocolate until just combined.
- Pour the melted chocolate mixture onto the prepared baking sheet. Use a rubber spatula or offset spatula to spread it into an even layer about ¼-inch thick.
- While the chocolate is still wet, sprinkle the reserved candy corn evenly over the surface. Add the candy pumpkins or autumn sprinkles if using. Finally, sprinkle with flaky sea salt. Press the toppings gently into the chocolate.
- Place the baking sheet in the refrigerator for at least 30 minutes, or until the chocolate is completely firm and set. Alternatively, freeze for 15 minutes.
- Once set, lift the bark out of the pan using the parchment paper. Place on a cutting board and break into irregular pieces with your hands.
Notes
For best results, use high-quality white chocolate chips (like Ghirardelli or Guittard). Avoid white melting wafers. If your kitchen is warm, the bark may take longer to set. The bark can be stored in an airtight container at room temperature for up to one week, or frozen for up to three months. For a dairy-free version, use vegan white chocolate chips.
Nutrition
- Serving Size: 1 piece (about 2 oun
- Calories: 235
- Sugar: 26
- Sodium: 120
- Fat: 13
- Saturated Fat: 8
- Carbohydrates: 30
- Protein: 2.5
Keywords: candy corn, white chocolate bark, Halloween treat, fall dessert, easy dessert, 5-minute recipe, party treat


