Love this? Save it for later!
Share the inspiration with your friends
It was 11:42 PM on a random Tuesday, and I had a craving that wouldn’t quit. I didn’t have the energy for a full-blown dinner, but I had three leftover baked potatoes from Sunday’s roast and a block of cheddar that was staring at me from the fridge. The idea just arrived—crispy, cheesy, loaded potato skins. Honestly, I was too tired to overthink it, so I just went for it.
I remember standing there in the quiet kitchen, the only light coming from above the stove, scooping out the potato flesh with a spoon. I made a bit of a mess—potato bits on the counter, cheese shavings on the floor—but it was one of those moments where you just let yourself cook without rules. The smell of bacon sizzling filled the house, and by the time I pulled those golden, crispy skins out of the oven, I knew I had stumbled onto something special.
Maybe you’ve been there—late night, weird cravings, and a fridge full of possibilities. These crispy loaded baked potato skins with bacon and cheddar became my go-to from that night on. They’re the kind of snack that feels like a reward, and honestly, they’re too good to save only for game day. This is the recipe that stuck, and I keep making it because it always delivers.
Why You’ll Love This Recipe
I’ve tested this recipe more times than I care to count—burned a few batches, learned the hard way about scooping too deep, and finally nailed the perfect texture. These aren’t just any potato skins; they’re the kind that disappear in minutes.
- Quick & Easy: Comes together in about 45 minutes, with most of that being hands-off oven time. Perfect for a last-minute snack or a lazy weekend treat.
- Simple Ingredients: No fancy grocery trips needed. Potatoes, bacon, cheddar, and a few pantry staples—you probably have everything right now.
- Perfect for Game Day or Parties: These are the first thing to go at any gathering. They’re shareable, dippable, and always a hit.
- Crowd-Pleaser: Kids love them, adults love them, and even picky eaters come back for seconds. I’ve yet to meet someone who doesn’t grab at least two.
- Unbelievably Delicious: The contrast between the crispy potato shell and the gooey melted cheese is pure comfort food magic. It’s next-level, I promise.
What makes these different from every other recipe? It’s the double-baking method. First, you bake the potatoes whole to get that fluffy interior, then you scoop, fill, and bake again until the edges are shatteringly crisp. It’s a small extra step that makes all the difference. And let me tell you, the first bite—when the cheese pulls and the bacon crunches—is the kind that makes you close your eyes and just enjoy the moment.
What Ingredients You Will Need
This recipe uses simple, wholesome ingredients that come together to create something truly special. Most of these are probably already in your kitchen, which is part of the beauty of it.
- Russet Potatoes (4 large): Russets are the gold standard for baked potatoes. Their high starch content gives you that fluffy interior and sturdy skin that holds up to scooping and filling. Look for ones that are firm and roughly the same size for even cooking.
- Bacon (8 slices): Thick-cut bacon is my preference here—it stays meaty and doesn’t disappear into the cheese. I like using applewood-smoked bacon for a subtle sweetness, but any good quality bacon works. You’ll cook it until crispy, then crumble it.
- Cheddar Cheese (1 ½ cups, shredded): Sharp cheddar is non-negotiable for that bold, tangy flavor. I recommend shredding it yourself from a block—pre-shredded cheese has anti-caking agents that prevent it from melting as smoothly. White or yellow cheddar both work great.
- Sour Cream (½ cup): This adds a cool, creamy contrast to the hot, crispy skins. Full-fat sour cream gives the best texture, but low-fat works in a pinch.
- Green Onions (¼ cup, sliced): For a fresh, mild onion kick and a pop of color. You’ll use these as a garnish right before serving.
- Butter (2 tablespoons, melted): Brushing the potato skins with melted butter before the second bake is what gives them that golden, crispy exterior. Don’t skip this step—it’s the secret to the crunch.
- Salt and Black Pepper (to taste): Simple seasoning that lets the other flavors shine.
- Optional Toppings: A drizzle of ranch dressing, a sprinkle of paprika, or some pickled jalapeños for heat. I sometimes add a little extra cheddar on top because, well, why not?
For the best texture, I always use Russet potatoes from my local grocery store—they’re reliable and affordable. If you’re looking for a dairy-free option, you can swap the cheddar for a plant-based shred and use vegan sour cream. The bacon, well, you could use turkey bacon, but honestly, the real thing is hard to beat.
Equipment Needed
You don’t need a fancy kitchen to make these, but a few tools will make the process much smoother.
- Baking Sheet (2): One for the initial potato bake, and one for the final crisping. I use rimmed baking sheets to catch any cheese drips.
- Parchment Paper or Aluminum Foil: Lining your baking sheet makes cleanup a breeze. Trust me, baked-on cheese is no fun to scrub.
- Chef’s Knife and Cutting Board: For halving the potatoes and chopping the green onions. A sharp knife makes clean cuts without tearing the potato skins.
- Small Spoon or Melon Baller: For scooping out the potato flesh. A melon baller gives you perfect, even scoops without damaging the skin.
- Pastry Brush: For brushing the melted butter onto the potato skins. A silicone brush works best and is easy to clean.
- Skillet: For cooking the bacon. A cast-iron skillet gives you the crispiest bacon, but any non-stick pan works.
- Box Grater: For shredding your own cheese. It takes an extra minute, but the melt is so much better.
If you don’t have a pastry brush, you can use a paper towel to dab the butter on—just be gentle so you don’t tear the skin. And if you’re short on baking sheets, you can reuse the same one after a quick wash between bakes.
Preparation Method
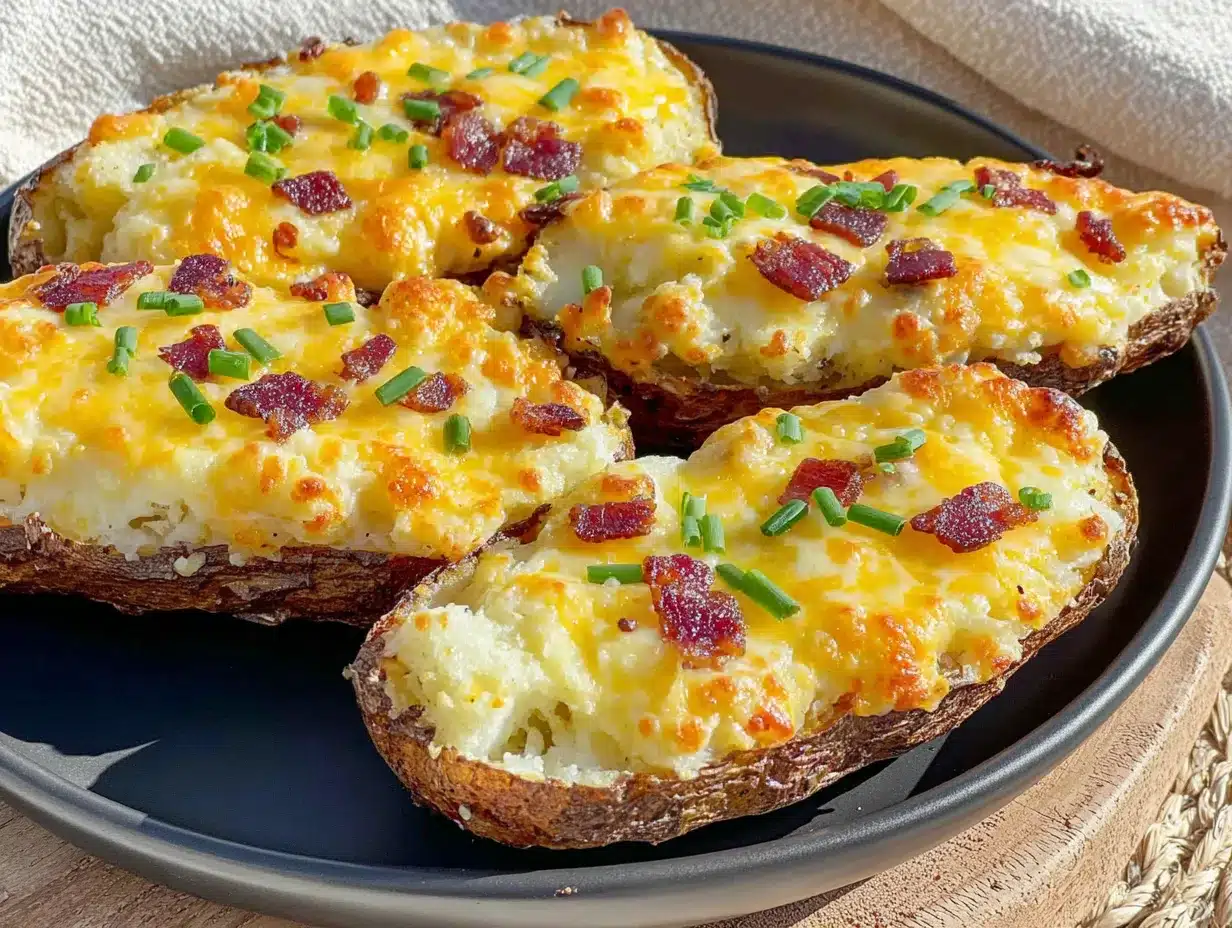
Let’s get cooking. I’ll walk you through every step so you get perfect results the first time.
- Preheat and Prep: Preheat your oven to 400°F (200°C). Wash and scrub your Russet potatoes thoroughly—you’re eating the skin, so you want it clean. Pat them dry with a kitchen towel. Prick each potato 4-5 times with a fork to let steam escape during baking.
- First Bake: Place the potatoes directly on the oven rack or on a lined baking sheet. Bake for 50-60 minutes, until the skins are crisp and a fork slides easily into the center. The internal temperature should read 205°F (96°C) when done. Let them cool for about 10 minutes—just enough so you can handle them without burning your fingers.
- Cook the Bacon: While the potatoes are baking, cook your bacon in a skillet over medium heat. Cook until crispy, about 6-8 minutes, flipping halfway. Transfer to a paper towel-lined plate to drain. Once cool, crumble or chop into small pieces. Set aside.
- Halve and Scoop: Once the potatoes are cool enough to handle, cut each one in half lengthwise. Using a small spoon or melon baller, carefully scoop out the potato flesh, leaving about ¼ inch (6 mm) of potato attached to the skin. You want a sturdy boat, not a paper-thin shell. Save the scooped potato for another use—mashed potatoes or soup are great options.
- Brush and Season: Place the potato skins on a lined baking sheet, cut-side up. Brush the inside and edges generously with melted butter. Sprinkle with a pinch of salt and pepper. This is where the magic starts—the butter will help them crisp up beautifully.
- Second Bake: Bake the buttered skins at 400°F (200°C) for 10 minutes. This dries them out and starts the crisping process. You’ll see the edges beginning to turn golden.
- Fill and Top: Remove the baking sheet from the oven. Divide the shredded cheddar cheese evenly among the potato skins. Sprinkle the crumbled bacon on top of the cheese. Don’t overload them—you want a nice even layer so everything melts together.
- Final Bake: Return the filled skins to the oven and bake for another 8-10 minutes, until the cheese is melted and bubbly, and the edges of the skins are deep golden brown and crispy. Keep an eye on them—you want gooey cheese, not burnt cheese.
- Garnish and Serve: Remove from the oven and let them rest for 2 minutes. Top with a dollop of sour cream and a sprinkle of sliced green onions. Serve immediately while they’re hot and crispy.
A quick tip: If you want extra crispy skins, you can increase the second bake time by 2-3 minutes. Just watch the cheese so it doesn’t burn. And if you’re making a big batch, keep the finished skins warm on a baking sheet in a 200°F (95°C) oven while you finish the rest.
Cooking Tips & Techniques
I’ve made this recipe more times than I can count, and I’ve learned a few things the hard way. Here are my best tips for perfect potato skins every time.
- Don’t Over-Scoop: The biggest mistake is scooping too much potato out. Leave at least ¼ inch of potato attached to the skin. If you go too deep, the skin will collapse and lose its structure. You want a sturdy boat that holds all that cheesy goodness.
- Dry Skins = Crispy Skins: After scooping, pat the inside of the skins with a paper towel to remove any excess moisture. Moisture is the enemy of crispiness. The butter bath and initial 10-minute bake also help drive off moisture.
- Use Room Temperature Cheese: Shredded cheese that’s at room temperature melts more evenly and quickly. Take your cheese out of the fridge when you start the first bake, and it’ll be perfect by the time you’re ready to fill.
- Batch Cooking Strategy: If you’re making these for a party, you can bake the potatoes and scoop them a day ahead. Store the empty skins in the fridge, then do the butter and second bake right before serving. It saves time and stress.
- The Bacon Trick: For extra crispy bacon, cook it in the oven at 400°F (200°C) on a wire rack set over a baking sheet. It cooks evenly and stays flat, making it easier to crumble. Plus, you can do it alongside the first potato bake.
I once forgot to brush the butter on before the second bake, and the skins came out dry and chewy instead of crispy. It was a sad batch, let me tell you. So don’t skip that step—it’s the difference between good and great.
Variations & Adaptations
One of the best things about this recipe is how easy it is to customize. Here are some of my favorite variations.
- Loaded BBQ Chicken Skins: Swap the bacon for shredded rotisserie chicken tossed in your favorite BBQ sauce. Use a mix of cheddar and Monterey Jack cheese. Top with a drizzle of ranch and some pickled red onions. It’s a whole meal in a skin.
- Vegetarian Option: Skip the bacon and load up with black beans, corn, diced bell peppers, and a sprinkle of cumin. Use pepper jack cheese for a little heat. The beans add protein and fiber, making it a satisfying meatless option.
- Spicy Buffalo Version: Toss the crumbled bacon in buffalo sauce before adding it to the skins. Use blue cheese crumbles instead of cheddar, and drizzle with ranch dressing. It’s spicy, tangy, and absolutely addictive.
- Breakfast Potato Skins: Fill the skins with scrambled eggs, crumbled breakfast sausage, and cheddar. Bake until the cheese melts, then top with a dollop of sour cream and fresh chives. Perfect for brunch.
- Low-Carb Adaptation: Use small sweet potatoes or even zucchini boats instead of Russet potatoes. The filling stays the same, and you get a slightly sweeter, lower-carb option. It’s not quite the same texture, but it’s delicious in its own right.
I once made a batch with leftover taco meat and jalapeños, and it was a hit at our taco Tuesday gathering. Don’t be afraid to experiment—these skins are a blank canvas for whatever you’re craving.
Serving & Storage Suggestions
These potato skins are best served fresh and hot, right out of the oven. The contrast between the crispy shell and the gooey cheese is at its peak within the first 10 minutes.
- Serving Temperature: Serve immediately while the cheese is still melted and the skins are crispy. If you’re making a big batch, keep them warm in a 200°F (95°C) oven for up to 30 minutes.
- Presentation: Arrange the skins on a large platter, lined with a napkin or parchment to absorb any excess grease. Garnish with a generous dollop of sour cream and a sprinkle of green onions for a pop of color.
- Complementary Dishes: These pair beautifully with a simple green salad, some crunchy celery and carrot sticks, or a bowl of chili. For drinks, a cold beer or a crisp white wine like Sauvignon Blanc cuts through the richness perfectly.
- Storage: If you have leftovers (unlikely, but possible), store them in an airtight container in the refrigerator for up to 3 days. The skins will lose their crispiness, but they’ll still taste great.
- Reheating: To bring back some of the crunch, reheat the skins in a 375°F (190°C) oven for 8-10 minutes. Avoid the microwave—it makes them soggy. If you’re in a hurry, an air fryer at 350°F (175°C) for 4-5 minutes works wonders.
Honestly, the flavors actually meld together a bit overnight, so leftover potato skins are still delicious—just not as crispy. I’ve been known to eat them cold straight from the fridge, and I have no regrets.
Nutritional Information & Benefits
Let’s be real—these are indulgent. But knowing what’s in them helps you enjoy them mindfully.
- Estimated Per Serving (2 halves): Calories: 380, Fat: 22g, Saturated Fat: 10g, Cholesterol: 55mg, Sodium: 620mg, Carbohydrates: 28g, Fiber: 3g, Sugar: 2g, Protein: 16g.
- Health Benefits: Potatoes are actually a good source of vitamin C, potassium, and fiber—especially if you eat the skin. The bacon provides protein and B vitamins, while the cheddar adds calcium. It’s not health food, but it’s not empty calories either.
- Dietary Considerations: This recipe is naturally gluten-free. For a lower-fat version, use reduced-fat cheddar and turkey bacon. For a dairy-free option, use plant-based cheese and vegan sour cream.
- Allergen Notes: Contains dairy (cheese, sour cream, butter). If you have a pork allergy, use turkey bacon or skip it altogether.
I like to think of these as a treat—something to enjoy on game day or when you need a little comfort. Balance is key, and these fit perfectly into a varied diet.
Conclusion
These crispy loaded baked potato skins with bacon and cheddar are the kind of recipe that earns a permanent spot in your rotation. They’re simple enough for a Tuesday night snack but impressive enough for a party platter. The double-baking method gives you that perfect crunch, and the combination of salty bacon, melted cheese, and cool sour cream is just unbeatable.
I love how versatile this recipe is—you can make it your own with different toppings, cheeses, or proteins. Whether you’re feeding a crowd or just treating yourself, these potato skins deliver every single time. They’ve become my go-to for potlucks, game days, and those late-night cravings that started it all.
I’d love to hear how yours turn out! Leave a comment below and let me know what variations you tried. Did you add jalapeños? Swap the cheese? Make them for a party? Share your photos and tag me—I can’t wait to see your creations. Now go make some crispy, cheesy magic!
Frequently Asked Questions
Can I make potato skins ahead of time?
Absolutely. You can bake the potatoes, scoop them, and store the empty skins in the fridge for up to 24 hours. When you’re ready to serve, just brush with butter and follow the second baking steps. It’s a great time-saver for parties.
Why are my potato skins soggy?
Soggy skins usually come from too much moisture. Make sure you pat the inside of the skins dry after scooping, and don’t skip the initial 10-minute bake before adding the cheese. Also, avoid overloading them with wet toppings like sour cream before baking—add those after.
Can I use a different type of potato?
Russets are best because of their thick skin and fluffy interior. Yukon Golds have thinner skin and a waxier texture, so they won’t get as crispy. Red potatoes are too small and thin-skinned for this recipe. Stick with Russets for the best results.
How do I get the cheese extra crispy on top?
For crispy cheese edges, sprinkle a little extra cheese around the rim of the skin before baking. You can also switch the oven to broil for the last 1-2 minutes of baking—just watch closely so it doesn’t burn.
Can I freeze loaded potato skins?
Yes, but they’re best fresh. To freeze, bake the skins fully, let them cool completely, and place them on a baking sheet in the freezer until solid. Transfer to a freezer bag and store for up to 2 months. Reheat directly from frozen in a 375°F (190°C) oven for 12-15 minutes.
Pin This Recipe!

Crispy Loaded Baked Potato Skins with Bacon and Cheddar

These crispy loaded baked potato skins with bacon and cheddar are the perfect snack for game day or a late-night craving. The double-baking method ensures a shatteringly crisp shell filled with gooey melted cheese and salty bacon.
- Prep Time: 15 minutes
- Cook Time: 30 minutes
- Total Time: 45 minutes
- Yield: 4 servings 1x
- Category: Appetizer
- Cuisine: American
Ingredients
- 4 large Russet potatoes
- 8 slices thick-cut bacon
- 1 ½ cups shredded sharp cheddar cheese
- ½ cup sour cream
- ¼ cup sliced green onions
- 2 tablespoons melted butter
- Salt and black pepper to taste
- Optional: ranch dressing, paprika, pickled jalapeños
Instructions
- Preheat oven to 400°F (200°C). Wash and scrub potatoes, pat dry, and prick each 4-5 times with a fork.
- Bake potatoes directly on oven rack or lined baking sheet for 50-60 minutes until fork-tender and internal temperature reaches 205°F (96°C). Let cool 10 minutes.
- While potatoes bake, cook bacon in a skillet over medium heat until crispy, about 6-8 minutes. Drain on paper towels, then crumble.
- Cut each potato in half lengthwise. Scoop out flesh leaving about ¼ inch (6 mm) attached to skin. Save flesh for another use.
- Place potato skins cut-side up on a lined baking sheet. Brush inside and edges with melted butter. Season with salt and pepper.
- Bake buttered skins at 400°F (200°C) for 10 minutes to dry and start crisping.
- Remove from oven. Divide shredded cheddar evenly among skins. Sprinkle crumbled bacon on top.
- Return to oven and bake 8-10 minutes until cheese is melted and bubbly and edges are deep golden brown and crispy.
- Let rest 2 minutes. Top with sour cream and sliced green onions. Serve immediately.
Notes
For extra crispy skins, increase second bake time by 2-3 minutes. To make ahead, bake and scoop potatoes a day in advance; store empty skins in fridge, then brush with butter and bake before serving. Avoid over-scooping to keep skins sturdy.
Nutrition
- Serving Size: 2 halves
- Calories: 380
- Sugar: 2
- Sodium: 620
- Fat: 22
- Saturated Fat: 10
- Carbohydrates: 28
- Fiber: 3
- Protein: 16
Keywords: potato skins, loaded potato skins, bacon cheddar potato skins, crispy potato skins, game day snack, party appetizer


