Love this? Save it for later!
Share the inspiration with your friends
My partner asked why I couldn’t just toss the chicken thighs in a bag with some garlic and Parmesan and shake it up instead of carefully brushing each piece with butter. I started to explain why that wouldn’t work—something about even coating and proper seasoning adhesion. Then I stopped. I mean, honestly, I had no good reason. I was just being stubborn about my method.
So I handed him the bag. He threw in the chicken, dumped in the garlic powder, shook it like he was mixing a cocktail, and added the Parmesan at the last second. It was a Tuesday night, and I was already mentally preparing to be disappointed. The air fryer preheated, he laid the thighs in the basket, and we waited.
What came out was honestly the crispiest, most flavorful chicken I’d made in months. The coating stuck perfectly. The cheese had browned in all the right spots. I stood there with a spatula in my hand, completely wrong, and absolutely delighted about it. You know that feeling when someone proves you wrong in the best possible way? That was this recipe. It stayed with me because it taught me something—sometimes the simplest method is the one you’ve been overthinking your way around.
Why You’ll Love This Recipe
These crispy air fryer garlic Parmesan chicken thighs are the kind of meal that makes you look forward to dinner all day. I’ve tested this recipe at least a dozen times, tweaking the seasoning ratios and cooking times to get that perfect golden crust without drying out the meat. Let me tell you, it was worth every trial.
- Quick & Easy : Comes together in under 30 minutes, perfect for busy weeknights or last-minute cravings. No marinating required.
- Simple Ingredients : No fancy grocery trips needed; you likely already have everything in your kitchen. Chicken, garlic, Parmesan, and a few pantry staples.
- Perfect for Dinner : Great for a cozy weeknight meal, meal prep, or even impressing guests without breaking a sweat.
- Crowd-Pleaser : Always gets rave reviews from kids and adults alike. The crispy coating is addictive.
- Unbelievably Delicious : The texture is pure magic—crunchy on the outside, juicy on the inside. It’s comfort food that feels a little lighter.
What makes this recipe different from the rest is the shaking-the-bag method. It sounds too simple to work, but it creates an even, clingy coating that crisps up beautifully in the air fryer. No messy brushing, no complicated dredging stations. This isn’t just another version of air fryer chicken—it’s my best version, born from being proven wrong by a bag shake.
This recipe is the kind that makes you close your eyes after the first bite. It’s comfort food reimagined—healthier, faster, but with the same soul-soothing satisfaction. Perfect for turning a simple Tuesday into something memorable.
What Ingredients You Will Need
This recipe uses simple, wholesome ingredients to deliver bold flavor and satisfying crunch without the fuss. Most of these are pantry staples, which makes this dish perfect for those nights when you need dinner on the table fast.
- Boneless, skinless chicken thighs (about 1.5 lbs or 680g) — thighs stay juicier than breasts during air frying. Look for uniform thickness for even cooking.
- Grated Parmesan cheese (½ cup or 50g) — use the finely grated kind from a canister or grate your own. I recommend Kraft for consistent texture, but fresh Parm works beautifully too.
- Garlic powder (1 tablespoon or 9g) — not garlic salt. We want pure garlic flavor without extra sodium.
- Paprika (1 teaspoon or 2g) — adds color and a subtle smoky sweetness. Smoked paprika works great here too.
- Onion powder (1 teaspoon or 2g) — rounds out the savory profile.
- Dried parsley (1 teaspoon or 1g) — optional but adds a nice herbal note and visual appeal.
- Salt (½ teaspoon or 3g) — adjust based on your Parmesan’s saltiness.
- Black pepper (¼ teaspoon or 0.5g) — freshly ground if possible.
- Olive oil spray — essential for that golden crust. Avocado oil spray works too.
- Fresh parsley (for garnish, optional) — a sprinkle of green makes it look restaurant-ready.
For the dipping sauce (optional but highly recommended):
- Greek yogurt (½ cup or 120g) — plain, full-fat for best texture.
- Lemon juice (1 tablespoon or 15ml) — fresh squeezed.
- Garlic powder (½ teaspoon or 1.5g) — because you can never have too much garlic.
- Salt and pepper to taste.
Ingredient selection tip: Look for chicken thighs that are similar in size so they cook evenly. If using frozen thighs, thaw them completely and pat them very dry—moisture is the enemy of crispiness. For a dairy-free version, try nutritional yeast in place of Parmesan, though the texture will be slightly different.
Equipment Needed
You don’t need much for this recipe, which is part of its beauty. Here’s what you’ll need:
- Air fryer — any size works, but a 5.8-quart or larger basket-style is ideal for fitting 4-6 thighs without overcrowding. I use a Cosori Pro, and it’s never let me down.
- Large zip-top bag — the hero of this recipe. A gallon-size works best. Reusable silicone bags are great if you have them.
- Tongs — for placing chicken in the basket and flipping halfway through. Silicone-tipped ones won’t scratch your air fryer basket.
- Meat thermometer — don’t skip this. It’s the only way to guarantee perfectly cooked chicken without cutting into it. An instant-read digital one costs about $10 and is worth every penny.
- Mixing bowl — for the dipping sauce if you’re making it.
- Cutting board and knife — for trimming any excess fat from the thighs.
Budget-friendly tip: You don’t need a fancy air fryer. I started with a $40 model from a discount store, and it made excellent chicken. The key is learning your specific machine’s hot spots and adjusting cooking times accordingly.
Preparation Method
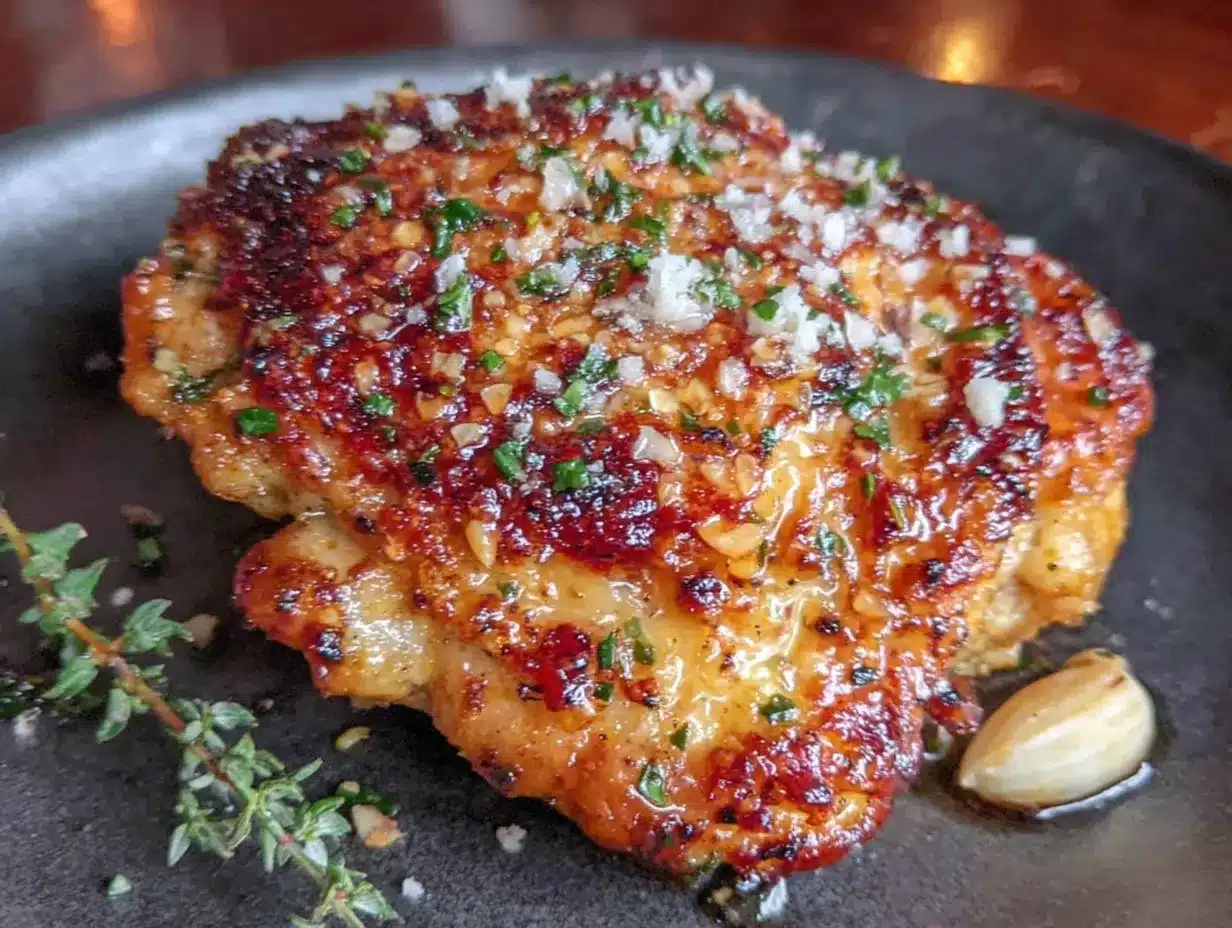
- Prep the chicken (5 minutes). Pat the chicken thighs dry with paper towels. This is crucial—excess moisture will steam the coating instead of crisping it. Trim any large pieces of fat, but leave a little for flavor. Season both sides lightly with salt and pepper.
- Mix the coating (2 minutes). In a small bowl, combine the grated Parmesan, garlic powder, paprika, onion powder, dried parsley, salt, and pepper. Give it a whisk with a fork to break up any clumps. The Parmesan should be evenly distributed.
- The bag shake method (3 minutes). Place the chicken thighs in a large zip-top bag. Pour the coating mixture over them. Seal the bag, leaving a little air inside, and shake vigorously for about 30 seconds. Make sure each piece is evenly coated. I like to massage the bag a bit with my hands to press the coating into the chicken.
- Preheat the air fryer (3 minutes). Most air fryers need a quick preheat. Set yours to 400°F (200°C) and let it run empty for 3 minutes. This ensures the chicken starts crisping immediately.
- Arrange the chicken (2 minutes). Lightly spray the air fryer basket with olive oil spray. Place the chicken thighs in a single layer, leaving space between each piece. Don’t overcrowd—work in batches if needed. The chicken should not overlap at all. Spray the tops of the thighs lightly with oil.
- Cook the first side (12 minutes). Air fry at 400°F (200°C) for 12 minutes. Do not open the basket during this time. You’ll start to smell the garlic and Parmesan—that’s a good sign.
- Flip and finish (6-8 minutes). Carefully flip each thigh using tongs. Spray the tops again with oil. Cook for another 6-8 minutes, until the internal temperature reaches 165°F (74°C) and the coating is deep golden brown and crispy.
- Rest (3 minutes). Remove the chicken from the air fryer and let it rest on a wire rack for 3 minutes. This keeps the bottom from getting soggy. The coating will continue to crisp as it cools slightly.
Sensory cues to watch for: At the 10-minute mark, you should hear a gentle sizzling sound. The kitchen will smell like toasted Parmesan and garlic. When you flip the chicken, the bottom should be golden with some darker brown spots—that’s the cheese caramelizing. If it looks pale, give it another 2 minutes before flipping.
Troubleshooting tip: If your coating isn’t sticking well, your chicken might be too wet. Pat it dry again before shaking the bag. Also, make sure your Parmesan is finely grated—larger shreds won’t adhere as well.
Cooking Tips & Techniques
I’ve made this recipe more times than I can count, and I’ve learned a few things the hard way. Here’s what I wish someone had told me from the start:
Don’t skip the oil spray. The first time I made these, I thought the Parmesan would crisp up on its own. It didn’t. A light spray of oil is what creates that golden, crunchy crust. It helps the cheese brown instead of just drying out.
Watch your batch size. I once tried to cram six thighs into a small air fryer basket because I was impatient. They came out unevenly cooked—some were dry, others were still soft. Air circulation is everything. Leave at least half an inch between each piece. If you’re cooking for a crowd, do two batches and keep the first batch warm in a 200°F oven.
Check your temperature early. Air fryers vary wildly. My friend’s air fryer runs 25 degrees hotter than mine. Start checking the internal temperature at the 16-minute mark for smaller thighs. You’re looking for 165°F, but I pull mine at 160°F and let carryover cooking do the rest—it keeps the meat juicier.
The bag trick works best with dry ingredients. Don’t add oil to the bag. The oil should only go on after the chicken is in the basket. Oil in the bag makes the coating clump up instead of distributing evenly. Trust me, I tried it. It was a mess.
One more thing—I once forgot to flip the chicken halfway through. The tops were gorgeous, but the bottoms were pale and soft. Don’t be like me. Set a timer for 12 minutes, flip, and reset.
Variations & Adaptations
This recipe is surprisingly flexible. Here are some variations I’ve tried and loved:
Spicy Garlic Parmesan: Add ½ teaspoon of cayenne pepper and ½ teaspoon of red pepper flakes to the coating mixture. The heat cuts through the richness of the cheese beautifully. My spice-loving neighbor requested this version for a game day gathering, and it disappeared in minutes.
Lemon Herb Twist: Swap the dried parsley for 1 teaspoon of dried oregano and add the zest of one lemon to the coating. Serve with lemon wedges. This version feels brighter and more summery—perfect with a side salad.
Gluten-Free Adaptation: This recipe is naturally gluten-free since we’re using Parmesan instead of flour or breadcrumbs. Just double-check that your Parmesan is certified gluten-free if that’s a concern. Some brands add anti-caking agents that may contain gluten.
Dairy-Free Version: Use nutritional yeast in place of Parmesan. It won’t crisp up quite the same way, but it adds a cheesy, umami flavor. I’d also recommend adding an extra tablespoon of olive oil spray to help with browning.
Chicken Breast Option: If you prefer white meat, use boneless, skinless chicken breasts. Cut them into 4-ounce portions and pound them to even thickness. Reduce cooking time to 10-12 minutes total, flipping at 6 minutes. Check temperature early—breasts dry out faster than thighs.
Air Fryer vs. Oven: You can bake these at 425°F (220°C) on a wire rack set over a baking sheet for 20-25 minutes. The texture won’t be quite as crispy, but it still tastes great. Just give them a good spray of oil before baking.
Serving & Storage Suggestions
These chicken thighs are best served hot, right out of the air fryer. The coating is at its crispiest within the first 15 minutes. I like to serve them with a simple lemon-garlic yogurt sauce on the side—it cuts through the richness and adds a tangy contrast.
What to serve with them:
- A crisp green salad with lemon vinaigrette
- Roasted vegetables like broccoli or asparagus
- Mashed potatoes or cauliflower mash
- Rice pilaf or quinoa
- Warm crusty bread to soak up any juices
Storage instructions: Leftover chicken keeps in an airtight container in the refrigerator for up to 4 days. The coating will soften over time, but that’s okay—just reheat them in the air fryer to bring back some crunch.
Reheating method: Place leftovers in the air fryer at 375°F (190°C) for 3-4 minutes. Flip halfway through. The microwave will make them soggy, so avoid it if you can. If you’re in a rush, a hot skillet with a tiny bit of oil works in a pinch.
Freezer tips: These freeze well for up to 3 months. Let them cool completely, then place them in a single layer on a baking sheet and freeze until solid. Transfer to a freezer bag. Reheat directly from frozen in the air fryer at 375°F for 6-8 minutes.
One thing I’ve noticed—the flavors actually deepen after a day in the fridge. The garlic and Parmesan meld together even more. So don’t be sad about leftovers. They make an amazing lunch the next day, sliced over a salad or tucked into a wrap.
Nutritional Information & Benefits
Here’s the approximate nutritional breakdown per serving (based on 4 servings, using boneless skinless chicken thighs and the coating as listed):
- Calories: 320-350
- Protein: 28g
- Fat: 20g (mostly from the chicken and cheese)
- Carbohydrates: 3g
- Fiber: 0.5g
- Sugar: 0.5g
- Sodium: 480mg (varies based on Parmesan saltiness)
This recipe is naturally low-carb and keto-friendly, with most of the calories coming from protein and fat. Chicken thighs are rich in selenium, which supports thyroid function, and B vitamins for energy. Parmesan adds a decent amount of calcium—about 15% of your daily needs per serving.
One thing I appreciate about this recipe is that it feels indulgent without actually being heavy. You’re getting real food—protein, healthy fats, and minimal processed ingredients. It fits into a balanced diet without making you feel like you’re missing out. That’s my favorite kind of meal.
Allergen note: This recipe contains dairy (Parmesan). For a dairy-free option, see the variations section. It is naturally gluten-free, nut-free, and egg-free.
Conclusion
These crispy air fryer garlic Parmesan chicken thighs have become a staple in my kitchen for good reason. They’re fast, foolproof, and genuinely delicious. The bag-shaking method might have started as a moment of humility for me, but now it’s the only way I make them. Sometimes the best recipes come from letting go of control and trying something simple.
I hope you give this recipe a try—and maybe even customize it to make it your own. Add extra garlic if you’re bold, throw in some red pepper flakes for heat, or serve it with your favorite dipping sauce. The possibilities are endless.
I’d love to hear how yours turn out. Drop a comment below and let me know if you tried any variations, or share a photo of your crispy chicken. Don’t forget to pin this recipe for later and share it with a friend who needs an easy dinner win. Happy cooking, friends!
Frequently Asked Questions
Can I use chicken breasts instead of thighs?
Absolutely. Just adjust the cooking time—chicken breasts typically need about 10-12 minutes total at 400°F, flipping halfway. Pound them to even thickness for best results, and always check the internal temperature.
Why is my coating not sticking to the chicken?
Your chicken might be too wet. Pat the thighs very dry with paper towels before adding them to the bag. Also, make sure your Parmesan is finely grated—larger shreds won’t adhere as well to the meat.
Can I make this recipe without an air fryer?
Yes! Bake the coated thighs on a wire rack set over a baking sheet at 425°F for 20-25 minutes, flipping halfway. Spray well with oil for best browning. The texture won’t be quite as crispy, but it’s still delicious.
How do I store and reheat leftovers?
Store in an airtight container in the fridge for up to 4 days. Reheat in the air fryer at 375°F for 3-4 minutes to restore crispiness. Avoid the microwave—it will make the coating soggy.
Is this recipe gluten-free?
Yes, this recipe is naturally gluten-free since we use Parmesan instead of flour or breadcrumbs. Just double-check that your Parmesan is certified gluten-free if you have celiac disease or a severe sensitivity.
Pin This Recipe!
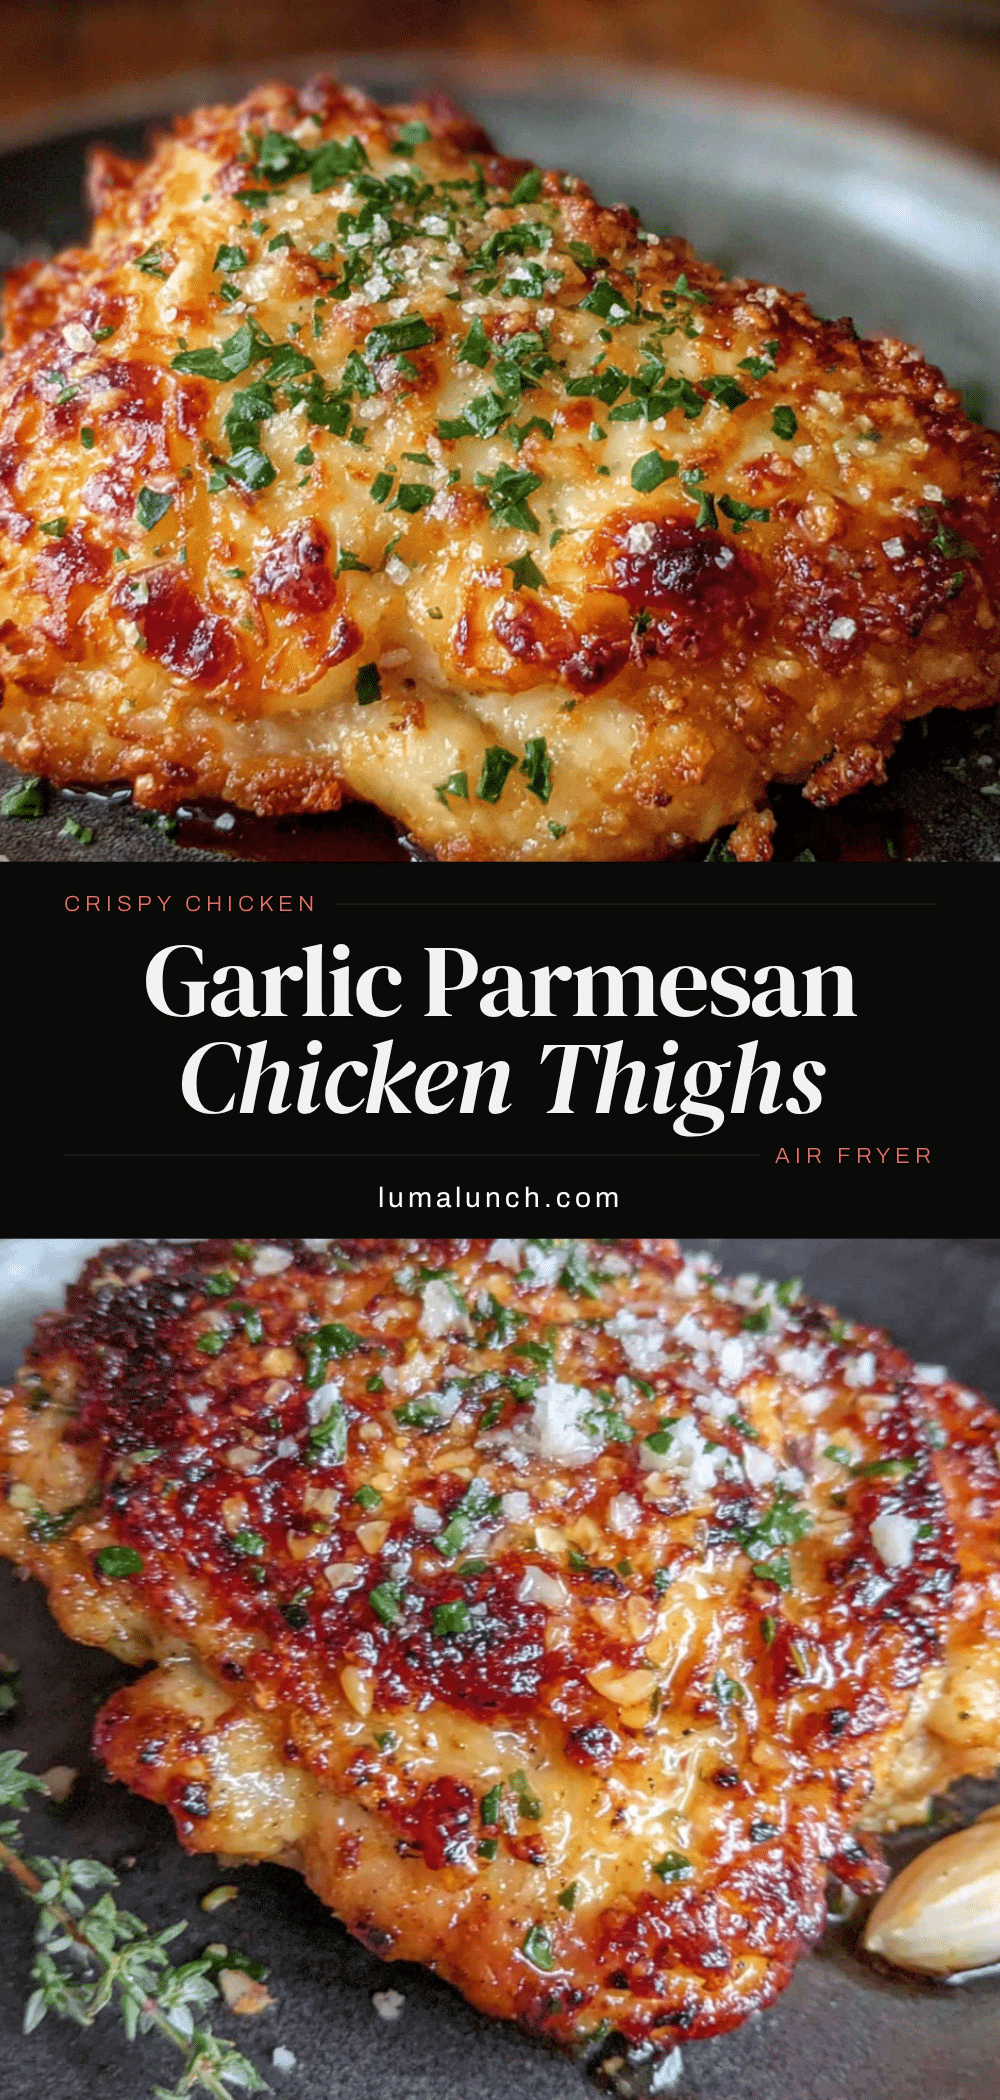
Crispy Air Fryer Garlic Parmesan Chicken Thighs

These crispy air fryer garlic Parmesan chicken thighs are the kind of meal that makes you look forward to dinner all day. Quick, easy, and unbelievably delicious, they come together in under 30 minutes with simple ingredients and a clever bag-shaking method for the perfect golden crust.
- Prep Time: 10 minutes
- Cook Time: 18-20 minutes
- Total Time: 28-30 minutes
- Yield: 4 servings 1x
- Category: Main Course
- Cuisine: American
Ingredients
- 1.5 lbs (680g) boneless, skinless chicken thighs
- ½ cup (50g) grated Parmesan cheese
- 1 tablespoon (9g) garlic powder
- 1 teaspoon (2g) paprika
- 1 teaspoon (2g) onion powder
- 1 teaspoon (1g) dried parsley (optional)
- ½ teaspoon (3g) salt
- ¼ teaspoon (0.5g) black pepper
- Olive oil spray
- Fresh parsley for garnish (optional)
- For the dipping sauce (optional):
- ½ cup (120g) plain Greek yogurt
- 1 tablespoon (15ml) lemon juice
- ½ teaspoon (1.5g) garlic powder
- Salt and pepper to taste
Instructions
- Prep the chicken (5 minutes): Pat the chicken thighs dry with paper towels. Trim any large pieces of fat, but leave a little for flavor. Season both sides lightly with salt and pepper.
- Mix the coating (2 minutes): In a small bowl, combine the grated Parmesan, garlic powder, paprika, onion powder, dried parsley, salt, and pepper. Whisk with a fork to break up any clumps.
- The bag shake method (3 minutes): Place the chicken thighs in a large zip-top bag. Pour the coating mixture over them. Seal the bag, leaving a little air inside, and shake vigorously for about 30 seconds until each piece is evenly coated. Massage the bag with your hands to press the coating into the chicken.
- Preheat the air fryer (3 minutes): Set your air fryer to 400°F (200°C) and let it run empty for 3 minutes.
- Arrange the chicken (2 minutes): Lightly spray the air fryer basket with olive oil spray. Place the chicken thighs in a single layer, leaving space between each piece. Do not overcrowd. Spray the tops of the thighs lightly with oil.
- Cook the first side (12 minutes): Air fry at 400°F (200°C) for 12 minutes. Do not open the basket during this time.
- Flip and finish (6-8 minutes): Carefully flip each thigh using tongs. Spray the tops again with oil. Cook for another 6-8 minutes, until the internal temperature reaches 165°F (74°C) and the coating is deep golden brown and crispy.
- Rest (3 minutes): Remove the chicken from the air fryer and let it rest on a wire rack for 3 minutes to keep the bottom from getting soggy.
Notes
Don’t skip the oil spray—it’s essential for a golden, crunchy crust. Leave at least half an inch between each piece for proper air circulation. Start checking internal temperature at the 16-minute mark for smaller thighs. For juicier meat, pull chicken at 160°F and let carryover cooking finish. Do not add oil to the bag—only spray after chicken is in the basket. If coating isn’t sticking, pat chicken drier. Leftovers keep in the fridge for up to 4 days; reheat in air fryer at 375°F for 3-4 minutes. Freezes well for up to 3 months.
Nutrition
- Serving Size: 1 serving (about 2 t
- Calories: 320350
- Sugar: 0.5
- Sodium: 480
- Fat: 20
- Saturated Fat: 6
- Carbohydrates: 3
- Fiber: 0.5
- Protein: 28
Keywords: air fryer chicken thighs, garlic parmesan chicken, crispy chicken thighs, easy chicken recipe, weeknight dinner, keto chicken, low carb chicken


