Love this? Save it for later!
Share the inspiration with your friends
My neighbor Sarah, who is maybe twelve years old, asked why I couldn’t just add pumpkin puree directly to the snickerdoodle dough instead of messing with reducing it on the stove. I started to explain why that wouldn’t work — something about excess moisture and the science of cookie spread — then stopped. Honestly, I had never actually tried it. I just assumed it would be a disaster. So I did what any reasonable adult would do: I told her she might be onto something, went home, and made a batch exactly the way she suggested. No reduction. No fuss. Just pumpkin straight from the can into the butter and sugar.
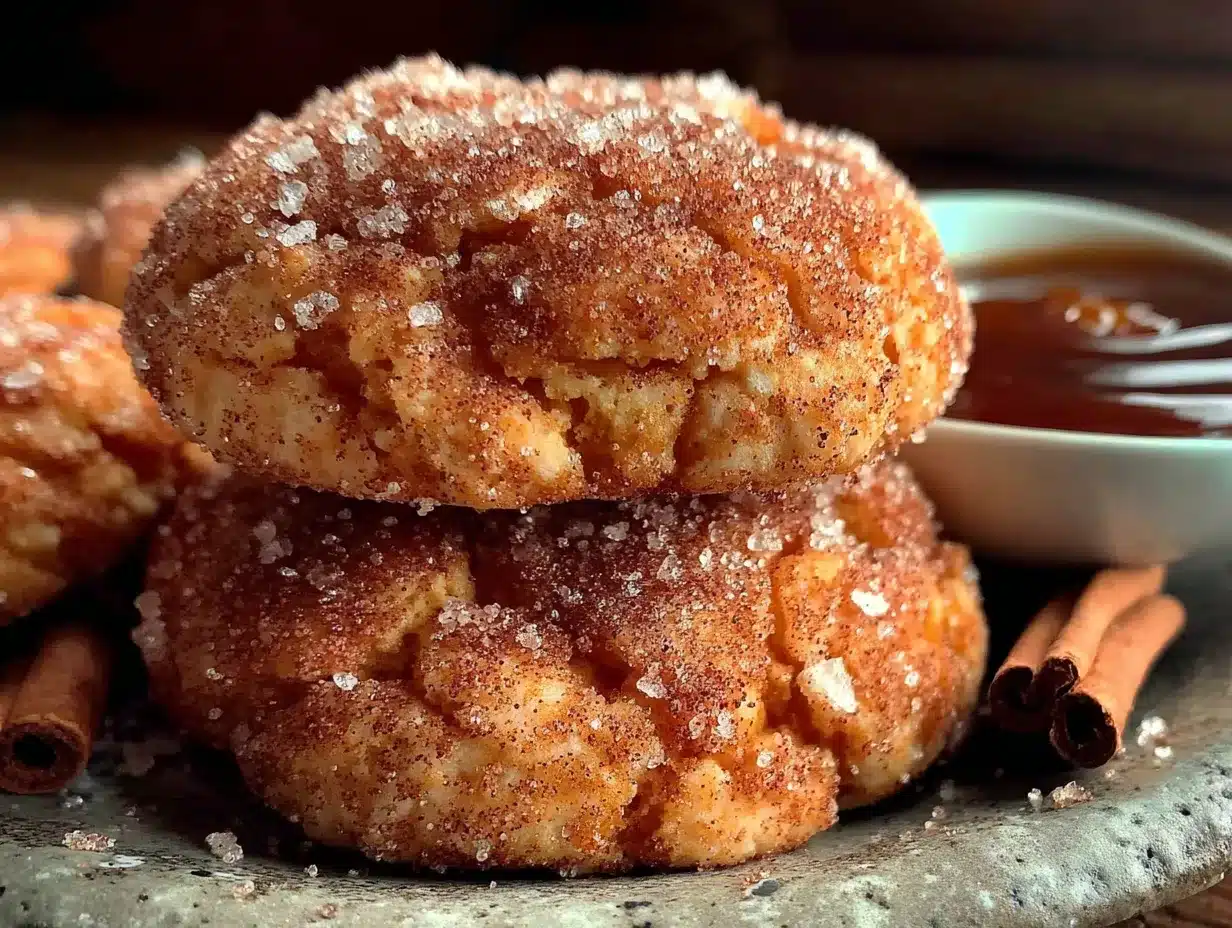
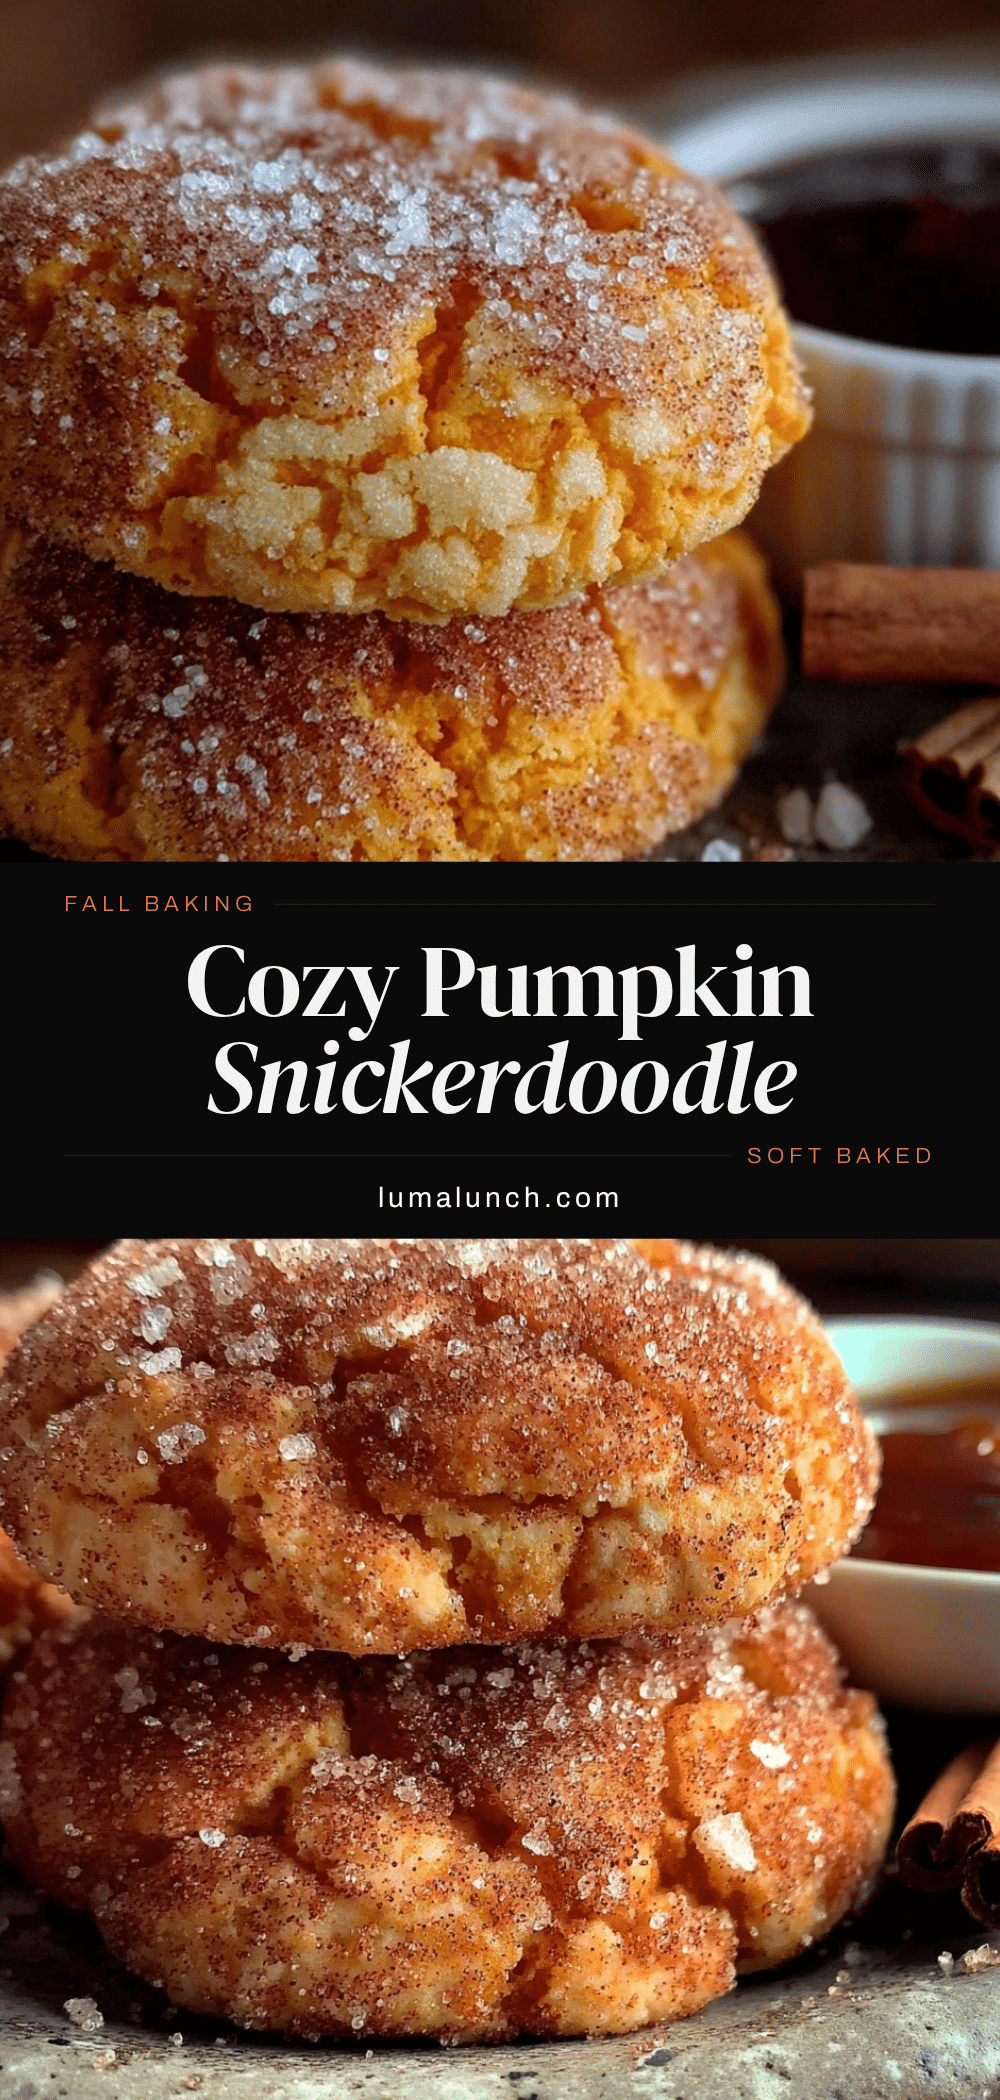
The cookies came out of the oven looking like little pillows of autumn — soft, puffy, with that signature crackled cinnamon-sugar top. And they were perfect. I mean, really perfect. The texture was tender in a way I hadn’t managed with my previous attempts at pumpkin cookies, which always turned out either too cakey or oddly gummy. These had that snickerdoodle chew, but with a subtle pumpkin warmth running through every bite. I actually texted Sarah a photo with the caption “You were right.” She replied with a single thumbs-up emoji, which felt about right.
That moment of being wrong — and being genuinely glad about it — is why these cookies have become my go-to for fall baking. Maybe you’ve been there, stubbornly committed to a method you read somewhere, only to realize a simpler approach works better. These cozy pumpkin snickerdoodle cookies are proof that sometimes the easiest path is the best one. They come together in under thirty minutes, fill your kitchen with the kind of smell that makes people wander in asking what you’re baking, and taste like everything you want autumn to be. Let me tell you, once you try this method, you won’t go back.
Why You’ll Love This Recipe
These aren’t your average pumpkin cookies. After testing this recipe about seven times (and eating more than my fair share of the “failures”), I can confidently say this version hits every note you want from fall baking.
- Quick & Easy: From start to finish, these cookies are ready in about 25 minutes. No chilling the dough, no complicated steps — just mix, roll, and bake.
- Simple Ingredients: You probably have everything in your pantry right now. No specialty flours or hard-to-find spices. Just basic baking staples plus a can of pumpkin puree.
- Perfect for Fall Gatherings: Whether it’s a Halloween party, Thanksgiving dessert table, or just a cozy Sunday afternoon, these cookies fit right in.
- Crowd-Pleaser: I brought a batch to my book club last month, and three people asked for the recipe before the discussion even started. Kids love them, adults love them — they disappear fast.
- Unbelievably Delicious: The combination of pumpkin, cinnamon, and that signature snickerdoodle tang from cream of tartar is pure comfort. The soft, chewy texture with the crackly cinnamon-sugar coating is next-level good.
What makes these different from other pumpkin cookie recipes? It’s the texture. Most pumpkin cookies turn out cakey — like little muffin tops. These have that classic snickerdoodle chew, thanks to the cream of tartar and the way we handle the pumpkin. No draining, no pressing, no fuss. Just pure, straightforward cookie magic.
This recipe isn’t just good — it’s the kind that makes you close your eyes after the first bite. It’s fall in cookie form, and it’s exactly what you need right now.
What Ingredients You Will Need
This recipe uses simple, wholesome ingredients to deliver that cozy fall flavor without any unnecessary fuss. Most of these are pantry staples you likely already have on hand, especially if you do any amount of fall baking.
For the Cookie Dough
- 2 ¾ cups (345g) all-purpose flour — I use Gold Medal unbleached for consistent results. Spoon and level your flour; don’t scoop directly from the bag or you’ll end up with dry cookies.
- 1 teaspoon baking soda — Helps the cookies spread just enough while staying soft.
- 2 teaspoons cream of tartar — This is the secret to that classic snickerdoodle tang. Don’t skip it — baking powder isn’t a substitute here.
- 1 teaspoon ground cinnamon — Adds warmth that complements the pumpkin perfectly.
- ½ teaspoon ground nutmeg — Freshly grated if you have it, but pre-ground works fine.
- ¼ teaspoon ground ginger — Just a hint for depth of flavor.
- ¼ teaspoon ground cloves — Optional but recommended for that full pumpkin spice experience.
- ½ teaspoon salt — Balances the sweetness and enhances all the flavors.
- ½ cup (113g) unsalted butter, softened — Let it sit at room temperature for about 30 minutes. Cold butter won’t cream properly.
- ¾ cup (150g) granulated sugar — Adds sweetness and helps with that crackly top.
- ½ cup (100g) packed light brown sugar — Adds moisture and a hint of molasses flavor that pairs beautifully with pumpkin.
- 1 large egg, room temperature — Helps the dough come together smoothly.
- 1 teaspoon vanilla extract — Pure vanilla, not imitation, for the best flavor.
- ½ cup (120g) pumpkin puree — Not pumpkin pie filling. Just plain canned pumpkin. Libby’s is my go-to brand.
For the Cinnamon-Sugar Coating
- ¼ cup (50g) granulated sugar
- 2 teaspoons ground cinnamon
- Pinch of nutmeg — Adds a little extra fall flavor to the coating.
Ingredient Tips: If you’re using a different brand of pumpkin puree, check the consistency. Some brands are more watery than others. If yours seems thin, let it sit in a fine-mesh strainer for about 10 minutes while you prep the other ingredients. For a dairy-free version, use vegan butter sticks — I’ve had good results with Country Crock Plant Butter. And if you don’t have cream of tartar, you can substitute 2 teaspoons of lemon juice or white vinegar mixed into the dough, though the flavor will be slightly different.
Equipment Needed
You don’t need any fancy equipment for these cookies, which is part of their charm. Here’s what you’ll want to have on hand:
- Large mixing bowl — Any medium-to-large bowl works. I use a ceramic one because it doesn’t slide around on the counter.
- Medium mixing bowl — For the dry ingredients.
- Electric hand mixer or stand mixer — A hand mixer works perfectly. You can do this by hand with a wooden spoon, but your arm will get a workout.
- Measuring cups and spoons — For accuracy. I prefer stainless steel for dry ingredients and a glass liquid measuring cup for the pumpkin.
- Rubber spatula — For scraping down the bowl and folding in the dry ingredients.
- Baking sheets — Two standard half-sheet pans work well. If you only have one, bake in batches and let the pan cool between uses.
- Parchment paper or silicone baking mats — Parchment paper is cheaper and disposable; silicone mats are reusable and work just as well.
- Small bowl — For the cinnamon-sugar coating.
- Cookie scoop — A 1.5-tablespoon scoop makes uniform cookies. If you don’t have one, use two spoons to portion the dough.
- Wire cooling rack — Essential for letting the cookies cool properly without getting soggy bottoms.
Budget-friendly tip: If you don’t have a cookie scoop, just use a regular tablespoon and shape the dough balls by hand. They won’t be perfectly uniform, but they’ll taste the same. And honestly, slightly imperfect cookies have more charm anyway.
Preparation Method
Let’s make these cookies. The process is straightforward, but I’ll walk you through each step with the little details that make a difference.
- Preheat your oven to 350°F (175°C). Line two baking sheets with parchment paper or silicone mats. Getting the oven hot before you start mixing ensures even baking from the moment the cookies go in.
- Whisk the dry ingredients together. In a medium bowl, combine the flour, baking soda, cream of tartar, cinnamon, nutmeg, ginger, cloves, and salt. Whisk until everything is evenly distributed — about 20 seconds. This ensures you don’t get a pocket of baking soda in one cookie. Set aside.
- Cream the butter and sugars. In a large mixing bowl, beat the softened butter, granulated sugar, and brown sugar together on medium speed until light and fluffy — about 2 to 3 minutes. You’ll see the mixture turn pale and increase in volume. Scrape down the sides of the bowl with a rubber spatula halfway through.
- Add the wet ingredients. Beat in the egg and vanilla extract until combined, about 30 seconds. Then add the pumpkin puree and mix on low speed until just incorporated. The mixture will look a little loose and might look slightly curdled — that’s normal. Don’t panic.
- Combine wet and dry ingredients. Gradually add the flour mixture to the wet ingredients, mixing on low speed. I add it in three additions, mixing just until the flour disappears after each one. Overmixing at this stage will make the cookies tough. Stop as soon as you don’t see any more streaks of flour. The dough will be soft — softer than regular snickerdoodle dough — but it should hold together.
- Make the cinnamon-sugar coating. In a small bowl, stir together the ¼ cup sugar, 2 teaspoons cinnamon, and pinch of nutmeg. Mix well with a fork so there are no clumps.
- Shape the cookies. Using a 1.5-tablespoon cookie scoop or a regular spoon, portion out rounded tablespoons of dough. Roll each portion into a ball between your palms. The dough is sticky, so lightly wet your hands if needed. Drop each ball into the cinnamon-sugar mixture and roll to coat thoroughly. Place on the prepared baking sheets, spacing them about 2 inches apart — these cookies spread a little.
- Bake. Bake one sheet at a time in the center of the oven for 10 to 12 minutes. At 10 minutes, the cookies will be puffed and look slightly underdone in the center — that’s exactly what you want. The edges should be set but not brown. For softer, chewier cookies, pull them at 10 minutes. For slightly crisper edges, go to 12 minutes.
- Cool on the baking sheet. Let the cookies rest on the hot baking sheet for 5 minutes. This allows them to finish setting up without overbaking. After 5 minutes, transfer them to a wire cooling rack to cool completely. The tops will develop that beautiful crackled look as they cool.
- Repeat. If you’re baking in batches, let the baking sheet cool completely before placing more dough on it. A hot pan will cause the dough to start spreading before it hits the oven, and you’ll get flat cookies.
Sensory cues: When the cookies come out of the oven, they should smell like fall — warm cinnamon, nutmeg, and a hint of pumpkin. The tops will be cracked and dusted with cinnamon sugar. The centers will look slightly soft and puffy, but they’ll set as they cool. If you press one gently with your finger, it should spring back.
Cooking Tips & Techniques
After making these cookies more times than I care to count, I’ve picked up a few tricks that make a real difference. Here’s what I wish someone had told me:
Don’t overmix the dough. This is the number one mistake I made in my early attempts. Once you add the flour, mix just until it disappears. Overmixing develops gluten, which makes cookies tough and dense instead of tender and soft. I actually stopped using my mixer at this stage and switch to folding by hand with a rubber spatula — it gives me more control.
Chill the dough if it’s too sticky. Some pumpkin purees are more watery than others. If your dough feels more like batter than cookie dough, pop it in the fridge for 20 to 30 minutes. This firms up the butter and makes the dough easier to handle. I learned this the hard way when my first batch spread into one giant cookie — delicious, but not exactly what I was going for.
Use a cookie scoop for even baking. Uniform size means uniform baking. I use a 1.5-tablespoon scoop, and every cookie comes out the same size. If you’re rolling by hand, try to make each ball roughly the same size — about the size of a walnut.
Rotate the pan halfway through. Ovens have hot spots. About 5 minutes into baking, rotate the pan 180 degrees. This ensures even browning and prevents the cookies on the back of the pan from getting too dark.
Let them cool on the pan. I know it’s tempting to move them immediately, but those 5 minutes on the hot baking sheet are crucial. The cookies are still setting up internally, and moving them too soon can cause them to fall apart or become misshapen. Trust the process.
One more thing: If you want extra-soft cookies, pull them at 10 minutes even if they look underdone. They’ll continue to bake from residual heat as they cool. I’ve ruined batches by leaving them in just two minutes too long — they were still good, just not as soft and chewy as I wanted.
Variations & Adaptations
One of the best things about this recipe is how versatile it is. Here are some variations I’ve tried and loved:
Gluten-Free Version: Substitute the all-purpose flour with a 1:1 gluten-free baking flour blend that contains xanthan gum. I’ve used King Arthur Measure for Measure with great results. The texture is slightly more tender, but the flavor is spot-on. Add an extra tablespoon of flour if the dough seems too wet.
Dairy-Free Version: Use vegan butter sticks instead of regular butter. I’ve tested this with Country Crock Plant Butter and Miyoko’s, and both work well. Make sure your pumpkin puree is also dairy-free — most are, but check the label.
Extra Pumpkin Spice: If you’re a pumpkin spice fanatic (no judgment here), add an extra teaspoon of pumpkin pie spice to the dry ingredients. You can also add a pinch of cardamom for a more complex flavor profile.
Stuffed Cookies: For a fun twist, press a small piece of cream cheese or a caramel candy into the center of each dough ball before rolling in cinnamon sugar. Seal the dough around the filling completely. The result is a gooey-centered cookie that’s absolutely decadent.
Iced Version: After the cookies cool, drizzle them with a simple glaze made from 1 cup powdered sugar, 2 tablespoons milk, and ½ teaspoon vanilla extract. Add a pinch of cinnamon to the glaze for extra flavor. Let the glaze set for about 30 minutes before serving.
Mini Cookie Version: Use a teaspoon-sized scoop and bake for 7 to 9 minutes. These are perfect for cookie platters or for portion control — though I find I just eat more of them.
My personal favorite variation is the cream cheese stuffed version. I tried it on a whim one Sunday afternoon when I had half a block of cream cheese in the fridge, and it was a game-changer. The tangy cream cheese against the sweet cinnamon-sugar coating and soft pumpkin cookie — honestly, it’s incredible.
Serving & Storage Suggestions
These cookies are best served warm, when the cinnamon-sugar coating is still slightly crackly and the centers are soft. Let them cool for about 10 minutes after coming out of the oven — just long enough so you don’t burn your mouth, but warm enough that the flavors are at their peak.
Presentation ideas: Arrange the cookies on a rustic wooden board or a white platter for that cozy fall aesthetic. Sprinkle a little extra cinnamon sugar over the top for visual appeal. They look beautiful on a dessert table alongside apple cider, pumpkin bread, or a warm apple crisp.
Pairing suggestions: These cookies are perfect with a cup of hot coffee, a chai latte, or a glass of cold milk. For a more indulgent treat, serve them with a scoop of vanilla ice cream or a dollop of whipped cream. They also pair surprisingly well with a warm mug of mulled cider.
Storage instructions: Store the cookies in an airtight container at room temperature for up to 5 days. Place a piece of bread in the container to keep them soft — the bread absorbs excess air and releases moisture. Replace the bread slice every other day if you’re storing them longer.
Freezing instructions: These cookies freeze beautifully. Freeze the baked cookies in a single layer on a baking sheet, then transfer to a freezer-safe bag or container. They’ll keep for up to 3 months. To thaw, let them sit at room temperature for about 30 minutes. You can also freeze the unbaked dough balls — roll them in cinnamon sugar first, then freeze on a baking sheet. Once frozen, transfer to a bag. Bake from frozen, adding 2 to 3 minutes to the baking time.
Flavor development: These cookies actually taste better the next day. The spices meld together overnight, and the texture softens slightly. If you can resist eating them all on day one, you’ll be rewarded with even more flavorful cookies on day two.
Nutritional Information & Benefits
Here’s the approximate nutritional breakdown for one cookie (based on the recipe making 24 cookies):
| Nutrient | Amount Per Cookie |
|---|---|
| Calories | 145 |
| Total Fat | 5g |
| Saturated Fat | 3g |
| Cholesterol | 20mg |
| Sodium | 95mg |
| Total Carbohydrates | 23g |
| Dietary Fiber | 1g |
| Sugars | 14g |
| Protein | 2g |
| Vitamin A | 15% DV |
Health benefits: Pumpkin is packed with vitamin A (beta-carotene), which supports eye health and immune function. It’s also a good source of fiber and antioxidants. The cinnamon in these cookies has anti-inflammatory properties and may help regulate blood sugar. While these are definitely a treat, the pumpkin adds a nutritional boost you won’t get from regular snickerdoodles.
Dietary considerations: This recipe contains gluten, dairy, and eggs. For gluten-free and dairy-free adaptations, see the variations section above. These cookies are nut-free as written, making them safe for school bake sales and nut-free households. They are not low-carb or keto-friendly due to the sugar content.
Conclusion
These cozy pumpkin snickerdoodle cookies are everything I want fall baking to be — simple, warm, and deeply satisfying. They came from a moment of being wrong about something I thought I knew, and honestly, I’m grateful for that. Sometimes the best recipes come from letting go of what you think you know and trying something new.
I hope you give these cookies a try, whether you’re baking for a crowd or just for yourself on a quiet autumn afternoon. Feel free to customize them — add more spice, stuff them with cream cheese, or keep them exactly as written. They’re forgiving and flexible, just like good recipes should be.
I’d love to hear how they turn out for you! Drop a comment below and let me know if you tried any variations, or tag me in your photos if you share them online. Happy fall baking, friends — may your kitchen smell like cinnamon and your cookies be perfectly soft.
Frequently Asked Questions
Can I use pumpkin pie filling instead of pumpkin puree?
No, please don’t. Pumpkin pie filling is already sweetened and spiced, which will throw off the sugar and spice balance in this recipe. Stick with plain pumpkin puree for the best results.
Why are my cookies spreading too much?
This usually happens if the dough is too warm or if you used a watery pumpkin puree. Try chilling the dough for 20 to 30 minutes before baking. Also, make sure your butter is softened but not melted — if it’s too soft, the cookies will spread more.
Can I make the dough ahead of time?
Absolutely. You can refrigerate the dough for up to 3 days. Let it sit at room temperature for about 10 minutes before scooping and rolling — it will be firmer than fresh dough, so you might need to warm it slightly to make it manageable.
How do I get that crackly top on the cookies?
The crackly top comes from rolling the dough balls generously in cinnamon sugar and from the cream of tartar in the dough. Make sure each ball is fully coated, and don’t skip the cream of tartar — it’s essential for that signature snickerdoodle texture and appearance.
Can I double this recipe?
Yes, this recipe doubles beautifully. Just make sure your mixing bowl is large enough to accommodate the extra dough. You may need to bake in more batches, so give your baking sheets time to cool between rounds.
Pin This Recipe!
Cozy Pumpkin Snickerdoodle Cookies: Easy Fall Baking Recipe
These soft, chewy pumpkin snickerdoodle cookies are the perfect fall treat. Made with simple ingredients and no complicated steps, they come together in under 30 minutes and deliver that classic snickerdoodle tang with a warm pumpkin twist.
- Prep Time: 15 minutes
- Cook Time: 10 minutes
- Total Time: 25 minutes
- Yield: 24 servings 1x
- Category: Dessert
- Cuisine: American
Ingredients
- 2 ¾ cups (345g) all-purpose flour
- 1 teaspoon baking soda
- 2 teaspoons cream of tartar
- 1 teaspoon ground cinnamon
- ½ teaspoon ground nutmeg
- ¼ teaspoon ground ginger
- ¼ teaspoon ground cloves (optional)
- ½ teaspoon salt
- ½ cup (113g) unsalted butter, softened
- ¾ cup (150g) granulated sugar
- ½ cup (100g) packed light brown sugar
- 1 large egg, room temperature
- 1 teaspoon vanilla extract
- ½ cup (120g) pumpkin puree (not pumpkin pie filling)
- ¼ cup (50g) granulated sugar (for coating)
- 2 teaspoons ground cinnamon (for coating)
- Pinch of nutmeg (for coating)
Instructions
- Preheat your oven to 350°F (175°C). Line two baking sheets with parchment paper or silicone mats.
- In a medium bowl, whisk together the flour, baking soda, cream of tartar, cinnamon, nutmeg, ginger, cloves, and salt until evenly distributed.
- In a large mixing bowl, beat the softened butter, granulated sugar, and brown sugar together on medium speed until light and fluffy, about 2 to 3 minutes. Scrape down the sides halfway through.
- Beat in the egg and vanilla extract until combined, about 30 seconds. Add the pumpkin puree and mix on low speed until just incorporated.
- Gradually add the flour mixture to the wet ingredients in three additions, mixing on low speed just until the flour disappears after each addition. Do not overmix.
- In a small bowl, stir together the ¼ cup sugar, 2 teaspoons cinnamon, and pinch of nutmeg for the coating.
- Using a 1.5-tablespoon cookie scoop or spoon, portion out rounded tablespoons of dough. Roll each into a ball between your palms. Drop each ball into the cinnamon-sugar mixture and roll to coat thoroughly. Place on prepared baking sheets, spacing them about 2 inches apart.
- Bake one sheet at a time in the center of the oven for 10 to 12 minutes. For softer cookies, pull at 10 minutes; for slightly crisper edges, go to 12 minutes.
- Let the cookies rest on the hot baking sheet for 5 minutes, then transfer to a wire cooling rack to cool completely.
- Repeat with remaining dough, letting the baking sheet cool completely between batches.
Notes
For extra-soft cookies, pull them at 10 minutes even if they look underdone. If the dough is too sticky, chill it for 20-30 minutes. These cookies taste even better the next day as the spices meld together.
Nutrition
- Serving Size: 1 cookie
- Calories: 145
- Sugar: 14
- Sodium: 95
- Fat: 5
- Saturated Fat: 3
- Carbohydrates: 23
- Fiber: 1
- Protein: 2
Keywords: pumpkin snickerdoodle cookies, fall baking, easy cookie recipe, pumpkin cookies, snickerdoodle, cinnamon sugar cookies


