Love this? Save it for later!
Share the inspiration with your friends
There used to be a little diner on the corner of Elm and 3rd in my hometown called The Spool. It was the kind of place with sticky vinyl booths and a jukebox that only played songs from the 80s. They made the most ridiculous, wonderful kids’ meal—a plate of mummy hot dogs that looked like they had been wrapped in a tiny, edible bandage. When The Spool closed down three years ago—the landlord sold the building to a chain smoothie shop—I felt a weird, specific pang of loss. It wasn’t just the hot dogs; it was the whole scene. The way the steam would fog up the windows on a cold October night. The way my son would giggle at the ketchup eyes staring back at him.
After about seven tries—some with dough that was too thick, some with hot dogs that burst open—I finally nailed it. This version of cozy mummy hot dogs with ketchup eyes is the one. It’s the one that tastes like a Friday night in October, when the air is crisp and the only thing on the schedule is a movie and a plate of something silly and warm. Honestly, it took me a while to get the dough just right—not too bready, not too flimsy. I wanted it to hold together but still be flaky and golden. Let me tell you, the first batch I made looked more like sad slugs than mummies. But we got there.
Maybe you’ve been there—chasing a flavor from a place that no longer exists. It feels a little obsessive, I know. But when you finally take that first bite and you’re transported right back to that sticky booth, it’s totally worth it. This recipe is why I keep making them. It’s not just about the food; it’s about bringing a little piece of The Spool back to life, one wrapped hot dog at a time.
Why You’ll Love This Recipe
This isn’t just another hot dog recipe. This is a full-on experience that brings joy to the table with almost no effort. I’ve tested this with my own two kids, my picky neighbor, and even a group of adults at a Halloween party—and everyone went back for seconds. Here’s why this one stands out:
- Quick & Easy: From start to finish, these come together in under 30 minutes. Perfect for a last-minute Halloween party or a cozy weeknight dinner when you want something fun without the fuss.
- Simple Ingredients: You probably already have everything in your fridge and pantry. No fancy grocery trips needed—just hot dogs, crescent roll dough, and a squeeze of ketchup.
- Perfect for Cozy Occasions: Great for Halloween parties, movie nights, birthday parties, or even a silly lunch on a rainy day. They fit right in with any casual gathering.
- Crowd-Pleaser: Kids absolutely love them, and adults can’t resist the nostalgia factor. They’re always the first thing to disappear off the platter.
- Unbelievably Delicious: The combination of salty, juicy hot dog wrapped in buttery, flaky dough is pure comfort food magic. The little ketchup eyes just make it better.
What makes this recipe different from the rest? It’s the technique. I’ve learned that using refrigerated crescent roll dough creates the perfect texture—flaky on the outside, soft on the inside—without being too heavy. I also wrap the dough at a slight angle to get that authentic mummy look, and I leave a tiny gap for the eyes. It’s these little details that turn a regular hot dog into a cozy mummy masterpiece.
This recipe is the kind that makes you close your eyes after the first bite. It’s comfort food reimagined—faster, simpler, but with the same soul-soothing satisfaction. Perfect for impressing your kids without stress, or turning a simple meal into something memorable.
What Ingredients You Will Need
This recipe uses simple, everyday ingredients to create something that feels special. You likely have most of these on hand, which makes it perfect for a spontaneous cozy night in. Here’s what you’ll need:
- 8 Hot Dogs: Use your favorite brand. I personally recommend all-beef hot dogs for the best flavor and texture. (They hold up better during baking and don’t get too rubbery.)
- 1 can (8 oz) Refrigerated Crescent Roll Dough: This is the secret to the flaky, buttery mummy wraps. I prefer the Pillsbury brand, but any store brand works well too. (Look for the sheets of dough if you want to cut your own strips—they’re easier to work with.)
- Ketchup: For the eyes, of course. Use a good-quality ketchup for the best color and flavor. (Heinz is my go-to.)
- 1 large Egg (optional): For an egg wash. This gives the dough a beautiful golden-brown color. You can skip it if you’re in a hurry, but it makes them look extra special.
- 1 tablespoon Water (optional): To mix with the egg for the wash.
- Salt and Pepper (optional): A tiny sprinkle of flaky sea salt on top of the dough before baking adds a nice savory touch.
Ingredient Selection Tips:
- For the hot dogs, look for ones that are plump and juicy. Avoid the skinny, low-quality ones because they can shrink too much during baking and leave the dough looking loose.
- If you can find crescent roll dough that comes in a sheet (not pre-perforated), it’s much easier to cut into even strips. If you only have the perforated kind, just pinch the seams together before cutting.
- For a dairy-free version, use crescent roll dough that is labeled dairy-free (some brands offer this) and skip the egg wash.
Substitution Guidance:
- Hot Dogs: Swap with turkey or chicken hot dogs for a lighter option. You can also use vegetarian sausages for a plant-based version—just make sure they are firm enough to hold the dough.
- Dough: If you don’t have crescent roll dough, you can use refrigerated pizza dough or even homemade pie crust. Cut it into thin strips and wrap the same way. (Pizza dough will be a bit chewier, but still delicious.)
- Ketchup: Use sriracha or mustard for a different flavor profile. Mustard eyes look a little funky, but they taste great!
Equipment Needed
You don’t need any fancy gadgets for this recipe. Here’s what you’ll need:
- Baking Sheet: A standard half-sheet pan works perfectly. Line it with parchment paper for easy cleanup.
- Parchment Paper: Absolutely essential to prevent sticking. You can also use a silicone baking mat.
- Sharp Knife or Pizza Cutter: For cutting the crescent roll dough into strips. A pizza cutter makes it super quick and even.
- Pastry Brush (optional): For applying the egg wash. If you don’t have one, you can use a clean paper towel or your fingers.
- Small Bowl (optional): For whisking the egg wash.
- Toothpick (optional): For dabbing on the ketchup eyes if you want to be extra precise. I usually just squeeze directly from the bottle, but a toothpick gives you more control.
Budget-Friendly Options:
- If you don’t have a pastry brush, just use a folded paper towel to dab the egg wash on the dough.
- Skip the pizza cutter and use a regular sharp knife—just make sure it’s sharp so you don’t squish the dough.
- You don’t need a fancy baking sheet; any rimmed pan will do.
Preparation Method
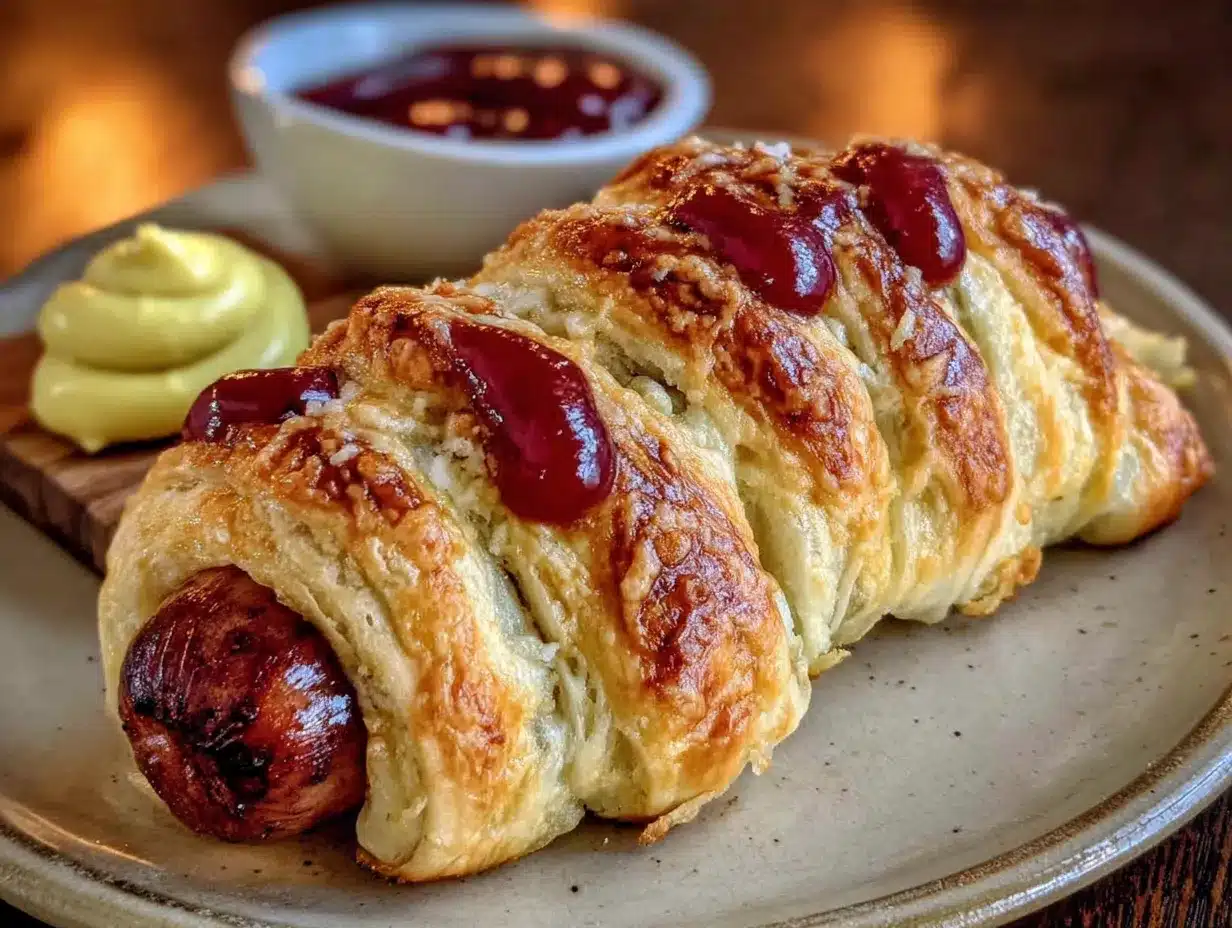
Let’s get to the fun part! Follow these steps carefully, and you’ll have a tray of adorable, delicious mummy hot dogs in no time.
- Preheat your oven to 375°F (190°C). Line a baking sheet with parchment paper. This is a small step, but it makes a huge difference—nothing sticks, and cleanup is a breeze.
- Prepare the dough. Open the can of crescent roll dough and unroll it onto a clean cutting board. If you’re using the perforated kind, pinch all the seams together to create one solid sheet. If you’re using a sheet of dough, you’re already ahead of the game. Using a sharp knife or pizza cutter, cut the dough into 8 long, thin strips—each strip should be about ½-inch wide. (Don’t worry if they’re not perfectly even; the mummies will still look cute.)
- Wrap the hot dogs. Take one hot dog and place it at the end of a dough strip. Wrap the strip around the hot dog at a slight angle, overlapping the dough slightly as you go. Leave a small gap at the top of the hot dog for the face—about 1 inch of exposed hot dog. (This is where the ketchup eyes will go.) Press the end of the dough gently to seal it. Repeat with the remaining hot dogs and dough strips. Place each wrapped hot dog on the prepared baking sheet, leaving about 1 inch of space between them.
- Optional: Apply the egg wash. In a small bowl, whisk together the egg and water until smooth. Using a pastry brush, lightly brush the egg wash over the dough on each mummy. This will give them a beautiful golden-brown color. (If you skip this step, they’ll still be tasty, just a little paler.)
- Bake. Place the baking sheet in the preheated oven and bake for 12-15 minutes, or until the dough is golden brown and the hot dogs are heated through. Keep an eye on them after 12 minutes—ovens vary, and you don’t want the dough to burn.
- Add the eyes. Remove the baking sheet from the oven and let the mummy hot dogs cool for 2-3 minutes. (They’re very hot right out of the oven!) Once they’re cool enough to handle, use a toothpick or squeeze bottle to dab two small dots of ketchup on the exposed hot dog area to create the eyes. (I like to make them look a little cross-eyed for extra personality.)
- Serve immediately. These are best enjoyed warm, when the dough is still flaky and the hot dog is juicy. Arrange them on a platter and watch them disappear!
Personal Tips for Efficiency:
- If you’re making a big batch, set up an assembly line. Wrap all the hot dogs first, then apply the egg wash to all of them at once.
- Don’t over-wrap the hot dogs. Two or three wraps around the hot dog is usually enough. Too much dough and the mummy will look more like a blob.
- If the dough feels too sticky, lightly dust your hands with flour. This helps keep the strips from tearing.
Cooking Tips & Techniques
I’ve made these mummy hot dogs more times than I can count, and I’ve definitely learned a few things the hard way. Here are my best tips to make sure yours turn out perfect every time:
- Don’t overwork the dough. Crescent roll dough is delicate. Handle it gently to keep it from getting tough. If it tears, just press it back together—it’ll still bake up fine.
- Angle the wraps. The key to the mummy look is wrapping the dough at a slight diagonal, not straight across. This creates that classic criss-cross bandage effect.
- Leave room for the face. I learned this one the hard way. If you wrap the dough all the way to the top of the hot dog, there’s no room for the eyes. Leave about an inch of bare hot dog at the top.
- Watch the baking time. Every oven is a little different. Start checking at the 12-minute mark. You want the dough to be a deep golden brown, but not dark brown. If the dough is browning too quickly, tent the baking sheet loosely with foil.
- Let them cool slightly before adding eyes. If you add the ketchup while the hot dogs are piping hot, the ketchup might slide right off. Give them a couple of minutes to cool down first.
Common Mistakes and How to Avoid Them:
- Dough is too thick: If your strips are too wide, the dough won’t cook through properly. Keep them thin—about ½ inch wide.
- Hot dogs burst: This can happen if you bake them for too long or at too high a temperature. Stick to 375°F and check them early.
- Ketchup eyes look messy: Use a toothpick to dab the ketchup on instead of squeezing straight from the bottle. It gives you much more control.
Variations & Adaptations
One of the best things about this recipe is how easy it is to customize. Here are some of my favorite variations:
- Cheesy Mummies: Before wrapping the hot dog, place a thin strip of cheddar or mozzarella cheese on top. The cheese will melt into the dough as it bakes, creating a gooey, delicious surprise.
- Spicy Mummies: Use spicy jalapeño hot dogs or brush the hot dogs with sriracha before wrapping. For the eyes, use sriracha instead of ketchup for a fiery kick.
- Vegetarian Mummies: Swap the hot dogs for vegetarian sausages or even carrot dogs (roasted carrots marinated in soy sauce and liquid smoke). The dough wraps around them just the same.
- Breakfast Mummies: Use breakfast sausages instead of hot dogs and serve them with a side of maple syrup for dipping. The sweet and salty combo is amazing.
- Pizza Mummies: Before wrapping, brush the hot dog with pizza sauce and sprinkle with shredded mozzarella. Bake as directed, and serve with extra marinara for dipping.
Personal Variation I’ve Tried: I once made a batch with smoked sausage instead of regular hot dogs, and it was incredible. The smoky flavor paired perfectly with the buttery dough. I also added a sprinkle of everything bagel seasoning on top before baking—highly recommend!
Serving & Storage Suggestions
These mummy hot dogs are best served warm, right out of the oven. Here’s how to make the most of them:
- Serving Temperature: Serve them warm, but not piping hot. Let them cool for 2-3 minutes after baking so the ketchup eyes stay put.
- Presentation: Arrange them on a platter with a side of extra ketchup or mustard for dipping. For a Halloween party, I like to place them on a bed of shredded lettuce to look like grass.
- Complementary Dishes: These pair perfectly with a bowl of tomato soup, a simple side salad, or some crispy potato wedges. For a fun party platter, serve them alongside pumpkin-shaped cheese crackers and veggie sticks.
- Storage: Store any leftovers in an airtight container in the refrigerator for up to 3 days. The dough will soften a bit, but they’ll still taste great.
- Reheating: To reheat, place them on a baking sheet in a 350°F (175°C) oven for 5-7 minutes, or until warmed through. You can also microwave them for 30 seconds, but the dough won’t be as crispy.
- Freezing: You can freeze the unbaked mummy hot dogs. Wrap them tightly in plastic wrap and place them in a freezer bag. When you’re ready to bake, add 5-7 minutes to the baking time. (Do not thaw first—bake from frozen.)
How Flavors Develop Over Time: These are definitely best fresh. The dough is most flaky and buttery right out of the oven. That said, they’re still delicious the next day—the flavors meld together, and the hot dog gets a little more infused with the dough.
Nutritional Information & Benefits
While these mummy hot dogs are definitely a treat, they can still fit into a balanced diet. Here’s a rough estimate per serving (1 mummy hot dog):
| Nutrient | Amount |
|---|---|
| Calories | 280 |
| Total Fat | 18g |
| Saturated Fat | 7g |
| Cholesterol | 35mg |
| Sodium | 680mg |
| Total Carbohydrates | 22g |
| Dietary Fiber | 0g |
| Sugars | 6g |
| Protein | 9g |
Health Benefits: Hot dogs provide a decent amount of protein, which helps keep you full. The crescent roll dough offers carbohydrates for quick energy. If you use turkey hot dogs, you can reduce the fat and sodium content significantly.
Dietary Considerations: This recipe is not gluten-free (due to the crescent roll dough) or dairy-free (unless you use a dairy-free dough). It is nut-free and egg-free if you skip the egg wash. For a lower-sodium option, choose low-sodium hot dogs and use unsalted butter in the dough if making from scratch.
Potential Allergens: Wheat (gluten), milk (in some dough brands), eggs (if using egg wash). Always check the labels on your ingredients.
Conclusion
These cozy mummy hot dogs with ketchup eyes are more than just a fun Halloween snack—they’re a little piece of nostalgia wrapped in buttery, flaky dough. They remind me of that little diner on Elm Street, of Friday nights when the world felt simpler and a plate of silly hot dogs could make everything better. I hope they bring that same warmth to your kitchen.
Don’t be afraid to make them your own. Swap the hot dogs for sausages, add cheese, or experiment with different dipping sauces. The beauty of this recipe is how forgiving it is. Whether you’re making them for a Halloween party, a cozy movie night, or just because it’s Tuesday, they’re guaranteed to bring a smile to everyone’s face.
I’d love to hear how yours turn out! Leave a comment below and let me know what variations you tried. Did you make them spicy? Cheesy? Did your kids help wrap the mummies? Share your photos on social media and tag me—I can’t wait to see your creations. And if you loved this recipe, don’t forget to share it with a friend who needs a little cozy comfort tonight.
Happy wrapping, friends!
Frequently Asked Questions
Can I make these mummy hot dogs ahead of time?
Yes! You can assemble them up to 24 hours in advance. Just wrap the hot dogs, place them on the baking sheet, cover with plastic wrap, and refrigerate. Bake them right before serving. You may need to add 2-3 minutes to the baking time since the dough will be cold.
Can I use homemade dough instead of crescent roll dough?
Absolutely! If you have a favorite pizza dough or pie crust recipe, that works perfectly. Just roll it out thin and cut it into strips. Homemade dough will give you a different texture—chewier if it’s pizza dough, flakier if it’s pie crust—but it’s still delicious.
How do I keep the ketchup eyes from smearing?
Let the hot dogs cool for 2-3 minutes before adding the eyes. The ketchup will stay put better on a slightly cooler surface. Also, use a toothpick to dab the ketchup on rather than squeezing it straight from the bottle—it gives you much more control.
Can I use other condiments for the eyes?
Of course! Mustard works great for a different look and flavor. You can also use sriracha for a spicy kick, or even a tiny dot of barbecue sauce. Just make sure the condiment is thick enough to stay in place.
What can I serve with these mummy hot dogs for a Halloween party?
These are great with a side of creamy tomato soup for dipping, or alongside some crispy potato wedges. For a full Halloween spread, add some spiderweb dip with veggie sticks and a batch of ghost-shaped cookies for dessert. They’re also fantastic with a simple side of apple slices and caramel dip for a sweet and salty combo.
Pin This Recipe!
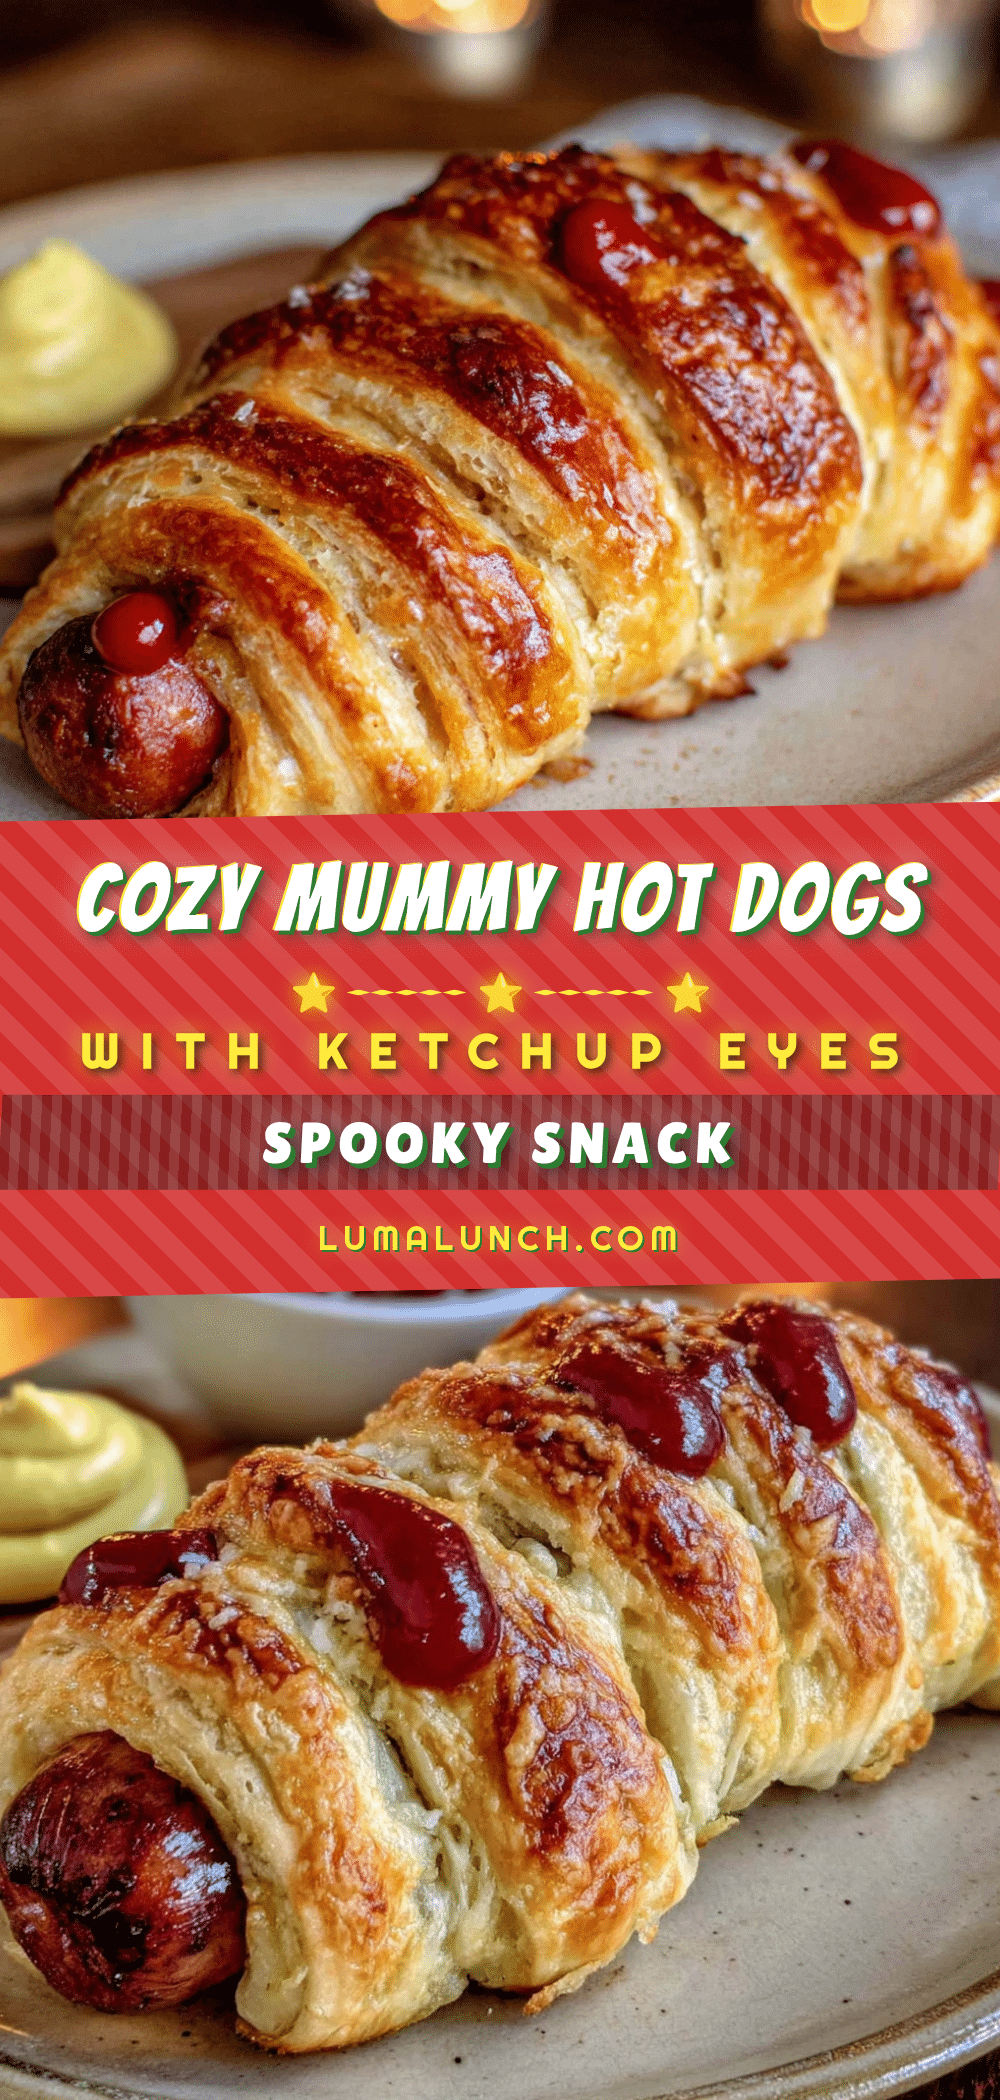
Cozy Mummy Hot Dogs with Ketchup Eyes
These adorable mummy hot dogs are wrapped in flaky crescent roll dough and topped with ketchup eyes. Perfect for Halloween parties, movie nights, or a fun weeknight dinner.
- Prep Time: 10 minutes
- Cook Time: 15 minutes
- Total Time: 25 minutes
- Yield: 8 servings 1x
- Category: Appetizer
- Cuisine: American
Ingredients
- 8 hot dogs (preferably all-beef)
- 1 can (8 oz) refrigerated crescent roll dough
- Ketchup (for the eyes)
- 1 large egg (optional, for egg wash)
- 1 tablespoon water (optional, for egg wash)
- Salt and pepper (optional, for sprinkling)
Instructions
- Preheat oven to 375°F (190°C). Line a baking sheet with parchment paper.
- Open the can of crescent roll dough and unroll onto a clean cutting board. If using perforated dough, pinch seams together to form a solid sheet. Cut dough into 8 long, thin strips, about ½-inch wide.
- Place one hot dog at the end of a dough strip. Wrap the strip around the hot dog at a slight angle, overlapping slightly, leaving about 1 inch of hot dog exposed at the top for the face. Press the end to seal. Repeat with remaining hot dogs and dough strips. Place on prepared baking sheet, spacing about 1 inch apart.
- Optional: In a small bowl, whisk together egg and water. Lightly brush the egg wash over the dough on each mummy.
- Bake for 12-15 minutes, until dough is golden brown and hot dogs are heated through. Check after 12 minutes to avoid burning.
- Remove from oven and let cool for 2-3 minutes. Using a toothpick or squeeze bottle, dab two small dots of ketchup on the exposed hot dog area to create eyes.
- Serve immediately.
Notes
For best results, use all-beef hot dogs and refrigerated crescent roll dough. Leave a gap at the top for the eyes. Let cool slightly before adding ketchup eyes to prevent smearing. Can be assembled up to 24 hours in advance and refrigerated; add 2-3 minutes to baking time if baking from cold.
Nutrition
- Serving Size: 1 mummy hot dog
- Calories: 280
- Sugar: 6
- Sodium: 680
- Fat: 18
- Saturated Fat: 7
- Carbohydrates: 22
- Protein: 9
Keywords: mummy hot dogs, Halloween recipe, crescent roll hot dogs, fun kids meal, easy appetizer


