Love this? Save it for later!
Share the inspiration with your friends
My neighbor asked why I couldn’t just crush up some chocolate cookies and call it dirt.
I started to explain why that wouldn’t work — then stopped. Honestly, I had been overthinking it. I was trying to teach her how to make a proper layered pudding dessert for her kid’s Halloween party, and I had a whole spiel about texture and crumb consistency. But she just looked at me, holding a bag of chocolate sandwich cookies, and said, “Isn’t that what dirt is?”
She was right. I mean, completely right. I had been so focused on making it look “gourmet” that I forgot the whole point was to make it look like actual graveyard dirt. So we crushed those cookies — not too fine, just enough to look like fresh soil — and layered them with creamy chocolate pudding and gummy worms. And let me tell you, it was the best batch I’d ever made. The kids went crazy for it. The adults snuck spoonfuls when no one was looking. And I learned something that day: sometimes the simplest idea is the best one.
Maybe you’ve been there — trying to make something perfect when all it really needs is to be fun. That’s what these Cozy Graveyard Dirt Pudding Cups are all about. They’re spooky enough for Halloween but cozy enough for a quiet night in. And they taste like childhood, honestly. Every time I make them, I think about that afternoon in my kitchen, with crumbs everywhere and my neighbor laughing at me for being such a perfectionist.
This recipe stayed with me because it reminded me not to take myself so seriously. So grab some chocolate pudding, a bag of gummy worms, and let’s make some dirt.
Why You’ll Love This Recipe
These Cozy Graveyard Dirt Pudding Cups are more than just a Halloween dessert — they’re a whole experience. I’ve tested this recipe at least a dozen times, tweaking the pudding consistency and the cookie crumb texture until everything felt just right. Here’s why I think you’ll fall for them too:
- Quick & Easy: You can have these ready in under 20 minutes. No baking, no complicated steps — just layering and chilling. Perfect for last-minute Halloween plans or a cozy night in.
- Simple Ingredients: Chocolate pudding, sandwich cookies, cream cheese, whipped topping, and gummy worms. That’s it. You probably already have most of this in your kitchen.
- Perfect for Halloween: Whether you’re hosting a spooky party or just want something fun for the kids, these cups deliver. They look impressive but take almost no effort.
- Crowd-Pleaser: I’ve served these at parties, family dinners, and even a book club meeting. Every single time, people go back for seconds. Kids love the gummy worms, adults love the creamy texture.
- Unbelievably Delicious: The combo of creamy pudding, tangy cream cheese, and crunchy cookie crumbs is pure comfort. It’s like a hug in a cup — but with worms.
What makes this version different from the rest? It’s the cream cheese layer. Most dirt pudding recipes skip it, but blending cream cheese into the pudding mixture gives it a richness that takes it from good to unforgettable. It’s not just another Halloween dessert — it’s the one people will ask for year after year.
This recipe isn’t just good — it’s the kind that makes you close your eyes after the first bite. It’s comfort food reimagined: faster, easier, but with the same soul-soothing satisfaction. Perfect for impressing guests without stress, or turning a simple evening into something memorable.
What Ingredients You Will Need
This recipe uses simple, everyday ingredients to create something truly special. Most of these are pantry staples, but I’ll share a few tips I’ve picked up along the way.
- Chocolate pudding mix (3.9 oz box, instant): I prefer Jell-O brand for consistent results, but any instant chocolate pudding works. Make sure it’s instant, not cook-and-serve — you want it to set quickly.
- Cold milk (2 cups): Whole milk gives the creamiest texture, but 2% works fine too. If you’re dairy-free, unsweetened almond or oat milk will do the job.
- Cream cheese (8 oz, softened): This is my secret ingredient. It adds a tangy richness that balances the sweetness. Let it sit out for 30 minutes before mixing so it blends smoothly.
- Powdered sugar (1/4 cup): Just enough to sweeten the cream cheese without making it cloying. Sift it if you want to avoid lumps.
- Whipped topping (8 oz tub, thawed): I use Cool Whip, but homemade whipped cream works if you’re feeling fancy. Thaw it in the fridge overnight for best texture.
- Chocolate sandwich cookies (about 24 cookies): Oreos are the classic choice. You’ll crush them into fine crumbs that look just like dirt. Regular or Double Stuf both work.
- Gummy worms (1 cup): The star of the show! I like the sour ones for extra tang, but any gummy worms will do. Cut a few in half so they look like they’re crawling out of the dirt.
- Halloween sprinkles or candy eyeballs (optional): For extra decoration. Pumpkins, ghosts, or bats add a fun touch.
When buying gummy worms, look for bright colors — they show up better against the dark pudding. And for the cookies, don’t bother scraping out the cream filling. It actually helps the crumbs stick together, which makes the “dirt” look more realistic.
Equipment Needed
You don’t need anything fancy for this recipe, which is part of the charm. Here’s what you’ll need:
- Mixing bowls (2 medium-sized): One for the pudding, one for the cream cheese mixture. Glass or stainless steel works best.
- Electric hand mixer or whisk: A hand mixer makes the cream cheese layer silky smooth. If you’re whisking by hand, make sure the cream cheese is really soft.
- Food processor or zip-top bag: For crushing the cookies. A food processor gives the most even crumbs, but a zip-top bag and rolling pin work great too — and it’s a little more fun.
- Small cups or glasses (8-10): Clear plastic cups are perfect for Halloween parties because you can see the layers. Mason jars or small glass bowls work too.
- Spatula: For scraping every bit of pudding out of the bowl. Waste not, want not.
- Measuring cups and spoons: For accurate measurements, especially with the milk and powdered sugar.
If you’re using a zip-top bag to crush cookies, double-bag it to avoid any messy explosions. I learned that one the hard way. Also, a small offset spatula helps spread the cream cheese layer evenly, but a regular spoon works just fine.
Preparation Method
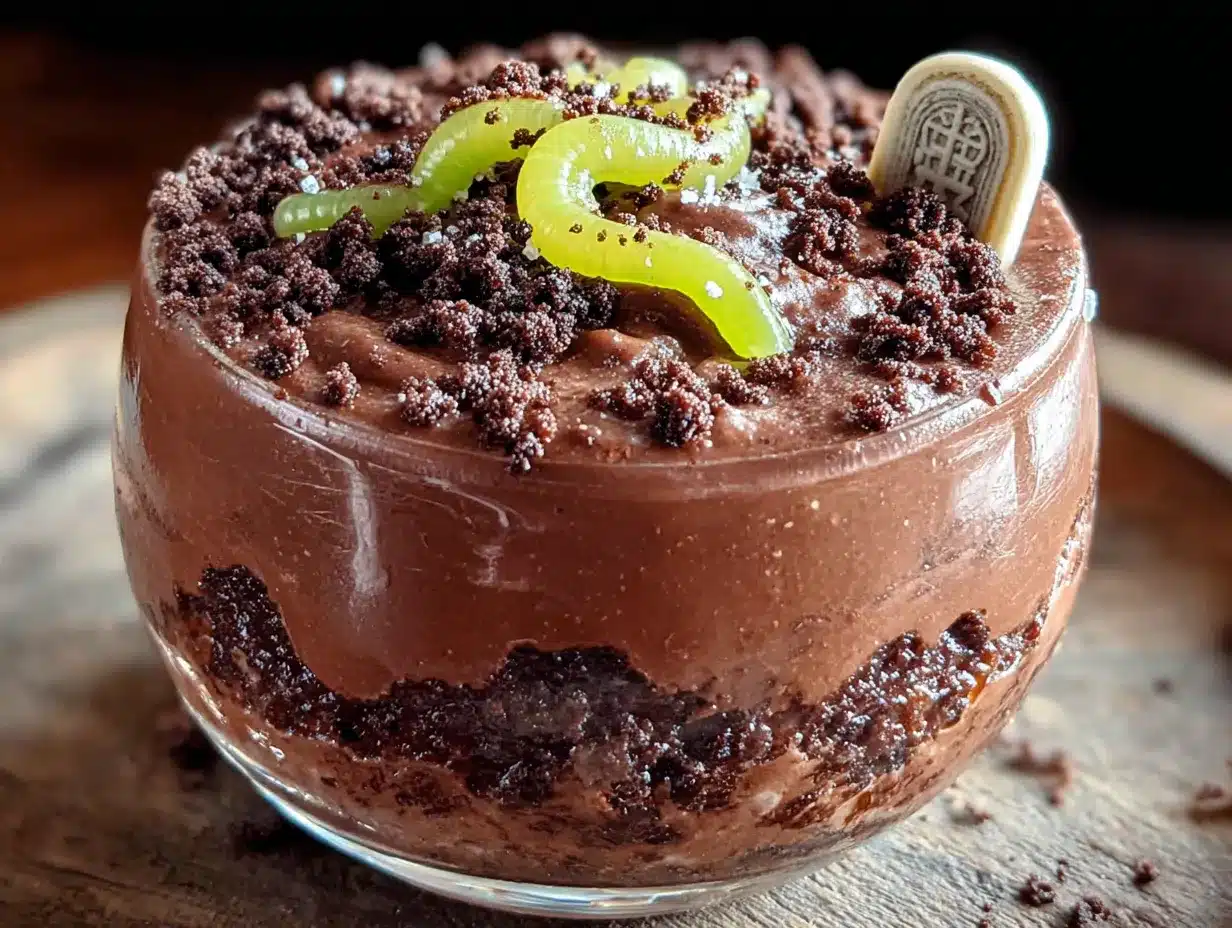
Let’s get our hands dirty — literally. Here’s how to make these Cozy Graveyard Dirt Pudding Cups step by step.
- Make the chocolate pudding: In a medium bowl, whisk together the instant pudding mix and 2 cups of cold milk. Whisk for about 2 minutes until it starts to thicken. Set it aside for 5 minutes to set up completely. You’ll know it’s ready when it holds its shape on the spoon.
- Prepare the cream cheese layer: In another bowl, beat the softened cream cheese with an electric hand mixer until smooth and fluffy — about 2 minutes. Add the powdered sugar and beat until combined. Then fold in half of the thawed whipped topping (about 1 cup) using a spatula. Mix gently until no white streaks remain.
- Crush the cookies: Place the chocolate sandwich cookies in a food processor and pulse until they form fine crumbs. If you’re using a zip-top bag, seal the cookies inside and crush them with a rolling pin. You want the texture of coarse sand — some smaller bits are fine, but avoid big chunks. Set aside 1/4 cup of crumbs for topping.
- Layer the cups: Grab your cups or glasses. Start with a layer of cookie crumbs at the bottom — about 2 tablespoons per cup. This creates the “dirt” base. Next, add a layer of the cream cheese mixture (about 3 tablespoons), spreading it evenly. Then add a layer of chocolate pudding (about 1/4 cup). Repeat the layers: another sprinkle of crumbs, more cream cheese mixture, and more pudding.
- Top with dirt and worms: Finish each cup with a generous layer of cookie crumbs on top. This is your graveyard dirt. Press a few gummy worms into the top so they look like they’re crawling out. You can also stick one or two halfway down the side of the cup for a peek-a-boo effect.
- Chill and set: Place the cups in the refrigerator for at least 2 hours, but overnight is even better. This allows the layers to meld together and the pudding to fully set. The cookies will soften slightly, which gives the whole thing a cake-like texture.
- Decorate before serving: Right before you serve, add any extra decorations — Halloween sprinkles, candy eyeballs, or even a small plastic tombstone. The gummy worms will stay fresh and chewy if you add them at the last minute.
A quick note: if your pudding seems too runny after mixing, don’t panic. It will thicken as it chills. Just give it a few extra minutes in the fridge before layering. And if you’re short on time, you can use pre-made chocolate pudding cups — just skip the mixing step and layer directly.
The sensory cues are important here. When you’re crushing the cookies, listen for that satisfying crackle. When you’re layering, watch how the dark pudding contrasts with the white cream cheese. And when you take that first bite — close your eyes. The creamy, crunchy, sweet, and tangy combo is pure magic.
Cooking Tips & Techniques
Over the years, I’ve made plenty of mistakes with this recipe. Here’s what I’ve learned so you don’t have to repeat my errors.
Don’t overmix the pudding. I once whisked it for five minutes straight because I was distracted, and it turned into a thick, lumpy mess. Two minutes is plenty. If you see lumps, let it sit for a minute and whisk gently again.
Let the cream cheese soften completely. Cold cream cheese creates lumps that are impossible to get rid of. Set it out on the counter for at least 30 minutes before you start. If you’re in a hurry, microwave it for 10-15 seconds — but watch it carefully so it doesn’t melt.
Crush cookies in batches. If you try to cram all 24 cookies into a food processor at once, you’ll end up with uneven crumbs. Work in two batches for the best texture. And if you’re using a zip-top bag, don’t overfill it — leave room for the rolling pin to do its work.
Layer strategically. The key to a beautiful cup is even layers. Use a spoon to spread each layer to the edges. If you’re using clear cups, you can see exactly how it looks — take advantage of that and make it pretty.
Chill overnight if you can. Two hours is the minimum, but overnight chilling transforms these cups. The flavors meld, the texture becomes almost mousse-like, and the cookies soften into a cake-like crumb. It’s worth the wait.
Keep gummy worms fresh. Don’t add them until just before serving, or they’ll get soggy from the moisture in the pudding. If you’re making these a day ahead, store the worms separately and add them right before you serve.
One of my biggest failures? I once forgot to add the cream cheese layer entirely. I just layered pudding and crumbs, and it was… fine. But it wasn’t great. That tangy cream cheese layer is what makes these cups special. Don’t skip it.
Variations & Adaptations
This recipe is incredibly flexible. Here are some of my favorite variations:
Gluten-Free Version: Use gluten-free chocolate sandwich cookies — brands like Glutino or Kinnikinnick work well. Check your pudding mix label too; most instant puddings are gluten-free, but it’s always worth confirming.
Dairy-Free Option: Substitute the milk with unsweetened almond or oat milk. Use dairy-free cream cheese (Kite Hill is my favorite) and coconut-based whipped topping. The texture will be slightly different, but still delicious.
Peanut Butter Twist: Add a layer of peanut butter between the cream cheese and pudding. Just warm 1/4 cup of peanut butter in the microwave for 15 seconds and drizzle it over the cream cheese layer. It pairs beautifully with the chocolate.
Pumpkin Spice Version: For a fall twist, add 1/2 teaspoon of pumpkin pie spice to the cream cheese mixture. Top with a sprinkle of cinnamon along with the cookie crumbs. It’s like Halloween and Thanksgiving had a baby.
Individual Parfaits: Instead of cups, layer everything in a large trifle dish for a party centerpiece. Double the recipe and arrange gummy worms around the edges. It’s dramatic and impressive.
Low-Sugar Option: Use sugar-free pudding mix and reduced-fat cream cheese. Skip the powdered sugar in the cream cheese layer — the pudding is sweet enough. Top with sugar-free gummy worms if you can find them.
I’ve tried the peanut butter version at a Halloween party, and it was gone in ten minutes. People were literally scraping the cups with their fingers. So if you’re feeling adventurous, go for it.
Serving & Storage Suggestions
These cups are best served cold, straight from the fridge. The contrast between the cool, creamy pudding and the crunchy cookie topping is pure bliss. Here’s how to serve and store them:
Serving Temperature: Serve chilled. If you’ve stored them in the fridge, they’re ready to go. For a slightly softer texture, let them sit at room temperature for 10 minutes before serving.
Presentation Ideas: Arrange the cups on a platter with extra gummy worms scattered around. Add a few plastic spider rings or skeleton hands for a spooky touch. If you’re using clear cups, the layers create a beautiful visual effect that guests will love.
Complementary Dishes: These pair perfectly with warm apple cider, hot chocolate, or a pumpkin spice latte. For a full Halloween spread, serve alongside spiderweb cupcakes or mummy meatballs for a savory option.
Storage Instructions: Store leftover cups covered in the refrigerator for up to 3 days. The cookie crumbs will soften over time, which some people actually prefer. If you want to keep them crunchy, store the crumbs separately and add them just before serving.
Freezer Option: You can freeze these cups for up to 1 month. Make them without the gummy worms and cookie topping, freeze in airtight containers, then thaw in the fridge overnight. Add fresh crumbs and worms before serving.
Reheating: These are meant to be served cold, but if you want a warm dessert, microwave a cup for 15-20 seconds. The pudding will become slightly warm and gooey, like a molten lava cake. It’s a different experience, but a good one.
The flavors actually develop over time. Day-old cups taste richer and more cohesive. So don’t be afraid to make them a day ahead — they’ll be even better.
Nutritional Information & Benefits
Let’s be real — this is a treat, not a health food. But here’s the breakdown so you know what you’re working with. Per serving (1 cup, based on 10 servings):
Calories: 320 | Fat: 16g | Carbohydrates: 42g | Protein: 5g | Sugar: 30g | Sodium: 280mg
The cream cheese adds a small amount of protein and calcium, while the milk provides vitamin D and B12. The dark chocolate in the cookies contains antioxidants — but let’s be honest, we’re eating this for the joy, not the nutrients.
Dietary Considerations: This recipe contains dairy, gluten, and soy (from the cookies). It can be adapted to be gluten-free, dairy-free, or low-sugar as noted in the variations section. Always check labels if you have specific allergies.
Healthier Swaps: Use low-fat cream cheese, skim milk, and sugar-free pudding to cut calories by about 100 per serving. The taste will still be great — just slightly less indulgent.
From a wellness perspective, I believe in balance. These cups are perfect for special occasions, and there’s nothing wrong with enjoying a little sweetness now and then. Life’s too short to skip dessert.
Conclusion
These Cozy Graveyard Dirt Pudding Cups are everything I love about Halloween — spooky, fun, and totally delicious. They’re the kind of dessert that makes people smile, whether they’re six years old or sixty. And honestly, they’re so easy to make that there’s no reason not to try them.
I hope you’ll take this recipe and make it your own. Add extra worms, skip the cream cheese if you must, or go wild with the decorations. The best recipes are the ones that feel like yours. And if you make a mess in the kitchen — good. That’s how you know you’re having fun.
I’d love to hear how yours turn out. Drop a comment below and tell me about your graveyard creations. Did you add something unexpected? Did the kids go crazy? Share your photos and tag me on social media — I can’t wait to see what you come up with.
Now go make some dirt. And don’t forget the worms.
Frequently Asked Questions
Can I make these dirt pudding cups ahead of time?
Absolutely. These cups actually taste better after chilling overnight. Just add the gummy worms right before serving to keep them from getting soggy.
What kind of cups should I use?
Clear plastic cups are best because you can see the layers. Small mason jars, glass bowls, or even paper cups work too. Just make sure they’re at least 8 ounces.
Can I use homemade pudding instead of instant?
Yes, but it will take longer to set. Cook the pudding on the stovetop, let it cool completely, and then layer. The texture will be richer, but the process takes more time.
How do I keep the gummy worms from getting hard?
Store them in an airtight container at room temperature until you’re ready to use them. Don’t refrigerate them, as cold temperatures make gummy candies tough.
Can I make this without cream cheese?
You can, but the texture won’t be as creamy. Skip the cream cheese layer and double the pudding mixture, or use a layer of vanilla pudding instead for a different flavor.
Pin This Recipe!
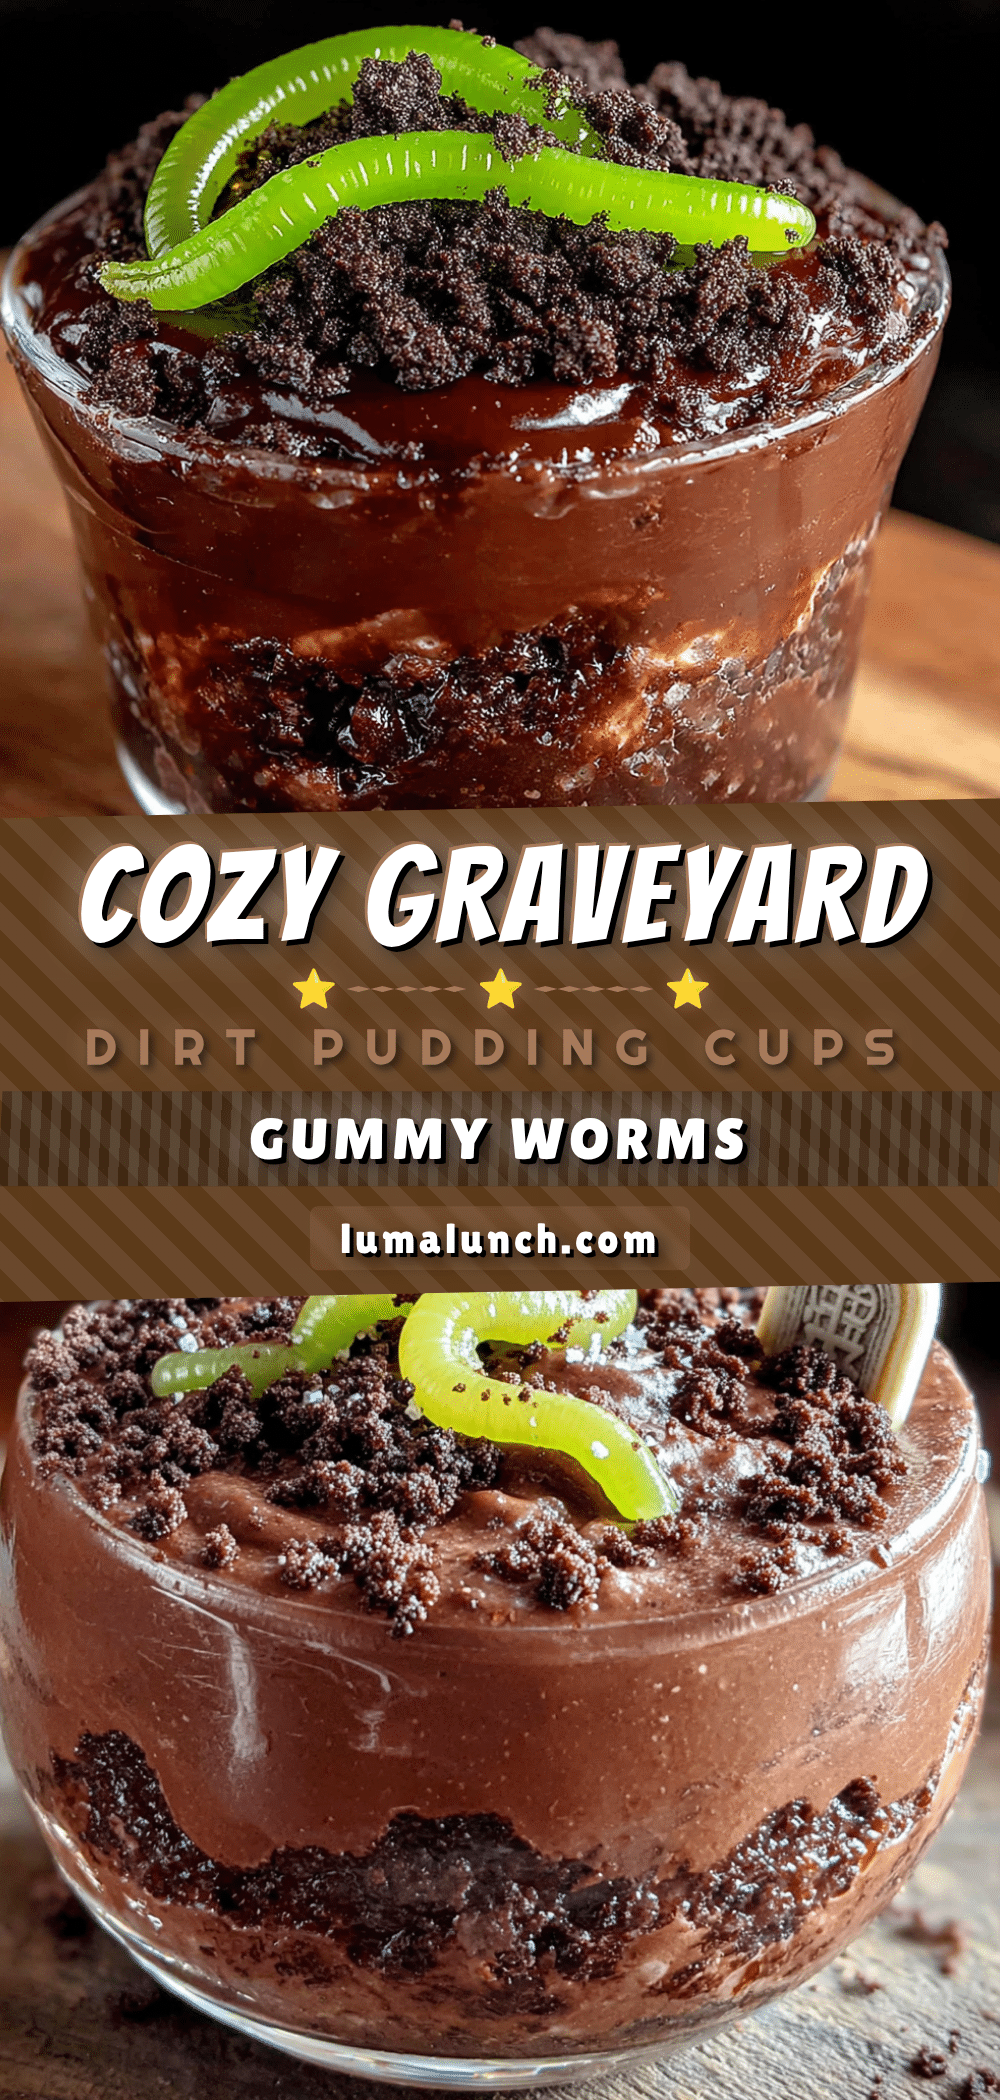
Cozy Graveyard Dirt Pudding Cups with Gummy Worms
These spooky yet cozy dirt pudding cups are a fun and easy Halloween dessert made with layers of creamy chocolate pudding, tangy cream cheese, crushed chocolate sandwich cookies, and gummy worms. Perfect for parties or a quiet night in, they come together in under 20 minutes and are sure to be a crowd-pleaser.
- Prep Time: 20 minutes
- Cook Time: 0 minutes
- Total Time: 2 hours 20 minutes (includes chilling)
- Yield: 8-10 servings 1x
- Category: Dessert
- Cuisine: American
Ingredients
- 1 box (3.9 oz) instant chocolate pudding mix
- 2 cups cold milk
- 8 oz cream cheese, softened
- 1/4 cup powdered sugar
- 1 tub (8 oz) whipped topping, thawed
- 24 chocolate sandwich cookies (e.g., Oreos)
- 1 cup gummy worms
- Halloween sprinkles or candy eyeballs (optional)
Instructions
- In a medium bowl, whisk together the instant pudding mix and 2 cups of cold milk for about 2 minutes until it starts to thicken. Set aside for 5 minutes to set completely.
- In another bowl, beat the softened cream cheese with an electric hand mixer until smooth and fluffy, about 2 minutes. Add the powdered sugar and beat until combined. Fold in half of the thawed whipped topping (about 1 cup) using a spatula until no white streaks remain.
- Crush the chocolate sandwich cookies in a food processor until they form fine crumbs (like coarse sand). Alternatively, place them in a zip-top bag and crush with a rolling pin. Set aside 1/4 cup of crumbs for topping.
- Layer the cups: Start with about 2 tablespoons of cookie crumbs at the bottom of each cup. Add about 3 tablespoons of the cream cheese mixture, spreading evenly. Then add about 1/4 cup of chocolate pudding. Repeat the layers: more crumbs, cream cheese mixture, and pudding.
- Finish each cup with a generous layer of cookie crumbs on top. Press a few gummy worms into the top so they look like they are crawling out. Optionally, stick one or two halfway down the side of the cup.
- Refrigerate the cups for at least 2 hours, or overnight for best results. This allows the layers to meld and the pudding to fully set.
- Just before serving, add any extra decorations like Halloween sprinkles or candy eyeballs. Serve chilled.
Notes
For best results, let the cream cheese soften at room temperature for 30 minutes before mixing. If the pudding seems too runny after mixing, let it sit a few more minutes to thicken. Add gummy worms just before serving to keep them from getting soggy. The cups can be made a day ahead and stored covered in the refrigerator.
Nutrition
- Serving Size: 1 cup
- Calories: 320
- Sugar: 30
- Sodium: 280
- Fat: 16
- Saturated Fat: 8
- Carbohydrates: 42
- Fiber: 1
- Protein: 5
Keywords: Halloween dessert, dirt pudding, gummy worms, chocolate pudding, no-bake dessert, easy dessert, kid-friendly


