Love this? Save it for later!
Share the inspiration with your friends
Introduction
Three times in a single week, I found myself elbow-deep in sticky oats and the scent of cinnamon swirling through the kitchen like a warm hug. Honestly, it started as a desperate attempt to find a snack that wouldn’t crumble into sad little flakes in my bag. By the fourth time I made these chewy apple cinnamon granola bars, I noticed the texture was just right—soft but still firm enough to hold up without turning into a crumbly mess. The smell of baked apples and cinnamon felt like autumn in a bite, even when it was blazing hot outside.
What really kept pulling me back wasn’t just the taste or the wholesome ingredients. It was the way the bars stayed chewy for days, perfect for those hectic mornings when I barely had time to breathe, let alone grab a proper breakfast. The blend of sweet apple bits and fragrant cinnamon made it feel like comfort food, but with a healthy twist. I swear, the second batch was a bit overcooked, and I learned the hard way that timing matters here—a few minutes too long and you lose that chewiness magic.
There’s something quietly satisfying about making a snack that holds up for a busy day, yet feels like a little treat. It’s become my go-to, alongside my healthy mess-free road trip snacks for kids, which are great when packing lunches or quick bites on the go. These granola bars have stuck with me because they’re not just another recipe; they’re a small, reliable joy in a cup-and-go world.
Why You’ll Love This Recipe
Honestly, I get why these chewy apple cinnamon granola bars became a staple so quickly. After testing countless recipes and tweaks, this version nails the balance of chewy texture, natural sweetness, and wholesome ingredients that actually satisfy.
- Quick & Easy: From start to finish, it takes about 25 minutes, perfect for squeezing into a busy afternoon or morning prep.
- Simple Ingredients: Nothing fancy here—just oats, apples, cinnamon, a touch of honey, and a few pantry staples you probably already have.
- Perfect for Snacking: Whether it’s a mid-morning pick-me-up or a post-workout bite, these bars keep hunger at bay without feeling heavy.
- Crowd-Pleaser: I’ve shared these at family gatherings and they never last long—kids and adults alike reach for seconds!
- Unbelievably Delicious: The chewiness combined with bursts of apple and warm cinnamon is honestly addictive, like a cozy apple pie you can carry around.
This recipe isn’t just another granola bar. The secret? I blend some of the oats into a fine flour, which gives the bars that chewy, almost cake-like texture without needing any flour at all. Plus, using fresh apple pieces instead of just dried fruit adds a juicy surprise in every bite. It’s comfort food reimagined for snacks—simple, wholesome, and satisfying.
What Ingredients You Will Need
This recipe uses simple, wholesome ingredients to deliver bold flavor and satisfying texture without the fuss. Most of these are pantry staples, and the fresh apples bring a seasonal touch that you can swap out depending on availability.
- Rolled oats (2 cups / 180g) – I prefer Bob’s Red Mill for their sturdy texture
- Apple, peeled and diced (1 medium, about 150g) – Granny Smith or Fuji work great for balance of tart and sweet
- Cinnamon (1 ½ tsp) – fresh ground is best to pack aroma
- Honey (⅓ cup / 113g) – natural sweetness and binder
- Unsweetened applesauce (½ cup / 120g) – adds moisture and helps with chewiness
- Vanilla extract (1 tsp) – for a warm, rounded flavor
- Chopped walnuts or pecans (½ cup / 60g) – optional but adds great texture and nuttiness
- Salt (¼ tsp) – enhances all the flavors
- Baking powder (½ tsp) – just a touch to keep it from getting too dense
Substitution tip: Use maple syrup instead of honey for a vegan option. If you want to make these gluten-free, ensure your oats are certified gluten-free. I’ve also swapped the nuts for seeds like pumpkin or sunflower when allergies were involved, and it worked just fine.
Equipment Needed
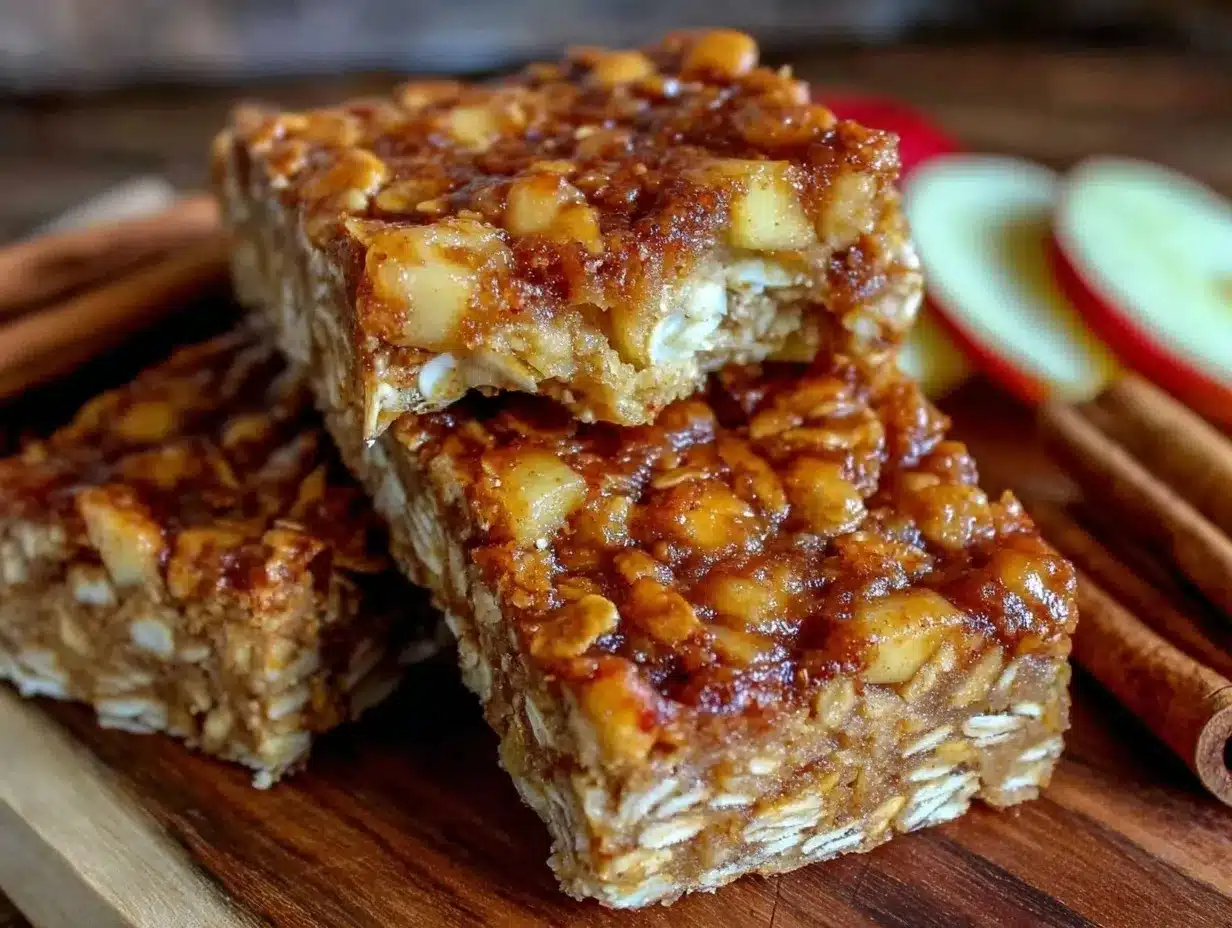
Nothing too fancy needed here, which is part of why I love this recipe so much. Here’s what you’ll want to have ready:
- Mixing bowls – a large one for dry ingredients and a smaller one for wet
- Measuring cups and spoons – precision matters for the honey and cinnamon
- Baking pan (8×8 inch / 20×20 cm) – I use a glass or metal pan, lined with parchment paper for easy removal
- Food processor or blender – to pulse some oats into oat flour (optional but recommended)
- Wooden spoon or spatula – for mixing
- Knife and cutting board – for chopping apples and nuts
If you don’t have a food processor, you can pulse the oats in a blender or even use store-bought oat flour, but the texture isn’t quite the same. My favorite budget-friendly parchment paper is Reynolds; it saves cleanup and helps keep the bars intact when slicing.
Preparation Method
- Preheat your oven to 350°F (175°C). Line your 8×8 inch baking pan with parchment paper, leaving some overhang on the sides for easy lifting later.
- Make oat flour: In your food processor, pulse ½ cup (45g) of the rolled oats until it becomes a fine flour-like consistency. This step takes about 2 minutes and makes a big difference in chewiness.
- Mix dry ingredients: In a large bowl, combine the remaining 1 ½ cups (135g) of rolled oats with the oat flour, cinnamon, salt, and baking powder. Stir to combine evenly.
- Prepare wet ingredients: In a smaller bowl, whisk together the honey, applesauce, and vanilla extract until smooth and slightly glossy. This should take about 1 minute.
- Combine wet and dry: Pour the wet mixture into the dry ingredients and stir gently with a wooden spoon until just combined. Fold in the diced apples and nuts—mix until everything is evenly distributed. The mixture should be sticky but not runny.
- Press into pan: Transfer the mixture into your prepared baking pan. Use a spatula or your hands (wet them slightly to prevent sticking) to press the mixture firmly and evenly into the pan. This ensures the bars hold together well.
- Bake: Place in the oven and bake for 18-22 minutes. Start checking at 18 minutes—the edges should be golden but the center still soft. Overbaking will dry out the bars and lose that chewiness.
- Cool completely: Remove from oven and let cool in the pan for at least 30 minutes. Use the parchment overhang to lift the slab out, then slice into bars. I usually get 10-12 bars depending on size.
Pro tip: If your apples are very juicy, pat them dry on paper towels before folding them into the mixture to avoid soggy bars. Also, don’t skip the cooling step—cutting too soon causes crumbling.
Cooking Tips & Techniques
Getting the perfect chewy texture takes a little attention, but it’s worth it. Here are some things I learned the hard way:
- Don’t skip pulsing oats: Turning part of your oats into oat flour is the secret to chewy bars that don’t fall apart. I used to think whole oats alone could do the trick, but that just made them dry and crumbly.
- Watch your baking time: It’s tempting to leave them in a bit longer “just in case,” but honestly, it kills the chewiness. Set a timer, and check early.
- Mix gently: Overmixing can activate gluten in the oats and make bars tough. Just fold ingredients until combined.
- Multitask cooling: While bars cool, I usually prep my lunch or tidy up the kitchen. This downtime is essential—cutting too early is a rookie mistake I won’t make again.
- Use parchment paper: This makes removing the bars so much easier and prevents breaking.
Variations & Adaptations
Once you’ve nailed the base recipe, it’s fun to mix things up depending on mood or diet:
- Seasonal fruit swap: Instead of apples, try diced pears or dried cranberries for a different fruity note.
- Gluten-free option: Use certified gluten-free oats and swap nuts for seeds if needed to avoid allergens.
- Extra spice kick: Add a pinch of nutmeg or ground ginger for a warming twist.
- No-bake version: Mix all ingredients and chill overnight in the fridge—skip the baking for a softer, more chewy bar.
- Nut-free adaptation: Replace walnuts with extra oats or seeds like sunflower or chia for crunch.
One time, I tried adding a handful of mini chocolate chips after baking—guilty pleasure alert! They melted slightly and gave a fun contrast to the apple cinnamon flavors.
Serving & Storage Suggestions
These chewy apple cinnamon granola bars are best served at room temperature or slightly chilled. They make a great grab-and-go breakfast or a wholesome afternoon treat with a cup of tea or coffee.
Pair them with something fresh like a crisp apple or a dollop of Greek yogurt to balance the sweetness. They also travel well in lunch boxes and backpacks, which makes them perfect for busy days or hiking trips.
Store the bars in an airtight container at room temperature for up to 4 days. For longer storage, wrap individually and freeze for up to 3 months. Thaw at room temperature or warm briefly in the microwave.
After a day or two, the flavors deepen—the cinnamon and apple meld into an even more comforting aroma. Honestly, sometimes I purposely wait a day to enjoy that mellowed taste.
Nutritional Information & Benefits
Each chewy apple cinnamon granola bar provides approximately 180 calories, 4g protein, 5g fat, and 30g carbohydrates, including 4g fiber and 10g natural sugars.
The oats deliver a good dose of fiber and whole grains, which helps keep you full longer. Apples are packed with antioxidants and vitamin C, while cinnamon contributes to blood sugar regulation and adds a lovely warm flavor without any extra calories.
These bars are gluten-free when made with certified oats and free from refined sugars, making them a wholesome snack option. Plus, the inclusion of nuts or seeds adds heart-healthy fats and crunch.
Conclusion
To me, these chewy apple cinnamon granola bars are more than just a snack—they’re a reliable little boost that feels homemade and thoughtful, even on the busiest days. I love how easily you can tweak the recipe to suit your tastes or pantry, which makes it feel like your own.
Whether you’re packing lunches, need a quick breakfast, or want something to curb afternoon hunger, these bars fit the bill perfectly. I’d be curious to hear how you make them yours, so drop a comment about your favorite variations or tips!
Here’s to snacking that’s simple, chewy, and just a little bit special.
FAQs About Chewy Apple Cinnamon Granola Bars
Can I use dried apples instead of fresh?
Yes, dried apples can work but they’ll make the bars less moist and chewy. If using dried, soak them in warm water for 10 minutes before adding.
How do I keep the bars from falling apart?
Pressing the mixture firmly into the pan and allowing the bars to cool completely before slicing are key. Also, pulsing some oats into oat flour helps bind everything together.
Can I make these nut-free?
Absolutely. Simply omit nuts or replace with seeds like pumpkin or sunflower for crunch without allergens.
What’s the best way to store these bars?
Keep them in an airtight container at room temperature up to 4 days or freeze for longer storage. Thaw before eating for best texture.
Are these bars suitable for kids?
Yes! They’re a wholesome, mess-free snack perfect for lunchboxes or after-school treats, much like the healthy mess-free road trip snacks for kids I often prepare.
Pin This Recipe!
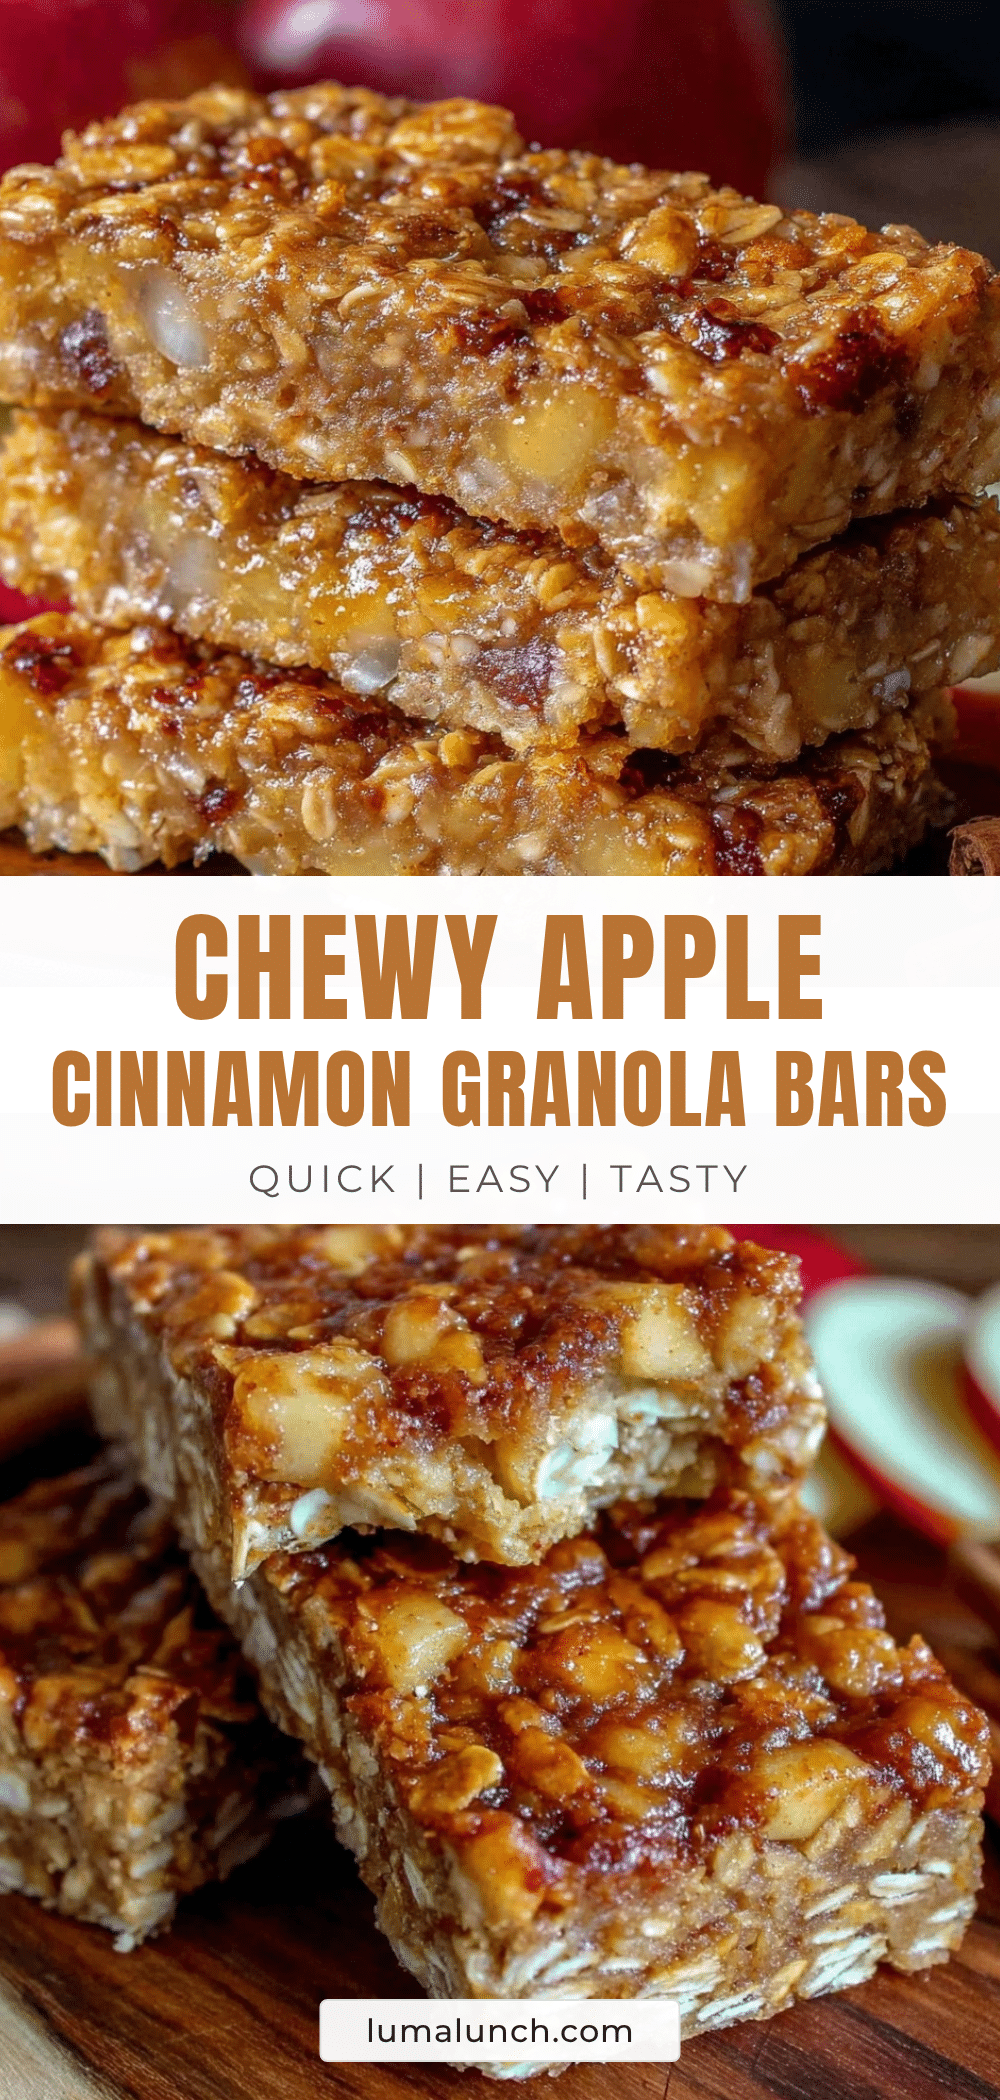
Chewy Apple Cinnamon Granola Bars
These chewy apple cinnamon granola bars offer a perfect balance of soft yet firm texture with bursts of fresh apple and warm cinnamon, making them a wholesome and satisfying snack.
- Prep Time: 10 minutes
- Cook Time: 20 minutes
- Total Time: 30 minutes
- Yield: 10-12 bars 1x
- Category: Snack
- Cuisine: American
Ingredients
- 2 cups (180g) rolled oats
- 1 medium apple, peeled and diced (about 150g) – Granny Smith or Fuji
- 1 ½ tsp cinnamon, fresh ground
- ⅓ cup (113g) honey
- ½ cup (120g) unsweetened applesauce
- 1 tsp vanilla extract
- ½ cup (60g) chopped walnuts or pecans (optional)
- ¼ tsp salt
- ½ tsp baking powder
Instructions
- Preheat your oven to 350°F (175°C). Line an 8×8 inch (20×20 cm) baking pan with parchment paper, leaving some overhang on the sides for easy lifting.
- In a food processor, pulse ½ cup (45g) of the rolled oats until it becomes a fine flour-like consistency, about 2 minutes.
- In a large bowl, combine the remaining 1 ½ cups (135g) rolled oats with the oat flour, cinnamon, salt, and baking powder. Stir to combine evenly.
- In a smaller bowl, whisk together the honey, applesauce, and vanilla extract until smooth and slightly glossy, about 1 minute.
- Pour the wet mixture into the dry ingredients and stir gently with a wooden spoon until just combined. Fold in the diced apples and nuts until evenly distributed. The mixture should be sticky but not runny.
- Transfer the mixture into the prepared baking pan. Press firmly and evenly into the pan using a spatula or slightly wet hands.
- Bake for 18-22 minutes. Start checking at 18 minutes; edges should be golden and center still soft. Avoid overbaking to maintain chewiness.
- Remove from oven and let cool completely in the pan for at least 30 minutes. Use parchment overhang to lift out and slice into 10-12 bars.
Notes
Pulse some oats into oat flour to achieve chewy texture. Avoid overbaking to keep bars soft. Pat apples dry if very juicy to prevent soggy bars. Cool completely before slicing to avoid crumbling. Use parchment paper for easy removal.
Nutrition
- Serving Size: 1 bar
- Calories: 180
- Sugar: 10
- Fat: 5
- Carbohydrates: 30
- Fiber: 4
- Protein: 4
Keywords: granola bars, apple cinnamon, chewy snack, healthy snack, homemade granola bars, easy snack, gluten-free option, nut-free option


