Love this? Save it for later!
Share the inspiration with your friends
I was digging through my purse for a parking validation stamp last Tuesday when my fingers found a crumpled, forgotten energy ball at the bottom. It was rock hard, probably two weeks old, and covered in lint. But for a split second—just a flash—I was eight years old again, sitting on my aunt Carol’s linoleum kitchen floor, watching her roll these same sticky, chocolatey spheres between her palms. She’d let me lick the spoon, and I’d sit there cross-legged, swinging my legs, convinced she made the best snack on the planet. She passed away three years ago, and I haven’t thought about that floor or that spoon in decades.
That sad little lint ball in my purse didn’t taste like much, but it sparked something. I spent the next two days in my own kitchen, trying to remember the exact texture, the perfect balance of peanut butter and cocoa, the way they held together without falling apart. Honestly, the first batch I made was a disaster—too dry, crumbled like sand. The second batch was too sticky, and I ate half the dough before I even rolled it. But the third time? That was it. That was the feeling I was after.
Maybe you’ve been there—chasing a taste you can’t quite name, a comfort you can’t explain. These no-bake chocolate peanut butter energy balls are that for me. They’re not fancy, not complicated, and they take exactly fifteen minutes to make. But every time I roll one, I’m back on that linoleum floor, and for a minute, everything feels a little warmer, a little simpler, a little more like home.
Why You’ll Love This Recipe
Let’s be real—there are a million energy ball recipes out there. But this one? This one is different. I’ve tested it more times than I care to admit, tweaked the ratios, burned through three jars of peanut butter, and annoyed my entire family with my “one more try” approach. The result is a recipe that actually works, every single time, with no fuss and no weird ingredients.
- Quick & Easy: Fifteen minutes. That’s it. No oven, no stove, no waiting. Mix, roll, eat. Perfect for those afternoons when you need something good, fast.
- Simple Ingredients: You probably have everything in your pantry right now. Oats, peanut butter, chocolate chips, honey, cocoa powder. No trips to specialty stores, no hunting down obscure superfoods.
- Perfect for Busy Days: These are my go-to for hectic mornings, afternoon slumps, and pre-workout fuel. They’re also great for lunchboxes and road trips.
- Crowd-Pleaser: I’ve brought these to potlucks, playdates, and even a book club meeting. Kids love them, adults love them, and they disappear faster than I expect every single time.
- Unbelievably Delicious: The combo of creamy peanut butter, rich cocoa, and sweet honey is pure comfort. They taste like dessert, but they’re packed with oats and protein, so you actually feel good after eating them.
What makes this version different is the texture. I spent a long time figuring out how to get them perfectly chewy without being dry or crumbly. The secret is a little bit of coconut oil—it keeps them moist and helps everything bind together beautifully. This isn’t just another energy ball recipe; it’s the one I make every single week, and the one I keep coming back to.
What Ingredients You Will Need
This recipe uses simple, wholesome ingredients that come together to create something truly satisfying. You don’t need anything fancy—just good, real food that works hard for you. Here’s what you’ll need:
- 1 cup old-fashioned rolled oats (use certified gluten-free if needed; I prefer Bob’s Red Mill for consistent texture)
- 1/2 cup creamy peanut butter (natural, no-stir kind works best; avoid oily, separated peanut butter as it makes the balls too soft)
- 1/3 cup honey (or maple syrup for a vegan option; local honey adds a lovely floral note)
- 1/4 cup unsweetened cocoa powder (I use Ghirardelli or Hershey’s Special Dark for a richer chocolate flavor)
- 1/4 cup mini chocolate chips (semi-sweet or dark; regular chocolate chips work too, but mini ones distribute more evenly)
- 1 tablespoon coconut oil (melted; this is the secret to the perfect texture—don’t skip it)
- 1/2 teaspoon vanilla extract (pure, not imitation, if you can swing it)
- 1/4 teaspoon salt (if your peanut butter is unsalted; skip if using salted peanut butter)
Ingredient Tips & Substitutions:
- Peanut Butter: You can substitute almond butter, cashew butter, or sunflower seed butter for a nut-free version. Just note that the texture may vary slightly—sunflower seed butter can turn green when combined with cocoa (it’s totally safe, just a little weird-looking).
- Oats: Quick oats work in a pinch, but they give a softer, less chewy texture. I really recommend old-fashioned oats for the best bite.
- Sweetener: Maple syrup, agave, or brown rice syrup all work. If you’re watching sugar, you can reduce the honey to 1/4 cup, but the balls will be less sweet and slightly drier.
- Chocolate Chips: White chocolate chips, butterscotch chips, or even chopped dark chocolate bars are all delicious swaps. For a healthier twist, try cacao nibs—they add a nice crunch and a hint of bitterness.
Equipment Needed
You don’t need a fancy kitchen for this recipe. In fact, you probably already own everything you need. Here’s the short list:
- Large mixing bowl (any size will do, but a bigger bowl makes mixing less messy)
- Measuring cups and spoons (for accuracy; I’ve learned the hard way that eyeballing ingredients leads to inconsistent results)
- Spatula or wooden spoon (for mixing; a sturdy spatula works best for scraping the bowl clean)
- Small microwave-safe bowl (for melting the coconut oil and honey together if they’re too thick)
- Baking sheet or large plate (lined with parchment paper, for holding the rolled balls)
- Cookie scoop or tablespoon (optional, but helpful for getting uniform-sized balls; I use a #60 scoop, which gives about 1 tablespoon per ball)
If you don’t have a cookie scoop, just use your hands—it’s more fun anyway. And if you don’t have parchment paper, wax paper or a silicone mat works just as well. No need to overthink it.
Preparation Method
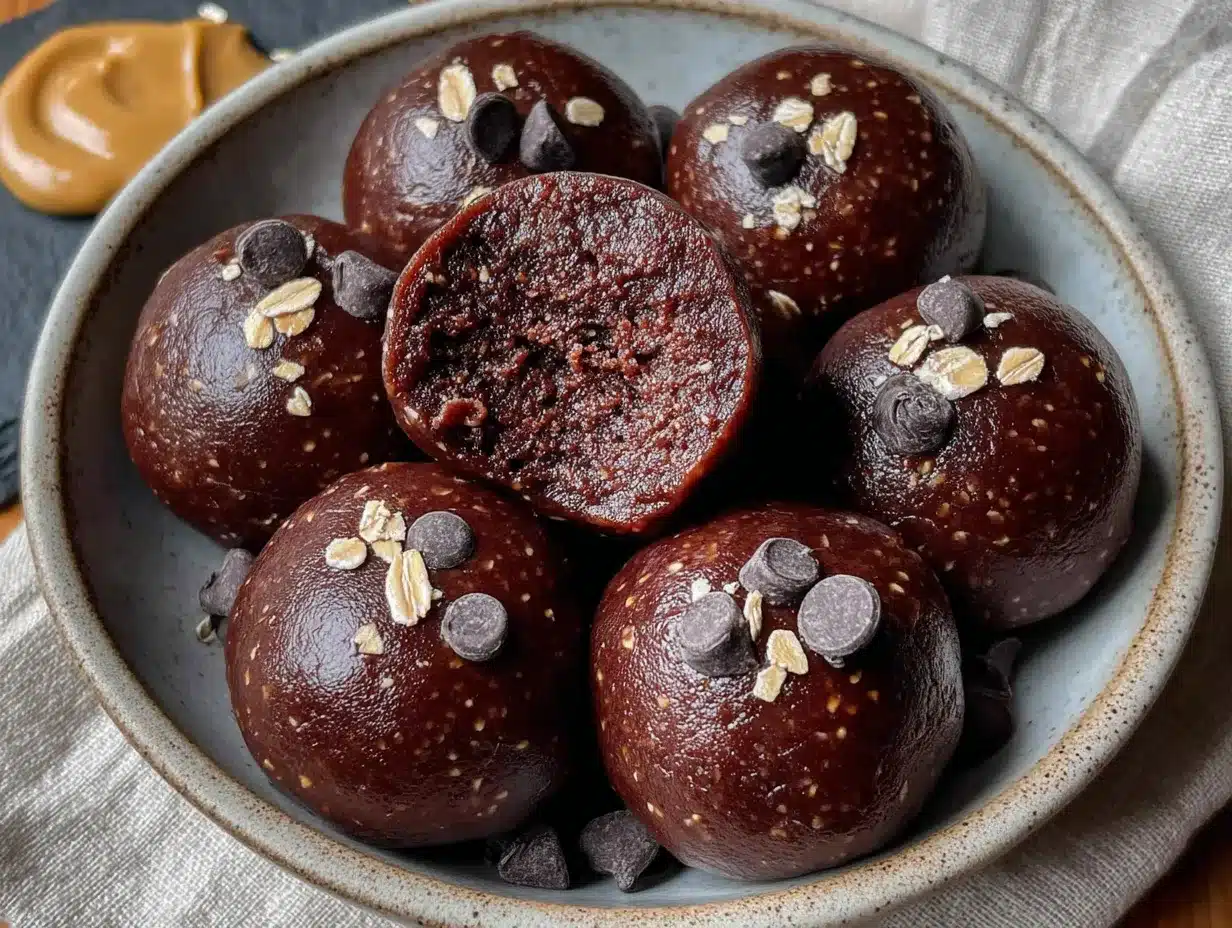
Ready to make these? It’s almost embarrassingly easy. Here’s how to do it, step by step, with all the little details I’ve learned along the way.
- Melt the coconut oil and honey together. In a small microwave-safe bowl, combine the coconut oil and honey. Microwave for 15-20 seconds, just until the coconut oil is melted. Stir until smooth. Be careful not to overheat—you don’t want it bubbling hot, just warm enough to mix. If you’re using maple syrup, you can skip this step and just stir it in at room temperature.
- Combine the dry ingredients. In a large mixing bowl, whisk together the rolled oats, cocoa powder, and salt. Make sure there are no clumps of cocoa—nobody wants a dry pocket of powder in their energy ball. I like to use a fork for this; it breaks up lumps better than a whisk.
- Add the wet ingredients. Pour the melted coconut oil and honey mixture into the bowl with the dry ingredients. Add the peanut butter and vanilla extract. Stir everything together with a spatula until fully combined. This takes a little elbow grease—the mixture will be thick and a bit sticky. That’s a good sign. Keep stirring until you can’t see any streaks of peanut butter or cocoa.
- Fold in the chocolate chips. Add the mini chocolate chips and fold them in gently. Don’t overmix at this point—you want the chips to stay intact, not get all melty and smeared. If the dough feels too dry and crumbly, add a teaspoon of water or a little more melted coconut oil. If it feels too sticky, add a tablespoon more oats.
- Chill the mixture (optional but recommended). Pop the bowl in the fridge for 15-20 minutes. This makes the dough easier to handle and helps the balls hold their shape. I’ve skipped this step in a hurry, and the balls were still delicious—just a little messier to roll. If you’re patient, chill it. Your hands will thank you.
- Roll into balls. Using your hands or a cookie scoop, portion out about 1 tablespoon of dough and roll it between your palms into a smooth ball. Place each ball on the parchment-lined baking sheet. You should get about 18-20 balls, depending on size. If your hands get sticky, dampen them slightly with water—it helps the dough not stick to your skin.
- Set and enjoy. Place the baking sheet in the fridge for at least 30 minutes to let the balls firm up. This step is important—they’ll be soft and a little fragile right after rolling, but they firm up beautifully as they chill. Once set, you can eat them right away or transfer them to an airtight container for storage.
Cooking Tips & Techniques
I’ve made these energy balls more times than I can count, and I’ve definitely made my share of mistakes along the way. Here are the things I wish someone had told me from the start:
- Don’t overmix the dough. I know it’s tempting to keep stirring until everything is perfectly uniform, but overmixing can make the balls dense and tough. Mix just until the ingredients come together, then stop.
- Use room temperature peanut butter. If your peanut butter has been sitting in the fridge, it’ll be too stiff to mix properly. Let it sit out for 15 minutes before starting, or microwave it for 10 seconds to soften it up.
- Wet your hands for easier rolling. This is my number one tip. Keep a small bowl of water nearby, and dip your fingers in before rolling each ball. The dough won’t stick to your hands, and you’ll get perfectly smooth, round balls every time.
- Chill the dough before rolling. I know I mentioned this already, but it bears repeating. Chilled dough is so much easier to work with. If you’re in a rush, you can skip it, but you’ll end up with slightly misshapen balls and sticky fingers.
- Use a cookie scoop for even sizes. If you want your energy balls to look professional and cook evenly (well, they don’t cook, but you know what I mean), use a small cookie scoop. It also makes the process faster and less messy.
Variations & Adaptations
One of the best things about this recipe is how easy it is to customize. Here are some of my favorite variations:
- Vegan Option: Swap the honey for maple syrup or agave nectar. Use dairy-free chocolate chips. Everything else is already plant-based, so you’re good to go.
- Nut-Free Version: Substitute sunflower seed butter or tahini for the peanut butter. Just a heads-up—sunflower seed butter can react with the cocoa powder and turn a greenish color. It’s totally safe and tastes fine, but it looks a little funky. If that bothers you, use tahini instead.
- Protein-Packed Balls: Add 2 tablespoons of your favorite protein powder (vanilla or chocolate work best). You may need to add an extra tablespoon of honey or water to compensate for the dryness of the powder.
- Crunchy Texture: Fold in 2 tablespoons of chopped nuts (almonds, peanuts, or walnuts) or shredded coconut for extra crunch. Toasted coconut adds a lovely nutty flavor.
- Spiced Version: Add 1/2 teaspoon of cinnamon and a pinch of cayenne pepper for a warm, slightly spicy kick. This is my personal favorite during the fall months—it pairs beautifully with the chocolate and peanut butter.
- Gluten-Free Adaptation: Use certified gluten-free rolled oats. That’s the only swap you need. Everything else is naturally gluten-free.
Serving & Storage Suggestions
These energy balls are wonderfully versatile when it comes to serving. Here’s how I like to enjoy them:
- Serving Temperature: They’re best served cold or at room temperature. I love eating them straight from the fridge—they’re firm, chewy, and incredibly satisfying. If you prefer a softer texture, let them sit out for 5-10 minutes before eating.
- Pairing Ideas: These pair beautifully with a cup of coffee or tea in the afternoon. They’re also great crumbled over yogurt or oatmeal for a little extra texture and sweetness. For a quick breakfast, grab two or three with a piece of fruit and you’re set.
- Storage Instructions: Store the energy balls in an airtight container in the refrigerator for up to two weeks. They’ll stay fresh and chewy the whole time. If you live in a warm climate, definitely keep them chilled—they can get soft and sticky at room temperature.
- Freezer Tips: These freeze beautifully! Place the rolled balls on a baking sheet and freeze until solid (about 1-2 hours), then transfer them to a freezer-safe bag or container. They’ll keep for up to three months. Thaw in the fridge overnight or at room temperature for 15-20 minutes before eating.
- How Flavors Develop: Honestly, these taste even better the next day. The flavors meld together as they sit, and the texture becomes perfectly uniform. I always try to make them a day ahead if I’m serving them for an event.
Nutritional Information & Benefits
These energy balls are a great balance of healthy fats, complex carbohydrates, and protein. Here’s a rough estimate per ball (based on 20 balls per batch):
- Calories: ~120
- Protein: 4g
- Fat: 7g
- Carbohydrates: 13g
- Fiber: 2g
- Sugar: 7g
Health Benefits:
- Oats are packed with soluble fiber, which helps keep you full and supports heart health.
- Peanut butter provides protein and healthy monounsaturated fats, making these a satisfying snack that won’t spike your blood sugar.
- Cocoa powder is rich in antioxidants, which can help reduce inflammation and support brain health.
- Honey offers natural sweetness with a lower glycemic impact than refined sugar, plus it has antibacterial properties.
These are great for pre-workout fuel, a midday pick-me-up, or a healthier dessert option. They’re also naturally gluten-free (with certified oats) and can easily be made vegan or nut-free.
Conclusion
I never thought a lint-covered energy ball at the bottom of my purse would lead me back to my aunt Carol’s kitchen, but here we are. This recipe is more than just a snack—it’s a little piece of comfort I can make anytime, anywhere, in just fifteen minutes. It’s the taste of childhood, the warmth of a memory, and the satisfaction of knowing exactly what’s in your food.
I really hope you give these a try. Play around with the variations, make them your own, and don’t be afraid to get a little messy. That’s half the fun, honestly. And when you do make them, I’d love to hear about it. Drop a comment below and tell me how they turned out, or share your own twist on the recipe. Did you add coconut? Swap the peanut butter for almond? I’m always looking for new ideas!
Until next time, happy rolling—and may your energy balls always be perfectly chewy.
Frequently Asked Questions
Can I use quick oats instead of rolled oats?
Yes, you can! Quick oats will work, but the texture will be softer and less chewy. If you prefer a heartier bite, stick with old-fashioned rolled oats. If you only have quick oats on hand, go for it—they’ll still taste great.
How do I keep the energy balls from falling apart?
If your energy balls are crumbly, the mixture might be too dry. Try adding a teaspoon of water or melted coconut oil at a time until the dough holds together when pressed. Chilling the dough for 15-20 minutes before rolling also helps a lot.
Can I make these without a microwave?
Absolutely! You can melt the coconut oil and honey on the stovetop in a small saucepan over low heat. Just warm them enough to combine, then let them cool slightly before mixing with the other ingredients. No microwave needed.
How long do these energy balls last at room temperature?
They’ll keep at room temperature for about 2-3 days, but I recommend storing them in the fridge for the best texture and freshness. In warmer weather, they can get soft and sticky if left out too long. In the fridge, they stay perfect for up to two weeks.
Can I add protein powder to this recipe?
Yes, you can! Add 2 tablespoons of your favorite protein powder (vanilla or chocolate work well). You may need to add an extra tablespoon of honey or water to balance the dryness. Start with a small amount and adjust as needed—too much protein powder can make the balls dry and crumbly.
Pin This Recipe!
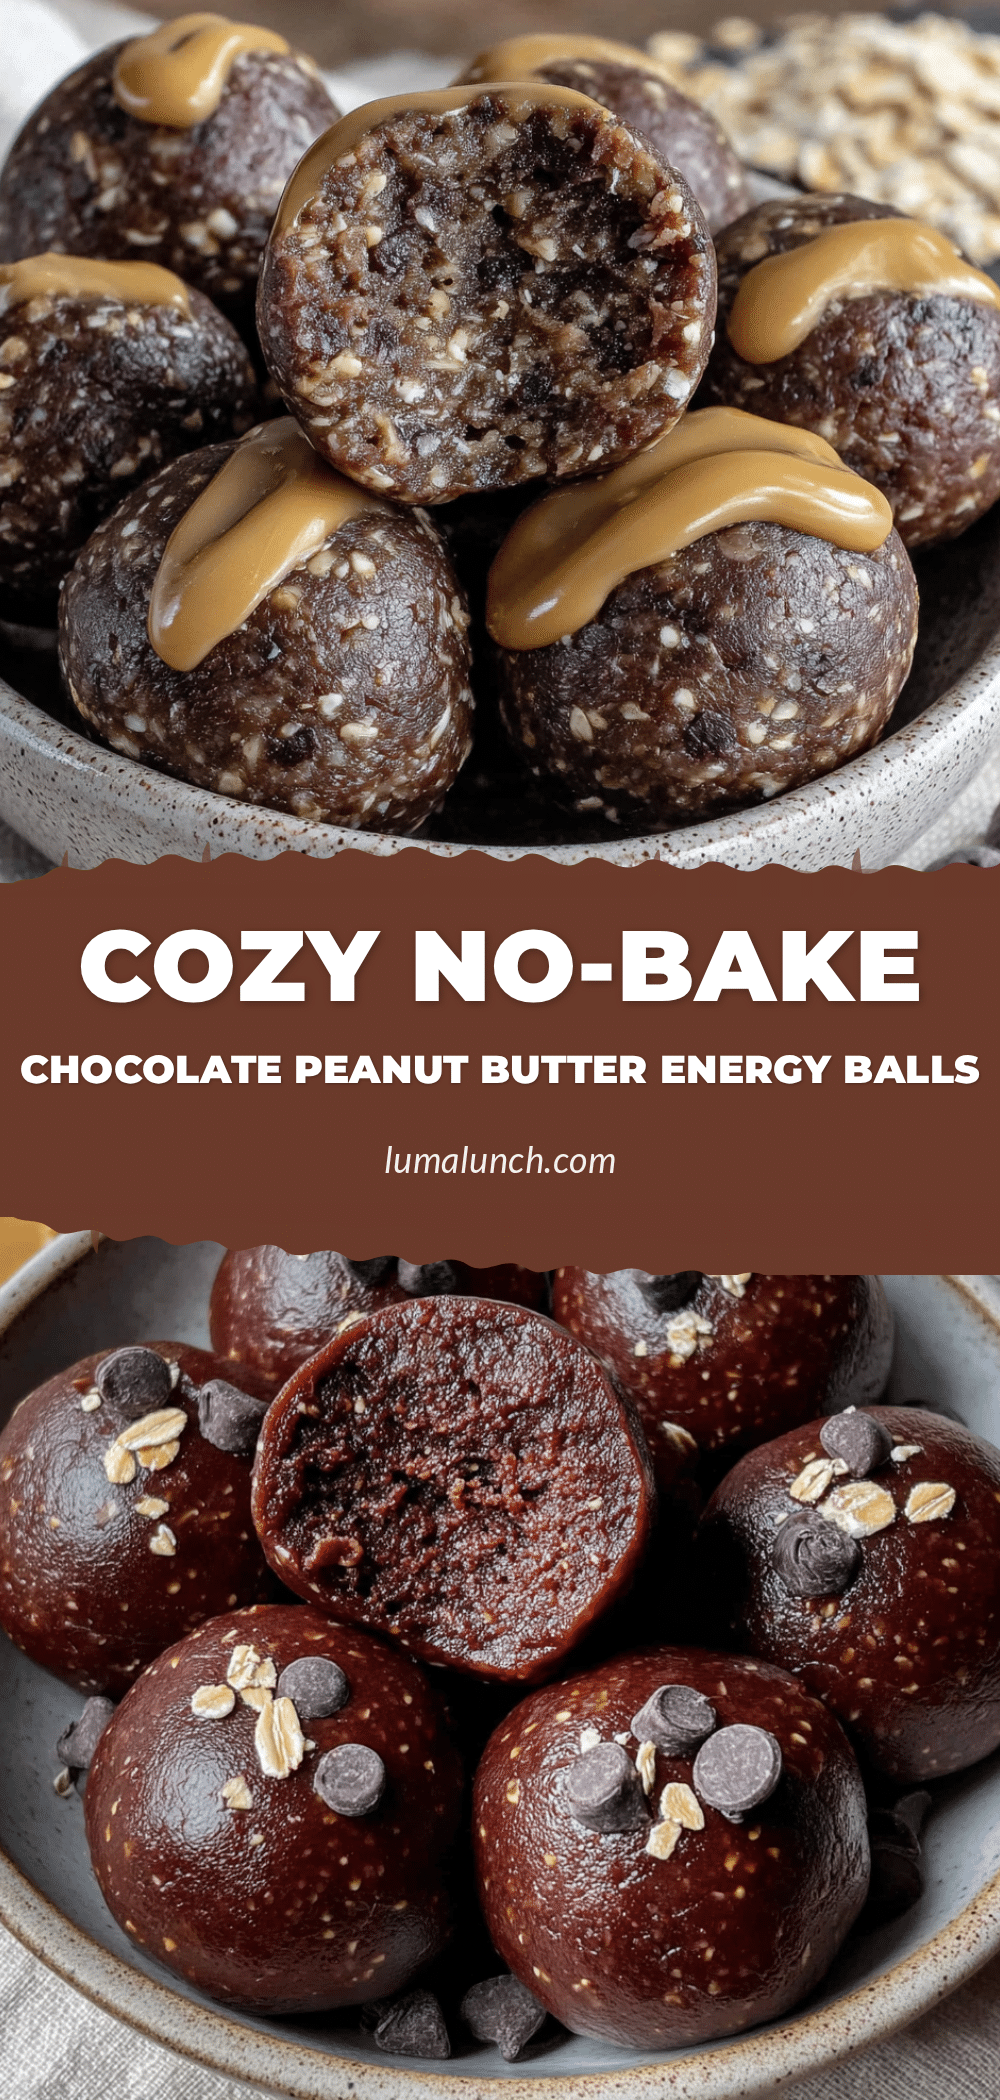
Best No-Bake Chocolate Peanut Butter Energy Balls (15-Minute Recipe)
These no-bake chocolate peanut butter energy balls are quick, easy, and made with simple pantry ingredients. Perfect for busy days, they come together in just 15 minutes and taste like a comforting treat.
- Prep Time: 15 minutes
- Cook Time: 0 minutes
- Total Time: 15 minutes
- Yield: 18-20 servings 1x
- Category: Snack
- Cuisine: American
Ingredients
- 1 cup old-fashioned rolled oats
- 1/2 cup creamy peanut butter
- 1/3 cup honey
- 1/4 cup unsweetened cocoa powder
- 1/4 cup mini chocolate chips
- 1 tablespoon coconut oil, melted
- 1/2 teaspoon vanilla extract
- 1/4 teaspoon salt (if peanut butter is unsalted)
Instructions
- Melt the coconut oil and honey together in a small microwave-safe bowl for 15-20 seconds, just until the coconut oil is melted. Stir until smooth.
- In a large mixing bowl, whisk together the rolled oats, cocoa powder, and salt until no clumps remain.
- Pour the melted coconut oil and honey mixture into the dry ingredients. Add the peanut butter and vanilla extract. Stir with a spatula until fully combined and no streaks remain.
- Fold in the mini chocolate chips gently. If the dough is too dry, add a teaspoon of water or more melted coconut oil; if too sticky, add a tablespoon more oats.
- Chill the mixture in the refrigerator for 15-20 minutes (optional but recommended for easier rolling).
- Using your hands or a cookie scoop, portion about 1 tablespoon of dough and roll into smooth balls. Place on a parchment-lined baking sheet. You should get about 18-20 balls.
- Refrigerate the baking sheet for at least 30 minutes to firm up the balls. Once set, transfer to an airtight container for storage.
Notes
For best texture, chill the dough before rolling. Wet your hands slightly to prevent sticking. These energy balls taste even better the next day as flavors meld. Store in the refrigerator for up to 2 weeks or freeze for up to 3 months.
Nutrition
- Serving Size: 1 energy ball
- Calories: 120
- Sugar: 7
- Sodium: 60
- Fat: 7
- Saturated Fat: 2
- Carbohydrates: 13
- Fiber: 2
- Protein: 4
Keywords: no-bake energy balls, chocolate peanut butter energy balls, healthy snack, gluten-free snack, vegan option, quick snack


