Love this? Save it for later!
Share the inspiration with your friends
Halloween was never my holiday. I mean, I liked the candy as much as the next kid, but the elaborate costumes, the messy face paint, the pressure to have a perfect spooky party—it always felt like a lot. So when my neighbor, a quiet guy named Leo who gardens in overalls and never seems to rush, asked me to come grab a spare pumpkin from his patch last October, I wasn’t expecting a culinary revelation. I walked into his kitchen, and there they were. Little clear cups filled with what looked exactly like rich, dark soil, with a gummy worm wriggling out of the top. It was so simple, so perfectly weird, and so utterly charming that I stopped mid-sentence.
Leo wasn’t trying to impress anyone. He was just making a dessert for his niece’s classroom party, and frankly, he looked a little embarrassed I’d caught him. “It’s just pudding and cookies,” he muttered, handing me a spoon. But that first bite—the creamy, chocolatey pudding against the crunch of the crushed Oreos—was honestly perfect. The gummy worm was the cherry on top, or, you know, the worm in the dirt. I stood there in his cluttered kitchen, eating a dessert meant for a six-year-old, and felt a wave of pure, uncomplicated joy. Maybe you know that feeling when something so simple just clicks?
That’s the thing about these Easy Halloween Dirt Cups. They are not fancy. They don’t require a double boiler or a trip to a specialty baking store. They are, at their core, a happy accident of convenience and creativity. And ever since that afternoon in Leo’s kitchen, I’ve been making them every single Halloween. They are the one recipe that never fails to make me smile, and they have become my secret weapon for effortless holiday fun.
Why You’ll Love This Recipe
Let’s be real for a second. Halloween desserts can be a nightmare. You have those intricate cookie designs that take hours, the cake pops that fall apart, or the elaborate haunted house that collapses before the party even starts. These Easy Halloween Dirt Cups are the exact opposite. They are the solution to the “I want to do something fun but I have zero time or energy” dilemma. I have tested this recipe with my own notoriously picky kids, at potlucks, and even for a last-minute office party, and it has a 100% success rate. It is, without a doubt, the easiest, most reliable holiday dessert I know.
- Quick & Easy: This comes together in just 10 minutes. Seriously. You can make it between answering the door for trick-or-treaters.
- Simple Ingredients: You likely have 90% of these items in your pantry right now. No weird, seasonal ingredients that you’ll never use again.
- Perfect for Parties: Whether it’s a school classroom party, a spooky movie night, or a Halloween potluck, these individual cups are perfect for serving a crowd.
- Crowd-Pleaser: Kids go absolutely bonkers for them, and adults secretly love them too. It’s that nostalgic, playful dessert everyone remembers.
- Unbelievably Delicious: The combination of the silky chocolate pudding and the crunchy, buttery cookie “dirt” is a textural masterpiece. It is comfort in a cup.
What makes this recipe different from the rest? It’s the ratio. I’ve had dirt cups where the “dirt” is soggy and the pudding is bland. My version ensures you get that perfect crunch in every single bite, and the pudding is always rich and creamy. It’s not just another version—it’s the best version, perfected through trial and error (and a few soggy disasters, let me tell you).
This is the kind of dessert that makes you feel like a holiday hero without any of the stress. It is comfort food at its most fun—quick, messy, and absolutely unforgettable.
What Ingredients You Will Need
This recipe uses incredibly simple, everyday ingredients to create a dessert that looks way more impressive than the effort it takes. The magic is in the layering and the playful presentation. Here’s what you need to grab from your kitchen.
- For the “Dirt”:
- 1 (14.3-ounce) package of Oreo cookies (about 36 cookies). You want the classic, original Oreos for the best color and flavor.
- 3 tablespoons of unsalted butter, melted. (This helps the “dirt” clump slightly, giving it a more realistic soil texture).
- For the Pudding:
- 2 (3.9-ounce) boxes of instant chocolate pudding mix. I prefer Jell-O brand for its consistent, smooth texture.
- 3 cups of cold whole milk. Whole milk gives the richest, creamiest pudding. You can use 2%, but avoid skim milk for the best texture.
- For the Topping & Decoration:
- 1 (8-ounce) container of frozen whipped topping (like Cool Whip), thawed. This is folded into the pudding to make it extra light and fluffy.
- 1 cup of reserved Oreo crumbs (for the top layer).
- 12-15 gummy worms. I recommend the classic, brightly colored ones for maximum “gross-out” appeal.
- Optional: A few small mint leaves or edible flowers for a “garden” look.
A quick note on the Oreos: you don’t need to remove the cream filling. The filling actually helps the crumbs bind together and adds a subtle sweetness. Just crush the whole cookie. I’ve used the generic store brand before, and they work fine, but the real Oreos have that unmistakable deep, dark chocolate color that makes the “dirt” look so realistic. For the gummy worms, any brand will do, but if you can find the sour ones, they add a nice tangy contrast to the sweet pudding.
Equipment Needed
One of the best things about this recipe is that you don’t need any fancy equipment. If you have a mixing bowl and a spoon, you are 90% of the way there. Here is the complete list of what you’ll need.
- A Food Processor or a Ziploc Bag: You need a way to crush the Oreos into a fine crumb. A food processor is the quickest, cleanest method. But if you don’t have one, don’t worry! Just put the cookies in a large Ziploc bag, seal it, and go to town with a rolling pin. It’s a great way to release some pre-Halloween stress!
- A Large Mixing Bowl: For making the pudding.
- A Medium Mixing Bowl: For mixing the crushed Oreos and butter.
- A Whisk or Electric Hand Mixer: A whisk works perfectly fine, but an electric hand mixer will make the pudding come together in under a minute. It’s a bit of a cheat code.
- 6 to 8 Small Cups or Glasses: Clear plastic cups are classic and perfect for showing off the layers. You can use small mason jars, dessert cups, or even small glass bowls. The clear cups are where the visual magic happens.
- A Rubber Spatula: For folding the whipped topping into the pudding without deflating it.
- A Small Spoon or Offset Spatula: For layering the “dirt” neatly.
I personally prefer using the small, 5-ounce plastic cups you can find at any party supply store. They are cheap, disposable, and perfect for kids’ hands. If you want a more sustainable option, small mason jars look incredibly cute and can be washed and reused for years.
Preparation Method
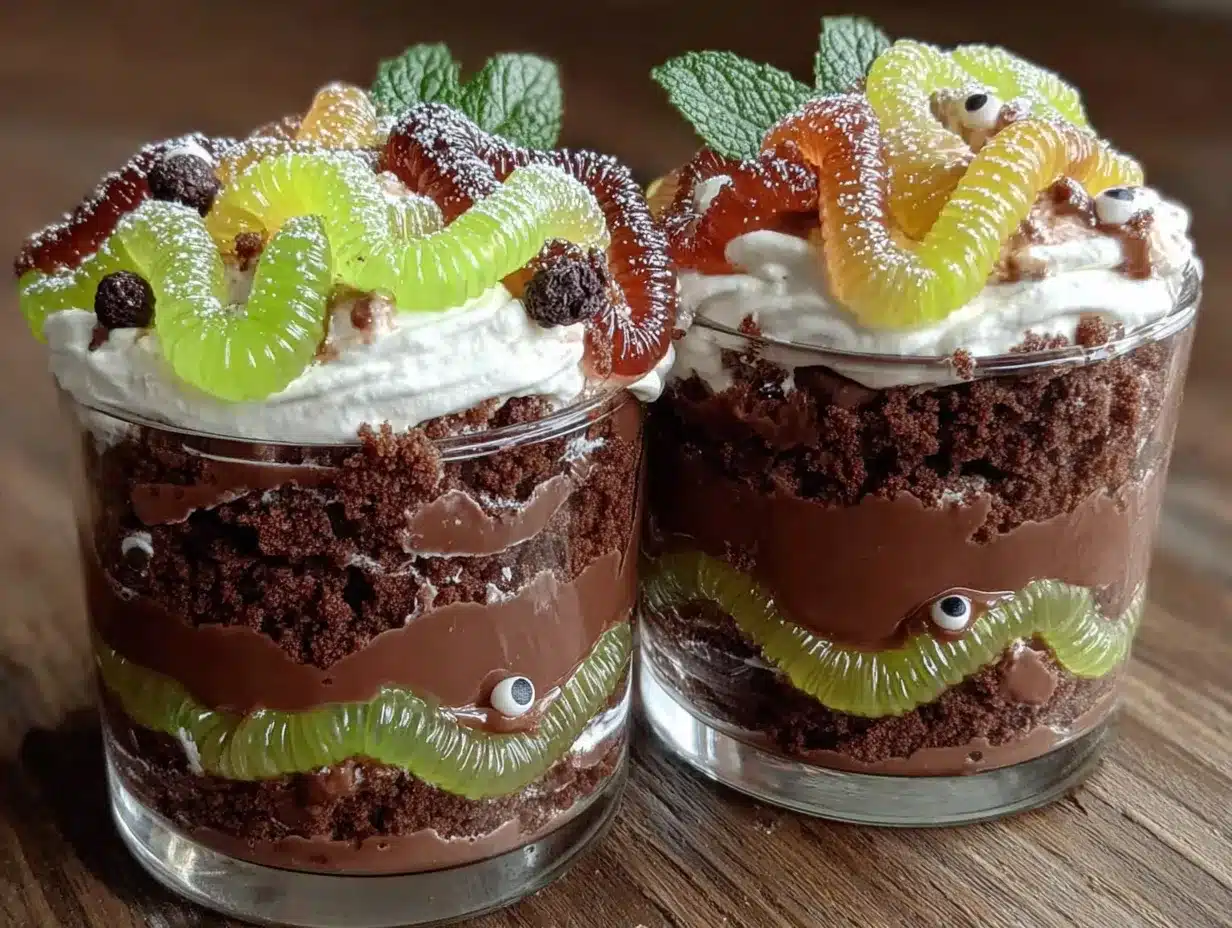
Alright, let’s get to the fun part. This is a no-bake, no-fuss recipe that comes together in a flash. Follow these steps, and you will have the cutest Halloween dessert on the block in less time than it takes to watch a single episode of your favorite show.
- Make the “Dirt”: First things first, crush your Oreos. Place the entire package of cookies (cream filling and all) into your food processor. Pulse until you have fine, dark crumbs that look like potting soil. If you are using the Ziploc bag method, make sure to get the crumbs as fine as you can. You want a uniform texture. Set aside about 1 cup of these crumbs for the final topping. In a medium bowl, combine the remaining Oreo crumbs with the 3 tablespoons of melted butter. Mix with a fork until the crumbs are evenly moistened. This step is crucial—it gives the dirt a slightly clumpy, realistic texture.
- Make the Pudding Base: In your large mixing bowl, whisk together the two boxes of instant chocolate pudding mix and the 3 cups of cold milk. Whisk vigorously for about 2 minutes, until the mixture is thick and smooth. If you are using an electric hand mixer, beat on low speed for about 1 minute. The pudding will be quite thick at this point.
- Fold in the Whipped Topping: This is the secret to the light, mousse-like texture. Take your thawed whipped topping and add it to the bowl with the pudding. Using your rubber spatula, gently fold it in. Don’t stir! You want to cut through the center of the mixture and scrape the bottom of the bowl, rotating the bowl as you go. Fold until just combined. A few white streaks are okay—you don’t want to overmix and deflate it.
- Assemble the Cups: Now for the layering. Start by spooning about 2 tablespoons of the buttery Oreo “dirt” into the bottom of each cup. Press it down gently with the back of your spoon. This creates a solid base layer. Next, spoon or pipe the chocolate pudding mixture on top of the dirt. Fill each cup about halfway full. Add another layer of the buttery Oreo dirt—about 1 tablespoon. Then, add another layer of the chocolate pudding mixture, filling the cup almost to the top.
- Finish with the Top Dirt: Take that reserved 1 cup of plain, unbuttered Oreo crumbs and sprinkle a generous layer on top of the final pudding layer. This top layer should look like a nice, even blanket of dry soil. It is the visual anchor of the whole dessert.
- Add the Worms: Here comes the best part. Take your gummy worms and gently poke them into the top of the “dirt.” You can have one worm wriggling its way out, or two or three for a more “infested” look. Get creative! Some of mine are half-buried, and some are just peeking out. It’s the spooky, silly centerpiece of the whole thing.
- Chill (Optional but Recommended): While you can eat these immediately, I highly recommend popping them in the fridge for at least 30 minutes before serving. This allows the flavors to meld and the texture to set perfectly. The “dirt” will soften just slightly, making it even more realistic.
A quick sensory cue: the pudding mixture should be thick and velvety, not runny. When you fold in the whipped topping, it should look like a soft, billowy cloud. And when you take your first bite, you should hear that satisfying crunch of the Oreo “dirt” followed by the smooth, creamy pudding. It is pure textural heaven.
Cooking Tips & Techniques
I have made these dirt cups more times than I can count, and I have learned a few things the hard way. Here are my top tips to ensure your Halloween dirt cups are a smashing success.
- The Pudding Must Be Instant: Do not, under any circumstances, use cook-and-serve pudding. It will not set properly in this recipe, and you will end up with a soupy mess. Instant pudding is the only way to go. It’s designed to set quickly with cold milk, which is exactly what we need.
- Don’t Overmix the Whipped Topping: This is the most common mistake. When you fold in the whipped topping, be gentle. Overmixing will deflate the air you’ve incorporated, making the pudding dense and heavy instead of light and mousse-like. Think of it as a gentle hug, not a wrestling match.
- Crush the Oreos to the Right Consistency: You want a fine crumb, not big chunks. Big chunks of cookie will be hard to eat with a spoon and won’t look like real dirt. A food processor is your best friend here. If you are using a bag and a rolling pin, really take your time to get the crumbs fine.
- Use Cold Ingredients: For the best results, make sure your milk is cold and your whipped topping is properly thawed (but still cold). This helps the pudding set up quickly and gives it a perfect texture. I always keep my milk in the fridge until the very last minute.
- Make Ahead of Time: One of the best things about this recipe is that it actually gets better with a little time in the fridge. You can assemble these cups a day in advance. Just wait to add the gummy worms until right before serving, or they will get a bit soggy and lose their chewy texture. The rest of the dessert will be perfectly set and delicious.
I once made a batch where I forgot to add the butter to the dirt. The result was a dry, crumbly mess that didn’t look like soil at all. It was a hard lesson, but it taught me how important that little bit of butter is for the realistic texture. Don’t skip it!
Variations & Adaptations
One of the reasons I love this recipe so much is its incredible versatility. It is a blank canvas for your Halloween creativity. Here are a few of my favorite ways to switch it up.
- Gluten-Free Version: This is super easy. Simply swap the regular Oreos for gluten-free Oreos. They taste almost identical and work perfectly in this recipe. The rest of the ingredients (pudding, milk, whipped topping) are naturally gluten-free, so you are good to go.
- Peanut Butter Lovers’ Twist: For a richer, more decadent version, add a layer of peanut butter. Before you add the first layer of pudding, spoon a teaspoon of creamy peanut butter onto the bottom “dirt” layer. You can also drizzle melted peanut butter on top of the final pudding layer before adding the top dirt. It pairs unbelievably well with the chocolate.
- Spooky “Graveyard” Theme: Instead of gummy worms, use the dirt cups as a base for a mini graveyard. Press a few small, rectangular cookies (like Milano cookies) into the dirt to serve as tombstones. You can even write “R.I.P.” on them with a little icing. Add a few candy pumpkins or skeletons for a full graveyard scene.
- Mint Chocolate Chip Version: If you are a fan of mint and chocolate, this is for you. Use mint-flavored Oreos (the ones with the green filling) and add a drop or two of peppermint extract to the pudding mixture. The cool mint flavor is a wonderful contrast to the rich chocolate.
I once made a version for a friend’s “Nightmare Before Christmas” themed party where I used black cocoa powder in the “dirt” to make it even darker and more dramatic. It was a huge hit. Don’t be afraid to experiment!
Serving & Storage Suggestions
These dirt cups are best served cold, straight from the fridge. The contrast between the cool, creamy pudding and the crunchy “dirt” is at its peak when it’s chilled. For presentation, I love to arrange them on a large platter or tray, maybe with a few extra gummy worms scattered around for effect. You can even add a small, plastic spider ring to the rim of each cup for an extra spooky touch.
As for what to serve with them, they are a perfect standalone dessert. But if you are hosting a full Halloween party, they pair wonderfully with salty snacks like popcorn or pretzels to balance the sweetness. A warm cup of apple cider or a glass of cold milk is the ideal beverage companion.
For storage, these cups keep beautifully in the refrigerator. Simply cover them with plastic wrap or pop on a lid if your cups have them. They will stay fresh for up to 3 days. I actually find that they taste even better on the second day, as the flavors have had more time to meld together. However, as I mentioned before, the gummy worms will start to soften and lose their chewiness after about 24 hours. If you are making them for a party on a Saturday, I recommend assembling them on Friday and adding the worms on Saturday morning.
I do not recommend freezing these dirt cups. The texture of the pudding and the whipped topping will become grainy and watery upon thawing. They are a fresh, refrigerated dessert, and they are best enjoyed that way.
Nutritional Information & Benefits
Let’s be honest: this is a treat, not a health food. But that doesn’t mean we can’t enjoy it with a little awareness. Here is a rough estimate of the nutritional information for one serving (based on 8 servings).
| Nutrient | Approximate Value per Serving |
|---|---|
| Calories | 380-420 |
| Fat | 18-22g |
| Saturated Fat | 10-12g |
| Carbohydrates | 50-55g |
| Sugar | 35-40g |
| Protein | 5-7g |
| Calcium | 10-15% DV |
From a health perspective, the main benefits come from the milk and the cocoa. The milk provides a good dose of calcium and vitamin D, which are essential for bone health. The cocoa in the Oreos and pudding contains antioxidants called flavonoids, which can be beneficial for heart health. The gummy worms, well, they are pure sugar and fun. But that’s okay! This is a dessert for a celebration. The key is moderation and enjoyment. I always tell my readers, “It’s not about what you eat between Halloween and Christmas, it’s about what you eat between Christmas and Halloween.”
For those with dietary restrictions, please note that this recipe contains dairy (milk, whipped topping), gluten (Oreos), and soy (often in chocolate pudding). I have provided gluten-free and dairy-free alternatives in the variations section above.
Conclusion
So there you have it. The easiest, most adorable, and most delicious Halloween dessert you will ever make. These Easy Halloween Dirt Cups are more than just a recipe; they are a memory in the making. They are the dessert that kids will remember making with you, the one that gets the biggest laugh at the party, and the one that proves that sometimes, the simplest things are the best.
I love this recipe because it brings out the kid in everyone. It is playful, messy, and unapologetically fun. It reminds me of Leo’s kitchen and that unexpected moment of pure joy. And honestly, that is what the holidays should be about. Not stress, not perfection, but connection and a little bit of silly fun.
I want to see your creations! Please leave a comment below and tell me how your dirt cups turned out. Did you add any fun variations? What kind of cups did you use? Your feedback and ideas are what make this community so special. And if you loved this recipe, please share it with your friends and family on Pinterest. Let’s spread the spooky, chocolatey joy together. Happy Halloween, friends
Frequently Asked Questions
Can I use sugar-free pudding and whipped topping?
Absolutely! You can easily make a lighter version of these dirt cups by using sugar-free instant chocolate pudding and sugar-free whipped topping. The texture will be slightly different, but it will still be delicious and satisfying.
How far in advance can I make these dirt cups?
You can assemble the cups (without the gummy worms) up to 2 days in advance. Keep them covered in the refrigerator. Add the gummy worms no more than 4-6 hours before serving to keep them from getting too soft.
What if I don’t have a food processor?
No problem at all! The Ziploc bag and rolling pin method works perfectly. You can also place the Oreos in a large bowl and crush them with the bottom of a sturdy glass or a meat tenderizer. It might take a little more elbow grease, but the result will be the same.
Can I use homemade chocolate pudding instead of instant?
You can, but it will change the texture significantly. Homemade pudding is usually thinner and will not set as firmly as instant pudding. If you use homemade, you may need to add a thickening agent like cornstarch and let it chill for several hours before assembling. For the quickest, easiest results, stick with instant.
My “dirt” looks too dark. How can I make it look more realistic?
If your Oreo crumbs look too black, you can lighten them by mixing in a small amount of crushed graham crackers or vanilla wafers. This will give the “dirt” a more varied, natural brown color. Start with a tablespoon of the lighter crumbs and add more until you get the shade you like.
Pin This Recipe!
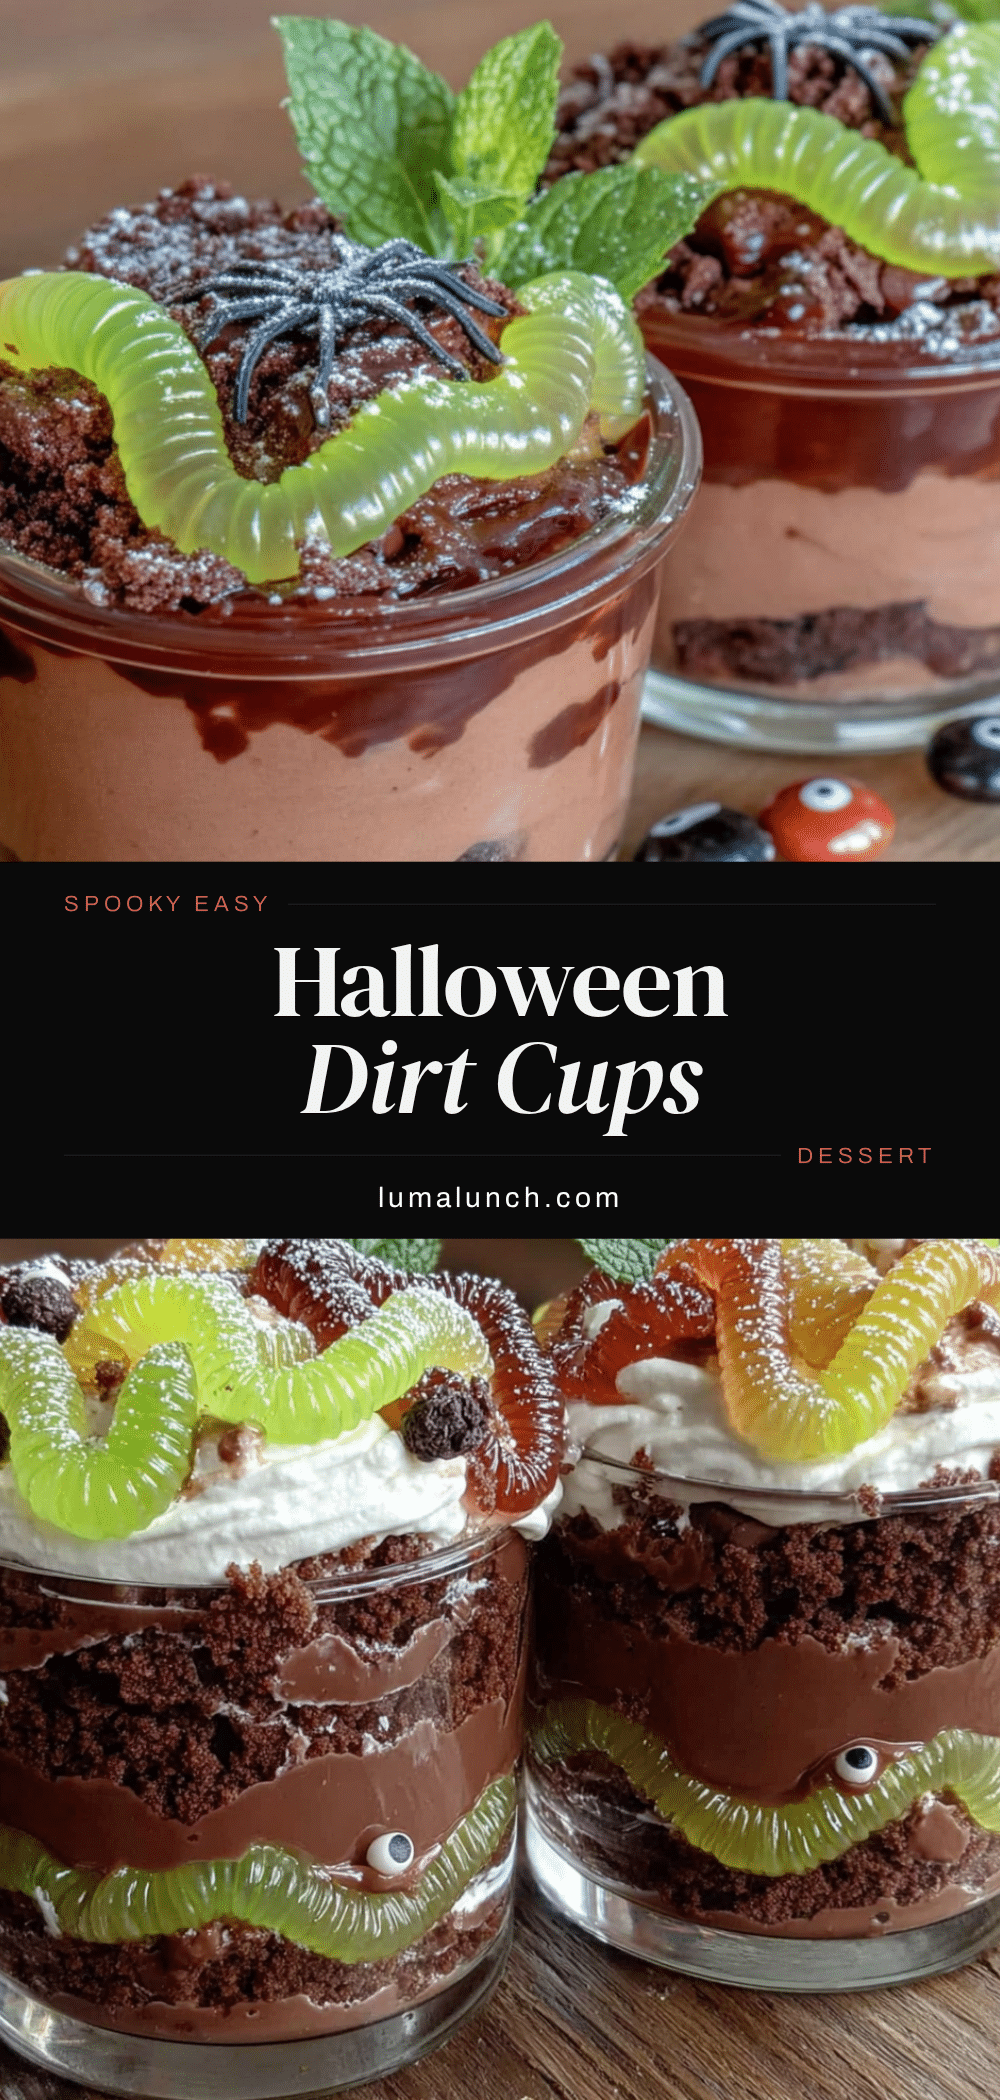
Easy Halloween Dirt Cups: Best 10-Minute Gummy Worm Dessert
These Easy Halloween Dirt Cups are the ultimate no-bake dessert, featuring layers of creamy chocolate pudding and crunchy Oreo ‘dirt’ topped with gummy worms. Ready in just 10 minutes, they are a fun, crowd-pleasing treat perfect for Halloween parties.
- Prep Time: 10 minutes
- Cook Time: 0 minutes
- Total Time: 10 minutes
- Yield: 8 servings 1x
- Category: Dessert
- Cuisine: American
Ingredients
- 1 (14.3-ounce) package Oreo cookies (about 36 cookies)
- 3 tablespoons unsalted butter, melted
- 2 (3.9-ounce) boxes instant chocolate pudding mix
- 3 cups cold whole milk
- 1 (8-ounce) container frozen whipped topping (like Cool Whip), thawed
- 1 cup reserved Oreo crumbs (for topping)
- 12–15 gummy worms
- Optional: small mint leaves or edible flowers for garnish
Instructions
- Make the ‘Dirt’: Crush the entire package of Oreos (cream filling included) in a food processor until fine crumbs form. Set aside 1 cup of crumbs for the final topping. In a medium bowl, combine the remaining Oreo crumbs with the melted butter and mix with a fork until evenly moistened.
- Make the Pudding Base: In a large mixing bowl, whisk together the instant chocolate pudding mix and cold milk for about 2 minutes until thick and smooth. Alternatively, use an electric hand mixer on low speed for 1 minute.
- Fold in the Whipped Topping: Add the thawed whipped topping to the pudding. Gently fold it in using a rubber spatula until just combined. Do not overmix.
- Assemble the Cups: Spoon about 2 tablespoons of the buttery Oreo ‘dirt’ into the bottom of each cup and press down gently. Add a layer of the chocolate pudding mixture, filling each cup about halfway. Add another layer of buttery Oreo dirt (about 1 tablespoon), then another layer of pudding, filling almost to the top.
- Finish with the Top Dirt: Sprinkle a generous layer of the reserved plain Oreo crumbs on top of the final pudding layer.
- Add the Worms: Gently poke gummy worms into the top ‘dirt’ layer, arranging them as desired.
- Chill (Optional but Recommended): Refrigerate for at least 30 minutes before serving to allow the flavors to meld and the texture to set.
Notes
Use instant pudding only; cook-and-serve will not set properly. Do not overmix the whipped topping to keep the texture light. For best results, use cold milk and properly thawed whipped topping. Assemble cups up to 2 days in advance, but add gummy worms no more than 4-6 hours before serving to prevent them from getting soft. The butter in the dirt is essential for a realistic, clumpy texture.
Nutrition
- Serving Size: 1 cup
- Calories: 400
- Sugar: 38
- Sodium: 380
- Fat: 20
- Saturated Fat: 11
- Carbohydrates: 52
- Fiber: 2
- Protein: 6
Keywords: Halloween dirt cups, gummy worm dessert, no-bake dessert, easy Halloween dessert, chocolate pudding cups, Oreo dirt cups


