Love this? Save it for later!
Share the inspiration with your friends
This was supposed to be a batch of French macarons. I had the almond flour measured, the egg whites aging on the counter, and my piping bags ready to go. Then my three-year-old nephew decided to “help” by dumping a half cup of extra sugar into the mixer bowl while I was answering a text. I stared at the overly stiff, grainy meringue and thought about dumping it all down the sink. Honestly, I was pretty annoyed. But I had already put in the work separating those eggs, and throwing it away felt wasteful.
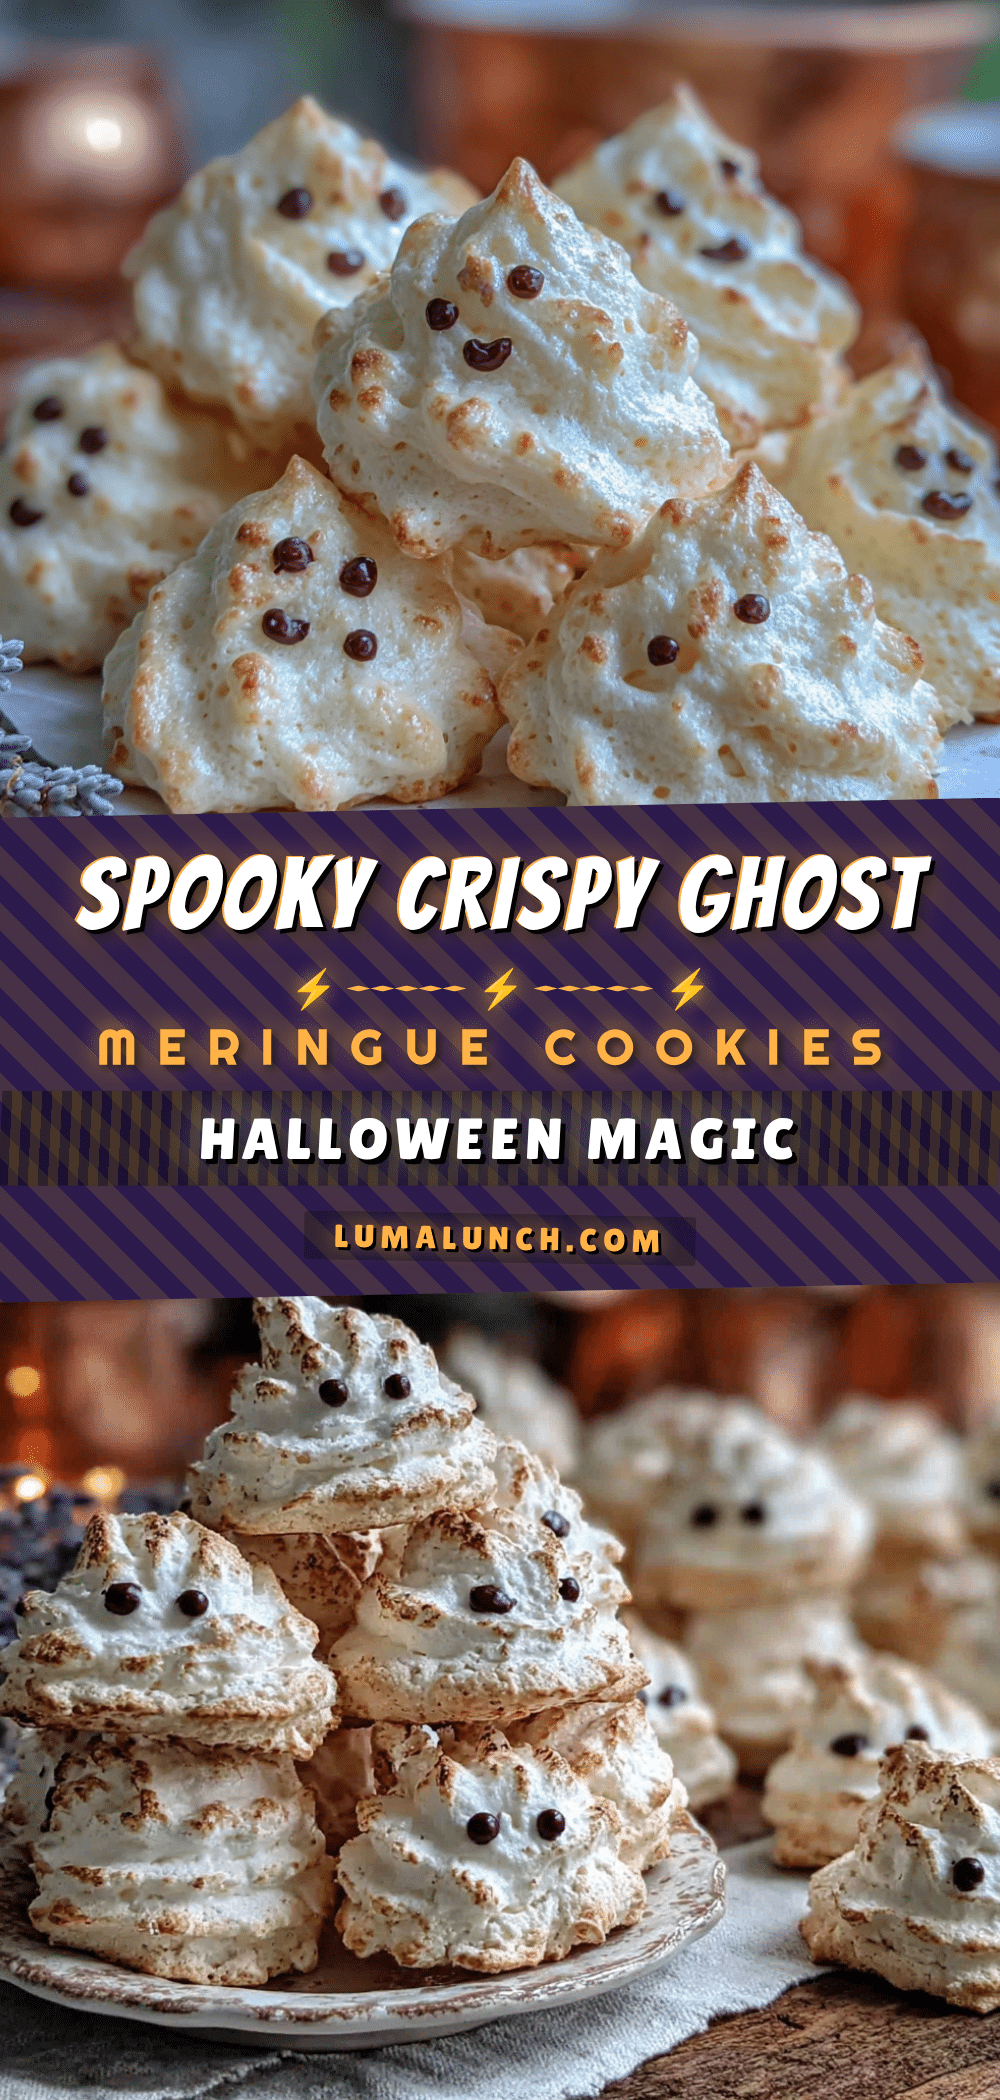
So I did something I never would have planned. I scooped the stiff meringue into a piping bag, cut a tiny hole, and piped little ghost shapes onto a baking sheet. No macaron feet. No sandwich filling. Just pure, sugary, ghostly little blobs. I baked them low and slow, and when I pulled them out of the oven, I actually laughed out loud. They were perfect. Light, airy, and hauntingly cute. My nephew called them “boo cookies,” and the name stuck.
You know that feeling when a kitchen disaster turns into something better than what you originally planned? That is exactly what happened here. These ghost meringues are now my go-to Halloween treat. They take maybe ten minutes to pipe, use just four ingredients, and disappear faster than any store-bought candy. Maybe you have been there, staring at a ruined batch of something, wondering if you can salvage it. Let me tell you, sometimes the happy accidents become the recipes you make every single year.
Why You Will Love This Recipe
I have tested a lot of meringue recipes over the years, and this one is hands-down the easiest. Here is why these ghost cookies deserve a spot in your Halloween baking rotation:
- Quick & Easy: From start to finish, these come together in about an hour and a half. Most of that time is hands-off baking.
- Simple Ingredients: You need egg whites, sugar, cream of tartar, and vanilla extract. That is it. No fancy grocery trips required.
- Perfect for Halloween Parties: These little ghosts are the star of any spooky spread. Kids love them, and adults appreciate something lighter than sugar cookies.
- Crowd-Pleaser: They are gluten-free, dairy-free, and naturally low in fat. Everyone can enjoy them without worry.
- Unbelievably Delicious: The texture is crisp on the outside with a soft, marshmallowy center. It is pure melt-in-your-mouth magic.
What makes these different from other meringue recipes? It is the technique. I use a slightly lower oven temperature than most recipes call for, which gives you that perfect white color without any browning. No one wants a tan ghost, right? I also add a tiny pinch of cream of tartar to stabilize the egg whites, which means even beginner bakers get stiff peaks every time.
This recipe is the kind that makes you close your eyes after the first bite. It is comfort food reimagined for Halloween—lighter, faster, but with the same soul-soothing satisfaction. Perfect for impressing guests without stress, or turning a simple afternoon into something memorable.
What Ingredients You Will Need
This recipe uses simple, wholesome ingredients to create that signature light-as-air meringue texture. Most of these are pantry staples, which makes these ghost cookies perfect for spontaneous Halloween baking.
For the Meringue Base
- 3 large egg whites, room temperature (room temperature egg whites whip up to a much higher volume than cold ones. Separate your eggs while they are still cold, then let the whites sit on the counter for 30 minutes before starting.)
- ¾ cup (150g) granulated white sugar (Regular granulated sugar works best. Avoid superfine or powdered sugar here—granulated dissolves properly during the whipping process and gives the meringue its structure.)
- ¼ teaspoon cream of tartar (This stabilizes the egg whites and helps them hold their shape. If you do not have cream of tartar, you can substitute ½ teaspoon of lemon juice or white vinegar.)
- ½ teaspoon vanilla extract (Pure vanilla extract gives the best flavor, but imitation vanilla works fine too. For a fun twist, try peppermint extract for a candy-cane vibe.)
For Decoration (Optional)
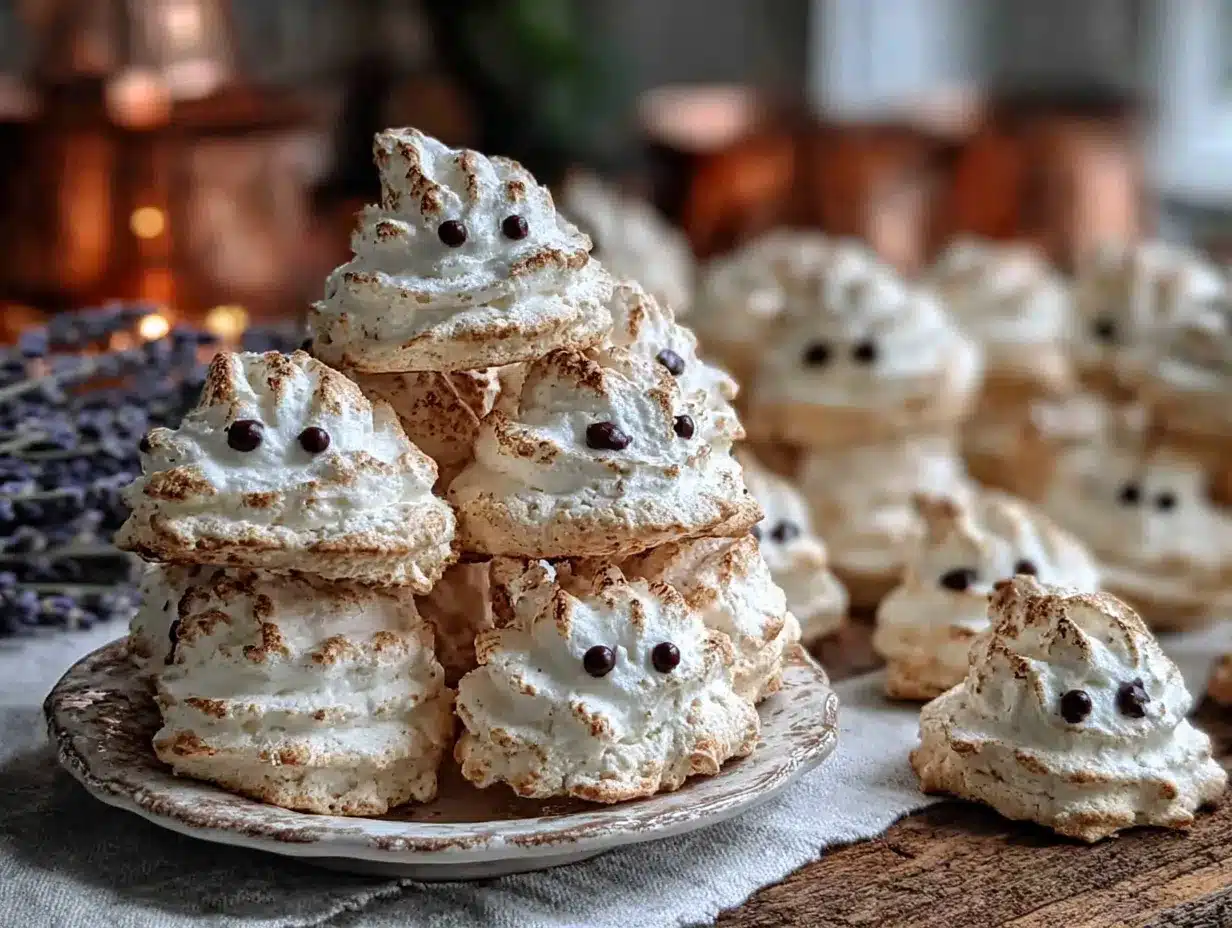
- Mini chocolate chips or black gel food coloring (Use mini chocolate chips for the ghost eyes, or dab on black gel food coloring after baking. I personally prefer the chocolate chips—they add a tiny bit of richness that balances the sweetness.)
Ingredient Selection Tips: I recommend using organic cane sugar for the cleanest flavor. If you are using farm-fresh eggs, you might notice the whites are slightly thicker and take a minute longer to whip—that is totally normal. For the best results, avoid eggs that are super fresh (like, laid yesterday fresh). Eggs that are about a week old actually whip up better because the whites have thinned out slightly.
Substitution Guidance: Need these to be vegan? You can use aquafaba (the liquid from a can of chickpeas) instead of egg whites. Use 3 tablespoons of aquafaba per egg white. The texture will be slightly different—slightly less crisp—but still delicious. For a sugar-free version, try using allulose or monk fruit sweetener, though the texture will be softer and less crisp.
Equipment Needed
You do not need a fancy kitchen to make these ghost cookies. Here is what you will need:
- Stand mixer or hand mixer (A stand mixer with the whisk attachment makes this almost effortless, but a hand mixer works just fine. I have made these with both, and honestly, the hand mixer gives you a better arm workout.)
- Large mixing bowl (Make sure it is completely clean and dry. Any trace of grease will prevent your egg whites from whipping up properly.)
- Piping bags or zip-top bags (I use disposable piping bags because they are easy to clean up. In a pinch, a sturdy zip-top bag with a corner snipped off works perfectly.)
- Baking sheets (Two standard baking sheets lined with parchment paper. Do not use wax paper—the meringues will stick.)
- Electric oven (A conventional oven works best. Convection ovens can cause the meringues to brown, so reduce the temperature by 25°F if using convection.)
- Cooling rack (For letting the ghosts cool completely before storing.)
Budget-Friendly Options: If you do not own piping bags, you can use a spoon to drop dollops of meringue onto the baking sheet. They will not look as ghost-like, but they will taste just as good. I have done this when I ran out of piping bags, and honestly, they looked like adorable little clouds.
Preparation Method
- Preheat your oven to 200°F (93°C). Line two baking sheets with parchment paper. Set them aside. The low temperature is crucial here—we are drying the meringues, not baking them. If your oven runs hot, use an oven thermometer to double-check the temperature.
- Separate your eggs. Crack each egg carefully, making sure no yolk gets into the whites. Any trace of yolk will prevent the whites from whipping up. I like to separate each egg into a small bowl first, then transfer the white to the mixer bowl. That way, if one yolk breaks, you have not ruined the whole batch.
- Let the egg whites come to room temperature. This takes about 30 minutes. Room temperature egg whites whip up to a much higher volume and create a more stable meringue. While you wait, measure out your sugar and set up your piping station.
- Add the cream of tartar. Sprinkle the cream of tartar over the room temperature egg whites. This acid helps stabilize the foam and gives you stiff peaks that hold their shape.
- Start whipping. Begin on medium speed for about 2 minutes until the mixture becomes frothy and bubbly. Then increase to high speed. You are looking for soft peaks—when you lift the whisk, the meringue should droop slightly but hold a soft shape.
- Add the sugar gradually. With the mixer running on high speed, add the sugar one tablespoon at a time. This takes about 3-4 minutes. Do not dump it all in at once—that can deflate the egg whites. The mixture should look glossy and thick by the time all the sugar is incorporated.
- Keep whipping until stiff peaks form. This takes another 5-7 minutes on high speed. You will know it is ready when the meringue holds a stiff peak that does not droop when you lift the whisk. Rub a tiny bit between your fingers—if it feels gritty, keep whipping. It should feel smooth and silky.
- Add the vanilla. Gently fold in the vanilla extract with a rubber spatula. Do not overmix—just a few folds until it is evenly distributed.
- Prepare your piping bag. Fit your piping bag with a small round tip (about ¼ inch wide) or simply snip the corner of a zip-top bag. Fill the bag with meringue. Twist the top to close it.
- Pipe the ghosts. Hold the piping bag straight up and down, about ½ inch above the parchment paper. Squeeze a small mound of meringue, then pull straight up quickly to create a little peak on top. This peak is what makes it look like a ghost. Leave about 1 inch between each ghost—they do not spread much, but you want air to circulate. Your meringue should look like little teardrops or puffy clouds.
- Add the eyes. If using mini chocolate chips, gently press two chips into each ghost for eyes. Do this immediately after piping, before the meringue starts to dry. If using black gel food coloring, wait until after baking to add the eyes.
- Bake for 60-75 minutes. Place the baking sheets in the preheated oven. Bake for 60 minutes, then check them. The meringues should be dry to the touch and easily lift off the parchment paper. If they are still sticky, bake for another 10-15 minutes. They should not be brown at all—just pale and ghostly white.
- Turn off the oven and let them cool inside. This is my secret trick. Turn off the oven and leave the meringues inside with the door slightly ajar (prop it open with a wooden spoon). Let them cool completely inside the oven for at least 1 hour. This extra drying time ensures they stay crisp all the way through.
- Cool completely. Once cooled, transfer the ghosts to a wire rack. They should feel light and airy. If any stick to the parchment, they need more drying time—pop them back in the turned-off oven for another 30 minutes.
Cooking Tips & Techniques
I have made these ghost meringues at least a dozen times, and I have learned a few things the hard way. Here are my best tips:
Humidity is the enemy. Meringues hate humid days. If you live somewhere humid, try to make these on a dry day. You can also run a dehumidifier in your kitchen for an hour before starting. I learned this lesson when I made a batch during a summer thunderstorm, and they came out sticky and sad.
Do not overbake. The line between perfectly dry and overbaked is thin. Overbaked meringues turn slightly brown and lose that pure white ghost look. If your oven runs hot, check them at the 50-minute mark. Trust your eyes, not just the timer.
Use a clean bowl. I cannot stress this enough. Any trace of grease, oil, or egg yolk will ruin your meringue. Wash your bowl and whisk attachment with hot, soapy water, then wipe them down with a bit of white vinegar on a paper towel. This removes any lingering grease.
Pipe with confidence. Your ghosts do not need to look perfect. In fact, the slightly uneven ones look more haunting. I have had ghosts that look like they are melting, floating, or doing a little dance. They all taste the same. Do not stress about perfection—just have fun with it.
Multitasking strategy: While the egg whites are coming to room temperature, line your baking sheets and measure your sugar. While the meringue is baking, clean up your kitchen. The active work time is only about 15 minutes, so plan your timing accordingly.
Variations & Adaptations
One of the best things about this recipe is how easy it is to customize. Here are some variations I have tried:
Chocolate Ghosts: Sift 2 tablespoons of unsweetened cocoa powder into the meringue after adding the sugar. Fold it in gently until combined. The ghosts will be a pale brown, but they taste like chocolate meringue. My nephew calls these “dirt ghosts.”
Peppermint Boos: Swap the vanilla extract for ½ teaspoon of peppermint extract. These taste like candy canes and are perfect for a winter-themed party. You can even add a tiny bit of red food coloring to make pink ghosts, though the color is not very Halloween-y.
Vegan Aquafaba Ghosts: Replace the egg whites with 6 tablespoons of aquafaba (the liquid from one can of chickpeas). Whip it with an electric mixer for about 8-10 minutes until stiff peaks form. The texture will be slightly less crisp, but the flavor is surprisingly neutral. Add a pinch of cream of tartar to help stabilize it.
Spooky Swirls: Before piping, swirl in a tiny amount of black or purple gel food coloring with a toothpick. Do not mix it fully—just create streaks. When you pipe the ghosts, they will have a marbled, ghostly effect that looks amazing.
Lemon Ghosts: Add 1 teaspoon of lemon zest along with the vanilla. The citrus flavor brightens up the sweetness and adds a fresh twist. These are especially good for a spring or summer Halloween party.
Serving & Storage Suggestions
These ghost meringues are best served at room temperature. They have a crisp exterior that gives way to a soft, marshmallowy interior. The texture is truly unique—like a crunchy cloud.
Presentation Ideas: Arrange the ghosts on a platter with some fake spider webs or orange and black sprinkles scattered around. You can also stick them onto cupcakes for a spooky topper. For a Halloween party, I like to serve them in a glass jar with a “Boo” label tied around the neck.
Storage Instructions: Store the meringues in an airtight container at room temperature. Do not refrigerate them—the moisture in the fridge will make them sticky. They will stay fresh for up to 2 weeks, though they rarely last that long in my house.
Freezer Tips: You can freeze these for up to 3 months. Place them in a single layer in a freezer-safe container, separated by parchment paper. To thaw, let them sit at room temperature for about 30 minutes. Do not microwave them—they will turn into a sticky mess.
Reheating: If your meringues have softened slightly (which happens in humid weather), you can re-crisp them. Place them on a baking sheet in a 200°F (93°C) oven for 10-15 minutes. Let them cool completely before serving.
Flavor Development: These meringues actually taste better the next day. The flavors meld together, and the texture becomes even more evenly crisp. If you can resist eating them all on day one, you will be rewarded on day two.
Nutritional Information & Benefits
Each ghost meringue (about 1 inch tall) contains approximately:
- Calories: 25
- Carbohydrates: 6g
- Protein: 1g
- Fat: 0g
- Sugar: 6g
These little ghosts are naturally gluten-free, dairy-free, and nut-free. They are also very low in fat, making them a lighter alternative to traditional Halloween treats. The main ingredient is sugar, so they are still a treat, but they are a treat you can feel good about serving to kids and adults alike.
Health Benefits of Key Ingredients: Egg whites are a great source of high-quality protein without the fat and cholesterol found in yolks. They also contain riboflavin and selenium. The cream of tartar adds a small amount of potassium. Of course, the sugar content means these should be enjoyed in moderation, but as far as Halloween treats go, these are on the lighter side.
Allergen Considerations: These contain eggs. For an egg-free version, use the aquafaba variation mentioned above. They are naturally free of the top eight allergens except eggs, making them a safe choice for many allergy-friendly households.
Frequently Asked Questions
Why did my meringue not get stiff peaks? This usually happens because there was a trace of grease or egg yolk in the bowl. Make sure your bowl and whisk are completely clean. It could also be that your eggs were too cold—let them come to room temperature before whipping.
Can I use liquid egg whites from a carton? Yes, but the results are not as good. Carton egg whites are pasteurized and often have stabilizers that prevent them from whipping to stiff peaks. If you use them, add an extra ¼ teaspoon of cream of tartar and expect a slightly softer meringue.
How do I know when the meringue is done baking? The meringues should be dry to the touch and lift easily off the parchment paper. They should not be sticky or tacky. If they are still soft, bake for another 10-15 minutes. They should also be pure white, not brown.
Can I make these in advance for a party? Absolutely. They stay fresh for up to 2 weeks in an airtight container. I often make them a week ahead of Halloween parties. Just make sure they are completely cool before storing them.
My ghosts flattened during baking. What went wrong? This usually means the meringue was not whipped enough. Make sure you whip to stiff peaks that hold their shape. It could also mean your oven temperature was too high, causing the meringue to spread before it set. Use an oven thermometer to check your temperature.
Conclusion
These ghost meringue cookies are proof that sometimes the best recipes come from happy accidents. What started as a ruined batch of macarons turned into my most-requested Halloween treat. They are simple, fun, and absolutely delicious. Plus, they look adorable sitting on a platter, haunting your kitchen in the best way possible.
I hope you give these a try. Play around with the flavors, experiment with the decorations, and make them your own. Maybe you will discover your own happy accident along the way. If you make these, I would love to hear about it. Drop a comment below, share a photo, or tag me in your ghost cookie creations. Happy Halloween, and happy baking!
Pin This Recipe!
Easy Ghost Meringue Cookies: The Best Halloween Treat
These ghost meringue cookies are light, airy, and hauntingly cute. Made with just four simple ingredients, they are the perfect Halloween treat that comes together in about an hour and a half.
- Prep Time: 15 minutes
- Cook Time: 60-75 minutes
- Total Time: 1 hour 30 minutes
- Yield: 24 servings 1x
- Category: Dessert
- Cuisine: American
Ingredients
- 3 large egg whites, room temperature
- ¾ cup (150g) granulated white sugar
- ¼ teaspoon cream of tartar
- ½ teaspoon vanilla extract
- Mini chocolate chips or black gel food coloring (optional, for decoration)
Instructions
- Preheat your oven to 200°F (93°C). Line two baking sheets with parchment paper.
- Separate your eggs carefully, making sure no yolk gets into the whites.
- Let the egg whites come to room temperature (about 30 minutes).
- Sprinkle the cream of tartar over the room temperature egg whites.
- Start whipping on medium speed for about 2 minutes until frothy, then increase to high speed until soft peaks form.
- With the mixer running on high speed, add the sugar one tablespoon at a time (about 3-4 minutes).
- Continue whipping until stiff peaks form (another 5-7 minutes). The meringue should feel smooth and silky when rubbed between fingers.
- Gently fold in the vanilla extract with a rubber spatula.
- Prepare your piping bag with a small round tip (about ¼ inch wide) or snip the corner of a zip-top bag. Fill with meringue.
- Pipe ghosts onto the parchment paper: hold the piping bag straight up, squeeze a small mound, then pull straight up quickly to create a peak. Leave about 1 inch between each ghost.
- If using mini chocolate chips, gently press two chips into each ghost for eyes immediately after piping.
- Bake for 60-75 minutes, until dry to the touch and easily lifting off the parchment paper.
- Turn off the oven and leave the meringues inside with the door slightly ajar (prop open with a wooden spoon) for at least 1 hour to cool completely.
- Transfer to a wire rack to cool completely before storing.
Notes
Humidity is the enemy of meringues; make on a dry day if possible. Use a clean, grease-free bowl. Pipe with confidence—imperfect ghosts look more haunting. For vegan version, replace egg whites with 6 tablespoons aquafaba (liquid from a can of chickpeas) and whip until stiff peaks form.
Nutrition
- Serving Size: 1 ghost meringue
- Calories: 25
- Sugar: 6
- Sodium: 10
- Carbohydrates: 6
- Protein: 1
Keywords: ghost meringue cookies, Halloween cookies, meringue cookies, easy Halloween treat, gluten-free cookies, dairy-free cookies


