Love this? Save it for later!
Share the inspiration with your friends
My friend Marcus swore he hated banana bread. For years. Every time someone brought a loaf to a gathering, he’d politely pass, making some comment about “mushy bread” or “why ruin perfectly good bananas.” I didn’t argue. Honestly, I’d had my share of sad, dense, flavorless banana breads too — the kind that taste more like baking soda than banana. So when I found myself with a bunch of spotty bananas last Tuesday and a sudden craving for something warm and sweet, I didn’t even think about Marcus. I just wanted a quick, easy fix. I grabbed a bowl, a fork, and started mashing.
The power didn’t go out, nobody showed up at my door, and I wasn’t testing a fancy new technique. I was just tired. Tired of dirtying my stand mixer for a simple loaf. Tired of recipes with fifteen steps. I wanted something I could throw together in the time it took my coffee to brew. So I started experimenting — just a bowl, a fork, and a whole lot of overripe bananas. Maybe you’ve been there, staring at those brown-speckled fruits on your counter, knowing you need to do *something* with them before they attract fruit flies.
I pulled out my favorite loaf pan, mashed the bananas with a little sugar and oil, and kept adding things until the batter looked right. No mixer. No complicated creaming of butter and sugar. I slid it into the oven and forgot about it until the smell started drifting through the house. When I pulled that golden loaf out, I knew I had something. The top was crackled and shiny, the edges were perfectly caramelized, and the inside? Moist, tender, and packed with banana flavor. I ate a slice warm, then another one cold the next morning. A few days later, Marcus came over for coffee. I offered him a slice without saying a word. He took a bite, paused, and asked for the recipe. That’s the moment I knew this one was special. It’s the kind of bread that changes minds without even trying.
Why You’ll Love This Recipe
This isn’t just another banana bread recipe. It’s the one you’ll make over and over, and here’s why it stands out from the rest.
- One Bowl, No Mixer: You only need one mixing bowl and a fork. No stand mixer, no hand mixer, no food processor. Less cleanup, more time for eating.
- Perfectly Moist Every Time: The combination of oil and buttermilk (or a simple homemade version) guarantees a tender crumb that stays moist for days. No dry, crumbly slices here.
- Uses Up Those Spotty Bananas: You know the ones. The brown, almost-black bananas sitting on your counter. This recipe was made for them. The riper, the better.
- Simple Pantry Ingredients: You likely have everything you need right now. Flour, sugar, oil, eggs, baking soda, and bananas. No fancy trips to the store.
- Forgiving and Foolproof: This batter is incredibly forgiving. Overmix it a little? It’ll still be great. Swap in some whole wheat flour? Works like a charm. It’s a recipe that adapts to you.
- Crowd-Pleaser: I’ve brought this to brunches, potlucks, and family gatherings. It disappears every single time. Kids love it, adults love it, and even self-proclaimed banana bread haters come back for seconds.
This recipe is comfort food at its finest — simple, satisfying, and deeply nostalgic. It’s the kind of bread that makes you close your eyes after the first bite, remembering lazy Sunday mornings and the smell of something baking in the oven. It’s perfect for busy weeknights when you need a quick treat, or for impressing guests without any stress. Honestly, it’s the best banana bread I’ve ever made, and I’m pretty sure you’ll feel the same way.
What Ingredients You Will Need
This recipe uses simple, wholesome ingredients to deliver bold banana flavor and a perfectly tender texture. Most of these are pantry staples, so you can whip this up anytime the craving strikes.
For the Banana Bread Batter
- 3 large ripe bananas, mashed (about 1 ½ cups or 340g) — The riper the better. Look for bananas with lots of brown spots. They’re sweeter and easier to mash.
- ½ cup (120ml) vegetable oil — I prefer a neutral oil like canola or avocado oil. It keeps the bread incredibly moist without adding any flavor. You can also use melted coconut oil.
- 1 cup (200g) granulated sugar — Regular white sugar works perfectly. For a deeper flavor, you can substitute half with light brown sugar, packed.
- 2 large eggs — Room temperature eggs blend more easily into the batter. If you forgot to take them out, place them in a bowl of warm water for 5 minutes.
- 1 teaspoon vanilla extract — Pure vanilla extract adds warmth and depth. Imitation vanilla works in a pinch, but the real stuff makes a difference.
- ½ cup (120ml) buttermilk — This is the secret to a tender crumb. Don’t have buttermilk? No problem. Add 1 ½ teaspoons of lemon juice or white vinegar to regular milk and let it sit for 5 minutes. It works perfectly.
- 2 cups (250g) all-purpose flour — Spoon and level your flour for the best results. Scooping directly from the bag can pack in too much flour, making the bread dry.
- 1 teaspoon baking soda — Make sure your baking soda is fresh. Test it by dropping a little into vinegar — if it fizzes vigorously, it’s good to go.
- ½ teaspoon salt — Fine sea salt or table salt works best. It balances the sweetness and enhances the banana flavor.
- 1 teaspoon ground cinnamon (optional) — I almost always add this. It pairs beautifully with bananas and adds a cozy warmth.
Optional Add-Ins
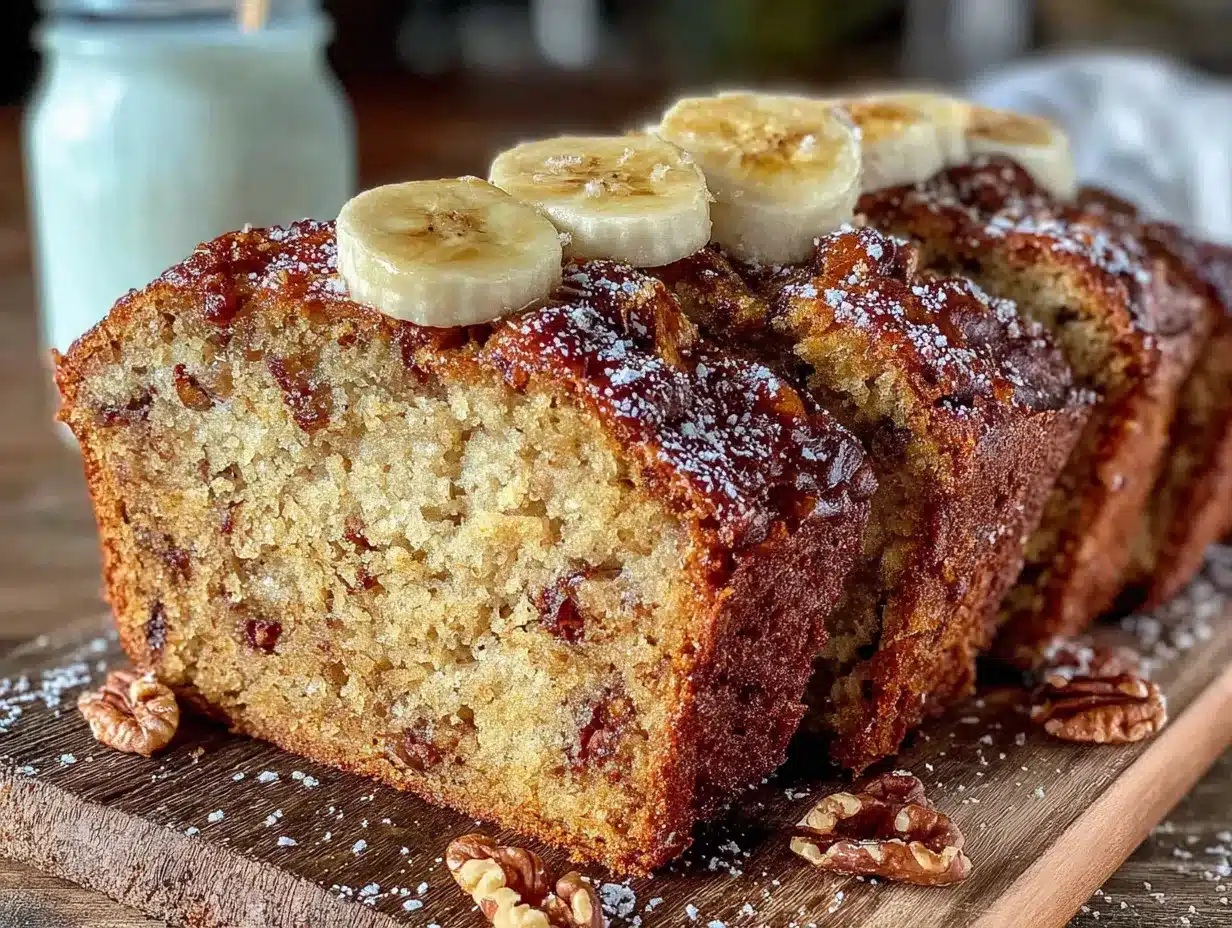
- ½ cup (60g) chopped walnuts or pecans — Toast them lightly for extra crunch and flavor.
- ½ cup (85g) chocolate chips — Semi-sweet or dark chocolate chips add little pockets of melted goodness.
- ¼ cup (40g) raisins or dried cranberries — For a chewy, sweet-tart surprise.
I personally love using King Arthur Flour for its consistent protein content, and I always reach for California walnuts when I’m adding nuts. For the oil, I prefer Chosen Foods avocado oil because it’s neutral and has a high smoke point. But honestly, any brand you have on hand will work beautifully.
Equipment Needed
You don’t need a fancy kitchen to make this banana bread. Here’s exactly what you’ll need:
- Large mixing bowl — Any medium-to-large bowl will do. I use a simple ceramic one that’s been in my family for years.
- Fork or whisk — A fork works surprisingly well for mashing bananas and mixing the wet ingredients. A whisk is great for combining the dry ingredients.
- 9×5-inch loaf pan — This is the standard size for banana bread. If you only have an 8×4-inch pan, your bread will be taller and可能需要 bake for an extra 5-10 minutes.
- Parchment paper or non-stick spray — I prefer parchment paper for easy removal. Just leave a little overhang on the sides to lift the bread out.
- Cooling rack — Essential for even cooling. If you don’t have one, you can use the grates from your oven or even a clean wire rack.
- Measuring cups and spoons — For accurate measurements. I recommend using dry measuring cups for flour and sugar, and a liquid measuring cup for oil and buttermilk.
- Rubber spatula — For scraping every last bit of batter into the pan. Don’t waste a drop.
If you don’t have a loaf pan, you can bake this batter in a 9-inch square pan for about 25-30 minutes. It makes a great banana cake! And if you’re on a budget, dollar store loaf pans work just fine — just keep an eye on the baking time as they can heat differently.
Preparation Method
Follow these steps carefully, and you’ll have the best banana bread of your life. I’ve included all the little details that make a big difference.
- Preheat your oven to 350°F (175°C). Position a rack in the center of the oven. While it heats, grease your 9×5-inch loaf pan with non-stick spray or line it with parchment paper, leaving a 2-inch overhang on the long sides. This makes lifting the bread out so much easier.
- Mash the bananas. In your large mixing bowl, add the 3 ripe bananas. Use a fork to mash them until they’re mostly smooth with a few small lumps. You want some texture, not baby food. A few chunks are totally fine and add nice little pockets of banana. This should take about 1 minute.
- Add the wet ingredients. To the mashed bananas, add the ½ cup vegetable oil, 1 cup granulated sugar, 2 large eggs, 1 teaspoon vanilla extract, and ½ cup buttermilk. Whisk everything together with your fork or a whisk until it’s well combined and smooth. Don’t worry if it looks a little separated — that’s normal. The mixture should be a pale, creamy yellow.
- Combine the dry ingredients. Right on top of the wet mixture, add the 2 cups all-purpose flour, 1 teaspoon baking soda, ½ teaspoon salt, and 1 teaspoon ground cinnamon if you’re using it. Use a spoon or your whisk to gently stir the dry ingredients together on top of the batter before mixing them in. This helps distribute the baking soda and salt evenly.
- Mix until just combined. Gently fold the dry ingredients into the wet ingredients using a rubber spatula or your fork. Stir only until you no longer see streaks of flour. A few small lumps are perfectly fine. Overmixing will develop the gluten and make your bread tough. This step should take about 30 seconds. Seriously, stop as soon as it comes together.
- Fold in any add-ins. If you’re using nuts, chocolate chips, or dried fruit, gently fold them in now with a few quick strokes. Don’t overmix.
- Pour the batter into the prepared pan. Use your rubber spatula to scrape every last bit of batter into the loaf pan. Spread it evenly with the spatula. Give the pan a gentle tap on the counter to release any air bubbles.
- Bake for 55-65 minutes. Place the pan in the preheated oven. Bake until the top is deep golden brown and a toothpick inserted into the center comes out clean or with a few moist crumbs. If the top is browning too quickly after 40 minutes, tent it loosely with aluminum foil. Every oven is different, so start checking at 50 minutes. My oven takes exactly 58 minutes.
- Cool in the pan. Place the loaf pan on a cooling rack and let the bread cool in the pan for 10 minutes. This allows it to set and makes it easier to remove.
- Remove and cool completely. After 10 minutes, use the parchment paper overhang to lift the bread out of the pan and onto the cooling rack. Let it cool completely before slicing, about 1 hour. I know it’s tempting, but slicing it warm will result in crumbly, gummy pieces. Trust me on this one.
Cooking Tips & Techniques
I’ve made this banana bread more times than I can count, and I’ve learned a few things along the way. Here are my best tips for perfect results every time.
Use really ripe bananas. This is the single most important tip. The bananas should be heavily speckled with brown spots, or even mostly black. They should be soft and smell intensely banana-y. If your bananas aren’t ripe enough, your bread will be less sweet and less flavorful. You can speed up ripening by placing them in a paper bag with an apple overnight, or by roasting them in their skins at 300°F for 15-20 minutes until they’re soft.
Don’t overmix the batter. I cannot stress this enough. Mix until the flour just disappears. Overmixing develops gluten, which makes the bread tough and dense instead of tender and fluffy. It’s okay if there are a few small lumps. They’ll disappear during baking.
Measure your flour correctly. The most common mistake in baking is using too much flour. Spoon the flour into your measuring cup and level it off with a knife. Never scoop directly from the bag — this can pack in up to 25% more flour, leading to a dry, crumbly bread.
Check for doneness properly. A toothpick inserted into the center should come out clean or with a few moist crumbs. If it comes out with wet batter, bake for another 5 minutes and check again. If the top is getting too dark, tent with foil. I once forgot to check and ended up with a burnt top and raw middle. Learn from my mistakes!
Let it cool completely. I know, I know. The smell is intoxicating. But slicing into warm banana bread is a recipe for disaster. It will be gummy and fall apart. Give it at least an hour on the cooling rack. Your patience will be rewarded with clean, perfect slices.
Room temperature ingredients matter. Cold eggs and cold buttermilk can seize the oil and make the batter lumpy. Take them out of the fridge 30 minutes before you start. If you’re in a hurry, place the eggs in warm water for 5 minutes and microwave the buttermilk for 10 seconds.
Variations & Adaptations
This recipe is incredibly versatile. Here are some of my favorite ways to change it up.
Dietary Variations
- Gluten-Free: Substitute the all-purpose flour with a 1:1 gluten-free baking blend that contains xanthan gum. I’ve had great results with Bob’s Red Mill 1-to-1 Baking Flour. The texture will be slightly more tender, but just as delicious.
- Dairy-Free: Replace the buttermilk with an equal amount of unsweetened almond milk or oat milk mixed with 1 ½ teaspoons of lemon juice. Let it sit for 5 minutes before using. Use a dairy-free yogurt as a substitute if you prefer.
- Vegan: Replace the eggs with 2 flax eggs (2 tablespoons ground flaxseed mixed with 6 tablespoons water, let sit for 5 minutes). Use coconut oil or a neutral vegetable oil, and a dairy-free milk with lemon juice for the buttermilk. The texture will be slightly denser but still delicious.
- Lower Sugar: Reduce the sugar to ¾ cup (150g). You can also substitute with coconut sugar for a deeper flavor, though the color will be darker.
Flavor Twists
- Chocolate Banana Bread: Reduce the flour to 1 ¾ cups and add ¼ cup unsweetened cocoa powder. Fold in ½ cup chocolate chips. This is my personal favorite variation.
- Blueberry Banana Bread: Gently fold in 1 cup fresh or frozen blueberries (don’t thaw them) at the end. Toss them in a tablespoon of flour first to prevent them from sinking to the bottom.
- Pumpkin Banana Bread: Replace ¼ cup of the mashed banana with ¼ cup pumpkin puree. Add 1 teaspoon pumpkin pie spice. This is perfect for fall.
- Coconut Banana Bread: Fold in ½ cup shredded unsweetened coconut and ½ teaspoon coconut extract. Toast some extra coconut for the top.
Different Cooking Methods
- Muffins: Divide the batter among a 12-cup muffin tin lined with paper liners. Bake at 350°F for 18-22 minutes. Perfect for grab-and-go breakfasts.
- Mini Loaves: Divide the batter among 3-4 mini loaf pans. Bake for 30-35 minutes. These make wonderful gifts.
- Bundt Pan: Grease a 10-cup bundt pan thoroughly and bake for 45-55 minutes. The presentation is stunning.
Serving & Storage Suggestions
This banana bread is wonderful in so many ways. Here’s how to enjoy it at its best.
Serving: Serve slices at room temperature for the best texture. For an extra treat, warm a slice in the microwave for 10-15 seconds and spread it with a pat of salted butter. It’s pure heaven. You can also toast slices lightly in a toaster or under the broiler for a crisp exterior and soft, warm center. Pair it with a cup of coffee, a glass of cold milk, or a hot cup of tea. For a dessert twist, serve it with a scoop of vanilla ice cream and a drizzle of caramel sauce.
Storage: Store the cooled banana bread tightly wrapped in plastic wrap or aluminum foil at room temperature for up to 4 days. I prefer to wrap it in plastic wrap and then place it in an airtight container. Do not refrigerate it — the cold air will dry it out and make it stale faster. The flavor actually improves after the first day as the banana flavor deepens.
Freezing: This banana bread freezes beautifully. Wrap the cooled loaf (or individual slices) tightly in plastic wrap, then in a layer of aluminum foil. Place in a freezer-safe bag or container. Freeze for up to 3 months. To thaw, leave it at room temperature for a few hours, or microwave individual slices for 20-30 seconds. I always keep a loaf in the freezer for unexpected guests or sudden cravings.
Reheating: For a freshly-baked taste, warm slices in a 300°F oven for 5-10 minutes. The top will crisp up slightly, and the inside will become soft and tender. You can also use a toaster oven for the same effect.
Nutritional Information & Benefits
While this banana bread is a treat, it does offer some nutritional benefits thanks to its key ingredients.
Estimated Nutritional Value (per slice, based on 10 slices):
- Calories: 320
- Fat: 14g
- Carbohydrates: 46g
- Fiber: 2g
- Sugar: 26g
- Protein: 5g
Health Benefits: Bananas are a great source of potassium, which supports heart health and muscle function. They also provide vitamin B6 and vitamin C. The oil provides healthy fats, and if you add nuts, you’ll get a boost of omega-3 fatty acids and protein. Using whole wheat flour for half the all-purpose flour adds extra fiber.
Dietary Considerations: This recipe can easily be adapted for gluten-free, dairy-free, and vegan diets (see variations above). It contains eggs, wheat, and dairy in its standard form. For a nut-free version, simply omit the walnuts or pecans. I personally love that this recipe feels indulgent but uses real, whole ingredients. It’s the kind of treat you can feel good about sharing with your family.
Conclusion
This easy one-bowl banana bread is more than just a recipe — it’s a solution to a problem we all face. What do you do with those spotty bananas on your counter? How do you satisfy a craving for something warm, sweet, and comforting without spending hours in the kitchen? The answer is right here, in one bowl, with no mixer required.
I’ve made this bread for brunches, for neighbors, for my own quiet mornings with a cup of coffee. It never fails to bring a smile. It’s the kind of recipe that becomes a part of your life — a go-to for last-minute guests, a treat for after-school snacks, a simple pleasure on a rainy afternoon. The best part? It’s completely yours to customize. Add chocolate chips, swap in some whole wheat flour, or turn it into muffins. Make it your own.
I’d love to hear how yours turns out. Did you add any fun mix-ins? Did you convert a banana bread skeptic like I did? Drop a comment below and share your experience. And if you loved this recipe, please share it with a friend who needs a little comfort in their life. Happy baking, my friend. You’ve got this.
Frequently Asked Questions
Can I use frozen bananas for this banana bread?
Absolutely! Frozen bananas are perfect for banana bread. Thaw them completely at room temperature or in the microwave. They will release a lot of liquid — don’t drain it. Just mash them with the liquid. The flavor is even more concentrated, which makes for an incredibly delicious bread.
Why did my banana bread sink in the middle?
A sunken middle usually means the bread was underbaked. Make sure your oven is at the correct temperature (an oven thermometer is a great investment). Also, make sure your baking soda is fresh. Old baking soda loses its leavening power. Finally, don’t open the oven door too often during baking, as the temperature fluctuation can cause the bread to collapse.
Can I make this banana bread without eggs?
Yes, you can! Use a flax egg (1 tablespoon ground flaxseed mixed with 3 tablespoons water per egg, let sit for 5 minutes) or a commercial egg replacer. The texture will be slightly denser and less fluffy, but it will still be delicious and moist. I’ve tested it with flax eggs and it works wonderfully.
How do I know when my banana bread is done baking?
The best way is to insert a toothpick or a thin knife into the center of the loaf. If it comes out clean or with a few moist crumbs (not wet batter), it’s done. The top should be deep golden brown and the edges should be pulling away from the sides of the pan slightly. You can also use an instant-read thermometer — the center should read about 200-205°F.
Can I double this recipe?
Yes, this recipe doubles beautifully. Simply double all the ingredients and bake in two 9×5-inch loaf pans. You can also bake it in a 9×13-inch pan for about 30-35 minutes. Just keep an eye on it and check for doneness a few minutes early, as larger pans bake faster. This is perfect for bake sales or holiday gifts.
Pin This Recipe!
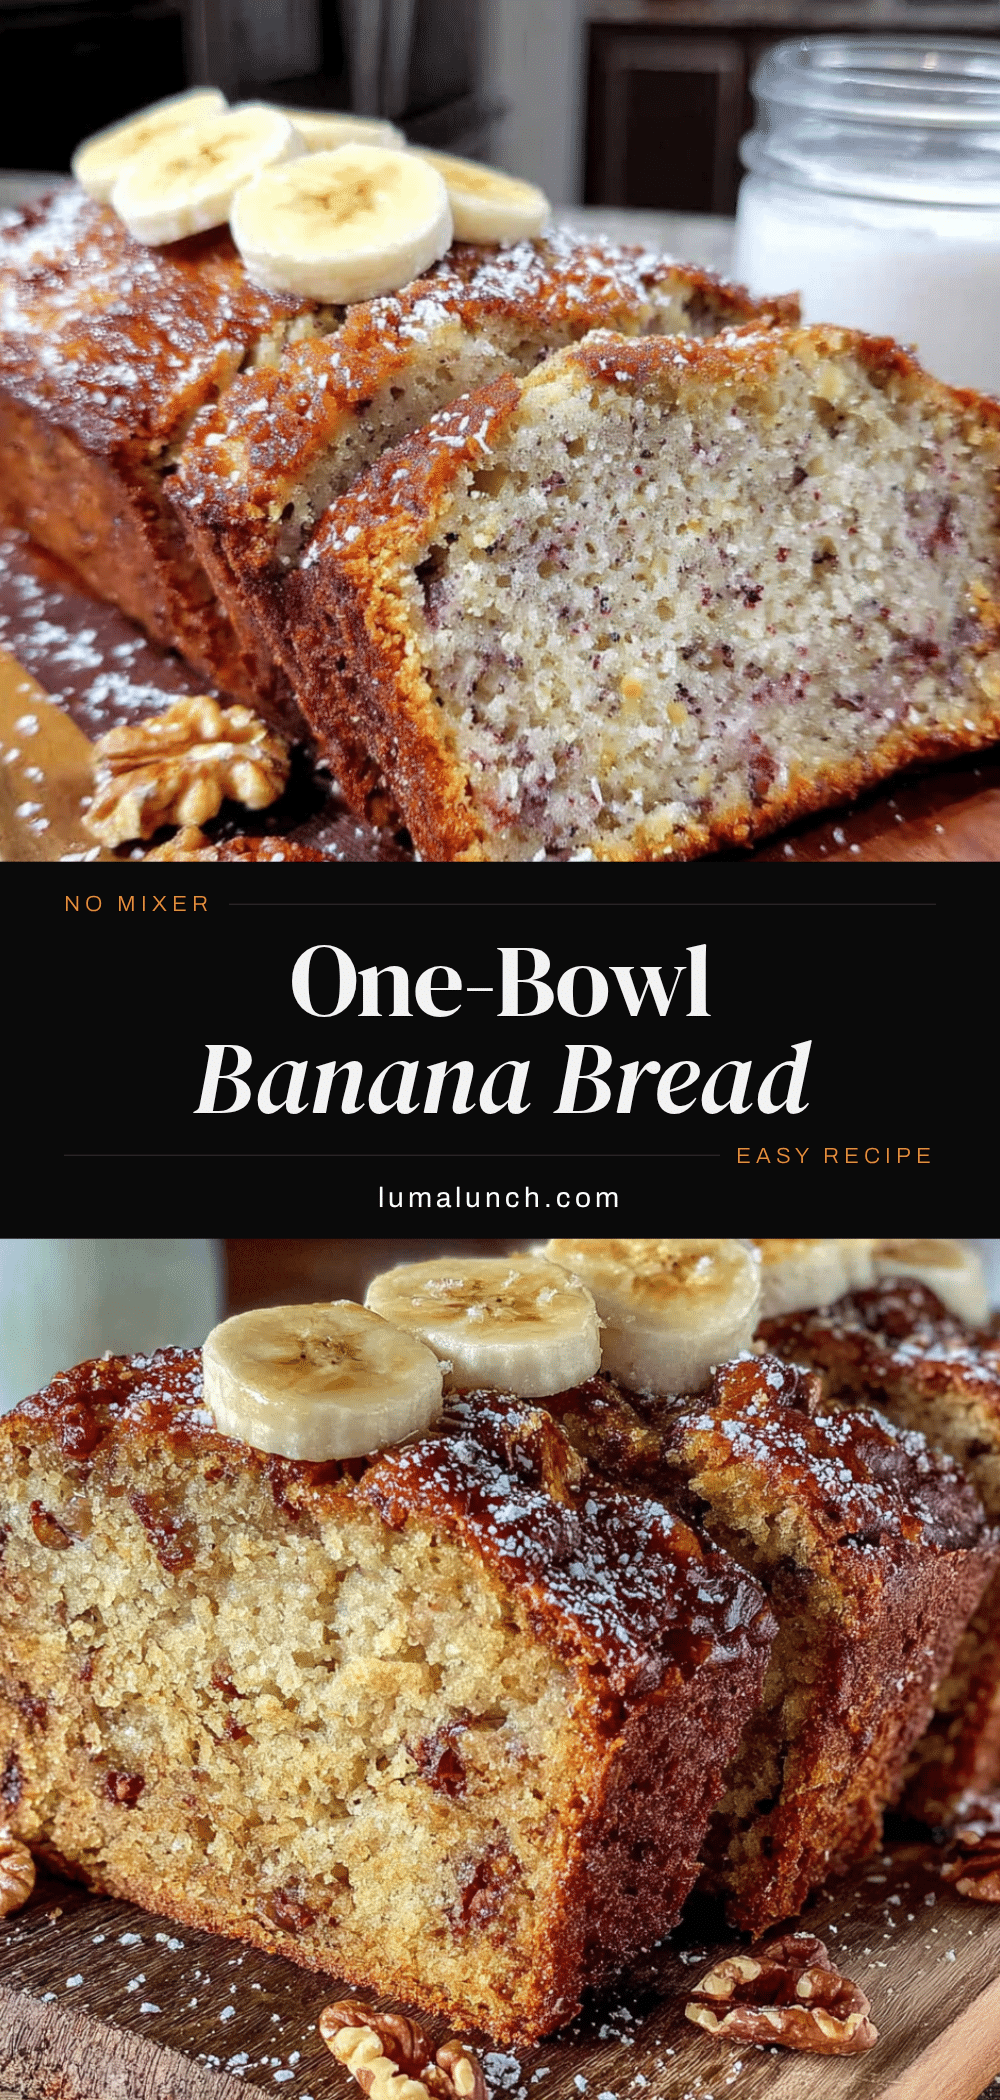
Easy One-Bowl Banana Bread: Best No-Mixer Recipe
This easy one-bowl banana bread is incredibly moist, tender, and packed with banana flavor. Made without a mixer, it’s a foolproof recipe that uses simple pantry ingredients and comes together in minutes.
- Prep Time: 15 minutes
- Cook Time: 55 minutes
- Total Time: 1 hour 10 minutes
- Yield: 10 servings 1x
- Category: Dessert
- Cuisine: American
Ingredients
- 3 large ripe bananas, mashed (about 1 ½ cups or 340g)
- ½ cup (120ml) vegetable oil
- 1 cup (200g) granulated sugar
- 2 large eggs
- 1 teaspoon vanilla extract
- ½ cup (120ml) buttermilk
- 2 cups (250g) all-purpose flour
- 1 teaspoon baking soda
- ½ teaspoon salt
- 1 teaspoon ground cinnamon (optional)
- ½ cup (60g) chopped walnuts or pecans (optional)
- ½ cup (85g) chocolate chips (optional)
- ¼ cup (40g) raisins or dried cranberries (optional)
Instructions
- Preheat your oven to 350°F (175°C). Position a rack in the center of the oven. Grease a 9×5-inch loaf pan with non-stick spray or line it with parchment paper, leaving a 2-inch overhang on the long sides.
- In a large mixing bowl, mash the 3 ripe bananas with a fork until mostly smooth with a few small lumps.
- Add the ½ cup vegetable oil, 1 cup granulated sugar, 2 large eggs, 1 teaspoon vanilla extract, and ½ cup buttermilk to the mashed bananas. Whisk until well combined and smooth.
- Add the 2 cups all-purpose flour, 1 teaspoon baking soda, ½ teaspoon salt, and 1 teaspoon ground cinnamon (if using) on top of the wet mixture. Gently stir the dry ingredients together on top before mixing them in.
- Fold the dry ingredients into the wet ingredients using a rubber spatula or fork until just combined. Do not overmix; a few small lumps are fine.
- If using any add-ins (nuts, chocolate chips, dried fruit), gently fold them in now.
- Pour the batter into the prepared loaf pan and spread it evenly. Tap the pan gently on the counter to release air bubbles.
- Bake for 55-65 minutes, until the top is deep golden brown and a toothpick inserted into the center comes out clean or with a few moist crumbs. If the top browns too quickly, tent with aluminum foil after 40 minutes.
- Let the bread cool in the pan on a cooling rack for 10 minutes.
- Remove the bread from the pan using the parchment overhang and let it cool completely on the rack, about 1 hour, before slicing.
Notes
Use really ripe bananas (heavily speckled or mostly black) for the best flavor. Do not overmix the batter. Measure flour correctly by spooning it into the measuring cup and leveling off. Let the bread cool completely before slicing to avoid a gummy texture. Room temperature ingredients blend more easily.
Nutrition
- Serving Size: 1 slice
- Calories: 320
- Sugar: 26
- Sodium: 280
- Fat: 14
- Saturated Fat: 2
- Carbohydrates: 46
- Fiber: 2
- Protein: 5
Keywords: banana bread, easy banana bread, one bowl banana bread, no mixer banana bread, moist banana bread, simple banana bread, classic banana bread