Love this? Save it for later!
Share the inspiration with your friends
My nephew asked why I couldn’t just wrap the stuffed peppers in cheese. I started to explain why that wouldn’t work — then stopped. I’d been overthinking this Halloween dinner for weeks, trying to make something “spooky” that actually tasted good. The kid had a point. I mean, what’s mummified about a regular stuffed pepper? Nothing. That’s when everything clicked.
Honestly, I was trying too hard. I’d bought black food coloring, considered making spider web designs out of sour cream, and even looked into edible eyes. My kitchen looked like a craft store exploded. But there I was, standing over a cutting board at 4 PM on a Saturday, and my seven-year-old nephew just asked the simplest question. Why not string cheese? Let me tell you, sometimes the best ideas come from the people who haven’t learned to overcomplicate things yet.
The first batch I made looked a little sad — the cheese strips were too thick and they slid right off the peppers. But the second batch? Those mummies stared back at me with their little olive eyes and I knew we had something special. The cheese got all melty and golden in spots, creating this perfect mummy-wrap effect that genuinely looked like ancient bandages. And the taste? Well, that’s the real magic here. These aren’t just cute — they’re genuinely delicious stuffed peppers that happen to look like they walked out of a tomb.
So here’s the thing about this recipe: it started with me being wrong. I thought I knew better, and I didn’t. And now I make these every Halloween because they’re the perfect balance of fun and actually good food. Maybe you’ve been there too — overcomplicating a recipe when the simplest answer was right in front of you. These mummy peppers are that answer.
Why You’ll Love This Recipe
These Spooky Mummy Stuffed Peppers aren’t just another Halloween recipe that looks better than it tastes. I’ve tested this about six times to get the balance right — the cheese-to-pepper ratio, the cooking time so the peppers are tender but not mushy, and the way the mummy wrapping stays put. Here’s what makes them special:
- Quick & Easy: Comes together in under 45 minutes, perfect for a busy Halloween weeknight or before the trick-or-treaters start knocking.
- Simple Ingredients: No weird Halloween novelty items needed. Ground meat, rice, cheese, olives, and bell peppers — that’s it.
- Perfect for Halloween Dinner: Kids actually eat these because they’re fun to look at and familiar in flavor. No fighting over dinner before candy time.
- Crowd-Pleaser: I’ve served these at two Halloween parties now and adults grab them just as fast as the kids do. The mummy look is universal.
- Unbelievably Delicious: The string cheese gets perfectly melty and slightly browned, creating this salty, gooey layer over the savory filling. It’s comfort food dressed up for a party.
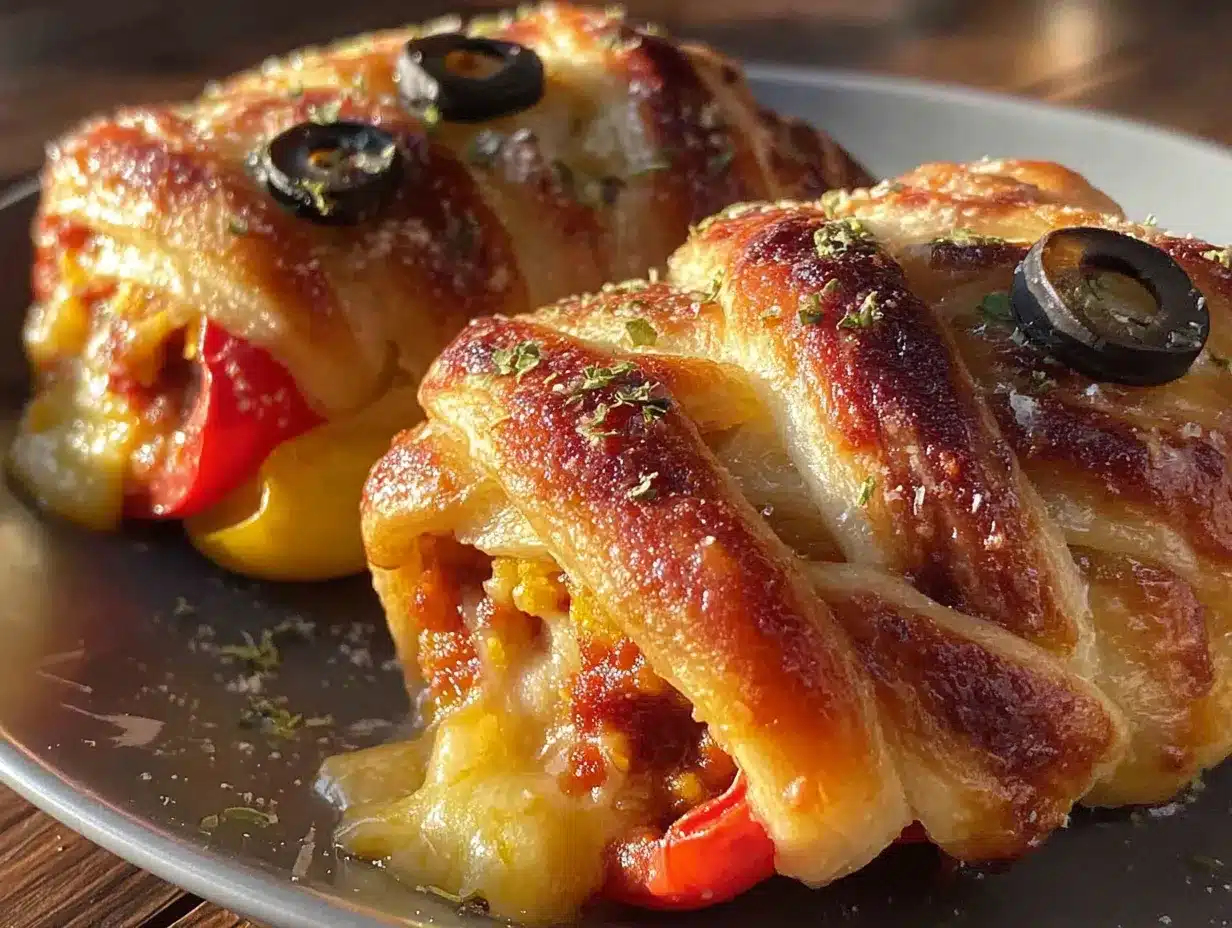
What makes this recipe different from every other stuffed pepper you’ve seen? It’s the mummy effect — the way the cheese wraps around the pepper like actual bandages, with little olive eyes peeking out. I tried using sliced cheese first and it just looked like a mess. String cheese is the secret. It peels apart naturally into thin strips that mimic linen wrappings perfectly. And when it bakes, it holds its shape while getting deliciously browned in spots.
This is the kind of recipe that makes you feel like a Halloween hero without spending hours in the kitchen. It’s fun enough for a party, simple enough for a Tuesday, and delicious enough that you’ll find yourself making it in October even when nobody’s coming over.
What Ingredients You Will Need
This recipe uses simple, everyday ingredients to create something that looks like it came out of a haunted kitchen. The magic is all in how you put them together. Most of these are pantry staples or easy to find at any grocery store.
For the Filling
- 1 pound ground beef (80/20 works best — the fat keeps the filling moist; you can also use ground turkey or Italian sausage)
- 1 cup cooked white rice (leftover rice works perfectly here; brown rice or quinoa also work)
- 1 small yellow onion, finely diced (about 1 cup)
- 3 cloves garlic, minced
- 1 can (15 ounces) tomato sauce (I prefer Hunt’s or Muir Glen for consistent flavor)
- 1 teaspoon dried oregano
- 1 teaspoon smoked paprika (adds a subtle smokiness that makes these extra cozy)
- ½ teaspoon salt
- ¼ teaspoon black pepper
- 1 cup shredded mozzarella cheese (for mixing into the filling — use whole milk mozzarella for best melt)
For the Mummy Wraps
- 6 medium bell peppers (any color works, but green peppers give the most “monster” vibe; yellow and orange look great too)
- 12 sticks string cheese (mozzarella string cheese — this is non-negotiable for the mummy effect; I use Sargento or store brand)
- 24 black olive slices (canned black olives, sliced into rounds — these become the mummy eyes)
- Optional: 2 tablespoons cream cheese (for gluing the olive eyes in place if they slide off)
Ingredient Tips
Look for bell peppers that are squat and round rather than tall and narrow — they sit better in the baking dish and look more like mummy heads. For the string cheese, make sure it’s the standard mozzarella kind, not the low-fat version. The full-fat cheese stretches better and browns more attractively. If you want to use ground turkey, add a tablespoon of olive oil to the pan when cooking to keep it from drying out.
For a vegetarian version, substitute the ground meat with 1½ cups of cooked lentils or a plant-based ground meat substitute. The filling will be slightly different in texture but still delicious. You can also swap the rice for cauliflower rice to make it lower-carb — just squeeze the moisture out of the cauliflower rice before mixing it in.
Equipment Needed
- Large skillet (12-inch works best for browning the meat evenly)
- 9×13-inch baking dish (glass or ceramic — metal works too but watch the cooking time)
- Sharp knife (for cutting the pepper tops and slicing olives)
- Cutting board
- Mixing bowl (medium size for combining the filling)
- Wooden spoon or spatula
- Measuring cups and spoons
- Small spoon (for stuffing the peppers and placing the olive eyes)
- Aluminum foil (for covering the dish during initial baking)
If you don’t have a 9×13 dish, you can use a large cast iron skillet or even a rimmed baking sheet — just make sure the peppers are stable and not tipping over. I’ve used a round 10-inch casserole dish before and fit 5 peppers snugly. No need to buy special equipment for this one.
Preparation Method
- Preheat your oven to 375°F. While it’s heating, bring a large pot of salted water to a boil. You’ll blanch the peppers briefly to soften them — this step makes them tender without over-baking later.
- Prepare the peppers: Cut the tops off each bell pepper about ½ inch from the stem. Remove the seeds and white membranes from inside. Rinse them out. If the peppers wobble when you set them down, trim a tiny sliver off the bottom — just enough so they stand flat, but don’t cut through the bottom wall.
- Blanch the peppers: Drop the hollowed peppers into the boiling water for 3 minutes. This softens them just enough that they’ll finish cooking perfectly in the oven without getting mushy. Remove them with tongs and set them upside down on a paper towel to drain.
- Cook the filling: In your large skillet over medium-high heat, add the ground beef. Break it apart with your spoon and cook until browned, about 6-8 minutes. If there’s excess fat, spoon most of it out — leave about a tablespoon for flavor. Add the diced onion and cook for 3 minutes until translucent. Add the minced garlic and cook for 30 seconds until fragrant.
- Build the flavor: Pour in the tomato sauce, then add the cooked rice, oregano, smoked paprika, salt, and pepper. Stir everything together and let it simmer for 3-4 minutes until the sauce thickens slightly. The filling should be moist but not soupy. Taste it and adjust the salt if needed — this is your chance to fix the seasoning.
- Add the cheese: Remove the skillet from heat and stir in 1 cup of shredded mozzarella. The residual heat will melt it perfectly. Let the filling cool for 5 minutes — this makes it easier to handle when stuffing the peppers.
- Stuff the peppers: Place the blanched peppers upright in your 9×13 baking dish. Using a small spoon, fill each pepper with the meat and rice mixture. Pack it gently but firmly — you want it full but not bursting. Each pepper should take about ½ to ¾ cup of filling depending on size.
- Create the mummy wraps: This is where the magic happens. Take each string cheese stick and peel it apart lengthwise into thin strips — you should get 4-5 strips per stick. You’ll need about 2 sticks per pepper. Wrap the strips around each stuffed pepper in a crisscross pattern, leaving a small gap near the top for the eyes. Don’t wrap too tightly — the cheese will expand slightly as it melts. Let some strips hang loose for that “ancient bandage” look.
- Add the eyes: Place two olive slices in the gap you left near the top of each pepper. Press them gently into the cheese so they stay put. If they seem like they might slide off, dab a tiny bit of cream cheese on the back of each olive slice to glue them in place. I learned this trick after my first batch lost half their eyes in the oven.
- Bake uncovered: Place the dish in the preheated oven and bake for 20-25 minutes. The cheese should be melted, golden in spots, and slightly crispy on the edges. The peppers should be tender when pierced with a fork but still hold their shape. If you want more browning, switch to broil for the last 1-2 minutes — but watch carefully because cheese burns fast.
- Rest before serving: Let the mummy peppers sit for 5 minutes after they come out of the oven. This lets the cheese set slightly so it doesn’t slide off when you move them. The filling also settles during this time, making them easier to serve.
Cooking Tips & Techniques
The first time I made these, I skipped the blanching step. Big mistake. The peppers were still crunchy when the filling was done, and the cheese had already browned too much. That 3-minute blanch is the difference between a perfect pepper and a disappointing one. Trust me on this.
Here’s another thing I learned the hard way: don’t overstuff the peppers. I know it’s tempting to pack as much filling in there as possible, but overstuffed peppers split during baking. The filling spills out, the cheese wrap gets messy, and your mummies look like they’ve been through a battle. Leave about ¼ inch of space at the top of each pepper before you add the cheese wraps.
The string cheese peeling technique takes a little practice. If the cheese is too cold, it breaks when you try to peel it. Let the sticks sit at room temperature for 10 minutes before you start peeling — they’ll separate much more easily. And don’t worry if some strips are thicker than others. That actually makes the mummies look more authentic, like real bandages wrapped by someone in a hurry.
For the olive eyes, slice them into rounds about ¼ inch thick. If you slice them too thin, they shrivel up in the oven. Too thick and they look like googly eyes — which honestly isn’t the worst thing, but it’s not the mummy look we’re going for. I use canned black olives because they’re soft enough to bite through easily when eating.
One more thing: if you’re making these for a party, you can prep everything earlier in the day. Stuff the peppers and wrap them with cheese, but don’t add the olive eyes yet. Cover the dish and refrigerate. About 30 minutes before you want to serve, add the olive eyes and bake. Add 5 minutes to the baking time if they’re going in cold from the fridge.
Variations & Adaptations
These mummy peppers are surprisingly flexible. Here are some ways I’ve adapted them over the years:
Vegetarian Mummy Peppers
Swap the ground beef for 1½ cups of cooked lentils or a plant-based ground meat substitute. I’ve used both and prefer lentils for the texture — they hold up better against the cheese wraps. Add an extra ¼ teaspoon of smoked paprika to make up for the missing meat flavor. My vegetarian sister-in-law requests these every year now.
Spicy Mummy Peppers
Add ½ teaspoon of red pepper flakes to the filling along with the oregano. You can also use pepper jack cheese instead of mozzarella for the filling (keep the string cheese wraps as mozzarella — pepper jack string cheese doesn’t melt the same way). My brother-in-law adds chopped jalapeños to his filling and calls them “angry mummies.”
Low-Carb Mummy Peppers
Replace the rice with 1½ cups of riced cauliflower. Make sure to squeeze the moisture out of the cauliflower rice before mixing it into the filling — I use a clean kitchen towel and wring it out over the sink. The texture is slightly different but the flavor is still fantastic. These work great if you’re watching your carbs but still want a fun Halloween dinner.
Breakfast Mummy Peppers
I tried this once for a Halloween morning and it worked surprisingly well. Use 1 pound of breakfast sausage instead of ground beef. Omit the tomato sauce and use ½ cup of salsa instead. Add 4 beaten eggs to the filling mixture (cook them first like scrambled eggs, then mix with the other ingredients). The cheese wraps work the same way. Serve these with a side of fruit for a complete Halloween breakfast.
Serving & Storage Suggestions
These mummy peppers are best served warm, right after that 5-minute rest. The cheese is still stretchy and the filling is piping hot. I like to serve them on a dark plate or a black platter to make the mummy faces pop. A simple green salad on the side balances out the richness, but honestly, these are filling enough to be a complete meal on their own.
For a Halloween party spread, arrange them on a platter with some “spooky” sides — maybe some black olive “spiders” or carrot “fingers” on the side. Kids love the presentation and adults appreciate that there’s actual dinner food available. I’ve also served these alongside a bowl of chili for a Halloween buffet and they disappeared fast.
Storage: Leftover mummy peppers keep well in the refrigerator for up to 4 days. Store them in an airtight container. The cheese will lose some of its crispy edges, but the flavor is still great. To reheat, place them in a 350°F oven for 10-12 minutes, or microwave them for 1-2 minutes. The microwave is faster but the cheese won’t be as crispy — the oven is worth the extra time if you’re not in a rush.
Freezer: You can freeze these before or after baking. To freeze before baking, assemble the peppers completely (including the cheese wraps and olive eyes) but don’t bake them. Wrap each pepper individually in plastic wrap, then place them in a freezer bag. They’ll keep for up to 3 months. To bake from frozen, add 15-20 minutes to the cooking time and cover with foil for the first 20 minutes. To freeze after baking, let them cool completely, then wrap and freeze the same way. Reheat from frozen in a 350°F oven for 20 minutes.
The flavors actually get better overnight as the seasonings meld together. I sometimes make a double batch specifically for leftovers — cold mummy peppers straight from the fridge are a guilty pleasure of mine the day after Halloween.
Nutritional Information & Benefits
Each serving (one mummy pepper) contains approximately 420 calories, 24 grams of protein, 28 grams of carbohydrates, and 22 grams of fat. These numbers will vary depending on the type of ground meat and cheese you use. The rice provides sustained energy, the bell peppers are packed with vitamin C (one pepper has more than an orange), and the protein from the meat and cheese keeps you full.
Bell peppers are an excellent source of antioxidants, particularly vitamin C and beta-carotene. Red peppers have the most nutrients, but all colors are healthy. The mozzarella cheese adds calcium and protein, while the olives provide healthy monounsaturated fats. This is a well-rounded meal that happens to look like it crawled out of a sarcophagus.
For those with dietary restrictions: this recipe contains dairy (cheese) and gluten (if using traditional rice — though rice is naturally gluten-free, always check your specific brand). To make it dairy-free, use dairy-free cheese alternatives for both the filling and the wraps — just note that dairy-free string cheese doesn’t peel or melt the same way. For a gluten-free version, use certified gluten-free rice and check your tomato sauce label. The recipe is naturally nut-free and egg-free as written.
Frequently Asked Questions
Can I make these mummy peppers ahead of time?
Absolutely. You can assemble them completely up to 24 hours in advance. Just add the olive eyes right before baking so they don’t sink into the cheese. If you’re prepping for a party, stuff the peppers and wrap them with cheese, then cover and refrigerate. Add the eyes and bake when you’re ready to serve.
What if I can’t find string cheese?
You can use mozzarella slices cut into thin strips, but it won’t work quite as well. Sliced mozzarella doesn’t have the same stretchy texture and tends to slide off more easily. If you’re in a pinch, use fresh mozzarella pearls sliced thin — they’ll melt into a more solid cheese layer that stays put better than sliced cheese.
Can I use different colored bell peppers?
Yes, and each color gives a different look. Green peppers look the most “monster-like” and have a slightly more bitter flavor that contrasts nicely with the sweet filling. Red peppers are sweeter and give a brighter, more colorful mummy. Yellow and orange are somewhere in between. I like using a mix of colors for variety on the platter.
How do I keep the olive eyes from falling off?
This was my biggest struggle at first. The trick is to press the olive slices gently into the cheese before baking — the cheese melts around them and holds them in place. If they’re still sliding off, dab a tiny bit of cream cheese on the back of each olive slice before placing it. You only need a smear, not a glob. The cream cheese acts like edible glue.
Can I use ground turkey instead of beef?
Yes, ground turkey works well. Use 93/7 ground turkey (not the extra lean 99/1) so it stays moist. Add a tablespoon of olive oil to the pan when cooking, and consider adding an extra ¼ cup of tomato sauce to compensate for the leaner meat. The flavor will be slightly milder, so you might want to increase the seasonings a bit.
Conclusion
These Spooky Mummy Stuffed Peppers are everything I want in a Halloween recipe — fun enough to make the kids smile, simple enough that I’m not stressed out making them, and delicious enough that I actually look forward to eating them. They’ve become a tradition in my house now, the dinner we always have before the sugar rush begins. Every year when October rolls around, my nephew asks if we’re making “the mummy peppers” again. And every year, I smile and say yes.
The beauty of this recipe is that it leaves room for your own creativity. Maybe you’ll use different colored peppers, or add some spice, or come up with your own mummy face design. That’s the whole point — taking something familiar and giving it a Halloween twist that’s all your own. I’d love to hear how yours turn out. Drop a comment below and let me know if your mummies had two eyes or three, if you added a scary cheese beard, or if your kids came up with something I haven’t even thought of yet. Happy Halloween, and happy cooking!
Pin This Recipe!
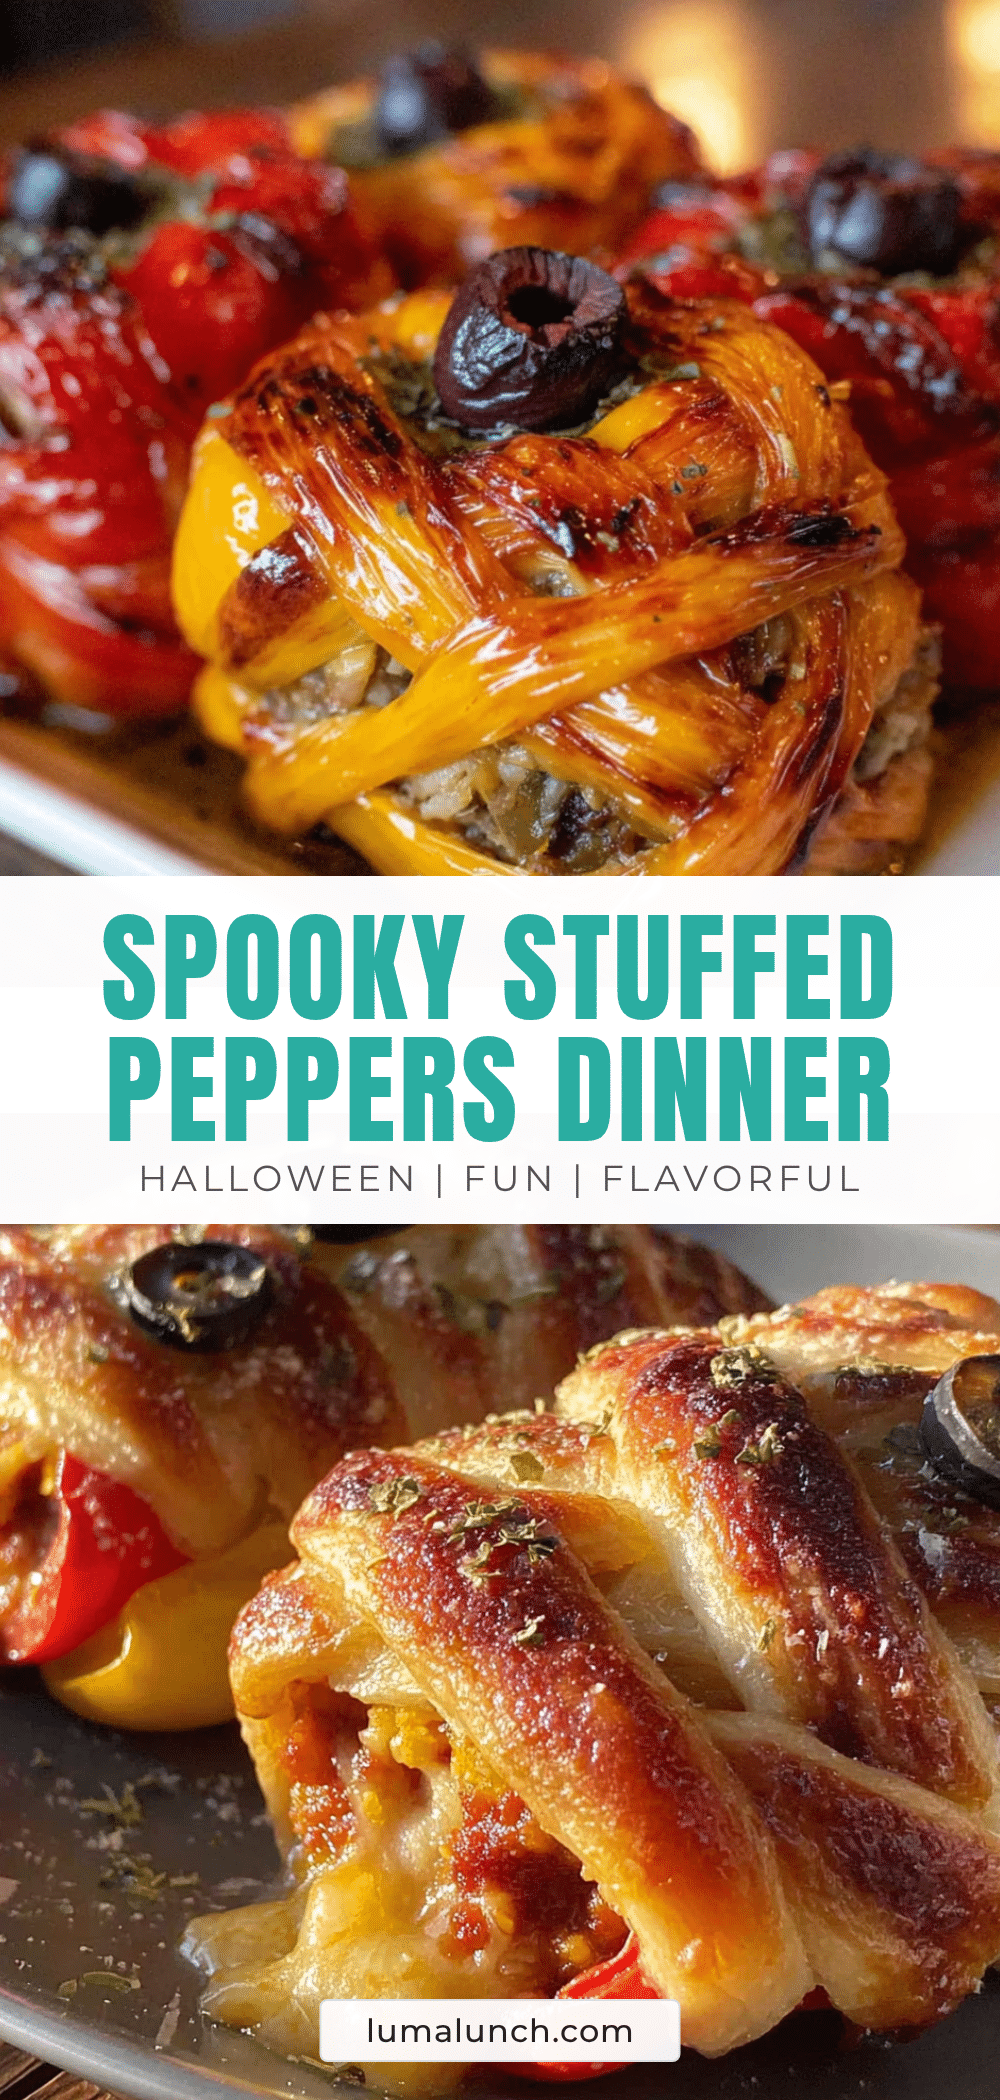
Easy Spooky Mummy Stuffed Peppers for Halloween
These Spooky Mummy Stuffed Peppers are a fun and delicious Halloween dinner that kids and adults will love. Bell peppers are stuffed with a savory beef and rice filling, then wrapped in mozzarella string cheese to look like mummies, with olive slice eyes.
- Prep Time: 15 minutes
- Cook Time: 30 minutes
- Total Time: 45 minutes
- Yield: 6 servings 1x
- Category: Main Course
- Cuisine: American
Ingredients
- 1 pound ground beef (80/20 works best)
- 1 cup cooked white rice
- 1 small yellow onion, finely diced (about 1 cup)
- 3 cloves garlic, minced
- 1 can (15 ounces) tomato sauce
- 1 teaspoon dried oregano
- 1 teaspoon smoked paprika
- ½ teaspoon salt
- ¼ teaspoon black pepper
- 1 cup shredded mozzarella cheese (whole milk recommended)
- 6 medium bell peppers (any color, green recommended for monster vibe)
- 12 sticks mozzarella string cheese
- 24 black olive slices (canned)
- Optional: 2 tablespoons cream cheese (for gluing olive eyes)
Instructions
- Preheat your oven to 375°F. Bring a large pot of salted water to a boil.
- Prepare the peppers: Cut the tops off each bell pepper about ½ inch from the stem. Remove seeds and membranes. Rinse. Trim a tiny sliver off the bottom if needed so they stand flat.
- Blanch the peppers: Drop the hollowed peppers into the boiling water for 3 minutes. Remove with tongs and set upside down on a paper towel to drain.
- Cook the filling: In a large skillet over medium-high heat, brown the ground beef for 6-8 minutes. Spoon out excess fat, leaving about 1 tablespoon. Add diced onion and cook for 3 minutes until translucent. Add minced garlic and cook for 30 seconds until fragrant.
- Build the flavor: Pour in tomato sauce, then add cooked rice, oregano, smoked paprika, salt, and pepper. Stir and simmer for 3-4 minutes until sauce thickens slightly. Taste and adjust seasoning.
- Add the cheese: Remove skillet from heat and stir in 1 cup shredded mozzarella. Let cool for 5 minutes.
- Stuff the peppers: Place blanched peppers upright in a 9×13 baking dish. Fill each pepper with the meat and rice mixture, packing gently but firmly. Each pepper takes about ½ to ¾ cup of filling.
- Create the mummy wraps: Peel each string cheese stick lengthwise into thin strips (4-5 strips per stick). Use about 2 sticks per pepper. Wrap strips around each stuffed pepper in a crisscross pattern, leaving a small gap near the top for eyes. Let some strips hang loose.
- Add the eyes: Place two olive slices in the gap near the top of each pepper. Press gently into the cheese. If needed, dab a tiny bit of cream cheese on the back of each olive slice to glue them in place.
- Bake uncovered: Place dish in preheated oven and bake for 20-25 minutes until cheese is melted, golden in spots, and slightly crispy on edges. Peppers should be tender but hold their shape. For more browning, broil for 1-2 minutes, watching carefully.
- Rest before serving: Let mummy peppers sit for 5 minutes after coming out of the oven to let the cheese set.
Notes
Blanching the peppers for 3 minutes is crucial for perfect texture. Don’t overstuff peppers; leave about ¼ inch of space at the top. Let string cheese sit at room temperature for 10 minutes before peeling for easier separation. For make-ahead: assemble peppers with cheese wraps but add olive eyes just before baking. Add 5 minutes to baking time if refrigerated. Leftovers keep in refrigerator for up to 4 days. Can be frozen before or after baking for up to 3 months.
Nutrition
- Serving Size: 1 mummy pepper
- Calories: 420
- Sugar: 6
- Sodium: 680
- Fat: 22
- Saturated Fat: 10
- Carbohydrates: 28
- Fiber: 3
- Protein: 24
Keywords: Halloween, stuffed peppers, mummy peppers, Halloween dinner, spooky recipe, kid-friendly, ground beef, bell peppers, string cheese


