Love this? Save it for later!
Share the inspiration with your friends
The summer I turned thirty, my kitchen counter was a disaster zone. I had oats in my hair, peanut butter on my elbow, and a toddler who just discovered that raw honey is, apparently, hilarious to smear everywhere. I was trying to meal prep for a week of chaos—work deadlines, soccer practice, and that thing where you forget to eat until 3 PM and then eat a bag of chips. That’s when my neighbor, a marathon runner named Carol, knocked on my door holding a Tupperware container. She watched me wipe oat dust off my forehead and didn’t say anything at first. Then she just handed me the container and said, “You look like you need these more than I do.”
Inside were these perfect little spheres of peanut butter and oats. No baking, no fuss, just pure, satisfying fuel. I took one bite and honestly, I felt like I had just discovered a cheat code for adulting. Carol told me she makes a batch every Sunday night for her long runs, but she also eats them at her desk when she’s too busy to chew properly—which, let me tell you, I understood completely. I tweaked her recipe a little over the years, adding a pinch of salt here, swapping in dark chocolate chips there, until it became my go-to. These easy no-bake peanut butter protein balls are the result of that happy accident.
Maybe you’ve been there—staring into the fridge at 4 PM, hungry but not hungry enough to actually cook something. Or maybe you just need a post-workout snack that doesn’t taste like cardboard. Either way, these little guys have your back. They’re the recipe that keeps on giving, and I’m so glad Carol knocked on my door that day.
Why You’ll Love This Recipe
Let’s be real for a second. There are a million protein ball recipes out there, and I’ve tried most of them. Some are dry and crumbly, some are so sticky they glue your jaw shut, and some just taste like a sad bowl of oats. These easy no-bake peanut butter protein balls are none of those things. They’re the Goldilocks of protein snacks—just right.
- Quick & Easy: We’re talking five minutes of active work. No oven, no stove, no waiting. Mix, roll, eat. That’s it.
- Simple Ingredients: You probably have everything in your pantry right now. Oats, peanut butter, honey, chocolate chips—no weird powders or obscure health food store finds.
- Perfect for Busy Weeks: These are my secret weapon for Monday mornings, afternoon slumps, and pre-workout fuel. They’re also fantastic for road trips and hiking.
- Crowd-Pleaser: I’ve brought these to potlucks and kids’ birthday parties. Adults love them, kids love them, and no one ever guesses they’re actually good for you.
- Unbelievably Delicious: The texture is soft and chewy, not dry or chalky. The peanut butter and honey create this perfect, slightly sticky sweetness that hits the spot every single time.
What makes these different from the rest? It’s the ratio. I’ve tested this recipe more times than I care to admit. Too many oats and they’re dry. Too much honey and they’re a sticky mess. This version has the perfect balance, plus a secret trick—a tiny splash of vanilla extract that makes the flavor pop. It’s not just another protein ball recipe; it’s the one you’ll come back to again and again.
Honestly, this recipe is comfort food reimagined. It’s healthier, faster, and still has that soul-soothing satisfaction of a peanut butter cookie. Perfect for impressing guests without stress, or turning a simple snack into something memorable.
What Ingredients You Will Need
This recipe uses simple, wholesome ingredients to deliver bold flavor and satisfying texture without the fuss. Most of these are pantry staples, so you can whip up a batch anytime the craving hits.
- Rolled Oats (1 cup / 90g): Use old-fashioned rolled oats for the best texture. Quick oats work in a pinch, but they make the balls a bit mushier. I prefer Bob’s Red Mill for consistency. (Gluten-free certified if needed!)
- Creamy Peanut Butter (½ cup / 130g): Natural peanut butter works great, but make sure it’s well-stirred. If you use the kind with added sugar and oil, the balls will be sweeter and a bit softer. I like Skippy Natural or a store-brand no-stir version for convenience.
- Honey (⅓ cup / 110g): Raw honey is my go-to for flavor, but any liquid honey works. Maple syrup is a fantastic vegan substitute—just note it’s a bit thinner, so the mixture might be slightly stickier.
- Mini Chocolate Chips (¼ cup / 45g): These are the little pockets of joy. Use dark chocolate for a less sweet option, or milk chocolate if you have a sweet tooth. I’ve used Enjoy Life brand for dairy-free versions.
- Ground Flaxseed (2 tablespoons / 14g): This is my secret binding agent. It adds fiber and omega-3s, plus it helps hold the balls together without making them dry. You can skip it, but you’ll need to add a tablespoon more oats.
- Vanilla Extract (1 teaspoon): Pure vanilla extract is worth the splurge here. It rounds out the flavors and makes everything taste more like a treat. Imitation vanilla works, but use a little less—it’s stronger.
- Pinch of Salt (¼ teaspoon): Don’t skip this! Salt balances the sweetness and makes the peanut butter flavor sing. I use fine sea salt.
Optional Add-Ins:
- Shredded Coconut (¼ cup): Adds texture and a tropical twist. Toast it first for extra flavor.
- Chia Seeds (1 tablespoon): For extra fiber and a fun poppy-like crunch.
- Protein Powder (2 tablespoons): If you want a protein boost, add a scoop of vanilla or chocolate protein powder. You’ll need to add an extra tablespoon of honey or water to balance the dryness.
Equipment Needed
The beauty of these easy no-bake peanut butter protein balls is that you don’t need much. Here’s what I use:
- Large Mixing Bowl: Any bowl big enough to get your hands in there. I use a stainless steel one because it’s lightweight and easy to clean.
- Measuring Cups and Spoons: For accuracy. I’ve eyeballed it before and ended up with a crumbly mess. Trust the measurements.
- Spatula or Wooden Spoon: For the initial mixing before you get your hands dirty.
- Baking Sheet or Plate: To hold the rolled balls while they set. Line it with parchment paper for easy cleanup.
- Cookie Scoop (optional): A small cookie scoop (about 1 tablespoon) makes uniform balls and speeds things up. I got mine at a dollar store and it’s perfect.
- Air-Tight Container: For storage. A glass container with a lid works best. Mason jars are also great.
If you don’t have a cookie scoop, just use your hands. Honestly, I often skip it and just roll them by feel. It’s more satisfying that way.
Preparation Method
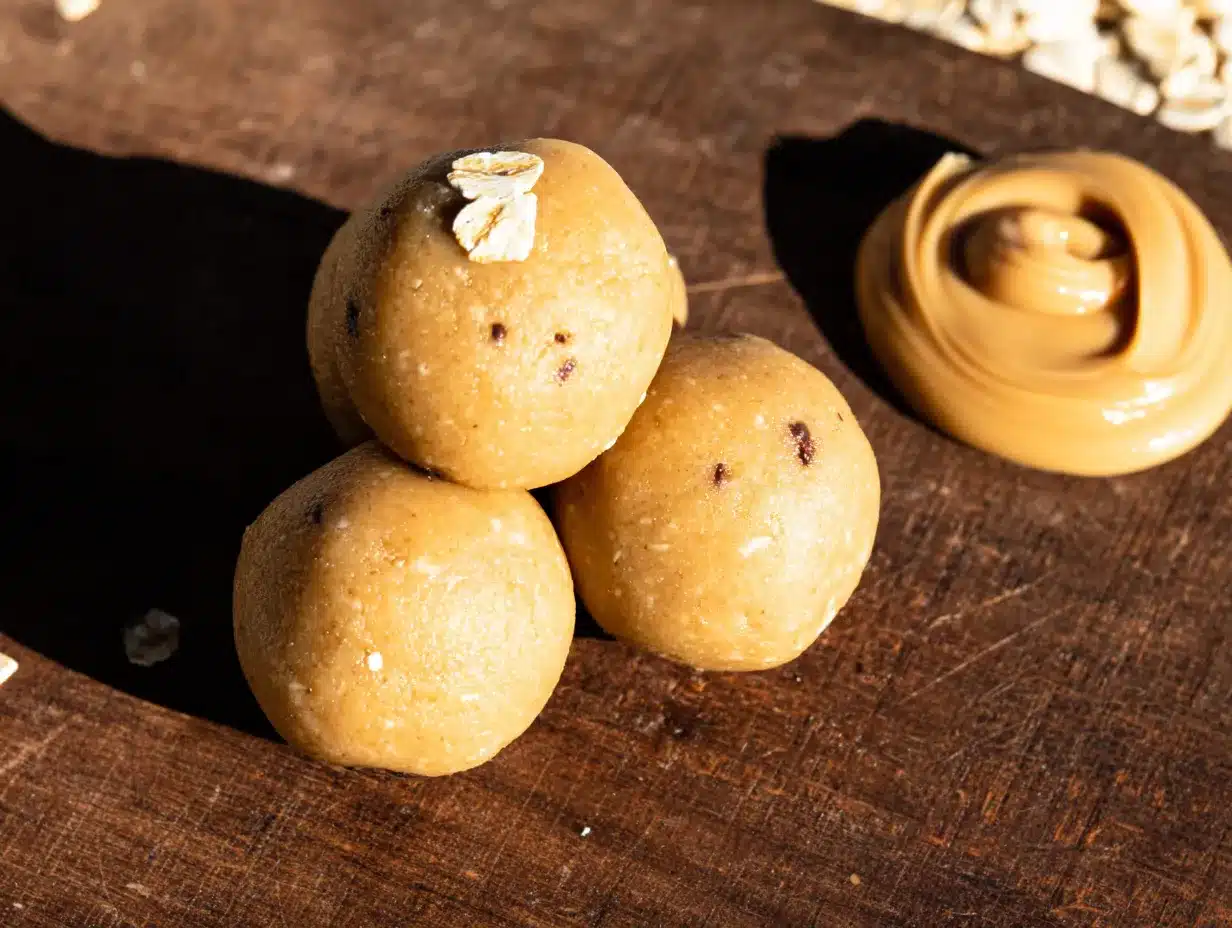
This is the easiest part. Seriously, if you can stir and roll, you can make these. Here’s the step-by-step:
- Combine the Dry Ingredients: In your large mixing bowl, add the rolled oats, ground flaxseed, and a pinch of salt. Give it a quick stir with your spatula to distribute everything evenly. (30 seconds)
- Add the Wet Ingredients: Pour in the creamy peanut butter, honey, and vanilla extract. Don’t worry if it looks messy at first—that’s normal. Stir everything together until it forms a thick, cohesive dough. It should be slightly sticky but not wet. If it’s too dry, add a teaspoon of honey or water. If it’s too sticky, add a tablespoon more oats. (2 minutes)
- Fold in the Chocolate Chips: Sprinkle the mini chocolate chips over the mixture and fold them in gently. You want them evenly distributed, not crushed. (30 seconds)
- Chill the Mixture (Optional but Helpful): Pop the bowl in the fridge for 10-15 minutes. This makes the dough firmer and easier to roll. If you’re in a hurry, you can skip this step—just expect slightly stickier hands. (10-15 minutes)
- Roll into Balls: Using your hands, scoop out about 1 tablespoon of the mixture and roll it between your palms into a smooth ball. Place each ball on the parchment-lined baking sheet. You should get about 15-18 balls, depending on size. (3-5 minutes)
- Set and Serve: Let the balls sit at room temperature for about 10 minutes to firm up slightly. Or, if you want them extra firm, pop the baking sheet in the fridge for 30 minutes. They’re ready to eat immediately, but they hold their shape better after chilling. (10-30 minutes)
Total Active Time: About 5 minutes (plus optional chilling).
Sensory Cues: The mixture should feel like a soft, slightly sticky playdough. When you roll it, it should hold together without cracking. The chocolate chips should be visible but not poking out everywhere. The smell is pure peanut butter bliss—warm, nutty, and sweet.
Cooking Tips & Techniques
I’ve made these easy no-bake peanut butter protein balls more times than I can count, and I’ve learned a few things along the way. Here are my best tips:
- Sticky Hands Solution: If your hands get too sticky while rolling, lightly wet them with water. The moisture creates a barrier and the mixture won’t stick as much. Alternatively, rub a tiny bit of coconut oil on your palms.
- Don’t Overmix: Once you add the chocolate chips, stop mixing as soon as they’re incorporated. Overmixing can break the chips and turn the whole thing brown. It still tastes fine, but it’s less pretty.
- Temperature Matters: If your peanut butter is cold from the fridge, let it sit at room temperature for 15 minutes before mixing. Cold peanut butter is harder to incorporate and can make the mixture lumpy.
- The “Squeeze Test”: Before rolling all the balls, take a small pinch of the mixture and squeeze it in your hand. If it holds together without crumbling, you’re good. If it falls apart, add a bit more honey or peanut butter.
- Consistency Over Size: Use a cookie scoop for uniform balls. They’ll set evenly and look more professional. Plus, it makes portion control easier.
- My Biggest Failure: The first time I made these, I used old, dry oats and didn’t add enough honey. The balls were crumbly and sad. I tried to fix them by adding water, which made them weirdly soggy. Lesson learned: always use fresh oats and taste the mixture before rolling. If it’s not sweet or sticky enough, adjust then.
Variations & Adaptations
These protein balls are incredibly versatile. Here are some of my favorite twists:
- Chocolate Peanut Butter: Add 2 tablespoons of unsweetened cocoa powder to the dry ingredients. The result is a rich, fudge-like ball that tastes like a healthier brownie bite.
- Crunchy Peanut Butter: Swap creamy peanut butter for crunchy. You’ll get little bits of peanut in every bite, which adds a nice texture contrast.
- Vegan Version: Use maple syrup instead of honey, and make sure your chocolate chips are dairy-free. Everything else is already plant-based.
- Nut-Free Option: Substitute sunflower seed butter (like SunButter) for the peanut butter. The flavor is slightly different, but still delicious. Note that sunflower seed butter can react with baking soda and turn green, but since we’re not baking, that’s not an issue here.
- Seasonal Twist: In the fall, add ½ teaspoon of pumpkin pie spice and swap the chocolate chips for dried cranberries. In the summer, add a tablespoon of freeze-dried strawberry powder for a fruity kick.
- Protein-Packed Version: Add a scoop of vanilla or chocolate protein powder. Reduce the oats by 2 tablespoons to keep the texture balanced. You might also need an extra tablespoon of honey to prevent dryness.
I once made a batch with almond butter and white chocolate chips, and honestly, it was incredible. The almond butter gave it a milder flavor, and the white chocolate added a creamy sweetness. Don’t be afraid to experiment!
Serving & Storage Suggestions
These easy no-bake peanut butter protein balls are best served chilled or at room temperature. I like to take them straight from the fridge for a cold, firm snack, but they’re also perfect at room temperature for lunchboxes or hiking.
- Serving Temperature: Cold from the fridge is my preference, but they’re delicious either way. If you’re serving them at a party, let them sit out for 10 minutes so they soften slightly.
- Presentation: Arrange them on a wooden board with fresh fruit and a few pretzels for a cute snack platter. For kids, I sometimes put them in a cupcake liner for a fun touch.
- Complementary Dishes: These pair beautifully with a glass of cold milk, a smoothie, or a cup of coffee. For a more substantial snack, serve alongside apple slices or celery sticks with extra peanut butter.
- Storage: Store in an air-tight container in the refrigerator for up to 2 weeks. They also freeze beautifully! Place them in a single layer on a baking sheet, freeze for an hour, then transfer to a freezer-safe bag. They’ll keep for up to 3 months.
- Reheating: No reheating needed! Just grab and go. If frozen, let them thaw in the fridge for an hour or at room temperature for 15 minutes.
- Flavor Development: These actually get better after a day or two in the fridge. The flavors meld together, and the texture becomes perfectly chewy. So don’t be afraid to make them ahead.
Nutritional Information & Benefits
These easy no-bake peanut butter protein balls are a powerhouse of nutrition wrapped in a delicious package. Here’s the approximate breakdown per ball (based on 16 balls):
- Calories: 145
- Protein: 5g
- Fat: 8g
- Carbohydrates: 16g
- Fiber: 2g
- Sugar: 9g
Health Benefits:
- Peanut Butter: Packed with healthy fats, protein, and vitamin E. It’s great for heart health and keeps you full longer.
- Rolled Oats: A fantastic source of soluble fiber, which helps lower cholesterol and stabilize blood sugar. They also provide sustained energy.
- Ground Flaxseed: Rich in omega-3 fatty acids and lignans, which have antioxidant properties. It’s also great for digestion.
- Honey: A natural sweetener with antibacterial properties and antioxidants. It’s a better choice than refined sugar.
- Dark Chocolate Chips: If you use dark chocolate, you’re getting a dose of antioxidants and flavonoids, which are good for your heart.
Dietary Considerations: This recipe is naturally vegetarian and can be made vegan (use maple syrup) and gluten-free (use certified gluten-free oats). It contains peanuts and may contain dairy (if using milk chocolate chips). Always check labels for allergen information.
I love that I can feel good about eating these. They’re not just a treat—they’re fuel for my busy days.
Conclusion
These easy no-bake peanut butter protein balls are proof that healthy snacks don’t have to be complicated or boring. With just five minutes of effort and a handful of pantry staples, you can have a batch of delicious, satisfying bites ready to go. Whether you need a quick pre-workout boost, a lunchbox treat, or a way to survive the 4 PM slump, these little guys deliver every single time.
I love that this recipe is so forgiving. You can tweak it based on what you have in your pantry, and it always turns out great. Add some coconut, swap the chocolate for raisins, or throw in a scoop of protein powder—it’s your kitchen, your rules. The fact that it came from a neighbor’s kindness just makes it taste even better.
I’d love to hear how yours turn out! Did you try a fun variation? Did your kids help you roll them? Drop a comment below and share your experience. And if you found this recipe helpful, please share it with a friend who needs a quick snack win. Happy rolling, friends!
Frequently Asked Questions
Can I use quick oats instead of rolled oats?
Yes, you can! Quick oats will work, but they’ll give the protein balls a softer, slightly mushier texture. Rolled oats provide a better chew and hold their shape more. If you only have quick oats, reduce the honey by a tablespoon since they absorb liquid differently.
How do I make these protein balls less sticky?
If your mixture is too sticky to roll, try these fixes: chill the mixture for 15 minutes in the fridge, add a tablespoon more oats, or lightly wet your hands with water before rolling. The cold temperature firms up the peanut butter and makes it much easier to handle.
Can I freeze these peanut butter protein balls?
Absolutely! Freezing is a great way to keep a batch on hand. Place the rolled balls on a baking sheet in a single layer and freeze for an hour. Then transfer them to a freezer-safe bag or container. They’ll keep for up to 3 months. Thaw in the fridge for an hour or at room temperature for 15 minutes.
What can I use instead of peanut butter?
You can substitute any nut or seed butter, such as almond butter, cashew butter, or sunflower seed butter. Keep in mind that different butters have different consistencies. Almond butter is usually thinner, so you might need to add a bit more oats. Sunflower seed butter works great and is perfect for nut-free environments.
How long do these protein balls last at room temperature?
They can stay at room temperature for up to 2 days in a cool, dry place. However, for best freshness and texture, I recommend storing them in the refrigerator. They’ll last up to 2 weeks in the fridge. If you’re taking them on a hike or to work, they’ll be fine in a lunchbox for a few hours.
Pin This Recipe!
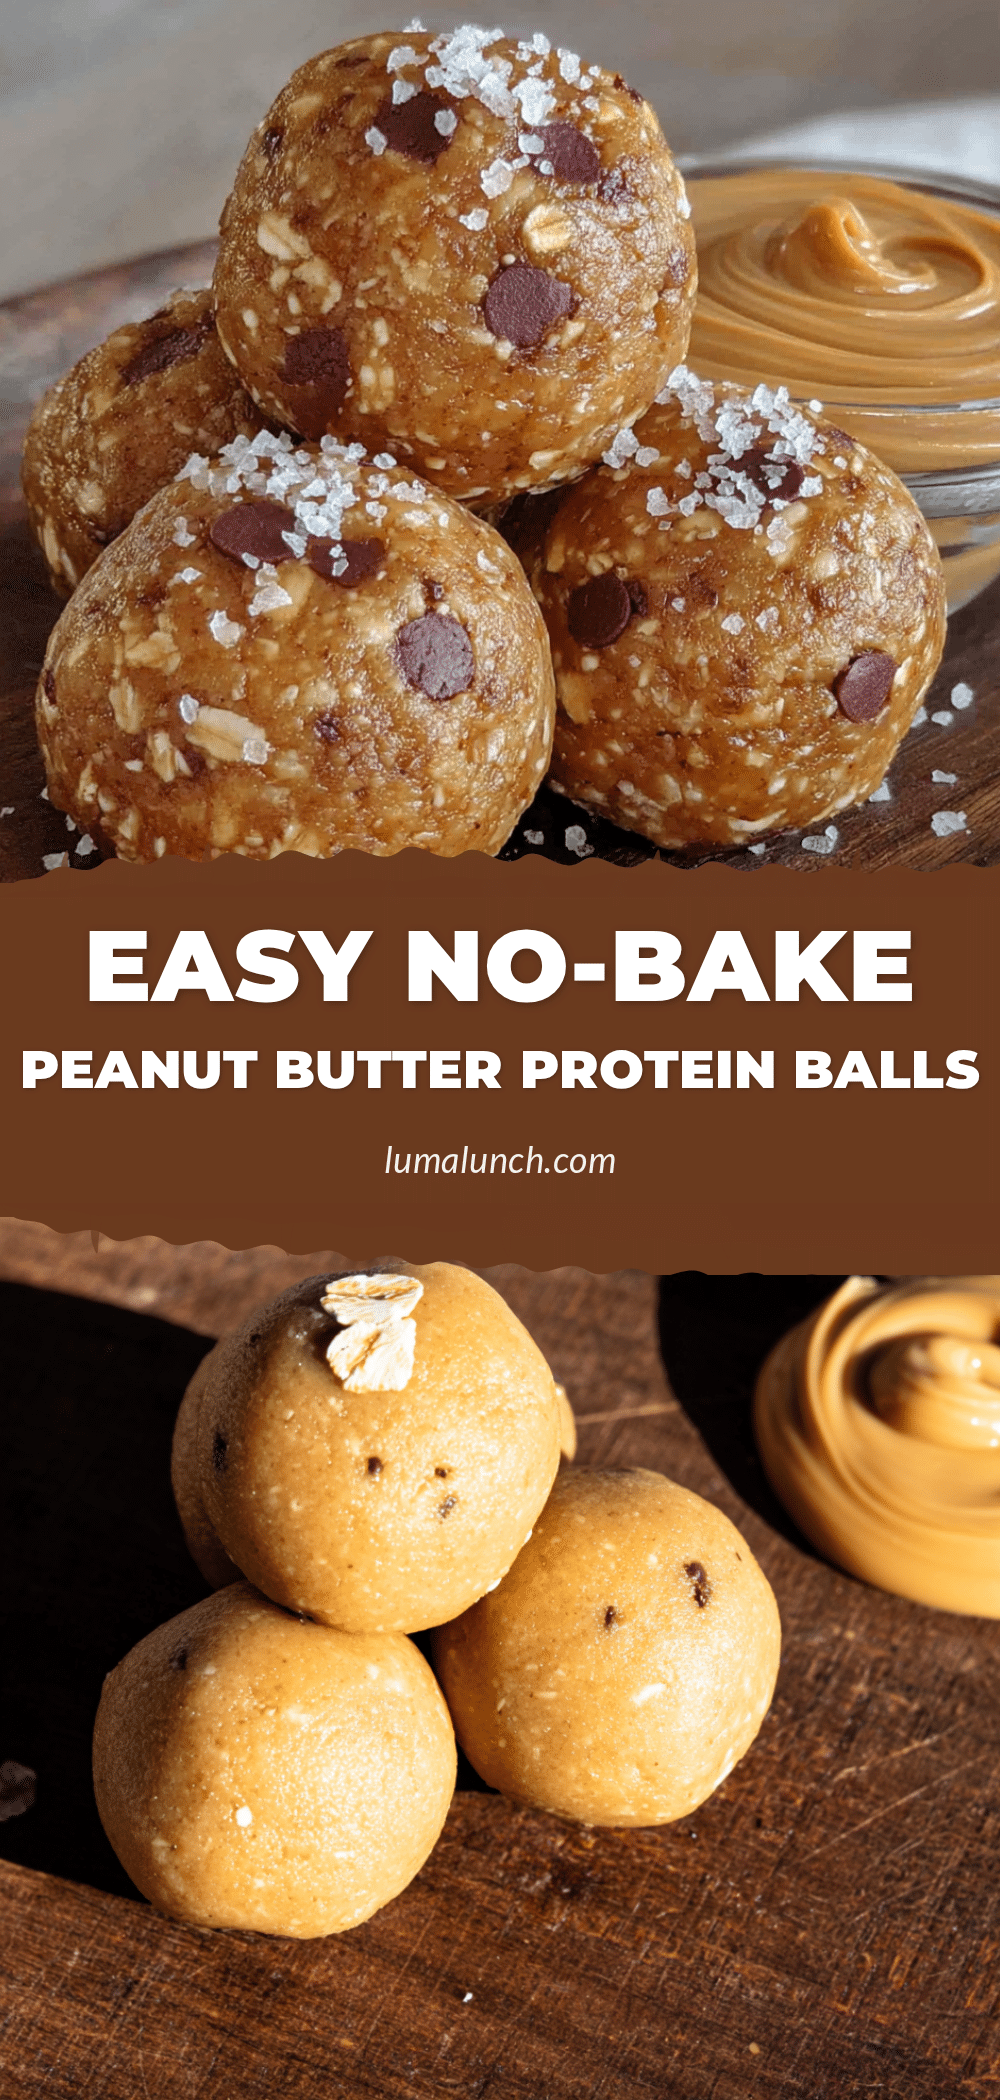
Easy No-Bake Peanut Butter Protein Balls (5-Minute Recipe)

These easy no-bake peanut butter protein balls are the perfect quick snack for busy weeks. Made with simple pantry staples, they come together in just five minutes and are great for pre-workout fuel, lunchboxes, or a healthy treat.
- Prep Time: 5 minutes
- Cook Time: 0 minutes
- Total Time: 5 minutes (plus optional chilling)
- Yield: 16 servings 1x
- Category: Snack
- Cuisine: American
Ingredients
- 1 cup (90g) rolled oats
- ½ cup (130g) creamy peanut butter
- ⅓ cup (110g) honey
- ¼ cup (45g) mini chocolate chips
- 2 tablespoons (14g) ground flaxseed
- 1 teaspoon vanilla extract
- ¼ teaspoon fine sea salt
Instructions
- In a large mixing bowl, combine the rolled oats, ground flaxseed, and salt. Stir to distribute evenly.
- Add the creamy peanut butter, honey, and vanilla extract. Stir until a thick, cohesive dough forms. If too dry, add a teaspoon of honey or water; if too sticky, add a tablespoon more oats.
- Fold in the mini chocolate chips gently until evenly distributed.
- Optional: Chill the mixture in the fridge for 10-15 minutes to make it easier to roll.
- Using your hands, scoop about 1 tablespoon of the mixture and roll into smooth balls. Place on a parchment-lined baking sheet. You should get about 15-18 balls.
- Let the balls sit at room temperature for 10 minutes to firm up, or refrigerate for 30 minutes for extra firmness. Serve immediately or store.
Notes
For less sticky hands, lightly wet your palms with water or rub with coconut oil. The balls get better after a day in the fridge as flavors meld. Freeze for up to 3 months.
Nutrition
- Serving Size: 1 ball
- Calories: 145
- Sugar: 9
- Sodium: 80
- Fat: 8
- Saturated Fat: 2
- Carbohydrates: 16
- Fiber: 2
- Protein: 5
Keywords: no-bake, peanut butter, protein balls, healthy snack, quick, easy, gluten-free option, vegan option


