Love this? Save it for later!
Share the inspiration with your friends
I found myself staring at a pile of apples on my counter last October—somehow I’d bought three different varieties at the farmers’ market without realizing it. My neighbor across the fence, a retired baker named Rosa, watched me trying to figure out what to do with them while I was watering my sad little herb garden. She didn’t say anything at first. Then she walked over with a worn index card in her hand, the edges soft and stained. “Try this,” she said. “It’s my grandmother’s crumble bar recipe, but I always add caramel because, well, why not?”
That card sat on my counter for two days before I finally gave it a shot. The first batch came out okay—a little dry, honestly, because I forgot to adjust for the apple variety I used. But the second batch? That was something else entirely. The butter from the shortbread crust soaked into the tender apples, and the caramel created these little pockets of gooey sweetness that caught me completely off guard. I mean, I’ve made a lot of desserts in my time, but this one had me scraping the pan with a spoon at midnight.
Maybe you’ve been there too—staring at a pile of fruit with no clear plan, or scrolling through recipes that all look the same. These caramel apple crumble bars are the kind of recipe that solves that problem without any drama. They’re forgiving, they’re flexible, and they taste like you spent hours in the kitchen when really, the hardest part is waiting for them to cool. That first bite of warm apple, buttery crumble, and sticky caramel is why I keep making them year after year.
Why You’ll Love This Recipe
Let me tell you why these bars have earned a permanent spot in my baking rotation. I’ve tested this recipe about seven times now—once with disastrous results when I used pre-sliced apples from a can (don’t do it, they turn to mush)—and every adjustment made it better. Here’s what makes them special:
- Quick & Easy: Comes together in under 45 minutes of active prep time, perfect for those afternoons when you need a dessert but don’t want to commit to a full pie.
- Simple Ingredients: No fancy grocery trips needed. Butter, flour, oats, apples, and some caramel bits—you probably have most of this already.
- Perfect for Fall Gatherings: Great for Thanksgiving, potlucks, or just a cozy Sunday afternoon when the weather turns crisp.
- Crowd-Pleaser: I brought these to a neighborhood barbecue last month, and three different people asked for the recipe before the night was over.
- Unbelievably Delicious: The contrast between the crunchy oat topping, the soft apple layer, and the gooey caramel is pure comfort food magic.
What makes this recipe different from the rest? It’s the technique of layering the caramel in two places—some in the filling and some drizzled on top—so every bite gets that sweet, buttery hit. Plus, using a mix of apple varieties gives you a more complex flavor than any single type could deliver. This isn’t just another apple bar recipe; it’s the one that makes you close your eyes after the first bite and forget about everything else.
What Ingredients You Will Need
This recipe uses simple, wholesome ingredients to deliver bold flavor and satisfying texture without the fuss. Most of these are pantry staples, which makes these bars perfect for spontaneous baking.
For the Shortbread Crust
- 2 cups all-purpose flour (I prefer King Arthur for consistent results)
- 1/2 cup granulated sugar
- 3/4 cup unsalted butter, cold and cut into small cubes (this is key for a flaky crust)
- 1/4 teaspoon salt
For the Apple Filling
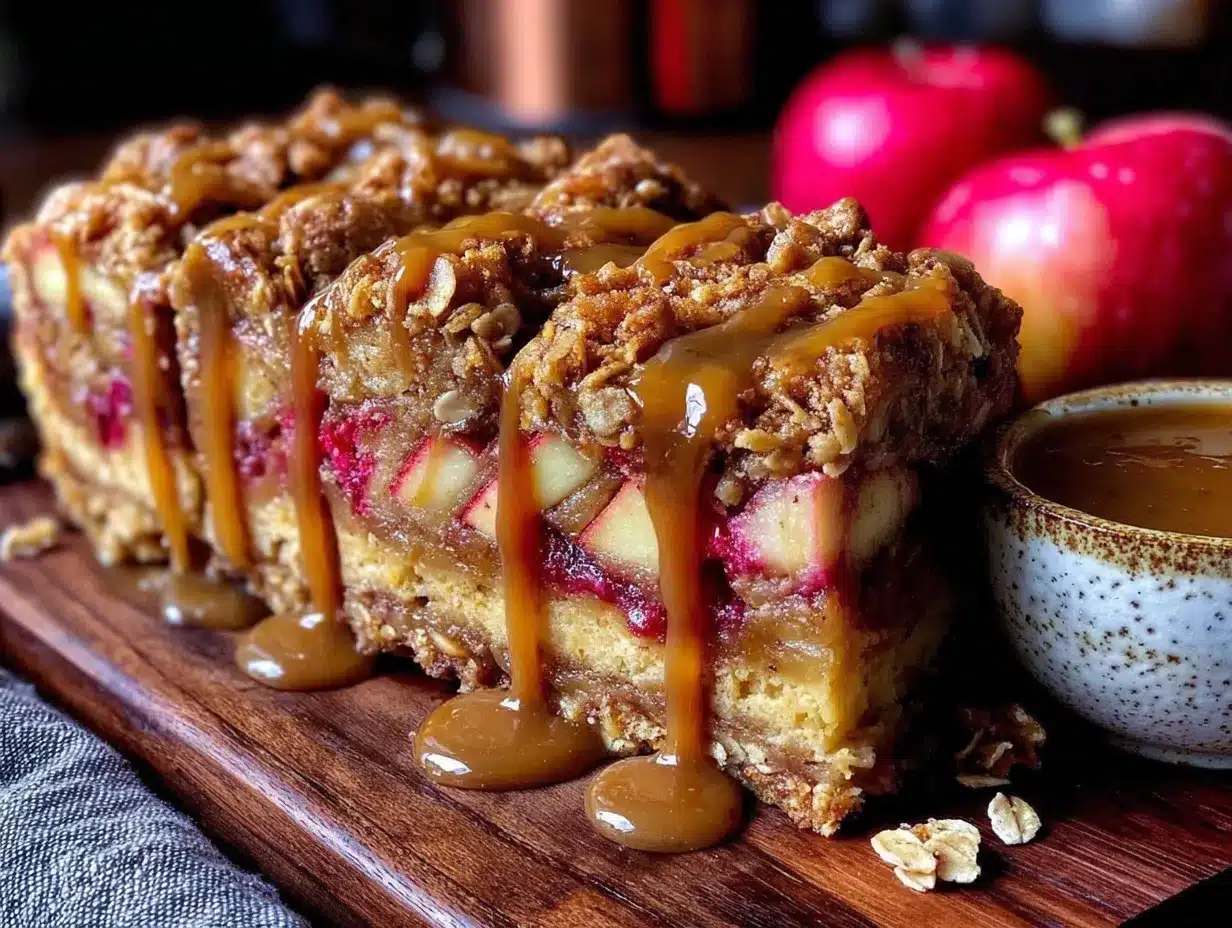
- 4 cups apples, peeled, cored, and diced (about 4 medium apples—use a mix of Granny Smith for tartness and Honeycrisp for sweetness)
- 1/4 cup granulated sugar
- 2 tablespoons all-purpose flour
- 1 teaspoon cinnamon
- 1/4 teaspoon nutmeg (freshly grated if you have it)
- 1 tablespoon lemon juice (keeps the apples from browning and adds brightness)
For the Crumble Topping
- 1 cup old-fashioned rolled oats (not quick oats—they get mushy)
- 1/2 cup all-purpose flour
- 1/2 cup brown sugar, packed
- 1/2 cup unsalted butter, melted
- 1/2 teaspoon cinnamon
- Pinch of salt
For the Caramel Layer
- 1 cup soft caramel candies (like Kraft caramels, unwrapped)
- 3 tablespoons heavy cream (or whole milk if that’s what you have)
For the apples, look for firm, crisp ones that hold their shape during baking. Granny Smith is my go-to because the tartness balances the sweet caramel perfectly. If you’re using very sweet apples like Fuji or Gala, reduce the sugar in the filling by a tablespoon. You can also swap the all-purpose flour in the crust for a gluten-free blend if needed—I’ve done it with Bob’s Red Mill 1-to-1 and it worked beautifully.
Equipment Needed
You don’t need a fancy kitchen for these bars, but a few tools make the process smoother. Here’s what I use:
- 9×13-inch baking pan (metal works best for even browning; glass is fine but may need extra baking time)
- Parchment paper (makes lifting the bars out so much easier—trust me on this)
- Large mixing bowls (one for the crust, one for the filling, one for the topping)
- Pastry cutter or fork (for cutting butter into the flour for the crust)
- Sharp knife and cutting board (for dicing apples evenly)
- Small saucepan (for melting the caramel)
- Cooling rack (prevents the bottom from getting soggy)
If you don’t have a pastry cutter, two forks work fine—just work quickly so the butter stays cold. And if you’re like me and hate washing extra dishes, you can melt the caramel in the microwave in a heat-safe bowl, stirring every 30 seconds. I’ve done it both ways, and honestly, the microwave method is faster with the same results.
Preparation Method
Let’s get baking. I’ve broken this down into clear steps so you don’t miss anything. Take your time with the crust—it’s the foundation of the whole bar.
-
Preheat your oven to 350°F (175°C). Line your 9×13-inch baking pan with parchment paper, leaving some overhang on two sides. This makes lifting the bars out a breeze later.
-
Make the shortbread crust. In a large bowl, whisk together 2 cups flour, 1/2 cup granulated sugar, and 1/4 teaspoon salt. Add the cold cubed butter and use a pastry cutter or your fingertips to work it into the flour until the mixture looks like coarse sand with some pea-sized butter pieces. Don’t overwork it—those little butter bits create a flaky texture. Press the mixture evenly into the bottom of the prepared pan. Bake for 15 minutes, until the edges are just starting to turn golden. Set aside to cool slightly while you prepare the filling.
-
Prepare the apple filling. In a medium bowl, toss the diced apples with 1/4 cup sugar, 2 tablespoons flour, 1 teaspoon cinnamon, 1/4 teaspoon nutmeg, and 1 tablespoon lemon juice. Make sure every piece is coated. The flour helps thicken the juices so the filling isn’t watery. Let this sit while you make the topping—the apples will release some liquid, which is totally fine.
-
Make the crumble topping. In another bowl, combine 1 cup oats, 1/2 cup flour, 1/2 cup brown sugar, 1/2 teaspoon cinnamon, and a pinch of salt. Pour in the melted butter and stir until everything is moistened and clumpy. Set aside.
-
Melt the caramel. In a small saucepan over low heat, combine the unwrapped caramels and heavy cream. Stir constantly until smooth and fully melted. This takes about 5 minutes. If you’re using the microwave, heat in 30-second bursts, stirring each time. Be careful—caramel gets hot fast and can burn.
-
Assemble the bars. Spread the apple mixture evenly over the pre-baked crust. Drizzle about half of the melted caramel over the apples—save the rest for later. Sprinkle the crumble topping evenly over everything, pressing down gently so it sticks.
-
Bake. Place the pan in the oven and bake for 35-40 minutes, until the topping is golden brown and the apple filling is bubbling around the edges. Your kitchen will smell incredible at this point. Let the bars cool in the pan on a wire rack for at least 20 minutes before drizzling the remaining caramel on top.
-
Cool completely. This is the hardest part, I know. But if you cut them while they’re warm, they’ll fall apart. Let them cool for at least 2 hours at room temperature, or pop them in the fridge for 45 minutes if you’re impatient like me. Once set, lift the bars out using the parchment paper and cut into squares.
Cooking Tips & Techniques
I’ve made a few mistakes with these bars so you don’t have to. Here’s what I learned the hard way:
Don’t skip the lemon juice. The first time I made these, I thought I could leave it out since the apples were already tart. Big mistake. The lemon juice not only prevents browning but also balances the sweetness of the caramel and sugar. Without it, the bars tasted one-note sweet.
Keep your butter cold for the crust. Warm butter melts into the flour instead of creating those little pockets that make shortbread tender and flaky. If your kitchen is warm, pop the cubed butter in the freezer for 10 minutes before you start. I learned this after making a crust that was more like a cookie—still tasty, but not what I wanted.
Watch the caramel closely. Caramel goes from perfectly melted to burnt in about 30 seconds. Stir constantly and keep the heat low. If it seizes up or gets too thick, add another tablespoon of cream and stir over low heat until smooth.
Use a sharp knife to cut the bars. A dull knife will squish the layers together and make a mess. Run the knife under hot water, wipe it dry, and cut cleanly. Wipe the blade between cuts for the prettiest squares.
Let them cool completely. I cannot stress this enough. I once cut into a pan after 30 minutes because I couldn’t wait, and the bars turned into apple-crumble soup. They tasted amazing, but presentation was a disaster. Patience pays off here.
Variations & Adaptations
One of the best things about this recipe is how flexible it is. Here are some variations I’ve tried and loved:
- Gluten-Free Version: Swap the all-purpose flour in the crust and topping with a 1-to-1 gluten-free baking flour. I’ve used Bob’s Red Mill and Cup4Cup with great results. The texture is slightly more tender, but nobody will notice.
- Dairy-Free Adaptation: Use vegan butter (I like Earth Balance) and coconut cream instead of heavy cream for the caramel. The flavor changes a bit—more coconutty—but it’s still delicious.
- Spiced Apple Variation: Add 1/4 teaspoon cardamom and a pinch of cloves to the apple filling for a warmer, more complex spice profile. This is my go-to for holiday gatherings.
- Nutty Crumble: Add 1/2 cup chopped pecans or walnuts to the crumble topping. Toast them first for extra flavor. I tried this on a whim one Thanksgiving, and it was a hit.
- Berry Apple Combo: Swap 1 cup of the diced apples for fresh or frozen raspberries or blueberries. The tart berries play beautifully with the sweet caramel. Just toss them with a little extra flour so they don’t make the filling too wet.
If you want to make these into a more dessert-like treat, serve them warm with a scoop of vanilla ice cream. The contrast between the warm bars and cold ice cream is honestly life-changing.
Serving & Storage Suggestions
These bars are best served at room temperature or slightly warm. The caramel gets a little gooey when warm, which is exactly what you want. For presentation, I like to dust them with a little powdered sugar right before serving—it makes them look fancy with zero extra effort.
They pair beautifully with a cup of hot coffee or a glass of cold milk. If you’re feeling extra, a dollop of whipped cream or a scoop of cinnamon ice cream takes them over the top.
Storage: Keep the bars in an airtight container at room temperature for up to 3 days. After that, move them to the fridge for up to a week. The texture changes slightly in the fridge—the crust gets a bit softer—but the flavor actually deepens.
Freezing: These freeze beautifully. Wrap individual bars in plastic wrap, then place them in a freezer-safe bag. They’ll keep for up to 3 months. To thaw, let them sit at room temperature for about 30 minutes, or pop them in a 300°F oven for 10 minutes to warm through.
Reheating: Microwave individual bars for 15-20 seconds to get that just-baked warmth. For a whole pan, cover with foil and reheat in a 325°F oven for 10-15 minutes.
One thing I love about these bars is that the flavors actually get better after a day or two. The caramel soaks into the apples and crust, making everything more cohesive. So don’t worry if you’re making them ahead—they might be even better the next day.
Nutritional Information & Benefits
Here’s the honest truth: these are a treat, not a health food. But that doesn’t mean they’re without redeeming qualities. One bar (based on 12 servings) contains approximately:
- Calories: 380
- Fat: 18g
- Carbohydrates: 52g
- Fiber: 3g
- Sugar: 32g
- Protein: 4g
The apples provide a good dose of fiber and vitamin C, especially if you leave the peel on (though I recommend peeling for texture in this recipe). Oats are a great source of soluble fiber, which supports heart health. And while the butter and caramel aren’t exactly superfoods, they do make life a little sweeter—and that counts for something.
If you’re watching your sugar intake, you can reduce the sugar in the apple filling by half and use a sugar-free caramel sauce. The bars won’t be as rich, but they’ll still satisfy that apple-crumble craving.
Conclusion
These caramel apple crumble bars are the kind of recipe that makes you look like a baking hero without breaking a sweat. They’ve got everything—a buttery shortbread crust, tender spiced apples, a crunchy oat topping, and gooey caramel running through every layer. Every time I make them, I’m reminded of Rosa passing me that stained index card over the fence, and how a simple recipe can become a tradition.
I hope you give these a try and make them your own. Maybe you’ll add extra cinnamon, swap in pears for half the apples, or drizzle them with even more caramel (I fully support that). Whatever you do, don’t forget to share them with someone you love—that’s really what these bars are about.
If you make these, I’d love to hear how they turned out. Drop a comment below or tag me in your photos. Happy baking!
Frequently Asked Questions
Can I use pre-canned apple pie filling instead of fresh apples?
You can, but I don’t recommend it. Canned pie filling is much softer and sweeter, which can make the bars mushy and overly sweet. Fresh apples give you a better texture and let you control the sweetness. If you’re in a pinch, drain the canned filling well and reduce the sugar in the recipe by half.
Why did my crust turn out soggy?
A soggy crust usually means the apples released too much liquid during baking. Make sure you’re tossing the apples with flour—it helps thicken the juices. Also, pre-baking the crust for 15 minutes creates a barrier that keeps it crisp. If your apples are very juicy (like McIntosh), consider adding an extra tablespoon of flour to the filling.
Can I make these bars vegan?
Yes! Use vegan butter in the crust and topping, and substitute the heavy cream in the caramel with full-fat coconut cream. For the caramel itself, look for vegan caramel candies or make your own with coconut milk and sugar. The texture will be slightly different, but they’re still delicious.
How do I prevent the caramel from becoming too hard after cooling?
This happens when the caramel is cooked too long or at too high a temperature. To keep it soft and chewy, melt the caramels with the heavy cream over low heat, stirring constantly. Don’t let it bubble vigorously. If your caramel does get too hard, you can reheat it gently with a splash more cream.
Can I use quick oats instead of old-fashioned rolled oats?
I wouldn’t recommend it. Quick oats are more finely processed and absorb moisture differently, which can make the crumble topping dense and mushy rather than crunchy and textured. Old-fashioned rolled oats give you that perfect crumbly, slightly chewy topping that makes these bars so good.
Pin This Recipe!
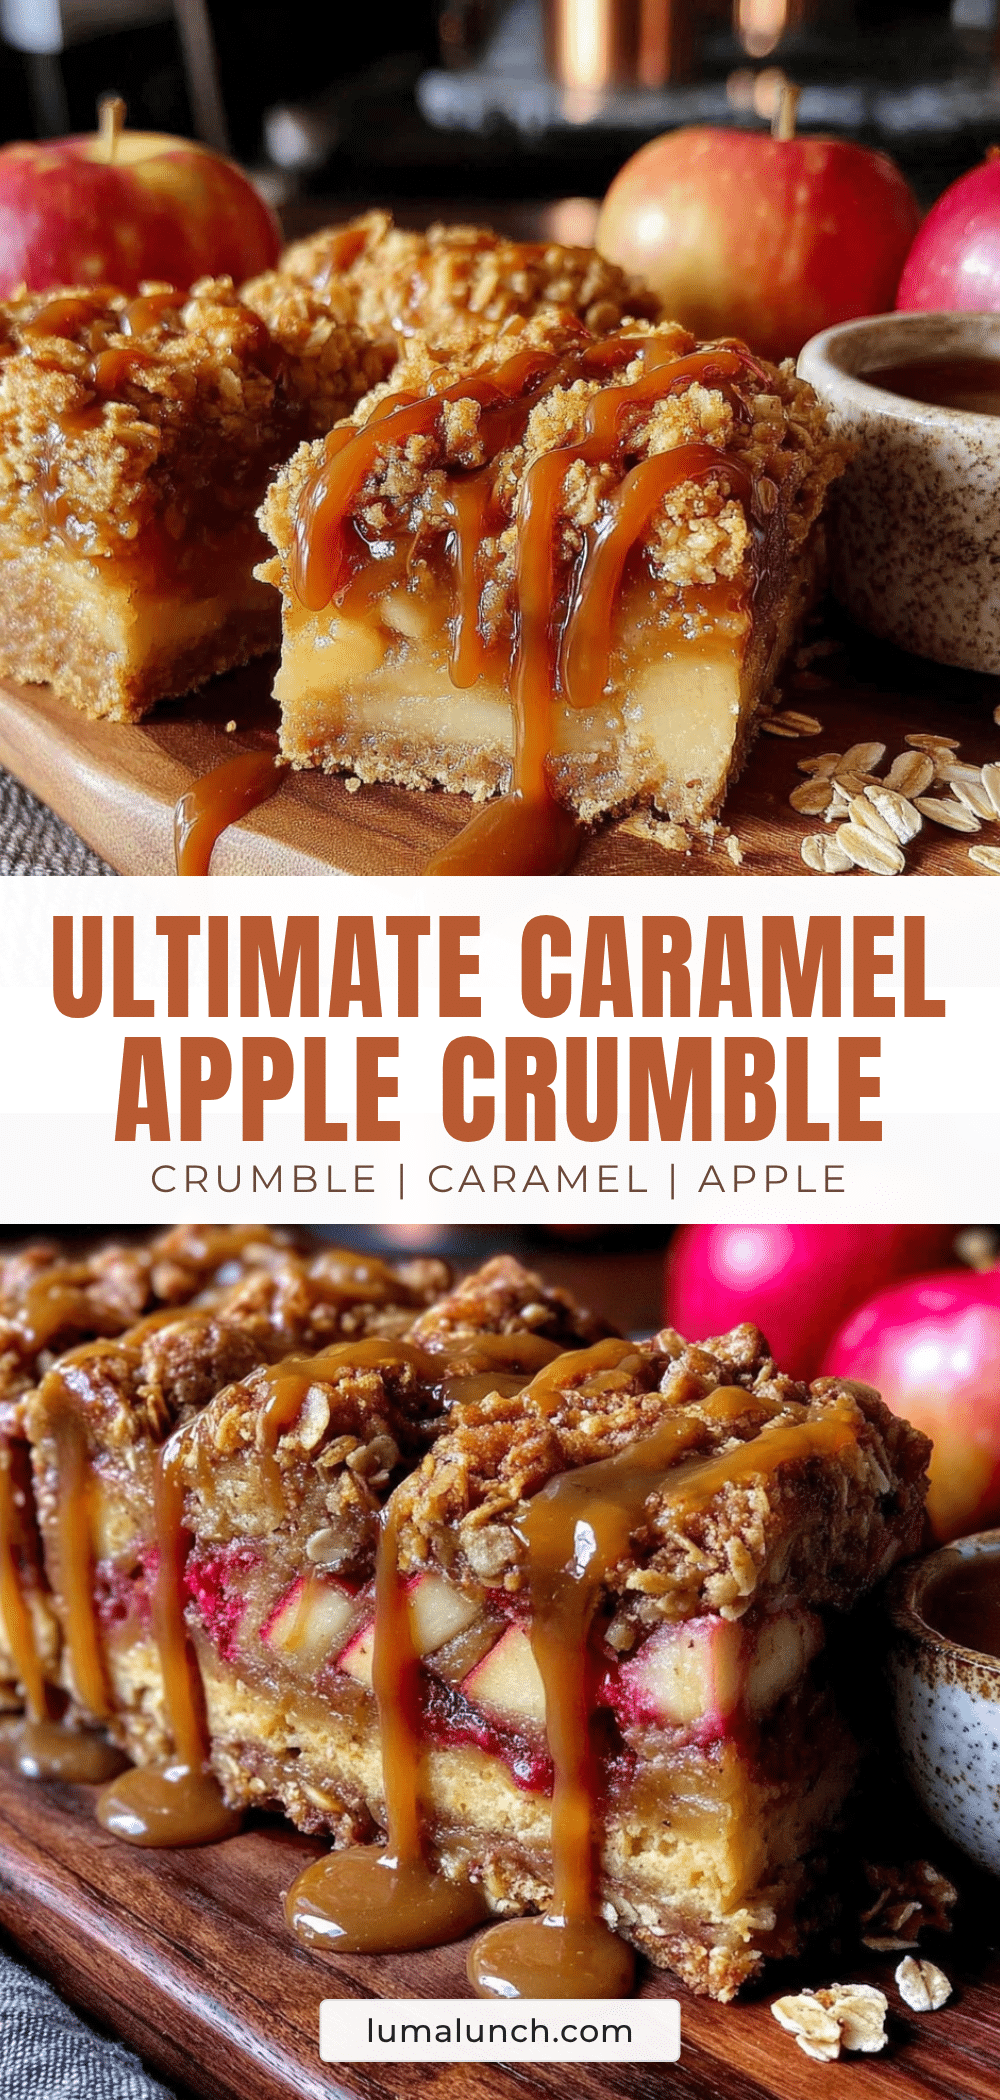
Best Easy Caramel Apple Crumble Bars Recipe
These caramel apple crumble bars feature a buttery shortbread crust, tender spiced apples, a crunchy oat topping, and gooey caramel in every layer. They’re forgiving, flexible, and taste like you spent hours in the kitchen when really, the hardest part is waiting for them to cool.
- Prep Time: 20 minutes
- Cook Time: 35-40 minutes
- Total Time: 55-60 minutes
- Yield: 12 servings 1x
- Category: Dessert
- Cuisine: American
Ingredients
- 2 cups all-purpose flour
- 1/2 cup granulated sugar
- 3/4 cup unsalted butter, cold and cut into small cubes
- 1/4 teaspoon salt
- 4 cups apples, peeled, cored, and diced (about 4 medium apples, mix of Granny Smith and Honeycrisp)
- 1/4 cup granulated sugar
- 2 tablespoons all-purpose flour
- 1 teaspoon cinnamon
- 1/4 teaspoon nutmeg
- 1 tablespoon lemon juice
- 1 cup old-fashioned rolled oats
- 1/2 cup all-purpose flour
- 1/2 cup brown sugar, packed
- 1/2 cup unsalted butter, melted
- 1/2 teaspoon cinnamon
- Pinch of salt
- 1 cup soft caramel candies (like Kraft caramels, unwrapped)
- 3 tablespoons heavy cream
Instructions
- Preheat your oven to 350°F (175°C). Line your 9×13-inch baking pan with parchment paper, leaving some overhang on two sides.
- Make the shortbread crust: In a large bowl, whisk together 2 cups flour, 1/2 cup granulated sugar, and 1/4 teaspoon salt. Add the cold cubed butter and use a pastry cutter or your fingertips to work it into the flour until the mixture looks like coarse sand with some pea-sized butter pieces. Press the mixture evenly into the bottom of the prepared pan. Bake for 15 minutes, until the edges are just starting to turn golden. Set aside to cool slightly.
- Prepare the apple filling: In a medium bowl, toss the diced apples with 1/4 cup sugar, 2 tablespoons flour, 1 teaspoon cinnamon, 1/4 teaspoon nutmeg, and 1 tablespoon lemon juice. Make sure every piece is coated. Let this sit while you make the topping.
- Make the crumble topping: In another bowl, combine 1 cup oats, 1/2 cup flour, 1/2 cup brown sugar, 1/2 teaspoon cinnamon, and a pinch of salt. Pour in the melted butter and stir until everything is moistened and clumpy. Set aside.
- Melt the caramel: In a small saucepan over low heat, combine the unwrapped caramels and heavy cream. Stir constantly until smooth and fully melted, about 5 minutes. Alternatively, microwave in 30-second bursts, stirring each time.
- Assemble the bars: Spread the apple mixture evenly over the pre-baked crust. Drizzle about half of the melted caramel over the apples. Sprinkle the crumble topping evenly over everything, pressing down gently.
- Bake: Place the pan in the oven and bake for 35-40 minutes, until the topping is golden brown and the apple filling is bubbling around the edges. Let the bars cool in the pan on a wire rack for at least 20 minutes before drizzling the remaining caramel on top.
- Cool completely: Let them cool for at least 2 hours at room temperature, or pop them in the fridge for 45 minutes. Once set, lift the bars out using the parchment paper and cut into squares.
Notes
Don’t skip the lemon juice—it balances the sweetness. Keep butter cold for the crust. Watch the caramel closely to avoid burning. Use a sharp knife to cut bars. Let them cool completely before cutting to prevent them from falling apart.
Nutrition
- Serving Size: 1 bar
- Calories: 380
- Sugar: 32
- Sodium: 180
- Fat: 18
- Saturated Fat: 11
- Carbohydrates: 52
- Fiber: 3
- Protein: 4
Keywords: caramel apple crumble bars, apple bars, crumble bars, fall dessert, apple dessert, caramel apple, easy dessert


