Love this? Save it for later!
Share the inspiration with your friends
The power went out halfway through my first attempt at making a proper apple crisp. It was a Tuesday evening in late October, the kind of damp, chilly night where the air smells like wet leaves and woodsmoke. I’d just moved into my first apartment with a real oven, and I was determined to make something that felt like home. The problem? I’d forgotten to check if the baking dish I bought actually fit in the oven. It didn’t. So there I was, standing in a dark kitchen, holding a bowl of sliced apples and brown sugar, with no oven and a serious case of rookie energy.
I could have given up and ordered takeout. Honestly, I almost did. But that bowl of apples looked so promising, and I had this stubborn idea that I could figure it out. I ended up cooking the filling on the stovetop in a cast iron skillet, then broiling the oat topping under the oven’s weak broiler in a separate pan. It was messy. The topping got a little too dark in one corner. But when I finally sat down with that warm, imperfect bowl of brown sugar apple crisp, I knew I was onto something special. The apples were tender and saucy, the brown sugar had turned into this deep, almost buttery caramel, and the oat crumble was crunchy and sweet in all the right ways.
Maybe you’ve been there, standing in your own kitchen with a half-baked idea and no clear plan. That’s how this cozy brown sugar apple crisp was born, not from perfection, but from a happy accident and a refusal to give up. It is the kind of dessert that makes your kitchen smell like a hug, and it has become my go-to for those nights when you just need something warm and comforting. I’ve been making it for years now, tweaking it here and there, and I’m finally ready to share the version that never fails.
Why You’ll Love This Recipe
This brown sugar apple crisp is not just another apple dessert. It is the one that will make you close your eyes after the first bite. I’ve tested this recipe more times than I can count, and I can tell you with confidence that it delivers every single time. Here is why it deserves a permanent spot in your recipe collection:
- Quick & Easy: Comes together in under an hour, with just 15 minutes of active prep. Perfect for those evenings when a craving hits out of nowhere.
- Simple Ingredients: No fancy grocery trips needed. You likely have everything in your pantry right now, except maybe the apples.
- Perfect for Cozy Nights: Great for fall gatherings, holiday dinners, or a quiet Tuesday when you need a little comfort.
- Crowd-Pleaser: Always gets rave reviews from kids and adults alike. I’ve brought it to potlucks and watched it disappear before the pumpkin pie.
- Unbelievably Delicious: The texture is next-level, with tender, saucy apples and a crunchy oat topping that stays crisp even the next day.
What makes this recipe different from the rest is the technique. Instead of just tossing apples with sugar and flour, I cook the filling briefly on the stovetop to concentrate the flavors and thicken the juices naturally. This means no runny, watery crisp, just a perfect, jammy apple filling that holds its own. The brown sugar gets a chance to caramelize slightly, creating that deep, almost molasses-like flavor that pairs so beautifully with the tart apples.
This recipe isn’t just good, it is the kind that makes you feel like you’ve wrapped yourself in a warm blanket. It is comfort food reimagined, simpler and faster, but with the same soul-soothing satisfaction. Perfect for impressing guests without stress, or turning a simple evening into something memorable.
What Ingredients You Will Need
This recipe uses simple, wholesome ingredients to deliver bold flavor and satisfying texture without the fuss. Most of these are pantry staples, so you can whip this up anytime the mood strikes.
For the Apple Filling
- 6 medium apples, peeled, cored, and sliced into 1/4-inch thick slices (I recommend a mix of Granny Smith and Honeycrisp for the best balance of tart and sweet)
- 1/2 cup packed light brown sugar (adds deep caramel notes)
- 2 tablespoons granulated sugar
- 1 tablespoon lemon juice (fresh squeezed is best, it keeps the apples from browning and brightens the flavor)
- 1 teaspoon ground cinnamon
- 1/4 teaspoon ground nutmeg (freshly grated if you have it)
- 1/4 teaspoon salt
- 2 tablespoons unsalted butter, cut into small cubes
- 1 tablespoon cornstarch mixed with 2 tablespoons cold water (cornstarch slurry)
For the Oat Crumble Topping
- 1 cup old-fashioned rolled oats (not quick oats, they get mushy)
- 1/2 cup all-purpose flour (or use a gluten-free 1:1 blend if needed)
- 1/2 cup packed light brown sugar
- 1/2 teaspoon ground cinnamon
- 1/4 teaspoon salt
- 1/2 cup unsalted butter, cold and cut into small cubes
- 1/2 cup chopped pecans or walnuts (optional, but highly recommended for extra crunch)
I personally prefer using Granny Smith apples for their firm texture and tartness, which balances the sweetness of the brown sugar perfectly. If you only have sweet apples like Fuji or Gala, reduce the brown sugar by a couple of tablespoons. For a dairy-free version, use coconut oil or a plant-based butter alternative in both the filling and the topping. Just make sure it is cold for the crumble.
Equipment Needed
You don’t need a lot of fancy tools for this recipe, which is part of its charm. Here is what you will need:
- 8×8-inch baking dish (or a 9-inch square dish, or a 2-quart baking dish)
- Large skillet (for cooking the apple filling, a 10-inch cast iron works beautifully)
- Mixing bowls (one large, one medium)
- Sharp knife and cutting board
- Measuring cups and spoons
- Wooden spoon or silicone spatula
- Pastry cutter or two forks (for cutting butter into the oat mixture)
- Aluminum foil (for tenting the crisp if the topping browns too quickly)
If you don’t have a pastry cutter, don’t worry. You can use two knives or even your fingertips to work the cold butter into the oat mixture. Just work quickly so the butter doesn’t warm up. I’ve also used a food processor in a pinch, just pulse a few times until the mixture looks like coarse sand. The key is keeping that butter cold for a flaky, crunchy topping.
Preparation Method
Let me walk you through this step by step. Trust me, it is easier than you think, and the result is absolutely worth it.
- Preheat your oven to 375°F (190°C). Position the rack in the center of the oven. This ensures even baking.
- Prepare the apple filling. In a large skillet over medium heat, melt the 2 tablespoons of butter. Add the sliced apples, brown sugar, granulated sugar, lemon juice, cinnamon, nutmeg, and salt. Stir everything together until the apples are well coated. Cook for about 5-7 minutes, stirring occasionally, until the apples start to soften and release their juices. You will see the mixture become bubbly and fragrant.
- Thicken the filling. Give your cornstarch slurry a quick stir and pour it into the skillet. Continue cooking for another 2-3 minutes, stirring constantly. The liquid will thicken and become glossy, coating the apples nicely. Remove from heat and set aside.
- Make the oat crumble topping. In a medium mixing bowl, combine the rolled oats, flour, brown sugar, cinnamon, and salt. Whisk together until evenly mixed. Add the cold butter cubes and use a pastry cutter or your fingertips to cut the butter into the dry ingredients. You are looking for a mixture that resembles coarse sand with some pea-sized butter pieces remaining. If you are using nuts, fold them in now.
- Assemble the crisp. Pour the cooked apple filling into your prepared baking dish. Spread it out into an even layer. Sprinkle the oat crumble topping evenly over the apples. Don’t press it down, just let it rest on top in a nice, craggy layer.
- Bake the crisp. Place the dish on a baking sheet to catch any drips (trust me on this). Bake for 30-35 minutes, until the topping is golden brown and the filling is bubbly around the edges. If the topping is browning too quickly, tent the dish loosely with aluminum foil for the last 10 minutes.
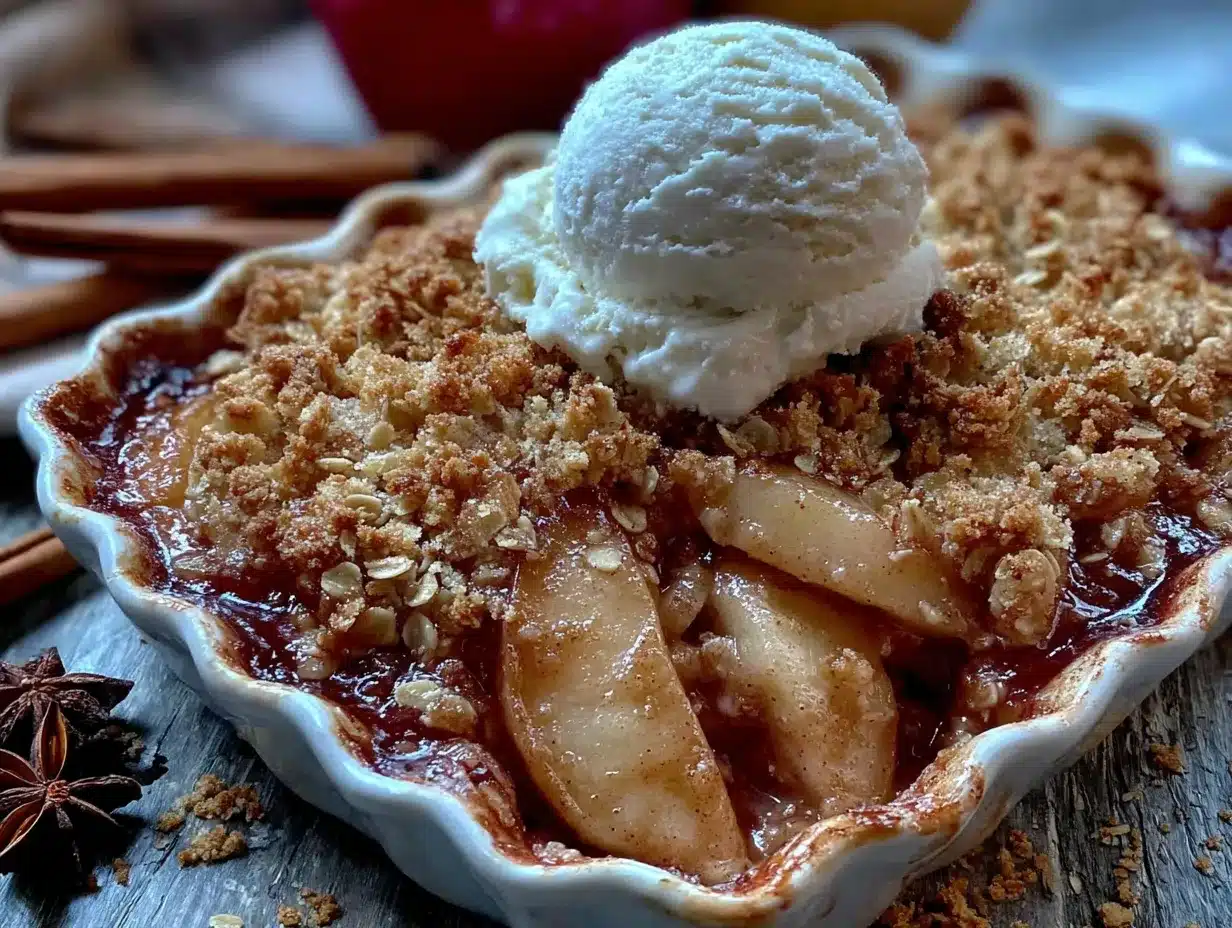
- Cool and serve. Let the crisp cool on a wire rack for at least 15 minutes before serving. This allows the filling to set up a bit. Serve warm, preferably with a scoop of vanilla ice cream or a drizzle of heavy cream.
The apples should be tender but not mushy, and the topping should be crunchy and golden. If you insert a knife into the center, it should slide through the apples easily. The filling will be thick and jammy, not watery. That is how you know it is perfect.
Cooking Tips & Techniques
I’ve made this brown sugar apple crisp more times than I can count, and I’ve learned a few things along the way. Here are my best tips for success:
- Don’t skip the stovetop step. I know it is tempting to just toss everything in the dish and bake, but cooking the filling first concentrates the flavors and prevents a watery crisp. It only takes 10 minutes, and it makes a huge difference.
- Use cold butter for the topping. This is non-negotiable. Cold butter creates steam pockets as it melts in the oven, which gives you that flaky, crunchy texture. If the butter is warm, you will end up with a dense, greasy topping.
- Mix your apple varieties. Using a mix of tart and sweet apples gives you a more complex flavor. Granny Smith for tartness, Honeycrisp for sweetness and texture, and maybe a Fuji for extra juiciness. Don’t use Red Delicious, they turn into mush.
- Let it rest before serving. I know it is hard to wait, but letting the crisp cool for 15-20 minutes allows the filling to set. If you dig in right away, you will end up with a soupy mess. Patience pays off.
- Watch the topping. Every oven is different. Check your crisp at the 25-minute mark. If the topping is already dark, tent it with foil for the remaining time. You want it golden brown, not burnt.
I once forgot to add the cornstarch slurry and ended up with a delicious but very soupy apple crisp. It was still good, but it didn’t have that perfect, jammy texture. Learn from my mistake, that slurry is important!
Variations & Adaptations
This recipe is wonderfully adaptable. Here are some of my favorite ways to change it up:
- Gluten-Free Version: Replace the all-purpose flour with a 1:1 gluten-free baking blend. The topping will be slightly more crumbly but still delicious. Make sure your oats are certified gluten-free if needed.
- Vegan Option: Use coconut oil or a plant-based butter alternative in both the filling and the topping. I like using refined coconut oil for a neutral flavor. The texture will be slightly different, but still very satisfying.
- Seasonal Fruit Swap: In the summer, try this with peaches, nectarines, or a mix of berries. In the winter, pears work beautifully. Just adjust the sugar based on the sweetness of the fruit. For pears, use slightly less sugar.
- Spice It Up: Add a pinch of cardamom, ginger, or allspice to the filling for a warmer, more complex flavor. A teaspoon of vanilla extract added to the filling is also lovely.
- Nut-Free Version: Simply omit the nuts from the topping. The crisp will still be crunchy and delicious. You can also add an extra 1/4 cup of oats to make up for the volume.
I once made a version with pears and a splash of bourbon in the filling. It was ridiculously good for a cold winter night. Don’t be afraid to experiment!
Serving & Storage Suggestions
This brown sugar apple crisp is best served warm, straight from the oven. The contrast between the warm, tender apples and the cold, creamy ice cream is pure magic. Here is how I like to serve and store it:
- Serving Temperature: Serve warm, but not piping hot. Let it rest for 15-20 minutes after baking. A scoop of vanilla bean ice cream or a dollop of lightly sweetened whipped cream is the classic pairing. For something different, try a drizzle of salted caramel sauce or a spoonful of Greek yogurt.
- Complementary Dishes: This crisp is wonderful on its own, but it also pairs beautifully with a cup of hot coffee or a glass of cold milk. For a full fall dessert spread, serve it alongside a pumpkin cheesecake or a slice of spiced apple cake.
- Storage: Cover the baking dish tightly with plastic wrap or aluminum foil and store in the refrigerator for up to 4 days. The topping will soften over time, but the flavor will still be amazing.
- Reheating: To restore some of the crunch, reheat individual portions in a 350°F oven for 10-15 minutes, or in the microwave for 30-60 seconds. The oven method is better for texture. You can also reheat the whole dish, covered, at 325°F for 20 minutes.
- Freezing: You can freeze the unbaked crisp for up to 3 months. Assemble the crisp in a freezer-safe dish, but do not bake. Wrap tightly in plastic wrap and then foil. To bake, thaw overnight in the refrigerator, then bake as directed, adding 10-15 minutes to the baking time.
The flavors actually develop and deepen after a day in the fridge. I sometimes make this a day ahead on purpose, just let it cool completely, cover, and refrigerate. Reheat before serving. It is almost better the next day.
Nutritional Information & Benefits
While this is definitely a treat, it does have some redeeming qualities. Here is a rough estimate of the nutritional information per serving (based on 8 servings):
- Calories: Approximately 380
- Fat: 18g
- Carbohydrates: 55g
- Fiber: 5g
- Sugar: 38g
- Protein: 4g
Apples are a great source of fiber and vitamin C, and oats provide soluble fiber that is good for heart health. The nuts add healthy fats and a bit of protein. Of course, this is still a dessert, so enjoy it in moderation. But honestly, a little bit of comfort food is good for the soul.
For those with dietary restrictions, this recipe can be made gluten-free and vegan with the substitutions mentioned above. It is naturally nut-free if you omit the pecans. Always check your labels if you have specific allergies.
Conclusion
This cozy brown sugar apple crisp with oat crumble is more than just a dessert. It is a warm hug on a cold day, a slice of nostalgia, and a reminder that simple things can be the most satisfying. It is the recipe I turn to when I need a little comfort, when I want to fill my kitchen with that incredible smell of cinnamon and baked apples, or when I want to impress someone without a lot of fuss.
I hope you give this recipe a try. Don’t be afraid to make it your own, swap in your favorite apples, add a pinch of extra spice, or go heavy on the crumble topping. That is the beauty of a recipe like this, it is forgiving and adaptable. And honestly, the best version is the one that makes you happy.
If you make this brown sugar apple crisp, I would love to hear about it. Leave a comment below and let me know how it turned out, or share your own twist on the recipe. And if you post a photo on Pinterest, tag me so I can see your beautiful creation. Happy baking, friends!
Frequently Asked Questions
Can I use quick oats instead of old-fashioned rolled oats?
I don’t recommend it. Quick oats are more finely processed and will absorb too much moisture, resulting in a softer, less crunchy topping. Old-fashioned rolled oats give you that nice, hearty texture that holds up during baking.
Do I have to peel the apples?
You don’t have to, but I recommend it for the best texture. The peels can become tough and chewy during baking. If you are in a hurry, you can leave them on, just make sure to wash the apples thoroughly and slice them thinly.
Can I make this in advance?
Absolutely. You can assemble the crisp completely, cover it, and refrigerate it for up to 24 hours before baking. You may need to add 5-10 minutes to the baking time since the filling will be cold. You can also bake it a day ahead and reheat it.
Why is my apple crisp watery?
This usually happens when the apples release too much liquid during baking. To prevent this, always cook the filling on the stovetop first to concentrate the juices and thicken them with the cornstarch slurry. Also, make sure you let the crisp rest after baking so the filling can set.
Can I use a different type of pan?
Yes, you can use a 9-inch square pan, a 2-quart baking dish, or even a 10-inch cast iron skillet. Just keep an eye on the baking time, a wider, shallower dish will cook faster, while a deeper dish may need a few extra minutes.
Pin This Recipe!

Cozy Brown Sugar Apple Crisp with Oat Crumble

This cozy brown sugar apple crisp features tender, saucy apples with a crunchy oat topping. It’s a quick and easy dessert that comes together in under an hour, perfect for fall gatherings or a comforting weeknight treat.
- Prep Time: 15 minutes
- Cook Time: 35 minutes
- Total Time: 50 minutes
- Yield: 8 servings 1x
- Category: Dessert
- Cuisine: American
Ingredients
- 6 medium apples, peeled, cored, and sliced into 1/4-inch thick slices (mix of Granny Smith and Honeycrisp recommended)
- 1/2 cup packed light brown sugar
- 2 tablespoons granulated sugar
- 1 tablespoon lemon juice (fresh squeezed)
- 1 teaspoon ground cinnamon
- 1/4 teaspoon ground nutmeg
- 1/4 teaspoon salt
- 2 tablespoons unsalted butter, cut into small cubes
- 1 tablespoon cornstarch mixed with 2 tablespoons cold water (cornstarch slurry)
- 1 cup old-fashioned rolled oats
- 1/2 cup all-purpose flour
- 1/2 cup packed light brown sugar
- 1/2 teaspoon ground cinnamon
- 1/4 teaspoon salt
- 1/2 cup unsalted butter, cold and cut into small cubes
- 1/2 cup chopped pecans or walnuts (optional)
Instructions
- Preheat your oven to 375°F (190°C). Position the rack in the center of the oven.
- Prepare the apple filling: In a large skillet over medium heat, melt 2 tablespoons of butter. Add the sliced apples, 1/2 cup brown sugar, granulated sugar, lemon juice, 1 teaspoon cinnamon, 1/4 teaspoon nutmeg, and 1/4 teaspoon salt. Stir to coat. Cook for 5-7 minutes, stirring occasionally, until apples start to soften and release juices.
- Thicken the filling: Stir the cornstarch slurry and pour into the skillet. Cook for 2-3 minutes, stirring constantly, until the liquid thickens and becomes glossy. Remove from heat.
- Make the oat crumble topping: In a medium bowl, combine rolled oats, flour, 1/2 cup brown sugar, 1/2 teaspoon cinnamon, and 1/4 teaspoon salt. Whisk to combine. Add cold butter cubes and cut in with a pastry cutter or fingertips until mixture resembles coarse sand with some pea-sized butter pieces. Fold in nuts if using.
- Assemble the crisp: Pour the cooked apple filling into an 8×8-inch baking dish and spread evenly. Sprinkle the oat crumble topping evenly over the apples without pressing down.
- Bake: Place the dish on a baking sheet. Bake for 30-35 minutes, until topping is golden brown and filling is bubbly around the edges. If topping browns too quickly, tent loosely with aluminum foil for the last 10 minutes.
- Cool and serve: Let the crisp cool on a wire rack for at least 15 minutes before serving. Serve warm, preferably with vanilla ice cream or a drizzle of heavy cream.
Notes
Don’t skip the stovetop step; it concentrates flavors and prevents a watery crisp. Use cold butter for the topping to ensure a crunchy texture. Mix apple varieties for complex flavor. Let the crisp rest before serving to allow the filling to set. Check the topping at 25 minutes to prevent burning.
Nutrition
- Serving Size: 1 serving
- Calories: 380
- Sugar: 38
- Sodium: 200
- Fat: 18
- Saturated Fat: 10
- Carbohydrates: 55
- Fiber: 5
- Protein: 4
Keywords: apple crisp, brown sugar apple crisp, oat crumble, easy apple dessert, fall dessert, comfort food


