Love this? Save it for later!
Share the inspiration with your friends
I wasn’t trying to reinvent dinner. Honestly, I was just tired. It was a Tuesday, the kind where the afternoon light has that tired-out, dusty look, and I had a hungry five-year-old staring at me from the kitchen table like I was personally responsible for the world’s slowest meal service. I’d stopped by my neighbor Sarah’s house earlier to grab a mail package that got delivered to her by mistake, and the smell of warm butter and toasted tortillas hit me before I even got past her screen door. She was just making a snack for her own kids, nothing fancy. She didn’t even look up from the stove when she said, “Grab a plate if you want one.” That casualness—the fact that she was making something so simple that it barely registered as cooking—stuck with me.
These easy cheese quesadilla dippers for picky eaters are born from that moment. They aren’t a gourmet creation. They’re the opposite of a culinary flex. They are the kind of food you make when you need to get dinner on the table, fast, without a single complaint. I’ve made them for my own kid, for my nephew who claims he hates everything, and for myself on nights when a real meal feels like too much effort. Maybe you’ve been there, standing in front of your fridge, wondering how to turn random ingredients into something that will actually get eaten. That’s where this recipe lives. It’s not about impressing anyone. It’s about getting a warm, cheesy, dippable meal in front of a hungry person without losing your mind.
And you know what? It works. Every single time.
Why You’ll Love This Recipe
Let’s be real for a second. Cooking for picky eaters can feel like a losing battle. You spend time on a meal, and they push it around their plate like it’s a science experiment. These easy cheese quesadilla dippers for picky eaters flip that script. They’re not just kid-friendly; they’re parent-approved for all the right reasons.
- Quick & Easy: From fridge to table in under 15 minutes. No marinating, no complicated steps, no waiting around. This is a lifesaver for busy weeknights or those “I forgot to defrost anything” moments.
- Simple Ingredients: You probably already have everything you need. Tortillas, cheese, a little butter or oil. That’s the core. No fancy grocery trips required.
- Perfect for Picky Eaters: The texture is soft, the flavor is mild and familiar, and the dipping aspect makes it fun. It’s a guaranteed win for kids (and adults) who are skeptical of new foods.
- Crowd-Pleaser: I’ve brought these to playdates and watched them disappear. Kids and adults both love them. They’re the ultimate neutral ground food.
- Unbelievably Delicious: Don’t let the simplicity fool you. The combination of a crispy, buttery exterior with a molten, stretchy cheese interior is pure comfort food magic. It’s simple, but it’s perfect.
What makes this different from just throwing cheese in a tortilla? It’s the technique. I’ve tested the heat level, the type of pan, and the exact amount of cheese to get that perfect melt without burning the tortilla. It’s not just another quesadilla; it’s the one that comes out perfectly golden and gooey every single time. This is the version that makes you close your eyes after that first bite, even if you’re just standing at the kitchen counter eating it.
What Ingredients You Will Need
This recipe is built on a foundation of simple, pantry-friendly ingredients. Each one plays a specific role in creating that perfect dipper experience. Don’t overthink it—just grab what you have.
- Flour Tortillas (8-inch): These are your vessel. I prefer medium-sized flour tortillas because they’re sturdy enough to hold the cheese but thin enough to get crispy. Corn tortillas work too, but they’re smaller and have a different texture. For the best results, I use Mission or Old El Paso brand flour tortillas. (Look for ones that are pliable, not stiff or cracked.)
- Shredded Cheddar Cheese (1 cup): The star of the show. Sharp cheddar gives you the most flavor, but mild cheddar works perfectly for sensitive palates. Pre-shredded cheese is fine in a pinch, but freshly shredded melts more smoothly because it doesn’t have the anti-caking coating. (Pro tip: Shred it yourself if you have five extra minutes.)
- Shredded Mozzarella Cheese (1/2 cup): This is the secret to that amazing stretch. Mozzarella adds a mild, milky flavor and gives the dippers that pull-apart quality that kids love. A low-moisture mozzarella works best.
- Butter (2 tablespoons, softened): For spreading on the outside of the tortillas. It’s what gives you that golden, crispy, restaurant-style finish. You can use salted or unsalted—both work. I prefer salted for a little extra flavor.
- Optional: Cooking Spray or Oil: If you want to skip the butter, a light spray of avocado oil or a drizzle of olive oil in the pan works too. The tortillas won’t be quite as rich, but they’ll still get crispy.
- For Dipping: This is where you get creative. Salsa (mild or medium), sour cream, guacamole, or even a simple warm queso are all excellent choices. For picky eaters, a small bowl of ketchup or ranch dressing can be the gateway to trying the quesadilla itself.
If you’re feeling adventurous, you can add a pinch of garlic powder or onion powder to the cheese mix, but honestly, the beauty of this recipe is its simplicity. Let the cheese and the crispy tortilla do the talking.
Equipment Needed
You don’t need a fancy kitchen to make these easy cheese quesadilla dippers for picky eaters. Most of this stuff is probably already in your drawers and cabinets. Here’s what you’ll need:
- Large Non-Stick Skillet or Griddle (10-12 inch): This is your best friend for quesadillas. The non-stick surface prevents the tortilla from sticking and helps it brown evenly. I’ve used a cast-iron skillet too, but you have to watch it more carefully to avoid burning. A good non-stick pan makes this recipe foolproof.
- Spatula: A wide, thin metal or silicone spatula is perfect for flipping. A fish spatula works great because it’s flexible and thin, making it easy to slide under the quesadilla without tearing it.
- Cutting Board and Sharp Knife or Pizza Cutter: For slicing the finished quesadillas into dippers. A pizza cutter is honestly the easiest tool for the job—one smooth roll and you have perfect strips. If you’re using a knife, a chef’s knife or a serrated bread knife works well.
- Mixing Bowl: Just a small one for combining your shredded cheeses.
- Butter Knife or Spatula: For spreading that thin layer of butter on the tortillas.
- Measuring Cups and Spoons: For the cheese and butter. Eyeballing it works too, but measuring helps with consistency.
- Paper Towels: For draining any excess oil or butter after cooking, and for clean-up.
If you don’t have a non-stick skillet, you can use a well-seasoned cast iron pan or even a griddle. Just add a little extra butter or oil to prevent sticking. Honestly, the most important tool is a good spatula. I learned that the hard way after a few torn tortillas.
Preparation Method
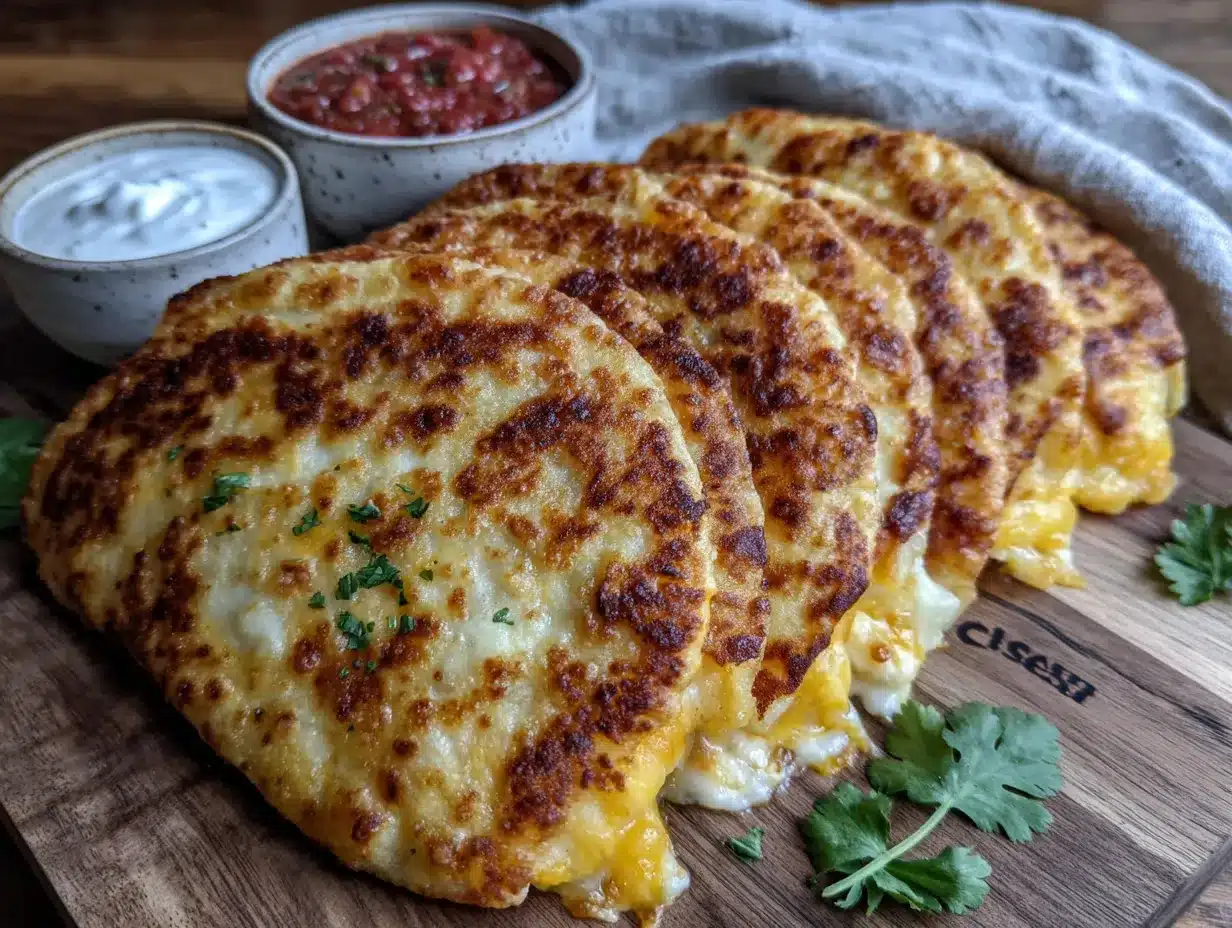
Alright, let’s get cooking. This is the easy part. Follow these steps, and you’ll have a plate of perfect dippers in no time. I’ve included all the little details I’ve learned from making these a hundred times.
- Prep Your Cheese (2 minutes): If you’re shredding your own cheese, do it now. Combine 1 cup of shredded cheddar and 1/2 cup of shredded mozzarella in a small bowl and toss them together. This ensures you get a mix of both cheeses in every bite. If you’re using pre-shredded, just dump it in the bowl and give it a stir.
- Butter the Tortillas (3 minutes): Take your softened butter and spread a very thin, even layer on one side of each tortilla. Don’t go overboard—you don’t want a greasy mess. Just a light coating. I use a butter knife and spread it from the center out to the edges. This step is non-negotiable for that perfect golden crust.
- Heat Your Pan (1 minute): Place your non-stick skillet over medium heat. Let it warm up for about a minute. You want it hot, but not screaming hot. If you drop a tiny piece of cheese in the pan, it should sizzle gently, not burn immediately. Medium heat is the sweet spot.
- Assemble the Quesadilla (1 minute): Place one tortilla, butter-side down, in the warm skillet. Immediately sprinkle about 1/2 cup of the cheese mixture evenly over the entire surface of the tortilla. Don’t pile it all in the center—spread it out to the edges so every dipper gets some cheese. Place the second tortilla on top, butter-side up.
- Cook the First Side (2-3 minutes): Let the quesadilla cook undisturbed for 2-3 minutes. You’ll see the bottom turning golden brown through the sides of the tortilla. The cheese should be starting to melt. Don’t be tempted to peek too early; let it get that nice crust.
- Flip and Cook the Second Side (2-3 minutes): Carefully slide your spatula under the quesadilla. It should feel firm. Flip it in one confident motion. Cook for another 2-3 minutes, until the second side is golden brown and the cheese is fully melted and gooey. If you see cheese oozing out the sides, that’s a good sign.
- Rest and Slice (2 minutes): Transfer the cooked quesadilla to your cutting board. Let it rest for about a minute. This allows the cheese to set slightly, so it doesn’t all pour out when you cut it. Use your pizza cutter or knife to slice it into strips. I usually cut it into 4 or 5 strips, each about 1.5 inches wide. These are your dippers.
- Repeat for Remaining Quesadillas: You can usually make two full quesadillas with this recipe, which gives you about 8-10 dippers. Just repeat the process. You don’t need to wipe out the pan between batches unless there are burnt bits.
- Serve Immediately: Arrange the dippers on a plate with your chosen dipping sauces. Serve them while they’re warm and the cheese is still stretchy. That’s the magic moment.
Troubleshooting Tip: If your tortilla is browning too fast but the cheese isn’t melted, your heat is too high. Turn it down to medium-low and give the cheese more time. If the tortilla is pale and soft after 4 minutes, your heat is too low. Crank it up just a notch.
Cooking Tips & Techniques
I’ve made a lot of quesadillas, and I’ve made every mistake in the book. Here’s what I’ve learned so you don’t have to make the same errors. These tips will take your easy cheese quesadilla dippers for picky eaters from good to perfect.
- Low and Slow (ish): Medium heat is your friend. High heat burns the tortilla before the cheese has a chance to melt. Low heat makes the tortilla tough and dry. Medium gives you that perfect window where the outside gets crispy and the inside gets molten at the same time.
- Don’t Overstuff: It’s tempting to pile on the cheese, but too much filling makes the quesadilla hard to flip and causes the cheese to spill out everywhere. A generous, even layer is all you need. Trust me, I’ve made a mess of my stovetop learning this lesson.
- The Weight Trick: If your quesadilla is puffing up in the middle and not cooking evenly, gently press down on it with your spatula while it cooks. This ensures even contact with the pan and helps the cheese melt uniformly. It also gives you a more even golden crust.
- Let It Rest: That one-minute rest on the cutting board isn’t just for show. If you cut into a quesadilla right out of the pan, the molten cheese will ooze out and you’ll have a sad, empty shell. Letting it rest allows the cheese to firm up just enough to stay put when you slice it.
- Batch Cooking: If you’re feeding a crowd, you can keep cooked quesadillas warm in a 200°F (93°C) oven on a baking sheet. Just place them in a single layer. Don’t stack them, or they’ll get soggy. This is a lifesaver for playdates or family movie nights.
- Clean Your Pan: Between batches, if you see any burnt cheese bits stuck to the pan, wipe it out with a paper towel. Burnt bits will stick to your next quesadilla and give it a bitter flavor. A clean pan is a happy pan.
Variations & Adaptations
One of the best things about this recipe is how easily it adapts. Once you have the basic technique down, you can customize it a hundred different ways. Here are a few of my favorite variations that still keep things picky-eater friendly.
- The “Hidden Veggie” Dipper: Finely grate a small carrot or zucchini and squeeze out the excess moisture with a paper towel. Sprinkle a tablespoon of it over the cheese before cooking. The flavor is undetectable, but you’ve snuck in a little extra nutrition. My kid has no idea.
- The Protein Boost: Add a layer of thinly sliced deli turkey or rotisserie chicken. Just make sure it’s shredded or sliced thin so it doesn’t create lumps. Leftover taco meat works beautifully too. It turns a snack into a more substantial meal.
- The Slightly Spicy Version: For kids (or adults) who are ready for a little kick, add a pinch of smoked paprika or a tiny sprinkle of chili powder to the cheese mix. Or, serve it with a mild salsa verde for dipping instead of plain salsa. It’s a gentle introduction to heat.
- The Bean & Cheese: Spread a thin layer of refried beans on one tortilla before adding the cheese. This adds fiber and a creamy texture without changing the flavor profile too much. Black beans (mashed slightly) work great too.
- The Breakfast Dipper: Swap the cheddar for a mix of mozzarella and a mild gouda. Serve with a side of warm maple syrup for dipping. It sounds weird, but the sweet and savory combo is incredible. My nephew calls them “breakfast sticks.”
I once tried a version with sun-dried tomatoes and feta for myself. It was delicious, but my kid looked at it like I’d served him a science project. The beauty of this base recipe is that you can make the plain version for the picky eaters and a fancier version for yourself using the exact same method.
Serving & Storage Suggestions
These dippers are best enjoyed fresh and hot, but I know life happens. Here’s how to serve them for maximum enjoyment and how to handle leftovers.
Serving: Serve the quesadilla dippers immediately after slicing, while the cheese is still warm and stretchy. Arrange them on a plate in a fan pattern or a little pile. The dipping sauce is the star of the show here. For picky eaters, I recommend serving a small bowl of mild salsa or sour cream on the side. For a more complete meal, pair them with a simple side of black beans, a small salad, or some sliced avocado. They also go great with a bowl of tomato soup for dipping—it’s like a grilled cheese, but dippier.
Storage: If you have leftovers (unlikely, but possible), let the dippers cool completely to room temperature. Place them in a single layer in an airtight container, separated by pieces of parchment paper so they don’t stick together. They will keep in the refrigerator for up to 3 days.
Reheating: The best way to reheat them is in a dry skillet over medium-low heat. Just put them back in the pan for about 1-2 minutes per side. This restores the crispiness. You can also use an air fryer at 350°F (175°C) for 3-4 minutes. Avoid the microwave—it makes the tortillas soggy and the cheese rubbery. I’ve made that mistake, and it’s just sad.
Freezing: You can freeze the cooked and cooled dippers. Place them in a single layer on a baking sheet and freeze until solid (about 1 hour). Then transfer them to a freezer-safe bag or container. They will keep for up to 2 months. Reheat from frozen in a skillet or air fryer, adding a couple of extra minutes to the cooking time.
The flavors are best right after cooking, but honestly, even cold quesadilla strips are pretty good straight from the fridge. Not that I would know anything about that.
Nutritional Information & Benefits
Let’s talk numbers. These easy cheese quesadilla dippers for picky eaters are a comfort food, but they’re not a nutritional disaster. Here’s a rough estimate for one serving (about 4-5 dippers, made with the recipe as written).
- Calories: Approximately 350-400
- Protein: 18-22 grams
- Fat: 20-25 grams
- Carbohydrates: 25-30 grams
- Fiber: 2-3 grams
- Calcium: 400-500 mg (a significant boost for bone health)
Health Benefits: The cheese provides a good source of calcium and protein, which are essential for growing kids (and for maintaining strong bones in adults). Tortillas offer carbohydrates for energy. If you use whole wheat tortillas, you’ll add a few grams of fiber. The mozzarella adds a bit of protein without being too heavy.
Dietary Considerations: This recipe is vegetarian. For a gluten-free option, use certified gluten-free tortillas. For a lower-fat version, use reduced-fat cheese and skip the butter on the outside (just use cooking spray). For a dairy-free version, use plant-based cheese shreds (though the melt won’t be quite the same). The main allergen here is dairy (milk) and gluten (wheat).
Look, this isn’t a health food. It’s a comfort food. But it’s a comfort food that can be part of a balanced diet, especially when you pair it with a side of veggies or fruit. It’s about making peace with feeding your family something they’ll actually eat.
Conclusion
These easy cheese quesadilla dippers for picky eaters are more than just a recipe—they’re a solution. They’re the answer to that 5 PM scramble when everyone is hungry and you’re out of ideas. They’re the peace offering at a table full of skeptical faces. They’re the snack that turns into dinner, and the dinner that doesn’t cause a meltdown.
I love this recipe because it’s honest. It doesn’t pretend to be something it’s not. It’s simple, it’s fast, and it works. It’s the kind of food that makes you feel like a good cook without any of the stress. I hope you make it on a Tuesday when you need a win, or on a Saturday when you just want something warm and cheesy. I hope you customize it, dip it in your favorite sauce, and eat it while it’s hot.
Now I want to hear from you! Have you tried these dippers? What’s your family’s favorite dipping sauce? Did you sneak in any hidden veggies? Drop a comment below and let me know. And if you loved this recipe, share it with a friend who needs a little kitchen win today. Happy cooking!
Frequently Asked Questions
Can I use corn tortillas instead of flour?
Yes, you can! Corn tortillas are smaller and have a different, slightly earthier flavor. They also get crispier faster, so keep an eye on them to prevent burning. They’re a great gluten-free option. Just be aware that they are more prone to cracking when you fold or flip them.
My cheese isn’t melting. What am I doing wrong?
This usually happens if your heat is too low or if you’re using pre-shredded cheese with a lot of anti-caking coating. Try turning the heat up to medium and giving it more time. Next time, try shredding your own cheese from a block—it melts much more smoothly.
How do I keep the dippers from getting soggy?
Sogginess happens when the steam gets trapped. Make sure you cook the quesadilla until it’s golden and crispy on both sides. Let it rest on a cutting board (not on a plate) for a minute before slicing. This allows steam to escape. Also, serve them immediately—they don’t hold up well under a dome or in a closed container.
Can I make these in an air fryer?
Absolutely. Preheat your air fryer to 350°F (175°C). Place the assembled quesadilla in the basket (you might need to cut it in half to fit). Cook for 5-7 minutes, flipping halfway through, until golden and crispy. The air fryer gives a wonderfully even crunch.
What are the best cheeses for a good stretch?
Mozzarella is the king of stretch. It’s what gives you that long, pull-apart cheese pull. A low-moisture part-skim mozzarella works best. You can also use provolone, fontina, or even a mild gouda. Avoid hard cheeses like parmesan for the main filling—they don’t melt well on their own.
Pin This Recipe!

Easy Cheese Quesadilla Dippers: Best Recipe for Picky Eaters

These easy cheese quesadilla dippers are the perfect solution for picky eaters. Made with simple ingredients like flour tortillas, cheddar, and mozzarella, they come together in under 15 minutes for a warm, cheesy, dippable meal that kids and adults love.
- Prep Time: 5 minutes
- Cook Time: 10 minutes
- Total Time: 15 minutes
- Yield: 4 servings 1x
- Category: Main Course
- Cuisine: Mexican
Ingredients
- 4 (8-inch) flour tortillas
- 1 cup shredded cheddar cheese
- 1/2 cup shredded mozzarella cheese
- 2 tablespoons butter, softened
- Optional: cooking spray or oil
- For dipping: salsa, sour cream, guacamole, warm queso, ketchup, or ranch dressing
Instructions
- Prep Your Cheese (2 minutes): If shredding your own cheese, combine 1 cup shredded cheddar and 1/2 cup shredded mozzarella in a small bowl and toss together. If using pre-shredded, just stir.
- Butter the Tortillas (3 minutes): Spread a thin, even layer of softened butter on one side of each tortilla.
- Heat Your Pan (1 minute): Place a large non-stick skillet over medium heat and let it warm up for about a minute.
- Assemble the Quesadilla (1 minute): Place one tortilla, butter-side down, in the warm skillet. Sprinkle about 1/2 cup of the cheese mixture evenly over the tortilla. Place the second tortilla on top, butter-side up.
- Cook the First Side (2-3 minutes): Cook undisturbed until the bottom is golden brown and the cheese starts to melt.
- Flip and Cook the Second Side (2-3 minutes): Carefully flip the quesadilla and cook until the second side is golden brown and the cheese is fully melted.
- Rest and Slice (2 minutes): Transfer to a cutting board and let rest for 1 minute. Slice into 4-5 strips (about 1.5 inches wide) using a pizza cutter or knife.
- Repeat for Remaining Quesadillas: Repeat the process for the second quesadilla.
- Serve Immediately: Arrange dippers on a plate with dipping sauces and serve warm.
Notes
For best results, use medium heat to avoid burning the tortilla before the cheese melts. Let the quesadilla rest for a minute before slicing to prevent cheese from oozing out. If the tortilla browns too quickly, reduce heat. For a gluten-free option, use certified gluten-free tortillas. For a dairy-free version, use plant-based cheese shreds.
Nutrition
- Serving Size: 4-5 dippers
- Calories: 375
- Sugar: 2
- Sodium: 600
- Fat: 22
- Saturated Fat: 12
- Carbohydrates: 28
- Fiber: 2
- Protein: 20
Keywords: cheese quesadilla dippers, easy quesadilla recipe, picky eater dinner, quick weeknight meal, kid-friendly dinner, cheesy dippers


