Love this? Save it for later!
Share the inspiration with your friends
My roommate Jenna asked why I couldn’t just toss the pears in the pan with the cranberries before they went into the oven. I started to explain why that wouldn’t work — then stopped. I honestly had no good reason. It was just the way I’d always done it, a method I’d picked up from some blog post years ago that I’d never questioned.
So I shrugged and said, “Let’s try it your way.” She dumped the sliced Bosc pears and the frozen cranberries into a skillet with some butter and maple syrup, and the smell that filled our tiny apartment kitchen was something else. I mean, it was good. Really good. The tart cranberries started to burst, and the pears softened just enough to get coated in that syrupy glaze. I felt a little silly for being so rigid about a recipe I thought I knew inside out.
That night, the crisp came out of the oven with a topping that was golden and crunchy, but the fruit underneath had this deep, jammy, almost caramelized quality that my old method had never achieved. The flavors had melded together in the pan before they even hit the oven. I took a bite, closed my eyes, and had to admit it — she was right. Maybe you’ve been there, too, convinced that your way is the only way, only to find out a beginner’s instinct was actually genius. This Wholesome Spiced Pear and Cranberry Crisp is the result of that lesson. It’s become my go-to fall dessert, and I keep making it because it proves that sometimes the best cooking happens when you let go of what you think you know.
Why You’ll Love This Recipe
This isn’t just another fruit crisp. This is the one that makes you pause after the first bite and wonder why you ever bothered with fussy pies or complicated cakes. As a recipe developer who’s tested more crisps than I can count, I can tell you this version hits a sweet spot between wholesome and indulgent that’s surprisingly hard to find.
- Naturally Sweetened : There’s no refined sugar in the fruit filling. The sweetness comes from ripe pears and a touch of maple syrup, which means you get that deep, complex sweetness without the sugar crash.
- Simple Ingredients : You probably have most of these in your pantry right now. Oats, flour, butter, and spices — it’s the kind of recipe that saves you when you need a dessert fast.
- Perfect for Fall Gatherings : Whether it’s Thanksgiving, a cozy dinner party, or a random Tuesday when you need comfort, this crisp fits the bill. It’s impressive without being stressful.
- Healthier Comfort Food : The oat topping uses whole grains, and the fruit is packed with fiber and vitamin C. You can feel good about eating it for breakfast the next day — and yes, I’ve done that.
- Foolproof Technique : That pan-cooking trick I mentioned? It eliminates the common problem of watery, undercooked fruit. You get a concentrated, jammy filling every single time.
What makes this recipe different from the dozens of other crisps out there is that it’s been tested by someone who was humbled by a roommate’s simple suggestion. It’s not just another version — it’s the version that made me rethink everything I thought I knew about fruit desserts. The texture is spot-on: tender fruit with a crisp, buttery topping that stays crunchy even the next day. It’s comfort food reimagined — healthier, faster, but with the same soul-soothing satisfaction that makes you close your eyes after that first warm bite.
What Ingredients You Will Need
This recipe uses simple, wholesome ingredients to deliver bold flavor and satisfying texture without the fuss. Most of these are pantry staples, which makes this crisp perfect for those moments when you need a dessert but don’t want to make a special trip to the store.
For the Fruit Filling
- 4 medium ripe but firm Bosc or Anjou pears, cored and sliced into ¼-inch thick slices (about 4 cups) — Bosc pears hold their shape beautifully during cooking
- 1 ½ cups fresh or frozen cranberries (no need to thaw if using frozen) — fresh cranberries have a brighter tartness, but frozen work perfectly
- 3 tablespoons maple syrup (use pure maple syrup, not pancake syrup)
- 1 tablespoon fresh lemon juice (about half a lemon) — this balances the sweetness and keeps the pears from browning
- 1 teaspoon vanilla extract
- 1 tablespoon arrowroot powder or cornstarch — this thickens the juices as the fruit cooks
- ½ teaspoon ground cinnamon
- ¼ teaspoon ground ginger
- ⅛ teaspoon ground cloves
- Pinch of sea salt
For the Crisp Topping
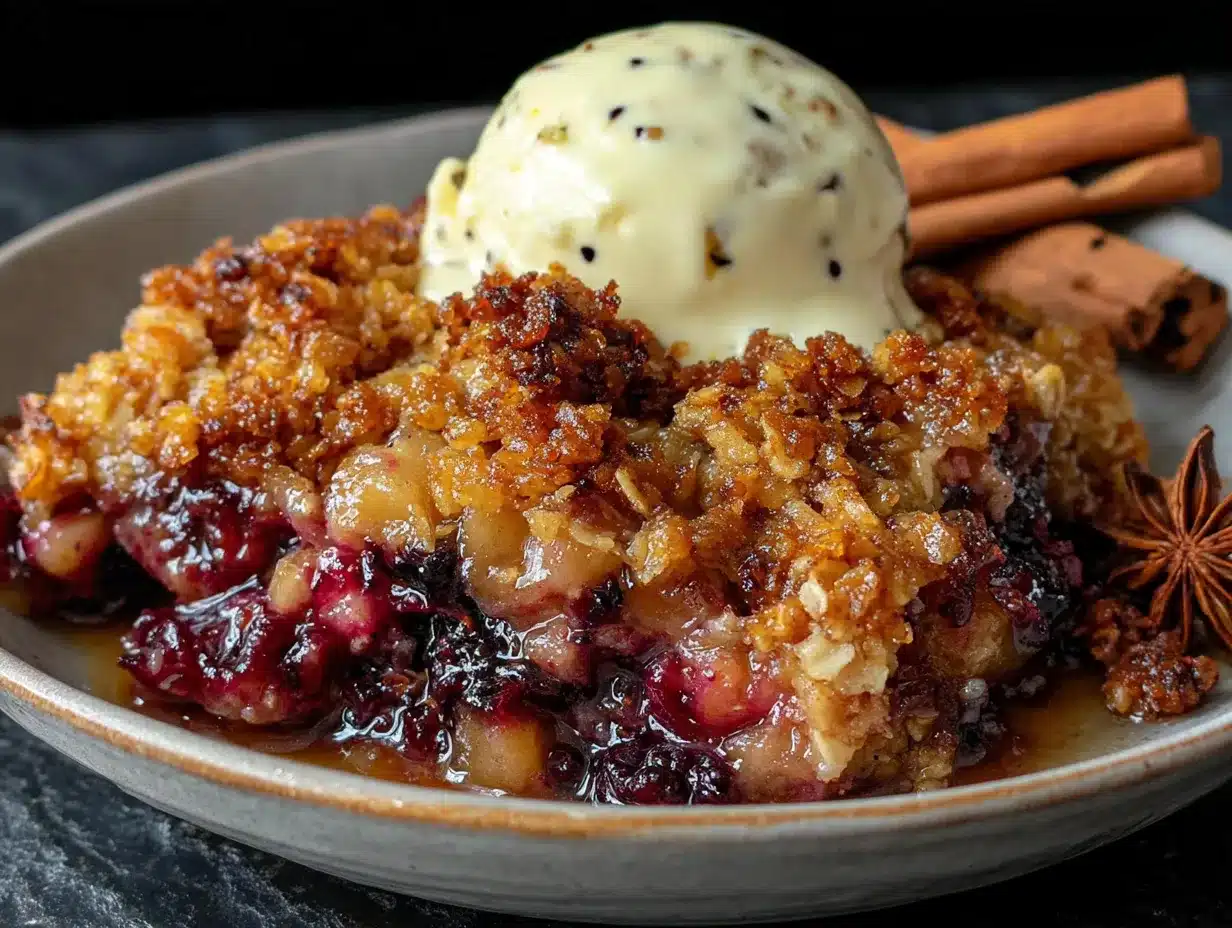
- 1 cup old-fashioned rolled oats (not quick oats) — I prefer Bob’s Red Mill for their hearty texture
- ½ cup whole wheat pastry flour or all-purpose flour — whole wheat pastry flour adds a lovely nuttiness
- ⅓ cup packed light brown sugar
- ½ teaspoon ground cinnamon
- ¼ teaspoon salt
- 6 tablespoons cold unsalted butter, cut into small cubes — you can substitute coconut oil for a dairy-free version
- ½ cup chopped pecans or walnuts (optional, but highly recommended)
A quick note on pears: you want them ripe but still firm. If they’re too soft, they’ll turn to mush during cooking. Give them a gentle squeeze near the stem — they should yield slightly but not feel squishy. For the oats, stick with old-fashioned rolled oats. Quick oats will give you a mushy topping, and steel-cut oats won’t soften enough during baking.
Equipment Needed
You don’t need anything fancy for this recipe, which is part of its charm. Here’s what you’ll need:
- A 9-inch square baking dish or a 2-quart baking dish — glass or ceramic works best because it heats evenly
- A large skillet (10 or 12-inch) for cooking the fruit — I use my trusty cast iron skillet for this
- A medium mixing bowl for the topping
- A sharp knife and cutting board for slicing the pears
- A wooden spoon or spatula for stirring
- A pastry cutter or two forks for cutting the butter into the topping — if you don’t have one, your fingers work just fine
- Measuring cups and spoons
If you don’t have a skillet, you can cook the fruit in a saucepan. The key is having enough surface area for the fruit to cook evenly. And if you’re using a cast iron skillet, you can actually bake the crisp right in it — one less dish to wash!
Preparation Method
- Preheat your oven to 375°F (190°C). Position the rack in the center of the oven. While it’s heating, you can prep everything else.
- Make the fruit filling. In a large skillet over medium heat, melt 1 tablespoon of butter. Add the sliced pears and cook for 3-4 minutes, stirring occasionally, until they start to soften and release some of their juices. You’ll see them turn slightly translucent at the edges.
- Add the cranberries. Toss in the cranberries (frozen is fine), maple syrup, lemon juice, vanilla, cinnamon, ginger, cloves, and salt. Stir everything together and let it cook for another 5-7 minutes. The cranberries will start to pop and release their color, turning the mixture a gorgeous ruby red. The liquid should thicken slightly — that’s the arrowroot powder doing its job.
- Pour the fruit into your baking dish. Spread it evenly. If you’re using a cast iron skillet, you can leave it right in there after cooking — just make sure it’s oven-safe.
- Make the crisp topping. In a medium bowl, combine the oats, flour, brown sugar, cinnamon, and salt. Stir with a fork to break up any lumps in the brown sugar. Add the cold butter cubes and use a pastry cutter or your fingertips to work the butter into the dry ingredients. You’re looking for a texture that resembles coarse meal with some pea-sized butter pieces remaining. If you’re adding nuts, stir them in now.
- Assemble the crisp. Sprinkle the topping evenly over the fruit filling. Don’t press it down — you want it to stay loose so it can crisp up nicely. Try to cover most of the fruit, but a few gaps are fine; they let the fruit bubble up and create those lovely caramelized edges.
- Bake for 30-35 minutes. The crisp is ready when the topping is golden brown and the fruit filling is bubbly around the edges. If the topping is browning too quickly, tent the dish loosely with foil for the last 10 minutes. Let it cool on a wire rack for at least 15 minutes before serving. This is important — the filling needs time to set, and you don’t want to burn your mouth on molten fruit.
A quick sensory check: when it’s done, your kitchen will smell like a fall candle, but better. The topping should feel firm and crunchy when you gently press it with a spoon. The fruit should be bubbling lazily around the edges, and the juices should be thick and syrupy, not watery.
Cooking Tips & Techniques
Here’s the thing about crisps — they seem simple, but a few small details can make the difference between good and unforgettable. I’ve learned these the hard way, through more soggy toppings and watery fillings than I care to admit.
Don’t skip the pan-cooking step. I know it adds an extra pan to wash, but it’s non-negotiable for the best texture. Cooking the fruit first concentrates the flavors and evaporates excess liquid. This means your crisp won’t be swimming in watery juice, and the flavors will be deeper and more complex. Trust me on this one — I learned it from a roommate who knew better than me.
Keep your butter cold. This is the secret to a crunchy topping. If the butter warms up too much, it will melt into the oats instead of creating those little pockets of flaky goodness. If your kitchen is warm, pop the topping in the fridge for 10 minutes before baking.
Watch your oven. Every oven runs a little differently. Start checking your crisp at the 25-minute mark. If the topping looks golden but the fruit isn’t bubbling yet, give it another 5 minutes. If the topping is browning too fast, cover it loosely with foil.
Let it rest. I know it’s tempting to dig in right away, but letting the crisp rest for 15-20 minutes is crucial. The filling will thicken as it cools, and you’ll get cleaner servings. Plus, you won’t burn your tongue. I once served a crisp straight from the oven and watched my guests do the hot-food dance — not my proudest moment.
Variations & Adaptations
One of the best things about this recipe is how flexible it is. Here are some variations I’ve tried and loved:
Gluten-Free Version : Substitute the all-purpose flour with a gluten-free all-purpose blend or almond flour. Bob’s Red Mill 1-to-1 Baking Flour works beautifully here. The oats should be certified gluten-free if that’s a concern.
Dairy-Free Version : Use cold coconut oil or a plant-based butter in the topping. I’ve had great results with Miyoko’s European Style Cultured Vegan Butter — it behaves almost exactly like dairy butter.
Different Fruit Combinations : Try swapping the pears for apples (Honeycrisp or Granny Smith work well) or adding a cup of chopped fresh or frozen rhubarb in the spring. The cooking time stays the same. I once made this with a mix of apples and blackberries, and it was incredible.
Spice It Up : Add a pinch of cardamom or nutmeg to the filling for a different flavor profile. A teaspoon of orange zest instead of lemon zest gives it a lovely citrusy brightness.
Individual Servings : Divide the fruit and topping among 4-6 ramekins and bake for 20-25 minutes. These make for a beautiful presentation at dinner parties, and everyone gets their own crispy edges.
Serving & Storage Suggestions
This crisp is best served warm, when the topping is still crunchy and the fruit is tender and jammy. A scoop of vanilla ice cream or a dollop of lightly sweetened whipped cream is the classic pairing, and for good reason — the cold creaminess against the warm, spiced fruit is pure magic. For a healthier option, try a spoonful of Greek yogurt or a drizzle of coconut cream.
If you have leftovers (which is rare in my house), here’s how to store them. Cover the baking dish tightly with foil or transfer the crisp to an airtight container. It will keep in the refrigerator for up to 4 days. The topping will soften over time, but it’s still delicious — almost like a crumble.
To reheat, place individual portions in a 350°F oven for 10-15 minutes, or microwave for 30-60 seconds. The oven method will help restore some of the topping’s crunch. You can also reheat it in an air fryer at 350°F for 5-7 minutes — I discovered this by accident and it works surprisingly well.
One thing I love about this crisp is that the flavors actually deepen after a day in the fridge. The spices meld with the fruit, and the cranberries become even more jammy. It’s almost better the next day, especially for breakfast with a scoop of yogurt.
Nutritional Information & Benefits
Here’s the estimated nutritional breakdown for one serving (based on 8 servings):
- Calories: 285
- Fat: 12g
- Carbohydrates: 42g
- Fiber: 6g
- Sugar: 22g (naturally occurring from fruit and maple syrup)
- Protein: 4g
This crisp is packed with nutritional benefits. Pears are an excellent source of fiber and vitamin C, and they contain antioxidants that support heart health. Cranberries are known for their high antioxidant content and are great for urinary tract health. The oats provide soluble fiber that helps lower cholesterol, and the nuts (if you add them) offer healthy fats and protein.
From a wellness perspective, this recipe hits that sweet spot of feeling indulgent while actually being pretty good for you. It’s sweet enough to satisfy a dessert craving but balanced enough that you don’t feel guilty having a second serving. That’s the kind of cooking I love — food that nourishes you and makes you happy at the same time.
Conclusion
This Wholesome Spiced Pear and Cranberry Crisp is more than just a dessert — it’s a reminder that the best recipes often come from letting go of rigid rules and listening to fresh ideas. That moment in my kitchen with Jenna taught me something I still carry with me: cooking is supposed to be flexible, fun, and forgiving. This crisp embodies all of that.
Whether you’re making it for a holiday table, a weeknight treat, or just because you have some pears that need using up, I hope this recipe brings you the same warmth and comfort it’s brought me. Don’t be afraid to make it your own — swap in your favorite fruits, adjust the spices, or double the topping (I won’t judge).
I’d love to hear how it turns out for you. Did you try a variation? Did your family love it? Drop a comment below and share your experience. And if you enjoyed this recipe, please share it with a friend who needs a little fall comfort in their life. Happy baking!
Frequently Asked Questions
Can I use canned pears for this recipe?
I don’t recommend it. Canned pears are already cooked and much softer, so they’ll break down too much during baking. Fresh pears give you the best texture and flavor. If you’re in a pinch, you could try very firm, underripe pears — just give them a few extra minutes in the skillet.
Why is my crisp topping soggy?
This usually happens for two reasons: either the fruit released too much liquid, or the topping wasn’t baked long enough. Cooking the fruit in the skillet first helps remove excess moisture. Also, make sure your butter is cold and your oven is fully preheated. If the topping still seems soggy, try baking it for an additional 5-10 minutes uncovered.
Can I make this crisp ahead of time?
Absolutely. You can assemble the entire crisp (without baking) and store it in the refrigerator for up to 24 hours. When you’re ready to bake, add about 10 minutes to the baking time since you’re starting from cold. You can also bake it fully, let it cool, and reheat it the next day — the flavors will be even better.
What’s the best way to slice pears for a crisp?
I like to slice them about ¼-inch thick. Too thin and they’ll turn to mush; too thick and they won’t soften enough during baking. Cut the pear in half lengthwise, remove the core with a melon baller or small spoon, then slice each half crosswise into even pieces. No need to peel them — the skin adds fiber and color.
Can I freeze this crisp?
Yes! Baked crisp freezes beautifully for up to 3 months. Let it cool completely, then wrap the dish tightly in plastic wrap and foil. To serve, thaw overnight in the refrigerator and reheat in a 350°F oven until warmed through. The topping won’t be as crunchy as fresh, but it’s still delicious. I don’t recommend freezing an unbaked crisp — the texture won’t be the same.
Pin This Recipe!
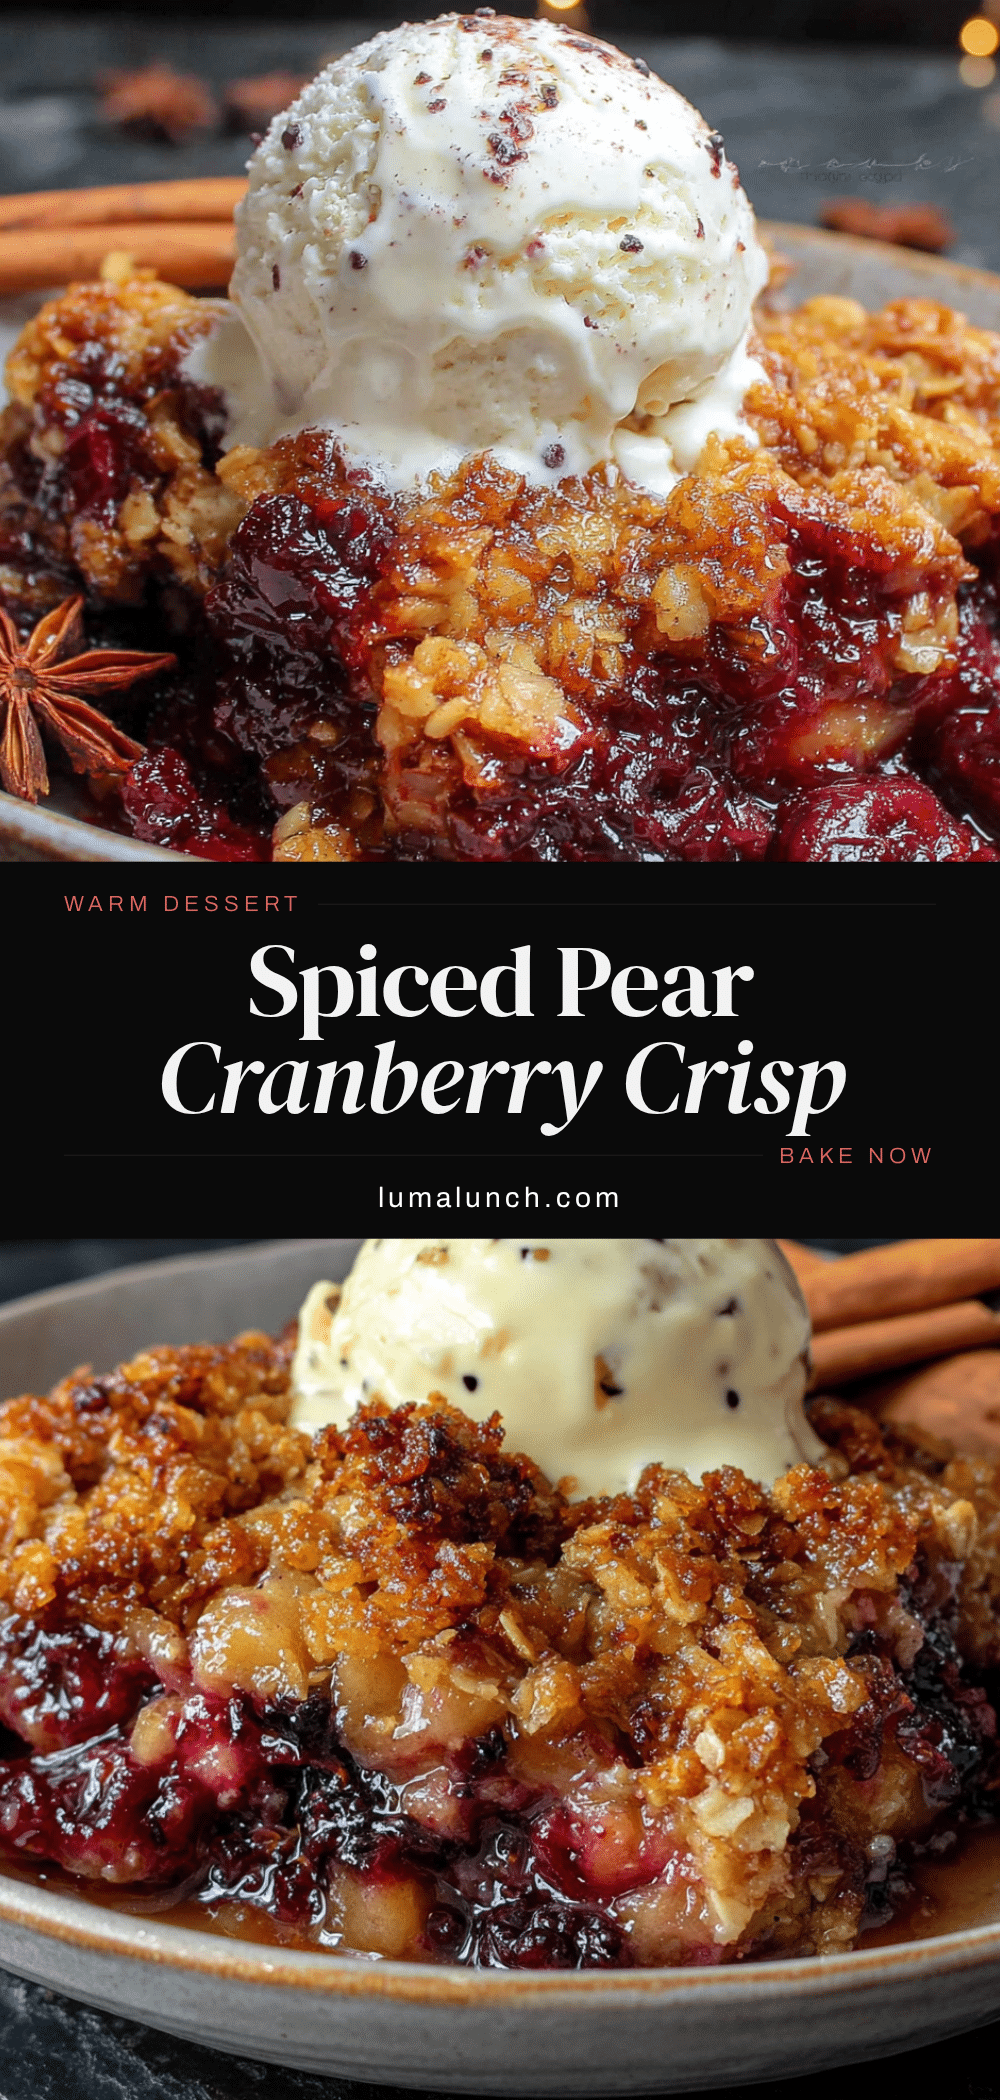
Easy Spiced Pear and Cranberry Crisp Recipe

A wholesome fall dessert featuring tender pears and tart cranberries with a crunchy oat topping, naturally sweetened with maple syrup. This foolproof recipe delivers deep, jammy flavor and is perfect for holiday gatherings or cozy weeknight treats.
- Prep Time: 15 minutes
- Cook Time: 35 minutes
- Total Time: 50 minutes
- Yield: 8 servings 1x
- Category: Dessert
- Cuisine: American
Ingredients
- 4 medium ripe but firm Bosc or Anjou pears, cored and sliced into ¼-inch thick slices (about 4 cups)
- 1 ½ cups fresh or frozen cranberries (no need to thaw if using frozen)
- 3 tablespoons maple syrup (pure maple syrup)
- 1 tablespoon fresh lemon juice (about half a lemon)
- 1 teaspoon vanilla extract
- 1 tablespoon arrowroot powder or cornstarch
- ½ teaspoon ground cinnamon
- ¼ teaspoon ground ginger
- ⅛ teaspoon ground cloves
- Pinch of sea salt
- 1 cup old-fashioned rolled oats (not quick oats)
- ½ cup whole wheat pastry flour or all-purpose flour
- ⅓ cup packed light brown sugar
- ½ teaspoon ground cinnamon
- ¼ teaspoon salt
- 6 tablespoons cold unsalted butter, cut into small cubes (or coconut oil for dairy-free)
- ½ cup chopped pecans or walnuts (optional)
Instructions
- Preheat your oven to 375°F (190°C). Position the rack in the center of the oven.
- Make the fruit filling: In a large skillet over medium heat, melt 1 tablespoon of butter. Add the sliced pears and cook for 3-4 minutes, stirring occasionally, until they start to soften and release some of their juices.
- Add the cranberries, maple syrup, lemon juice, vanilla, cinnamon, ginger, cloves, and salt. Stir together and cook for another 5-7 minutes until the cranberries start to pop and the liquid thickens slightly.
- Pour the fruit into a 9-inch square baking dish or 2-quart baking dish. Spread evenly.
- Make the crisp topping: In a medium bowl, combine the oats, flour, brown sugar, cinnamon, and salt. Stir with a fork to break up lumps. Add the cold butter cubes and use a pastry cutter or your fingertips to work the butter into the dry ingredients until the texture resembles coarse meal with some pea-sized butter pieces. If using nuts, stir them in now.
- Assemble the crisp: Sprinkle the topping evenly over the fruit filling. Do not press it down.
- Bake for 30-35 minutes until the topping is golden brown and the fruit filling is bubbly around the edges. If the topping browns too quickly, tent loosely with foil for the last 10 minutes.
- Let cool on a wire rack for at least 15 minutes before serving.
Notes
Don’t skip the pan-cooking step—it concentrates flavors and prevents a watery filling. Keep butter cold for a crunchy topping. Let the crisp rest for 15-20 minutes before serving to allow the filling to set. For gluten-free, use a gluten-free all-purpose flour blend and certified gluten-free oats. For dairy-free, use cold coconut oil or plant-based butter.
Nutrition
- Serving Size: 1 serving
- Calories: 285
- Sugar: 22
- Fat: 12
- Carbohydrates: 42
- Fiber: 6
- Protein: 4
Keywords: pear crisp, cranberry crisp, spiced pear crisp, fall dessert, healthy crisp, oat topping, maple syrup, easy dessert