Love this? Save it for later!
Share the inspiration with your friends
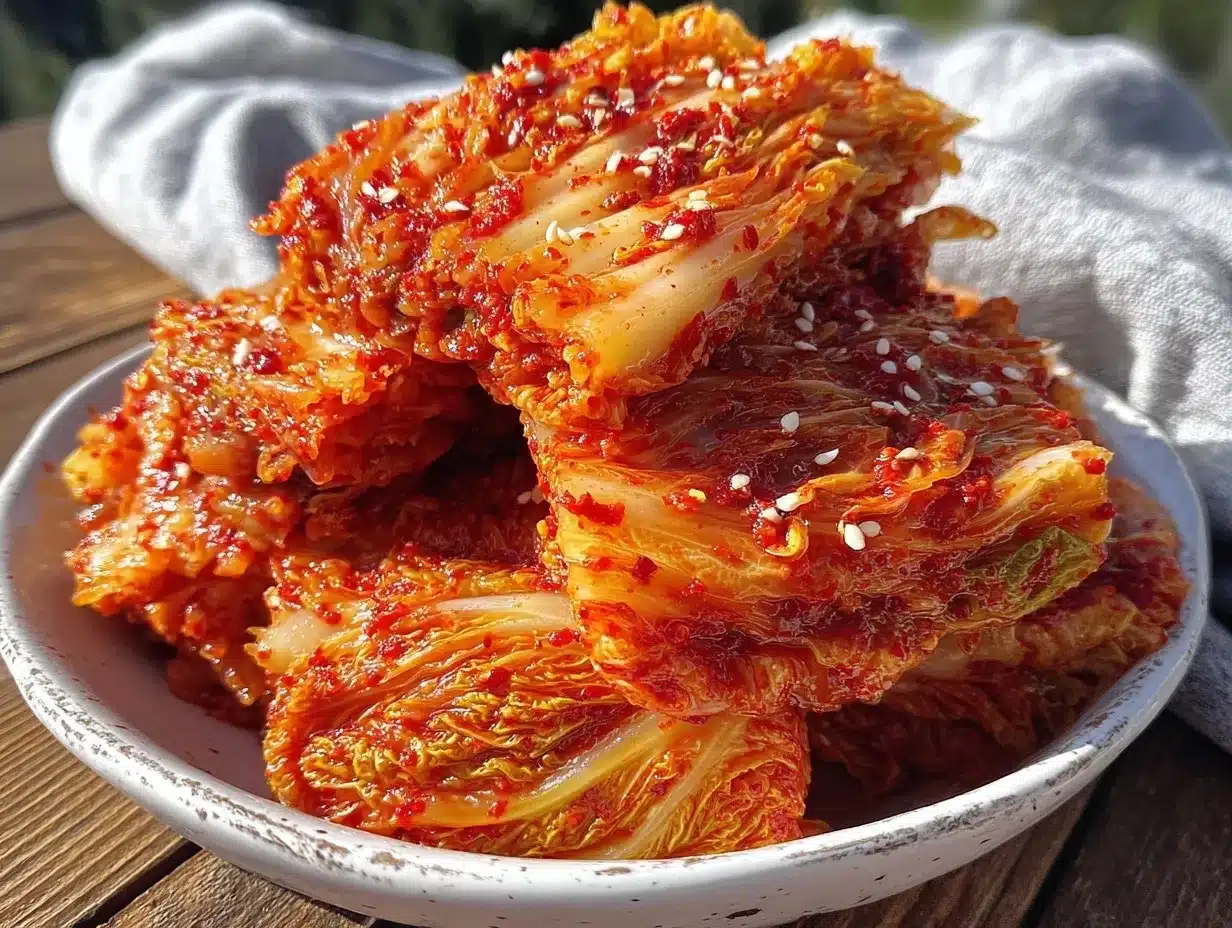
“Are you sure this is going to taste okay?” my friend asked, eyeing the bubbling jar on my countertop with a mix of curiosity and mild suspicion. Honestly, I wasn’t entirely sure myself the first time I made this easy spicy homemade Napa kimchi recipe. I’d stumbled into it late one night after grabbing a head of Napa cabbage on a whim, inspired by a craving for something bold but doable. No complicated ingredients lists, no intimidating fermentation timers—just a dash of heat and a whole lot of flavor, crafted right in my small kitchen.
Kimchi always seemed like one of those recipes reserved for seasoned cooks or those with a dedicated fermentation setup. But this version? It’s straightforward enough that even on a chaotic weekday evening, when I’m juggling a million things, I can whip up a batch that’s spicy, tangy, and perfectly crunchy. The smell wafting from the jar after just a day or two is enough to pull me back into the kitchen for a taste test (or three).
What surprised me most was how the simple ingredients came together without fuss, capturing that authentic Korean taste without hours of prep or fancy tools. My skepticism turned into confidence as I found myself making it repeatedly, sharing with friends who texted back almost immediately asking for the recipe. There’s something quietly satisfying about having kimchi ready in the fridge, knowing it’s homemade and tailored just right for my spice tolerance. This easy spicy homemade Napa kimchi recipe stuck with me because it’s real, approachable, and a little fiery—just the way I like it.
Why You’ll Love This Recipe
- Quick & Easy: Comes together in under 45 minutes, making it perfect for beginners and busy cooks who want authentic kimchi without a big time commitment.
- Simple Ingredients: Uses pantry staples and fresh produce you can find at most grocery stores—no need for rare or expensive items.
- Perfect for Any Occasion: Whether you’re spicing up a weeknight dinner or adding a punch to your next potluck, this kimchi fits right in.
- Crowd-Pleaser: The balance of spicy, sour, and umami flavors always gets compliments from both kimchi lovers and newbies alike.
- Unbelievably Delicious: The crunchy texture of Napa cabbage paired with the depth of homemade spice paste creates a flavor combo that’s both refreshing and addictive.
This isn’t just another kimchi recipe floating around the internet. What makes it stand out is the tailored spice mix I developed after tweaking it multiple times to suit my taste buds. Instead of overwhelming heat, you get just the right kick that’s balanced with a hint of sweetness and garlic punch. And since it’s designed for ease, you don’t need to fuss with complicated fermentation gadgets or exotic ingredients. I’ve tested it thoroughly in my own kitchen, and it’s been a hit every time—family approved and friend recommended!
Honestly, this recipe has turned kimchi from a mysterious side dish into a staple for my meals, one that brings a little excitement to even the simplest plates. It’s comfort food with a spicy twist that you’ll find yourself reaching for again and again.
What Ingredients You Will Need
This easy spicy homemade Napa kimchi recipe uses straightforward, wholesome ingredients to deliver bold flavor and satisfying texture without the fuss. Most of these are pantry staples or easy to find at your local grocery or Asian market.
- Napa cabbage (1 medium head, about 2 pounds) – The star ingredient providing crunch and mild sweetness.
- Coarse sea salt (1/4 cup / 60g) – For salting and softening the cabbage (I prefer Diamond Crystal for consistent texture).
- Water (enough to soak cabbage) – To create the brine.
- Garlic (4-5 cloves, minced) – Adds pungent depth and warmth.
- Fresh ginger (1 tablespoon, grated) – For a subtle zing that brightens the flavor.
- Korean red pepper flakes (gochugaru) (3 tablespoons) – The key to that signature spicy heat (adjust to taste; I like the medium heat level from Chung Jung One brand).
- Fish sauce (2 tablespoons) – Brings umami richness (can substitute with soy sauce for vegetarian option).
- Granulated sugar (1 teaspoon) – Balances the spice and helps fermentation.
- Green onions (3-4, chopped) – Adds freshness and mild sharpness.
- Carrot (1 medium, julienned) – For color and a touch of natural sweetness.
- Optional: Korean radish (1/2 cup, julienned) – Adds crunch and traditional texture.
If you want to swap out any ingredients, you can use tamari instead of fish sauce for a gluten-free or vegetarian version. For the red pepper flakes, if you can’t find gochugaru, a mix of smoked paprika and cayenne can work in a pinch, but the authentic flavor won’t be quite the same. When selecting your Napa cabbage, look for firm, crisp leaves without brown spots to get the best crunch.
Equipment Needed
- Large mixing bowl: For salting and softening the cabbage. A non-reactive bowl like glass or stainless steel works best.
- Colander: To drain the salted cabbage.
- Knife and cutting board: For chopping and julienning vegetables.
- Gloves: Optional but highly recommended to protect your hands from the chili paste—trust me, I learned the hard way!
- Large jar or airtight container: For fermenting the kimchi. Mason jars or food-grade plastic containers work well.
- Spatula or wooden spoon: For mixing the kimchi paste evenly into the cabbage.
You don’t need any fancy fermentation crocks or weights, though some people like to use a fermentation weight to keep the cabbage submerged. I’ve found that pressing the kimchi down with your hands and sealing tightly does the trick just fine. If you’re on a budget, repurposing a clean glass jar from your pantry is a perfectly fine choice. Just make sure it seals well to keep those delicious flavors locked in.
Preparation Method
- Prep the Napa cabbage: Cut the cabbage lengthwise into quarters and remove the core. Chop into 2-inch pieces. Place in a large bowl and sprinkle evenly with the 1/4 cup (60g) of coarse sea salt. Toss well to coat all leaves. Add enough cold water to cover the cabbage completely. Let it soak for 1 to 2 hours, tossing gently every 30 minutes. The cabbage should soften and shrink noticeably by the end.
- Rinse and drain: After soaking, rinse the cabbage under cold running water 2-3 times to wash away excess salt. Drain thoroughly in a colander, squeezing gently to remove extra water but leaving the cabbage moist. Set aside.
- Make the kimchi paste: In a medium bowl, combine minced garlic, grated ginger, 3 tablespoons Korean red pepper flakes, 2 tablespoons fish sauce, and 1 teaspoon sugar. Mix well until it forms a thick, vibrant red paste. The aroma should be pungent and spicy, with a hint of sweetness.
- Add vegetables: Stir in chopped green onions, julienned carrot, and optional Korean radish into the paste. This adds layers of crunch and freshness.
- Mix cabbage and paste: Wearing gloves, add the drained cabbage into the spice paste bowl. Use your hands or a spatula to rub and mix the paste thoroughly into every piece of cabbage. This step is crucial—make sure every leaf is well coated for even flavor and fermentation.
- Pack into jar: Transfer the kimchi mixture into a clean, airtight jar or container. Press down firmly to remove air pockets and submerge the cabbage in its own juices. Leave about an inch of space at the top for expansion.
- Ferment: Seal the jar tightly and leave it at room temperature (around 68-72°F / 20-22°C) for 1 to 3 days, depending on your preference for sourness. Check daily, pressing down to keep cabbage submerged. Once it tastes tangy and bubbly to your liking, transfer to the refrigerator. The flavors will continue to develop but at a slower pace.
Timing tip: I usually start fermentation in the evening so I can monitor it the next day when I’m home. If you notice any white film on top, it’s just harmless yeast—skim it off to keep the kimchi fresh. Also, don’t panic if bubbles form inside; that’s a good sign fermentation is working!
Cooking Tips & Techniques
Making kimchi might sound intimidating at first, but after a few tries, you’ll get into a rhythm that makes it feel like second nature. Here are some tips from my own kitchen experiments that might save you some headaches:
- Salt evenly and soak thoroughly: The key to crisp kimchi is properly salting the cabbage to draw out excess moisture. Don’t rush this step—1 to 2 hours is ideal to soften the leaves without making them soggy.
- Adjust spice levels carefully: Gochugaru varies in heat depending on the brand. Start with less if you’re unsure, because you can always add more next time. I learned that the hard way after a batch nearly set my tongue on fire!
- Use gloves when mixing: The chili paste can irritate your skin and eyes. It’s worth the extra effort to protect your hands.
- Press down firmly in the jar: Air pockets can cause uneven fermentation or spoilage. Press the cabbage down to keep it submerged under the brine.
- Ferment at room temperature: Too warm and your kimchi will ferment too fast and become overly sour; too cold and it may not ferment well. Around 68-72°F (20-22°C) is ideal.
- Be patient: The flavor develops over time. Taste your kimchi daily after the first day to find the perfect stage for you.
Don’t be discouraged by early attempts that seem bland or too spicy. I’ve had batches that were way too salty or under-seasoned before finding this balance. Trial and error is part of the fun, and each batch teaches you something new about your own taste preferences.
Variations & Adaptations
This easy spicy homemade Napa kimchi recipe is wonderfully versatile. Here are a few ways to tweak it based on what you have or prefer:
- Vegetarian/Vegan: Swap fish sauce with soy sauce or tamari to keep the umami flavor without animal products.
- Milder version: Reduce gochugaru to 1-2 tablespoons and omit the radish for a gentler heat and simpler texture.
- Extra crunchy: Add diced Korean radish or even some thinly sliced jicama for a satisfying crunch.
- Quick kimchi: Skip the fermentation step and enjoy immediately as a spicy slaw on tacos, sandwiches, or rice bowls.
- Different veggies: Toss in shredded daikon, sliced cucumbers, or even chopped apples for a seasonal twist.
Personally, I once tried a batch with grated pear blended into the chili paste for a subtle sweetness that balanced the heat beautifully. It was a hit at a friend’s dinner party and a reminder that kimchi is as much about personal expression as it is tradition.
Serving & Storage Suggestions
Kimchi is best served cold or at room temperature, allowing its complex flavors to shine. It pairs beautifully alongside grilled meats, rice bowls, or as a zesty topping for noodles. I often spoon it over simple fried rice or mix it into scrambled eggs for a quick flavor boost.
Store your kimchi in an airtight container in the refrigerator. It will keep well for up to 3 weeks, with flavors deepening over time. If you notice the kimchi becoming more sour than you like, just use it in cooked dishes where the tang adds a nice contrast.
Reheating kimchi is not usually recommended since the heat can mellow the flavors, but it’s fantastic when quickly stir-fried with pork or tofu. The aromas that fill the kitchen during cooking are worth every second.
Nutritional Information & Benefits
This homemade Napa kimchi is packed with probiotics from the natural fermentation process, which can support gut health and digestion. Napa cabbage is low in calories but high in fiber and vitamins C and K, making this a nutritious addition to any meal.
One serving (about 1/2 cup or 120g) typically contains roughly 25 calories, minimal fat, and a good dose of antioxidants thanks to the garlic and ginger. Keep in mind the sodium content from the salt and fish sauce; if you’re watching your salt intake, you can reduce these slightly, though it may affect fermentation.
For gluten-free eaters, this recipe is naturally suitable if you use gluten-free soy sauce or tamari. The spicy kick helps satisfy cravings without adding any unhealthy fats or sugars, making it a smart choice for health-conscious cooks.
Conclusion
This easy spicy homemade Napa kimchi recipe has become a quiet obsession for me—something I turn to when I want a bit of fiery comfort and a fresh crunch in my meals. It’s approachable, forgiving, and delivers real, bold flavors that feel both traditional and personal. Whether you’re a kimchi newbie or looking for a reliable recipe to keep on hand, this one makes the whole process less intimidating and more enjoyable.
Feel free to tweak the spice, experiment with add-ins, or adjust fermentation times to make it your own. I love how simple ingredients transform into something so vibrant and alive with just a little patience and care.
If you give this recipe a try, I’d love to hear how it turns out for you—drop a comment or share your own twists. Here’s to bringing a little homemade heat and happiness to your kitchen!
FAQs About Easy Spicy Homemade Napa Kimchi
How long does it take to ferment kimchi?
Typically, kimchi ferments at room temperature for 1 to 3 days depending on your taste preference. After that, it’s best stored in the fridge to slow down fermentation.
Can I make kimchi without fish sauce?
Yes! You can substitute fish sauce with soy sauce or tamari for a vegetarian or vegan version. The flavor will be slightly different but still delicious.
What if my kimchi tastes too salty?
If it’s too salty, try rinsing some off with water before eating or use the kimchi in cooked dishes like fried rice where the saltiness balances out.
Do I need special jars for fermenting kimchi?
No special jars are required. A clean mason jar or food-safe plastic container with a tight lid works perfectly fine for fermenting kimchi.
How spicy is this kimchi recipe?
This recipe has a moderate level of spiciness that you can adjust by using less or more Korean red pepper flakes (gochugaru) depending on your heat tolerance.
For those who enjoy experimenting with fermented dishes, you might find inspiration from my recipe for crispy garlic chicken, which pairs wonderfully with kimchi for a balanced meal. Also, if you’re curious about other fermented favorites, the easy pickled vegetables recipe offers a quick and tangy complement to your homemade kimchi adventures.
Pin This Recipe!
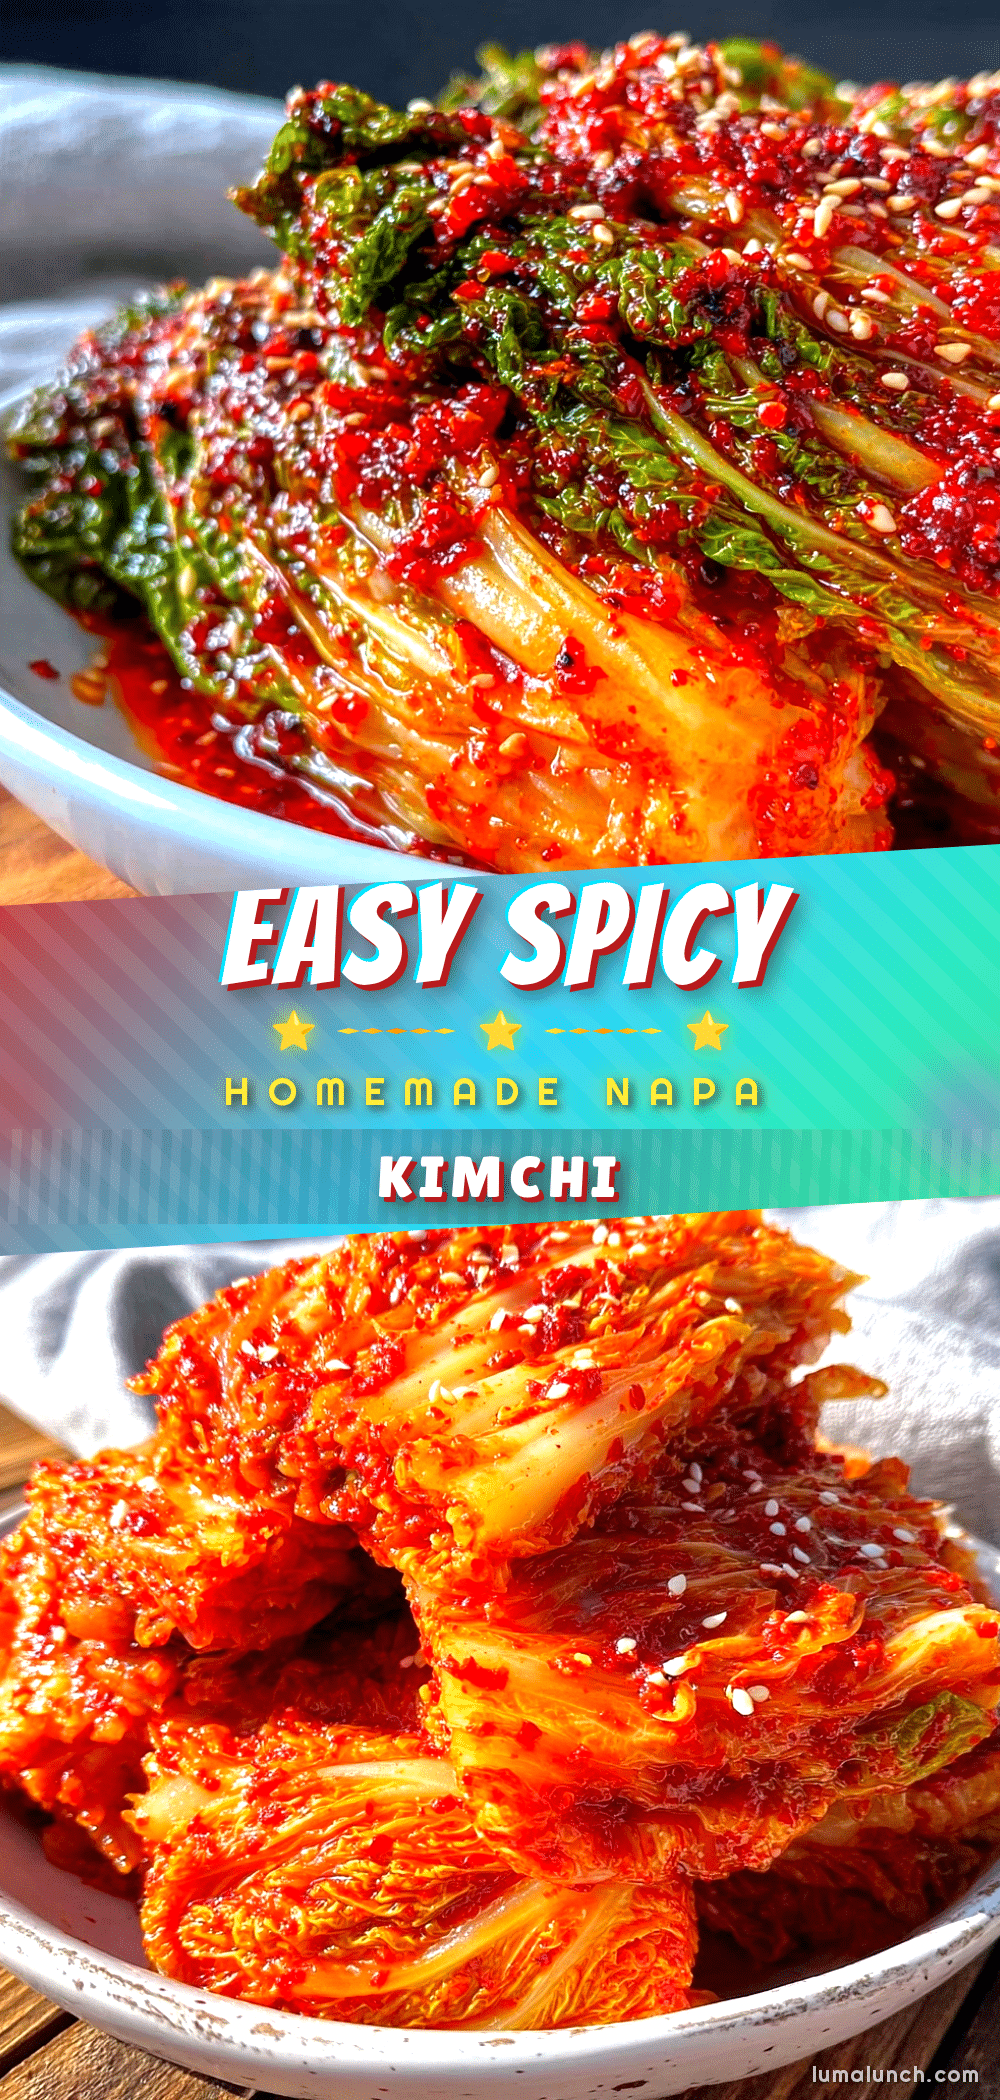
Easy Spicy Homemade Napa Kimchi Recipe Perfect for Beginners

A straightforward and approachable recipe for spicy, tangy, and crunchy Napa kimchi that requires no complicated ingredients or fermentation gadgets, perfect for beginners and busy cooks.
- Prep Time: 15 minutes
- Cook Time: 1 to 3 days fermentation
- Total Time: 1 day 15 minutes to 3 days 15 minutes
- Yield: About 6 servings 1x
- Category: Side Dish
- Cuisine: Korean
Ingredients
- 1 medium head Napa cabbage (about 2 pounds)
- 1/4 cup (60g) coarse sea salt
- Water (enough to soak cabbage)
- 4–5 cloves garlic, minced
- 1 tablespoon fresh ginger, grated
- 3 tablespoons Korean red pepper flakes (gochugaru)
- 2 tablespoons fish sauce (can substitute with soy sauce or tamari for vegetarian/vegan option)
- 1 teaspoon granulated sugar
- 3–4 green onions, chopped
- 1 medium carrot, julienned
- Optional: 1/2 cup Korean radish, julienned
Instructions
- Cut the Napa cabbage lengthwise into quarters and remove the core. Chop into 2-inch pieces. Place in a large bowl and sprinkle evenly with 1/4 cup (60g) coarse sea salt. Toss well to coat all leaves. Add enough cold water to cover the cabbage completely. Let soak for 1 to 2 hours, tossing gently every 30 minutes until softened and shrunk.
- Rinse the cabbage under cold running water 2-3 times to wash away excess salt. Drain thoroughly in a colander, squeezing gently to remove extra water but leaving the cabbage moist. Set aside.
- In a medium bowl, combine minced garlic, grated ginger, 3 tablespoons Korean red pepper flakes, 2 tablespoons fish sauce, and 1 teaspoon sugar. Mix well until a thick, vibrant red paste forms.
- Stir in chopped green onions, julienned carrot, and optional Korean radish into the paste.
- Wearing gloves, add the drained cabbage into the spice paste bowl. Use hands or a spatula to rub and mix the paste thoroughly into every piece of cabbage, ensuring even coating.
- Transfer the kimchi mixture into a clean, airtight jar or container. Press down firmly to remove air pockets and submerge the cabbage in its own juices. Leave about an inch of space at the top for expansion.
- Seal the jar tightly and leave it at room temperature (68-72°F / 20-22°C) for 1 to 3 days depending on desired sourness. Check daily, pressing down to keep cabbage submerged. Once tangy and bubbly to your liking, transfer to the refrigerator to slow fermentation.
Notes
Use gloves when mixing the chili paste to protect your hands. Press down firmly in the jar to remove air pockets and keep cabbage submerged. Ferment at room temperature around 68-72°F for best results. Adjust spice level by varying gochugaru amount. If white film appears on top, skim it off as it is harmless yeast. Store kimchi in refrigerator after fermentation and consume within 3 weeks. For vegetarian or vegan version, substitute fish sauce with soy sauce or tamari.
Nutrition
- Serving Size: 1/2 cup (120g)
- Calories: 25
- Sugar: 2
- Sodium: 600
- Fat: 0.1
- Carbohydrates: 5
- Fiber: 2
- Protein: 1
Keywords: kimchi, napa cabbage, spicy kimchi, homemade kimchi, fermented vegetables, Korean recipe, easy kimchi, beginner kimchi