Love this? Save it for later!
Share the inspiration with your friends
I was at my local farmer’s market last October, clutching a bag of tiny pumpkins I had no business buying, when I noticed the older woman running the honey stand watching me struggle. She didn’t say anything at first. Then she just reached under her table and handed me a napkin with a cupcake on it—plain vanilla, no frosting, nothing fancy. “You look like you need sugar,” she said, and laughed. That cupcake was perfect. Simple, moist, exactly what I needed on a chilly autumn morning. I thanked her and asked how she got her cakes so tender, and she shrugged. “Buttermilk and patience,” she said. “Everything else is just decoration.”
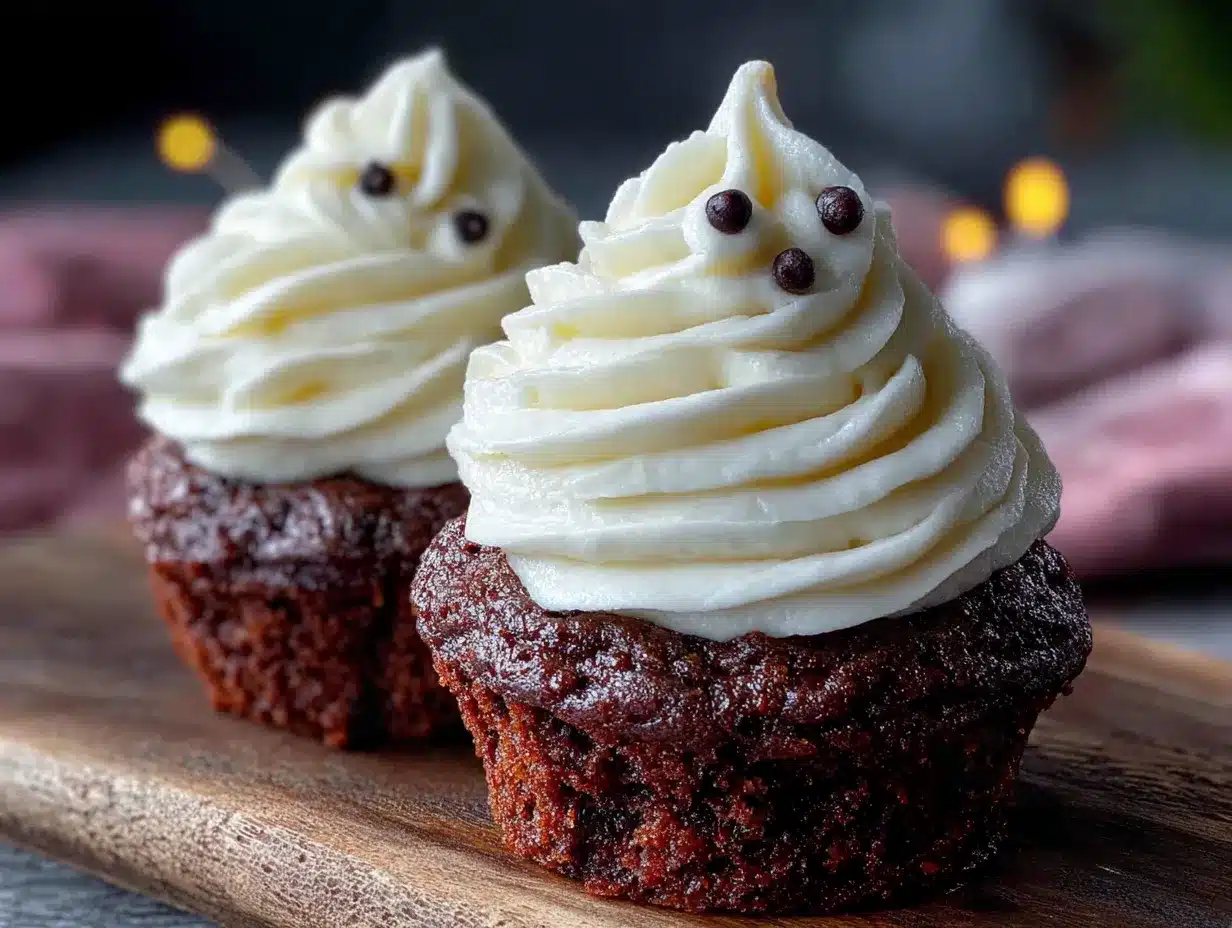
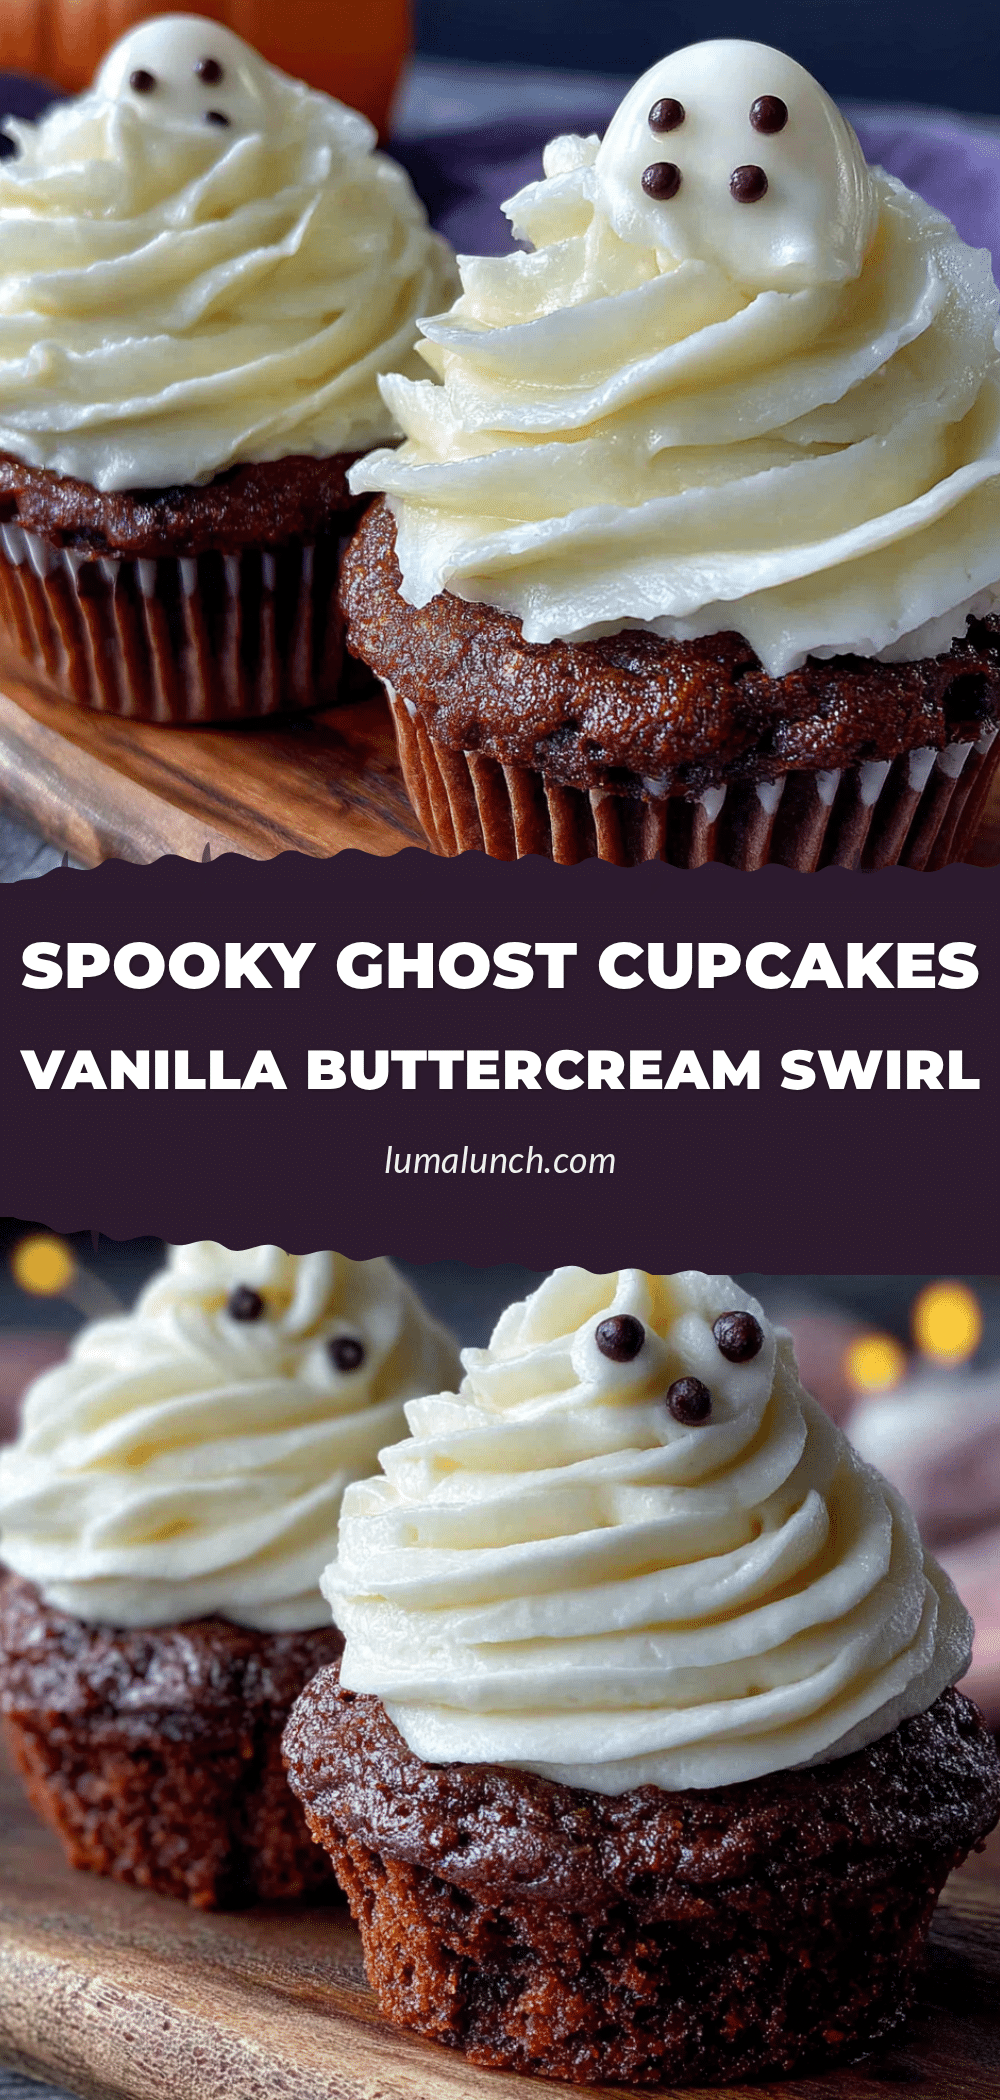
I thought about that conversation for weeks. That plain little cupcake became the starting point for something I make every single October now: these spooky ghost cupcakes with vanilla buttercream swirl. They’re not complicated, honestly. The cake part is soft and buttery with that slight tang from buttermilk, and the frosting is the kind of sweet, cloud-like vanilla buttercream that makes you close your eyes for a second. Then you pipe it into little ghost shapes, add some chocolate eyes, and suddenly you’ve got the cutest Halloween treat on the block. I mean, who can resist a ghost that looks more adorable than spooky? Maybe you’ve been there—staring at complicated Halloween dessert ideas online, wondering if you really have the time or patience for a multi-day project. These are not that. These are the kind of cupcakes you can whip up on a Tuesday afternoon, and they’ll still steal the show at any party.
What I love most is how this recipe carries that farmer’s market moment with it. The woman’s name was Margaret, and I never saw her again after that season, but her buttermilk trick stuck. Every time I make these cupcakes, I remember that simple exchange. No grand lesson, no formal teaching—just someone sharing what they knew because I happened to be standing there. That’s how good recipes travel, you know? Through napkins and chance encounters and the willingness to pass something along. These ghost cupcakes are my way of keeping that spirit alive, one swirl at a time.
Why You’ll Love These Spooky Ghost Cupcakes
Let me tell you why this recipe has become my go-to Halloween treat year after year. I’ve tested it more times than I care to count, tweaking the buttermilk ratio and the frosting consistency until everything clicked perfectly. My family has approved every single version, which honestly says a lot because they’re brutally honest critics.
- Quick & Easy: These cupcakes come together in about 45 minutes from start to finish. Perfect for last-minute Halloween parties or when your kid announces at 4 PM they need treats for school the next day.
- Simple Ingredients: No fancy grocery trips needed. Butter, sugar, flour, buttermilk, vanilla—you probably have most of this in your kitchen right now. The only special purchase might be the black gel food coloring for the eyes.
- Perfect for Halloween: These little ghosts are the life of any spooky gathering. They work for classroom parties, office potlucks, or just a fun weekend baking project with the kids.
- Crowd-Pleaser: I’ve brought these to three different Halloween events now, and every single time, people ask for the recipe. Kids adore them, adults sneak seconds, and nobody believes they’re this simple to make.
- Unbelievably Delicious: The texture is what gets you. That buttermilk makes the crumb so tender and moist, and the vanilla buttercream is the perfect balance of sweet and creamy. It’s not just a pretty face—these cupcakes actually taste amazing.
What makes this recipe different from all the other ghost cupcakes out there? It’s the buttermilk trick Margaret taught me. Most recipes use regular milk, but buttermilk gives you a softer, more tender crumb that stays moist for days. Plus, the frosting is stabilized just enough that your ghost swirls hold their shape without being stiff or greasy. I’ve tried half a dozen buttercream recipes, and this one is the sweet spot—literally.
These cupcakes are comfort food with a Halloween twist. They’re the kind of treat that makes you feel like a kid again, but they’re polished enough to impress adult guests. No stress, no complicated techniques, just pure spooky fun that tastes as good as it looks.
What Ingredients You Will Need
This recipe uses simple, wholesome ingredients to deliver a tender, flavorful cupcake and a silky buttercream that pipes like a dream. Most of these are pantry staples, which makes these ghost cupcakes perfect for spontaneous baking sessions.
For the Cupcakes
- 1 ½ cups (190g) all-purpose flour — I use King Arthur Flour for consistent results, but any brand works. Spoon and level your flour for the best texture.
- 1 cup (200g) granulated sugar — Regular white sugar gives the cupcakes a clean sweetness. You can reduce to ¾ cup if you prefer less sweet cakes.
- ½ cup (113g) unsalted butter, softened — Make sure it’s truly at room temperature. Cold butter won’t cream properly and will leave you with dense cupcakes. I leave mine out for about an hour.
- 2 large eggs, room temperature — Cold eggs can seize the batter. If you forgot to take them out, place them in warm water for 5 minutes.
- ½ cup (120ml) buttermilk, room temperature — This is the secret ingredient. The acidity tenderizes the gluten and creates a super moist crumb. No buttermilk? Add 1 tablespoon of lemon juice to regular milk and let it sit for 5 minutes.
- 1 teaspoon vanilla extract — Pure vanilla makes a difference here. I recommend Nielsen-Massey for a rich, floral flavor.
- 1 ½ teaspoons baking powder — Make sure it’s fresh. Test it by dropping a bit into hot water—it should fizz immediately.
- ¼ teaspoon salt — Balances the sweetness and enhances the vanilla flavor.
For the Vanilla Buttercream Swirl
- 1 cup (226g) unsalted butter, softened — Again, room temperature is crucial. Cold butter makes lumpy frosting.
- 3-4 cups (360-480g) powdered sugar — Start with 3 cups and add more if needed for piping consistency. Sift it to avoid lumps.
- 2 teaspoons vanilla extract — I go a little heavy here because vanilla is the star of this frosting.
- 2-3 tablespoons heavy cream or milk — Heavy cream gives a richer texture, but milk works fine. Add slowly until you reach the right consistency.
- Pinch of salt — Don’t skip this. It cuts the sweetness and makes the vanilla pop.
For the Ghost Decorations
- Black gel food coloring — Regular liquid food coloring is too runny for eyes. Wilton’s black gel is my go-to because it dries quickly and doesn’t bleed into the frosting.
- Optional: Orange or black sprinkles — For extra Halloween flair. I sometimes add a few around the base of each ghost.
For seasonal variations, you can swap the vanilla extract in the cupcakes for pumpkin spice in the fall, or add a teaspoon of orange zest for a citrusy twist. If you’re dairy-free, use vegan butter and a plant-based buttermilk substitute (almond milk with lemon juice works great).
Equipment Needed
You don’t need a fancy kitchen to make these ghost cupcakes. Here’s what you’ll actually use:
- 12-cup muffin tin — Standard size works best. I’ve tried mini tins, but the ghosts look better on regular-sized cupcakes.
- Paper cupcake liners — White or black liners are perfect for Halloween. I prefer white because they make the ghosts stand out more.
- Mixing bowls — One large bowl for the dry ingredients and one for the wet. I use glass bowls because they’re easy to see through.
- Electric hand mixer or stand mixer — A hand mixer works perfectly for both the batter and the frosting. I’ve made these with a whisk too, but your arm will thank you for using a mixer.
- Piping bag with a large round tip — A Wilton 1A or any ½-inch round tip creates the perfect ghost shape. If you don’t have a piping bag, use a zip-top bag with the corner snipped off.
- Cooling rack — Essential for letting cupcakes cool completely before frosting. Warm cupcakes will melt your buttercream into a sad puddle.
- Toothpick or small skewer — For drawing the ghost eyes. I keep a few on hand because I always lose them halfway through.
Budget-friendly tip: Skip the fancy piping bag and use a sturdy zip-top bag instead. Just don’t overfill it, or the seam might split when you’re squeezing. Learned that one the hard way, let me tell you.
Preparation Method
Let’s get baking. These steps are straightforward, but I’ve included all the little details I wish someone had told me the first time.
Step 1: Preheat and Prep
Preheat your oven to 350°F (175°C). Line your muffin tin with 12 paper liners. I like to set everything out on the counter before I start—butter, eggs, buttermilk—so they can come to room temperature together. Trust me, cold ingredients are the enemy of fluffy cupcakes.
Step 2: Mix the Dry Ingredients
In a medium bowl, whisk together the flour, baking powder, and salt. Whisk for about 20 seconds to aerate everything evenly. Set this aside. Don’t skip the whisking—it distributes the baking powder so you don’t end up with one cupcake that’s super puffy and another that’s flat.
Step 3: Cream the Butter and Sugar
In a large bowl, beat the softened butter and granulated sugar together with your hand mixer on medium speed until light and fluffy. This takes about 3-4 minutes. You’re looking for a pale yellow color and a texture that looks almost like whipped butter. Scrape down the sides of the bowl halfway through. I usually set a timer because I have a tendency to under-cream when I’m in a hurry.
Step 4: Add Eggs and Vanilla
Add the eggs one at a time, beating well after each addition. The batter might look a little curdled at this point—that’s normal, especially if your eggs were slightly cooler than the butter. Don’t panic. Add the vanilla extract and beat for another 30 seconds.
Step 5: Alternate Dry and Wet Ingredients
With the mixer on low speed, add about one-third of the flour mixture. Mix until just combined. Then add half of the buttermilk. Mix again. Repeat with another third of flour, the remaining buttermilk, and finally the last of the flour. Stop mixing as soon as the flour disappears. Overmixing develops gluten and makes tough cupcakes. The batter should be thick and smooth, like a soft dough.
Step 6: Fill and Bake
Divide the batter evenly among the 12 liners. I use a cookie scoop for this—it’s less messy and gives you equal portions. Fill each liner about two-thirds full. Bake for 18-22 minutes, or until a toothpick inserted into the center comes out clean or with a few moist crumbs. My oven runs hot, so I check at 18 minutes. The tops should be lightly golden and spring back when you touch them.
Step 7: Cool Completely
Let the cupcakes cool in the pan for 5 minutes, then transfer them to a wire rack. This is important—if you leave them in the pan too long, the bottoms get soggy. Let them cool completely before frosting. I mean completely. Warm cupcakes will turn your beautiful buttercream into a runny mess. I usually wait at least an hour.
Step 8: Make the Buttercream
While the cupcakes cool, make the frosting. Beat the softened butter on medium speed until smooth and creamy, about 2 minutes. Gradually add the powdered sugar, one cup at a time, beating on low speed after each addition. Add the vanilla and salt. Then add the heavy cream, one tablespoon at a time, until you reach a smooth, spreadable consistency. For piping, you want it thick enough to hold its shape but soft enough to squeeze easily. Beat on medium-high for 2 minutes to make it extra fluffy.
Step 9: Pipe the Ghosts
Fit your piping bag with the large round tip and fill it with buttercream. Hold the bag upright over each cupcake, about half an inch above the surface. Squeeze gently to create a tall swirl, then pull straight up to form the ghost’s head. You want a shape that’s wider at the bottom and tapers to a point at the top—like a teardrop. Don’t overthink it. Imperfect ghosts are actually cuter.
Step 10: Add the Faces
Dip a toothpick into the black gel food coloring. Gently dot two eyes onto each ghost. For the mouth, you can do a little “o” shape or a wavy line. I make mine look slightly surprised, like they just saw something spooky. Let the faces set for about 10 minutes before serving or storing.
Cooking Tips & Techniques
Over the years, I’ve made plenty of mistakes with these ghost cupcakes, and I’m sharing them so you don’t have to repeat them. Here’s what I’ve learned:
Don’t overmix the batter. This is the number one mistake I see. Mix until the flour just disappears, then stop. Overmixed batter creates tunnels and a tough texture. I once kept mixing because I thought I saw a tiny flour streak, and the cupcakes came out rubbery. Learn from my impatience.
Room temperature ingredients are non-negotiable. Cold butter won’t cream properly, cold eggs can seize the batter, and cold buttermilk won’t incorporate smoothly. I set everything out on the counter an hour before I start baking. If I forget, I microwave the buttermilk for 15 seconds and place the eggs in warm water for 5 minutes. The butter I just have to wait for—there’s no shortcut there.
Check your baking powder freshness. Expired baking powder is the silent killer of cupcake recipes. Test it by dropping a teaspoon into hot water. If it doesn’t fizz aggressively, toss it and buy new. I learned this after a particularly flat batch of cupcakes that I tried to pass off as “intentionally dense.” Nobody was fooled.
Pipe with confidence. When you’re making the ghost swirls, commit to the shape. Hesitation creates lopsided ghosts. Squeeze firmly, pull up smoothly, and release pressure before you lift the bag away. If you mess up, just scrape off the buttercream and try again. The frosting is forgiving.
Use a light hand with the black gel. A tiny dot goes a long way. If you press too hard, the gel will blob and run down the side of the ghost. I use the tip of a toothpick and dab gently. Less is more with those little eyes.
Plan your timing. These cupcakes are best frosted the same day you bake them, but you can bake the cupcakes a day ahead and store them in an airtight container. Make the frosting fresh on serving day for the best texture. I’ve tried making the frosting ahead, and it gets a bit stiff in the fridge—you have to re-whip it anyway.
Variations & Adaptations
One of the best things about this recipe is how easy it is to customize. Here are some variations I’ve tried and loved:
Chocolate Ghost Cupcakes: Replace ¼ cup of the flour with unsweetened cocoa powder. The dark chocolate base makes the white ghost frosting pop even more visually. My nephew declared these “the best Halloween thing ever” last year.
Gluten-Free Version: Use a 1:1 gluten-free baking flour blend. I’ve tested this with Bob’s Red Mill, and the texture is surprisingly close to the original. Add an extra tablespoon of buttermilk because gluten-free flours tend to absorb more liquid.
Vegan Adaptations: Substitute the butter with vegan butter, use flax eggs (1 tablespoon ground flaxseed + 3 tablespoons water per egg), and replace buttermilk with almond milk plus a teaspoon of apple cider vinegar. The texture is slightly denser but still delicious. I made these for a friend’s vegan Halloween party, and they disappeared in minutes.
Pumpkin Spice Ghosts: Add 1 teaspoon of pumpkin pie spice to the dry ingredients and replace ¼ cup of buttermilk with pumpkin puree. The warm spices pair beautifully with the vanilla buttercream. This is my personal favorite for November.
Different Frosting Flavors: Swap the vanilla extract in the buttercream for peppermint, almond, or orange extract. A chocolate buttercream would also work—just add ¼ cup of cocoa powder to the powdered sugar. I tried a lavender vanilla version once, and it was surprisingly elegant.
Mini Ghost Cupcakes: Use a mini muffin tin and reduce the baking time to 10-12 minutes. These are perfect for kids’ parties where you want smaller portions. The ghosts look even cuter in miniature form.
Serving & Storage Suggestions
These ghost cupcakes are best served at room temperature, which lets the buttercream soften to that perfect creamy texture. Arrange them on a white platter or a black cake stand for maximum Halloween impact. I like to scatter a few candy pumpkins or black sprinkles around the base for extra flair.
For parties, I recommend frosting the cupcakes about an hour before serving. This gives the buttercream time to set slightly, so the ghost shapes hold up well. If you’re transporting them, place them in a single layer in a cake carrier or a shallow box. Don’t stack them—the ghosts will smoosh each other.
Storage: Store unfrosted cupcakes in an airtight container at room temperature for up to 3 days. Frosted cupcakes should be refrigerated in a single layer in an airtight container for up to 4 days. The buttercream will firm up in the fridge, so let them sit at room temperature for about 20 minutes before serving.
Freezing: You can freeze unfrosted cupcakes for up to 3 months. Wrap each one individually in plastic wrap, then place them in a freezer bag. Thaw at room temperature before frosting. I’ve also frozen the buttercream in a piping bag—just thaw it in the fridge overnight and re-whip for a minute before using.
Reheating: These cupcakes are meant to be served at room temperature, so no reheating needed. If you prefer a slightly warm cake, microwave an unfrosted cupcake for 10 seconds. Don’t microwave the frosted ones—the buttercream will melt into a puddle.
One thing I love about these cupcakes is that the flavors actually develop overnight. The vanilla becomes more pronounced, and the buttermilk tang mellows into something really lovely. So if you can, make the cupcakes a day ahead. They taste even better the next day.
Nutritional Information & Benefits
Let’s be real—these are cupcakes, not health food. But here’s what you’re working with per cupcake (frosted):
Estimated Nutritional Values (per cupcake):
- Calories: 380-420
- Fat: 22g
- Carbohydrates: 48g
- Protein: 3g
- Sugar: 36g
- Sodium: 180mg
Now, let’s talk about what’s actually good in here. The buttermilk provides calcium and probiotics, which support digestive health. Butter contains vitamin A and healthy fats that help your body absorb fat-soluble vitamins. And vanilla extract has been shown to have antioxidant properties. So there’s that.
Dietary Considerations:
- Contains dairy, eggs, and gluten
- Can be adapted to be vegan (see variations section)
- Can be adapted to be gluten-free (see variations section)
- Not suitable for low-carb or keto diets
My personal philosophy? These are a treat, meant to be enjoyed in moderation. I don’t stress about the numbers when I’m making them for Halloween. Life is too short to count calories on a ghost cupcake. Just savor the moment—and maybe have a glass of water nearby.
Conclusion
These spooky ghost cupcakes with vanilla buttercream swirl are everything I want in a Halloween treat: simple to make, absolutely adorable, and genuinely delicious. They carry that memory of Margaret and her buttermilk trick, and every time I make them, I feel like I’m passing a little bit of that kindness along. That’s what cooking is about, honestly—sharing what you know and making something that brings people together.
I hope you give these a try. Don’t stress about making the ghosts perfect. The wonky ones have more personality, I swear. Customize them however you like—add sprinkles, change the frosting flavor, make them gluten-free. This recipe is a starting point, not a rulebook.
I’d love to hear how yours turn out. Drop a comment below and tell me about your ghost creations. Did your kids help pipe the faces? Did you try the pumpkin spice version? Share your photos and tag me—I want to see your spooky masterpiece. Happy Halloween, and happy baking!
Frequently Asked Questions
Can I make these ghost cupcakes ahead of time?
Absolutely. Bake the cupcakes up to 2 days ahead and store them in an airtight container at room temperature. Make the frosting fresh on the day you plan to serve them for the best texture. If you need to frost them ahead, refrigerate the finished cupcakes and let them sit at room temperature for 20 minutes before serving.
How do I get my buttercream to hold its shape for the ghost swirl?
The key is using enough powdered sugar. Start with 3 cups and add more until the frosting is thick enough to hold a peak when you lift the mixer beater. Also, make sure your butter is properly softened but not melted. If your frosting is too soft, refrigerate it for 10 minutes before piping.
Can I use a different type of frosting?
Yes! Cream cheese frosting works beautifully and adds a tangy contrast to the sweet cake. Chocolate buttercream is also delicious. Just make sure whatever frosting you use is thick enough to hold the ghost shape. Whipped cream won’t work—it’s too soft and will deflate.
How do I prevent my cupcakes from sticking to the liners?
Use good-quality paper liners and make sure your cupcakes are completely cool before you try to peel them. If you’re still having trouble, try spraying the liners lightly with non-stick spray before filling them. I’ve also found that foil liners work great and never stick.
Can I freeze the frosted ghost cupcakes?
I don’t recommend freezing frosted cupcakes because the buttercream can develop ice crystals and the ghost faces might smear. Freeze the unfrosted cupcakes instead, then thaw and frost them fresh. The buttercream freezes well on its own in a piping bag—just thaw overnight in the fridge and re-whip for a minute.
Pin This Recipe!
Best Easy Spooky Ghost Cupcakes with Vanilla Buttercream Swirl
Soft and tender buttermilk cupcakes topped with a cloud-like vanilla buttercream piped into adorable ghost shapes. These spooky treats are simple enough for a Tuesday afternoon baking session but impressive enough to steal the show at any Halloween party.
- Prep Time: 15 minutes
- Cook Time: 20 minutes
- Total Time: 45 minutes
- Yield: 12 cupcakes 1x
- Category: Dessert
- Cuisine: American
Ingredients
- 1 ½ cups (190g) all-purpose flour
- 1 cup (200g) granulated sugar
- ½ cup (113g) unsalted butter, softened
- 2 large eggs, room temperature
- ½ cup (120ml) buttermilk, room temperature
- 1 teaspoon vanilla extract
- 1 ½ teaspoons baking powder
- ¼ teaspoon salt
- 1 cup (226g) unsalted butter, softened (for frosting)
- 3–4 cups (360-480g) powdered sugar
- 2 teaspoons vanilla extract (for frosting)
- 2–3 tablespoons heavy cream or milk
- Pinch of salt (for frosting)
- Black gel food coloring (for ghost eyes)
- Optional: Orange or black sprinkles
Instructions
- Preheat oven to 350°F (175°C). Line a 12-cup muffin tin with paper liners.
- In a medium bowl, whisk together flour, baking powder, and salt for about 20 seconds.
- In a large bowl, beat softened butter and granulated sugar with an electric mixer on medium speed until light and fluffy, about 3-4 minutes.
- Add eggs one at a time, beating well after each addition. Add vanilla extract and beat for 30 seconds.
- With mixer on low speed, add one-third of the flour mixture, mixing until just combined. Add half of the buttermilk and mix. Repeat with another third of flour, remaining buttermilk, and final third of flour. Stop mixing as soon as flour disappears.
- Divide batter evenly among 12 liners, filling each about two-thirds full.
- Bake for 18-22 minutes, or until a toothpick inserted into the center comes out clean or with a few moist crumbs.
- Cool cupcakes in pan for 5 minutes, then transfer to a wire rack to cool completely (at least 1 hour).
- For buttercream: Beat softened butter on medium speed until smooth and creamy, about 2 minutes. Gradually add powdered sugar, one cup at a time, beating on low. Add vanilla, salt, and heavy cream one tablespoon at a time until smooth and spreadable. Beat on medium-high for 2 minutes until fluffy.
- Fit a piping bag with a large round tip (Wilton 1A or ½-inch) and fill with buttercream. Hold bag upright over each cupcake, squeeze gently to create a tall swirl, then pull straight up to form a teardrop-shaped ghost.
- Dip a toothpick into black gel food coloring and dot two eyes and a mouth onto each ghost. Let faces set for 10 minutes before serving.
Notes
Room temperature ingredients are crucial for best texture. Don’t overmix the batter. For dairy-free, use vegan butter and plant-based buttermilk substitute. Cupcakes can be baked a day ahead; make frosting fresh on serving day. Unfrosted cupcakes can be frozen for up to 3 months.
Nutrition
- Serving Size: 1 cupcake
- Calories: 400
- Sugar: 36
- Sodium: 180
- Fat: 22
- Saturated Fat: 13
- Carbohydrates: 48
- Protein: 3
Keywords: ghost cupcakes, Halloween cupcakes, vanilla buttercream, buttermilk cupcakes, spooky treats, easy Halloween dessert