Love this? Save it for later!
Share the inspiration with your friends
It was 11:47 PM on a random Wednesday in October, and I had a ridiculous craving for something creamy, spiced, and just a little bit spooky. Not the store-bought candy kind of craving—the kind where you want to actually bake something, but your brain is half-asleep and your standards for “acceptable ingredients” have seriously lowered. I didn’t have any cream cheese blocks that were properly softened, but I had a tub of low-fat cottage cheese that was staring at me from the fridge, and the weirdest idea arrived: what if I just… blended it smooth and used it instead?
Honestly, I was tired. It had been a long day of testing other recipes, and the kitchen was already a disaster zone. I told myself this was just a “for me” experiment—no blog post, no photos, no pressure. I grabbed a can of pumpkin puree, some pumpkin pie spice that was probably from last year, and a box of graham crackers I’d hidden from my kids. I wasn’t trying to be a hero. I was just a tired person who wanted a treat that wouldn’t make me feel terrible in the morning.
And then something magical happened. The cottage cheese blended into the smoothest, creamiest base I’d ever felt—no lumps, no weird texture, just pure velvet. I poured it over a pressed crust, swirled some dark chocolate into a spiderweb pattern (okay, it looked more like a confused octopus at first), and baked it while I cleaned up. By the time the bars were cool enough to slice, it was well past midnight, and I was standing in my kitchen in pajamas, eating a bar that tasted like fall but felt surprisingly light. That first bite was the kind that makes you close your eyes and forget you were ever tired. Maybe you’ve been there—when a happy accident in the kitchen turns into something you actually want to make again on purpose.
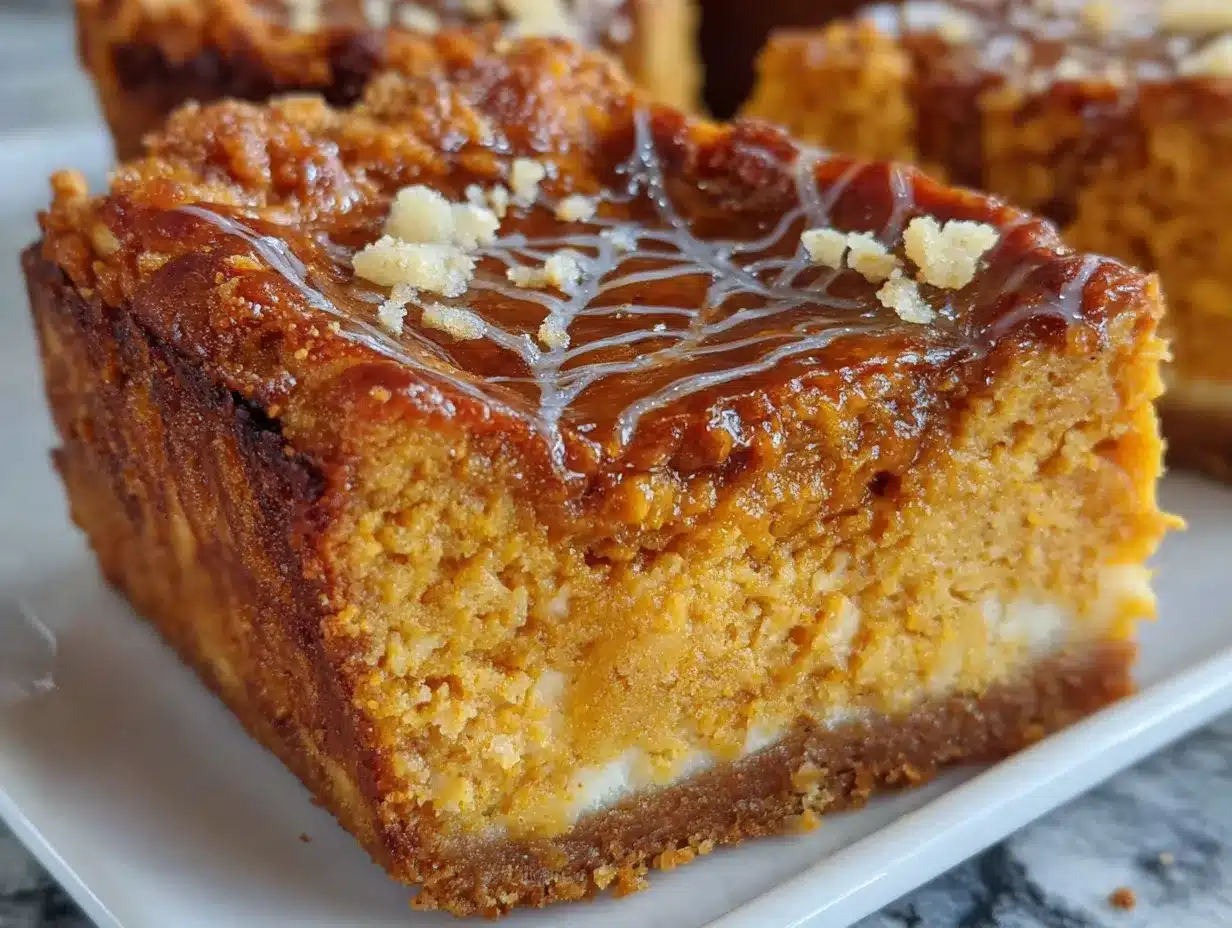
These Lighter Spiderweb Pumpkin Cheesecake Bars are that accident, perfected. They’re creamy, spiced, and have that dramatic chocolate web on top that makes everyone think you worked way harder than you actually did. And the best part? They’re actually healthy enough to eat for breakfast. Not that I’ve done that. Okay, maybe twice.
Why You’ll Love This Recipe
Let me tell you why these bars have become my most-requested fall dessert, even from people who swear they “don’t like healthy baking.”
- Quick & Easy: These bars come together in about 30 minutes of active time. The hardest part is waiting for them to chill. Seriously—no water bath, no complicated techniques, no stress.
- Simple Ingredients: You probably have most of this in your kitchen right now. No weird health food store trips required. I use cottage cheese instead of cream cheese for a protein boost, and it works like a dream.
- Perfect for Fall Gatherings: Whether it’s a Halloween party, Thanksgiving dessert table, or just a cozy Tuesday night, these bars fit right in. The spiderweb design makes them festive without being fussy.
- Crowd-Pleaser: I’ve served these to kids, picky eaters, and my mother-in-law who “doesn’t like healthy food.” Every single person asked for the recipe. The secret is that nobody can tell they’re lighter—they just taste indulgent.
- Unbelievably Delicious: The texture is so creamy and smooth, you’d never guess the base is cottage cheese. The pumpkin spice is warm and cozy, and the chocolate swirl adds just the right amount of richness. It’s comfort food reimagined—healthier, faster, but with the same soul-soothing satisfaction.
What makes this recipe different from all the other pumpkin cheesecake bars out there? It’s the technique of blending cottage cheese until it’s silky smooth. Most lighter versions use reduced-fat cream cheese, which can be grainy or lack flavor. Cottage cheese, when blended properly, creates an ultra-creamy texture with way less fat and more protein. Plus, you get that gorgeous spiderweb effect with just a few drizzles of melted chocolate—no artistic skills required.
This recipe isn’t just good—it’s the kind that makes you close your eyes after the first bite. It’s perfect for impressing guests without stress, or turning a simple fall evening into something memorable.
What Ingredients You Will Need
This recipe uses simple, wholesome ingredients to deliver bold flavor and satisfying texture without the fuss. Most of these are pantry staples, especially if you do any fall baking.
For the Crust
- Graham cracker crumbs – 1 ½ cups (about 12 full sheets, crushed). You can use gluten-free graham crackers if needed.
- Unsalted butter – 3 tablespoons, melted. I prefer Kerrygold for its rich flavor, but any brand works.
- Granulated sugar – 1 tablespoon. Just a touch to help the crust hold together.
- Pinch of salt – Balances the sweetness.
For the Cheesecake Filling
- Low-fat cottage cheese – 2 cups (16 ounces). I recommend Good Culture or Daisy brand for best texture. Look for small-curd cottage cheese—it blends smoother. Do NOT use nonfat—it can be watery.
- Pumpkin puree – 1 cup (not pumpkin pie filling). Libby’s is my go-to for consistent texture.
- Eggs – 2 large, room temperature. This helps the filling set properly.
- Pumpkin pie spice – 2 teaspoons. You can make your own with cinnamon, nutmeg, ginger, and cloves.
- Vanilla extract – 1 teaspoon. Pure vanilla, not imitation, makes a difference here.
- Maple syrup – ⅓ cup. Use pure maple syrup for the best flavor. Honey works too, but maple complements pumpkin perfectly.
- Coconut flour – 2 tablespoons. This helps absorb moisture and gives structure. (Adds stability without making it grainy.)
For the Spiderweb Decoration
- Dark chocolate chips – ¼ cup. I use 70% cacao for a rich, not-too-sweet contrast. Enjoy Life makes a good dairy-free option.
- Coconut oil – 1 teaspoon. Helps the chocolate drizzle smoothly.
Ingredient Selection Tip: For the cottage cheese, avoid anything labeled “whipped” or “blended”—you want the small-curd style so you can control the final texture. If you only have large-curd, just blend it a little longer.
Substitution Guidance: For a dairy-free version, use dairy-free cream cheese (like Kite Hill) instead of cottage cheese, and use coconut oil in place of butter. The texture will be slightly denser but still delicious. For a gluten-free option, use certified gluten-free graham crackers or almond flour-based crust.
Equipment Needed
You don’t need a fancy kitchen to make these bars. Here’s what you’ll actually use:
- 8×8-inch baking pan – The perfect size for these bars. If you use a 9×9, the bars will be thinner and bake faster, so check them at 25 minutes.
- Parchment paper – Non-negotiable for easy removal. Leave some overhang on two sides as handles.
- Food processor or high-speed blender – This is key for getting the cottage cheese silky smooth. I use my Vitamix, but a NutriBullet or any blender with a “puree” setting works. A food processor also works—just blend for a full 60 seconds.
- Mixing bowls – One medium, one small.
- Whisk – For combining the filling ingredients.
- Spatula – For scraping every last bit of filling into the pan.
- Toothpick or skewer – For creating the spiderweb design. A butter knife works in a pinch, but toothpicks give you more control.
- Small microwave-safe bowl – For melting the chocolate.
- Measuring cups and spoons – Standard set.
Budget-Friendly Tip: If you don’t have a food processor or blender, you can press the cottage cheese through a fine-mesh sieve with the back of a spoon. It takes about 5 minutes of elbow grease, but it works! I’ve done this when traveling and it’s totally fine.
Preparation Method
Let’s get baking. I’ve tested this method about a dozen times, so trust the process—even the weird parts.
Step 1: Prep Your Pan and Oven
Preheat your oven to 325°F (163°C). Line your 8×8-inch baking pan with parchment paper, leaving about 2 inches of overhang on two opposite sides. This creates handles so you can lift the bars out cleanly later. Lightly spray the parchment with nonstick cooking spray—just a quick mist.
Step 2: Make the Crust
In a medium bowl, combine 1 ½ cups graham cracker crumbs, 1 tablespoon sugar, and a pinch of salt. Pour in 3 tablespoons melted butter and stir with a fork until the mixture looks like wet sand. It should clump together when you squeeze it in your fist. Press this mixture firmly into the bottom of your prepared pan. Use the bottom of a measuring cup to really pack it down—this prevents a crumbly crust later. Bake for 8 minutes, then set aside to cool slightly. Don’t skip this step—a pre-baked crust stays crisp instead of getting soggy.
Step 3: Blend the Cottage Cheese Base
Here’s the magic step. Add 2 cups cottage cheese to your blender or food processor. Blend on high for a full 60 seconds—set a timer, because it takes longer than you think. Scrape down the sides halfway through. The mixture should be completely smooth, with no visible curds. If it looks grainy, keep blending. This is the step that makes or breaks the texture. I once rushed this and ended up with lumpy cheesecake—not a good look.
Step 4: Make the Filling
Add 1 cup pumpkin puree, 2 eggs, 2 teaspoons pumpkin pie spice, 1 teaspoon vanilla, ⅓ cup maple syrup, and 2 tablespoons coconut flour to the blender with the cottage cheese. Blend again for 20-30 seconds until everything is combined and smooth. The batter will be thick but pourable—like a thin pancake batter. Taste it (yes, raw egg and all—just a tiny bit). It should be perfectly spiced, not too sweet. If you want more pumpkin flavor, add another ¼ teaspoon of spice.
Step 5: Assemble and Create the Spiderweb
Pour the filling over the pre-baked crust. Gently tap the pan on the counter a few times to release any air bubbles. Now, for the spiderweb: melt ¼ cup dark chocolate chips with 1 teaspoon coconut oil in the microwave in 20-second bursts, stirring between each. Drizzle the melted chocolate over the filling in 3-4 concentric circles, starting from the center and working outward. Use a toothpick to drag lines from the center outward, like spokes on a wheel. Then drag lines from the outside inward between each spoke. This creates the web effect. Don’t over-swirl or you’ll lose the pattern—less is more.
Step 6: Bake
Bake at 325°F for 30-35 minutes. The edges should be set and slightly puffed, but the center should still jiggle slightly when you gently shake the pan. It will continue to set as it cools. If the top starts browning too quickly (around 25 minutes), tent loosely with foil.
Step 7: Cool and Chill
Let the bars cool completely on a wire rack—about 1 hour. Then transfer to the refrigerator and chill for at least 4 hours, preferably overnight. This is the hardest part, I know. But trust me, the texture needs that time to fully set. If you cut them too early, they’ll be soft and messy. Cold bars slice like a dream.
Step 8: Slice and Serve
Lift the bars out using the parchment handles. Use a sharp knife to cut into 16 squares. Wipe the knife clean between cuts for the cleanest edges. Serve cold or at room temperature—both are delicious.
Cooking Tips & Techniques
After making these bars more times than I can count, here are the things I wish I’d known from the start.
Don’t over-bake. This is the number one mistake. Pumpkin cheesecake is done when the edges are set but the center still wobbles like Jell-O. Over-baking makes it crack and turns the texture rubbery. I learned this the hard way when I made a batch for a party and ended up with pumpkin-flavored hockey pucks. Set a timer and trust the jiggle.
Blend the cottage cheese thoroughly. I cannot stress this enough. If you see any white specks in your filling after baking, you didn’t blend long enough. Give it a full 60 seconds, then scrape and blend for another 30. Your blender will thank you, and so will your taste buds.
Room temperature eggs matter. Cold eggs can make the filling seize up, especially with the coconut flour. Leave your eggs on the counter for 30 minutes before starting, or place them in a bowl of warm water for 5 minutes.
Multitasking strategy: While the crust is baking, prep your filling ingredients. By the time the crust is done, you’re ready to pour and bake. This cuts your total active time down significantly.
For consistent slices: Chill the bars for the full 4 hours, then use a long, sharp knife. Run it under hot water, wipe dry, then slice. Repeat between cuts. This gives you those gorgeous, clean edges you see in food photos.
If your spiderweb disappears: The chocolate can sink into the filling if it’s too warm. Let the filling sit for 5 minutes after pouring before you add the chocolate. Also, don’t use chocolate that’s too runny—let it cool for a minute after melting.
Variations & Adaptations
One of the best things about this recipe is how adaptable it is. Here are some variations I’ve tried and loved.
Dairy-Free Version
Replace the cottage cheese with 2 cups of dairy-free cream cheese (Kite Hill is my favorite). Use melted coconut oil instead of butter in the crust. The texture will be slightly denser, but still creamy and delicious. I made this for a friend with dairy allergies and she asked for the recipe twice.
Gluten-Free Version
Use gluten-free graham crackers or a simple almond flour crust: 1 ½ cups almond flour, 3 tablespoons melted coconut oil, 1 tablespoon maple syrup. Press and bake as directed. The coconut flour in the filling is already gluten-free, so no changes needed there.
Paleo-Friendly Adaptation
Replace graham crackers with a mixture of 1 cup almond flour and ½ cup shredded coconut. Use coconut oil instead of butter. Replace maple syrup with honey or coconut sugar. This version is a bit more crumbly but tastes incredible.
Pumpkin Chocolate Swirl (No Spiderweb)
If you’re not feeling the Halloween theme, just swirl the chocolate through the filling randomly. It creates a beautiful marbled effect and tastes just as good. I do this version for Thanksgiving when I want something more elegant.
Extra Protein Boost
Add one scoop of vanilla or unflavored protein powder to the filling. You may need to add 2-3 tablespoons of milk to thin it out. This makes a great post-workout treat that still feels like dessert.
Personal Variation: I once added a teaspoon of orange zest to the filling, and it was incredible. The citrus brightens the pumpkin and chocolate beautifully. Try it if you have an orange lying around.
Serving & Storage Suggestions
These bars are versatile enough for any occasion, but here’s how I like to serve and store them.
Serving Temperature: I prefer these bars straight from the fridge—cold and firm, like a traditional cheesecake. But they’re also lovely at room temperature for about 20 minutes, which softens the texture slightly. For a fancy touch, let them sit out for 10 minutes and top with a dollop of coconut whipped cream and a sprinkle of cinnamon.
Presentation Ideas: For Halloween parties, arrange the bars on a black platter and add some candy eyeballs or edible glitter. For Thanksgiving, dust with a light snowfall of powdered sugar. For everyday, just slice and enjoy—they’re beautiful enough on their own.
Complementary Dishes: These bars pair beautifully with a cup of hot apple cider, a spiced chai latte, or a simple black coffee. For a dessert board, serve alongside dark chocolate-dipped strawberries and spiced nuts.
Storage Instructions: Store in an airtight container in the refrigerator for up to 5 days. Place a piece of parchment paper between layers if stacking—the chocolate web can stick. These bars actually taste better on day two, after the flavors have had time to meld.
Freezer Instructions: These freeze beautifully. Wrap individual bars tightly in plastic wrap, then place in a freezer-safe bag or container. Freeze for up to 3 months. To thaw, transfer to the refrigerator overnight, or let sit at room temperature for 30 minutes. I always keep a stash in my freezer for unexpected guests or late-night cravings.
Reheating Tips: These are meant to be served cold, but if you want a warm dessert, microwave a single bar for 10-15 seconds. The chocolate will get slightly melty and the pumpkin flavor becomes more pronounced. Just don’t overdo it—nobody wants warm cheesecake.
How Flavors Develop: The pumpkin spice and maple syrup really deepen after 24 hours in the fridge. If you can, make these a day ahead. The texture also firms up perfectly, making slicing much easier.
Nutritional Information & Benefits
Let’s talk numbers. Each bar (based on 16 servings) contains approximately:
- Calories: 145
- Protein: 7g
- Fat: 6g
- Carbohydrates: 16g
- Fiber: 2g
- Sugar: 9g
Compared to traditional pumpkin cheesecake bars (which can clock in at 300+ calories and 20g of fat per serving), these are a serious upgrade. The cottage cheese base provides a solid protein boost, keeping you full and satisfied. Pumpkin is packed with vitamin A, fiber, and antioxidants—it’s basically a vegetable, right? And dark chocolate adds a dose of magnesium and flavonoids.
Dietary Considerations: This recipe is naturally vegetarian and can be made gluten-free and dairy-free with simple substitutions. It’s lower in sugar than traditional cheesecake, thanks to the maple syrup instead of refined sugar. The coconut flour adds a bit of healthy fat and fiber.
Potential Allergens: Contains dairy (cottage cheese, butter) and eggs. The crust contains gluten unless you use gluten-free graham crackers.
From a wellness perspective, these bars fit perfectly into a balanced lifestyle. They’re indulgent enough to feel like a treat, but smart enough that you don’t have to feel guilty about having a second one. I love that I can serve them to my family and know they’re getting something that actually nourishes them.
Conclusion
These Lighter Spiderweb Pumpkin Cheesecake Bars are proof that you don’t have to choose between healthy and delicious. They’re creamy, spiced, and have that dramatic chocolate web that makes everyone think you’re a baking genius—when really, it’s just a happy accident that turned into a staple recipe.
I love that this recipe started as a weird, late-night experiment with cottage cheese and ended up as my most-requested fall dessert. It reminds me that sometimes the best things come from not overthinking—just trusting your instincts and having fun in the kitchen. Whether you’re making these for a Halloween party, a Thanksgiving dessert table, or just because you want something cozy and good for you, I hope they bring you the same joy they’ve brought me.
Please, customize these bars to your heart’s content. Swap the chocolate for white chocolate, add some chopped pecans to the crust, or double the pumpkin spice. Make them your own. And when you do, come back and tell me about it—I genuinely love hearing how you’ve made a recipe work for your life.
So go ahead, preheat that oven, and make some magic. Your taste buds (and your body) will thank you. Happy baking, friend!
Frequently Asked Questions
Can I use cream cheese instead of cottage cheese?
Absolutely. If you’re not looking for a lighter version, substitute 16 ounces of room-temperature cream cheese for the cottage cheese. Omit the coconut flour, as cream cheese has more structure. The bars will be richer and more traditional.
Why did my spiderweb design disappear after baking?
This usually happens if the filling was too warm when you added the chocolate, or if you swirled too aggressively. Let the filling sit for 5 minutes after pouring, and use a light hand with the toothpick. Also, make sure your chocolate is slightly thickened—if it’s too runny, it will sink.
Can I make these bars without a blender?
Yes, but the texture won’t be as smooth. Press the cottage cheese through a fine-mesh sieve with the back of a spoon, then whisk vigorously with the other filling ingredients. It takes more effort, but it works in a pinch.
How do I know when the bars are done baking?
The edges should be set and slightly puffed, but the center should still jiggle when you gently shake the pan. Think of it like Jell-O—it should wobble, not ripple. Over-baking leads to cracks and a dry texture, so err on the side of under-done.
Can I freeze these bars for later?
Yes! They freeze beautifully for up to 3 months. Wrap individual bars tightly in plastic wrap, then place in a freezer bag. Thaw overnight in the refrigerator, or let sit at room temperature for 30 minutes. I always keep a stash in my freezer for emergencies.
Pin This Recipe!
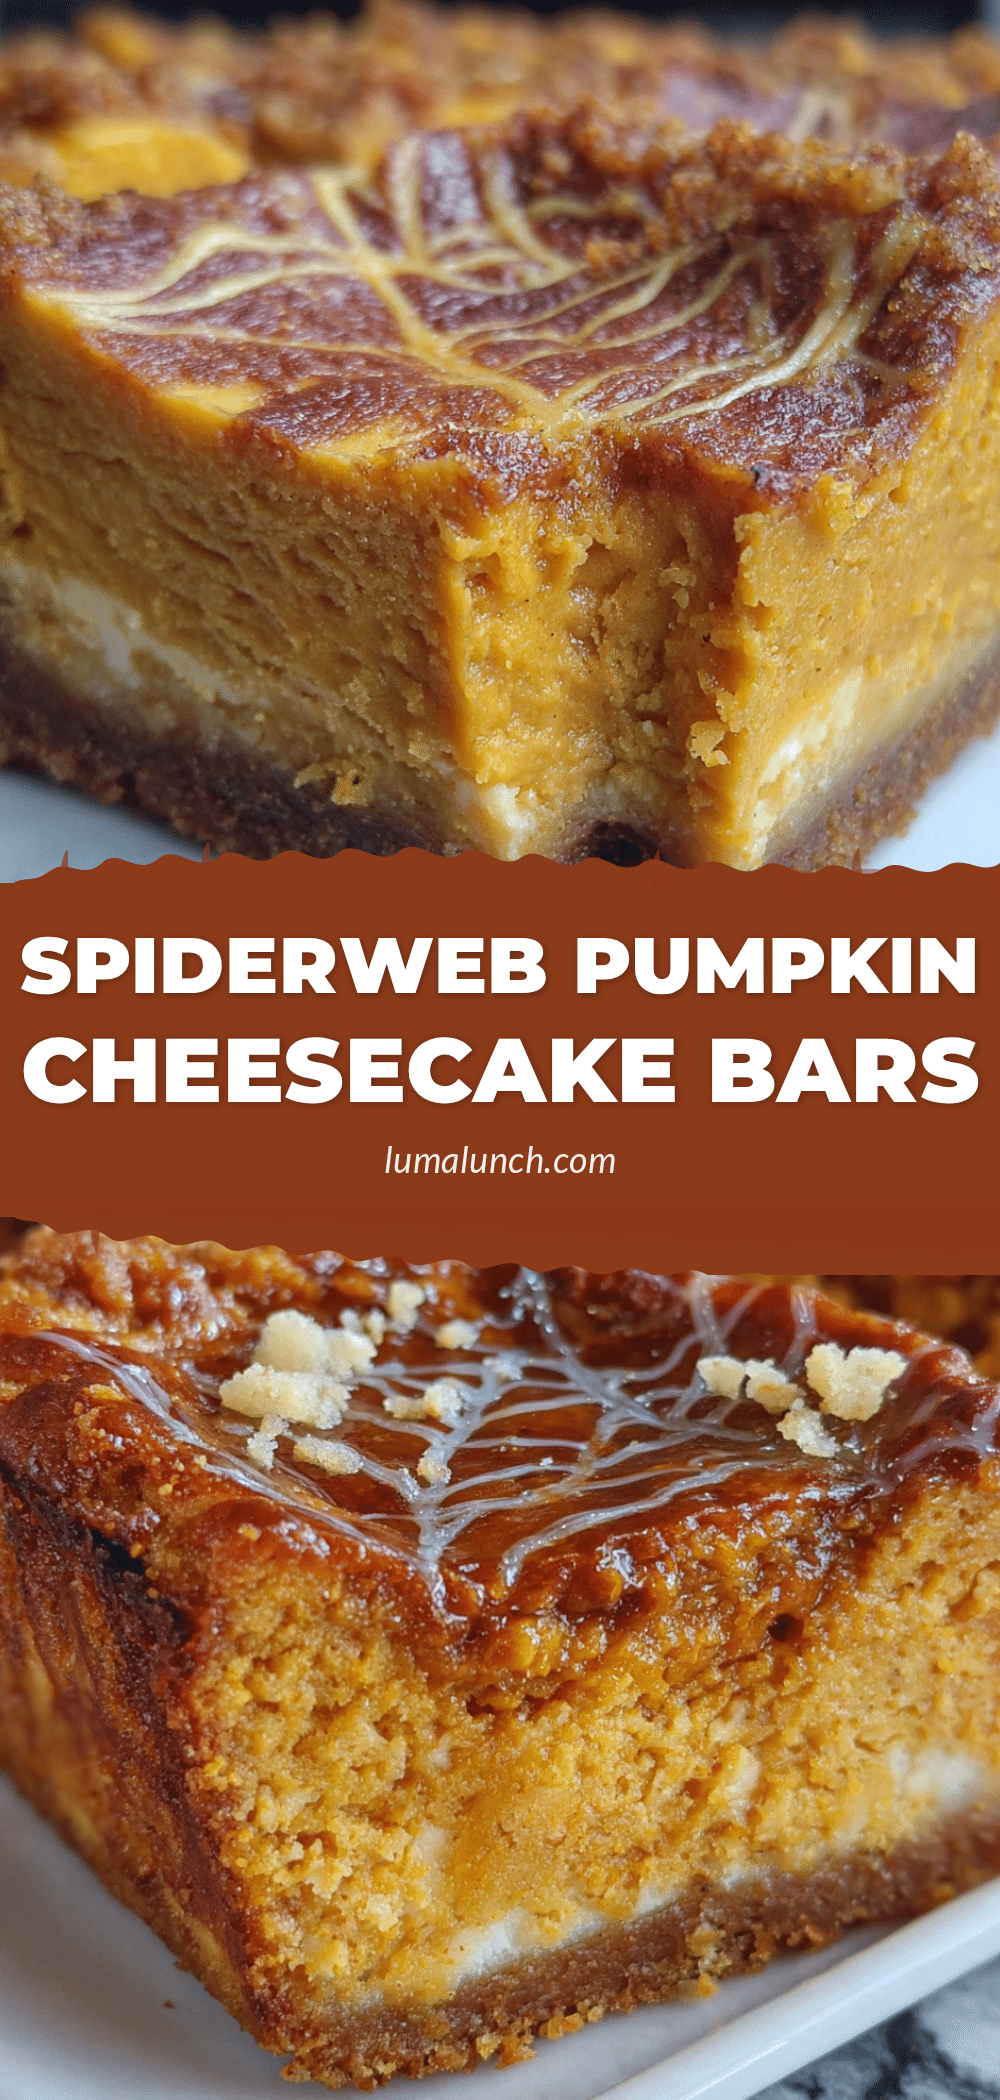
Lighter Spiderweb Pumpkin Cheesecake Bars
Creamy, spiced pumpkin cheesecake bars with a dramatic chocolate spiderweb on top, made lighter with cottage cheese instead of cream cheese. A healthy, easy fall dessert that tastes indulgent.
- Prep Time: 30 minutes
- Cook Time: 35 minutes
- Total Time: 5 hours 5 minutes (includes chilling)
- Yield: 16 servings 1x
- Category: Dessert
- Cuisine: American
Ingredients
- 1 ½ cups graham cracker crumbs (about 12 full sheets, crushed)
- 3 tablespoons unsalted butter, melted
- 1 tablespoon granulated sugar
- Pinch of salt
- 2 cups low-fat cottage cheese (16 ounces)
- 1 cup pumpkin puree (not pumpkin pie filling)
- 2 large eggs, room temperature
- 2 teaspoons pumpkin pie spice
- 1 teaspoon vanilla extract
- ⅓ cup pure maple syrup
- 2 tablespoons coconut flour
- ¼ cup dark chocolate chips (70% cacao)
- 1 teaspoon coconut oil
Instructions
- Preheat oven to 325°F (163°C). Line an 8×8-inch baking pan with parchment paper, leaving 2 inches of overhang on two opposite sides. Lightly spray with nonstick cooking spray.
- In a medium bowl, combine graham cracker crumbs, sugar, and salt. Pour in melted butter and stir with a fork until mixture resembles wet sand. Press firmly into the bottom of the prepared pan using the bottom of a measuring cup. Bake for 8 minutes, then set aside to cool slightly.
- Add cottage cheese to a blender or food processor. Blend on high for a full 60 seconds, scraping down the sides halfway through, until completely smooth with no visible curds.
- Add pumpkin puree, eggs, pumpkin pie spice, vanilla extract, maple syrup, and coconut flour to the blender. Blend for 20-30 seconds until combined and smooth. The batter should be thick but pourable.
- Pour the filling over the pre-baked crust. Gently tap the pan on the counter to release air bubbles.
- Melt dark chocolate chips with coconut oil in the microwave in 20-second bursts, stirring between each, until smooth. Drizzle the melted chocolate over the filling in 3-4 concentric circles, starting from the center and working outward. Use a toothpick to drag lines from the center outward like spokes, then drag lines from the outside inward between each spoke to create a spiderweb pattern.
- Bake at 325°F for 30-35 minutes, until edges are set and slightly puffed but the center still jiggles slightly. If top browns too quickly, tent loosely with foil after 25 minutes.
- Cool completely on a wire rack (about 1 hour), then refrigerate for at least 4 hours, preferably overnight.
- Lift bars out using parchment handles. Use a sharp knife to cut into 16 squares, wiping the knife clean between cuts. Serve cold or at room temperature.
Notes
Blend cottage cheese thoroughly for a smooth texture. Don’t over-bake; the center should still jiggle. Chill for at least 4 hours for best texture. For dairy-free, use dairy-free cream cheese and coconut oil. For gluten-free, use gluten-free graham crackers.
Nutrition
- Serving Size: 1 bar
- Calories: 145
- Sugar: 9
- Sodium: 180
- Fat: 6
- Saturated Fat: 3
- Carbohydrates: 16
- Fiber: 2
- Protein: 7
Keywords: pumpkin cheesecake bars, healthy dessert, spiderweb, Halloween, fall dessert, cottage cheese cheesecake, lighter cheesecake


