Love this? Save it for later!
Share the inspiration with your friends
My neighbor watched me hauling groceries up three flights of stairs last October, my bag threatening to split at the seams. She didn’t say anything at first, just shook her head with a knowing smile. Then she disappeared into her apartment and came back holding a plate covered in foil, still warm. “You looked like you needed this more than I do,” she said, pressing it into my hands. Inside were these impossibly dark, velvety cupcakes topped with the most brilliant orange buttercream I had ever seen.
I almost dropped them when I tried to juggle my keys and the plate. Honestly, I was having one of those weeks where everything felt a little heavy, you know? The kind where you forget to eat lunch because nothing sounds good anyway. But that first bite changed my mood entirely. The cake was so tender it practically melted, and that citrus buttercream hit me like a ray of sunshine on a cloudy day. I stood there in my hallway, leaning against the doorframe, eating a cupcake and feeling the stress just drain away.
Her name is Rosa, and she moved here from Mexico City about five years ago. She told me later that the black velvet cake was her grandmother’s recipe, but the orange buttercream was something she added herself after moving to the States. “It reminds me of the orange trees in my grandmother’s yard,” she said. “Every winter, we would pick them together.” I loved that she adapted her family recipe instead of keeping it frozen in time. That’s what good cooking is, I think — honoring where something came from while letting it grow roots somewhere new.
I’ve made these cupcakes at least a dozen times since that day. They’ve become my go-to for everything from bad days to birthday parties. There’s something about that dark, rich cake paired with bright citrus that just works. Maybe you’ve been there too — needing something that feels both comforting and surprising at the same time. These cupcakes are exactly that.
Why You’ll Love This Recipe
I’ve tested this recipe more times than I care to admit. The first few batches were disasters, honestly. Too dry, too dense, the buttercream splitting because I got impatient. But Rosa was patient with me over text messages, and I finally got it right. Here is why this version stands out from every other cupcake recipe you’ll find online:
- Quick & Easy : From start to finish, these come together in about 45 minutes. Perfect for when you need a baking project that doesn’t take over your whole evening.
- Simple Ingredients : No weird extracts or hard-to-find items. You probably have most of this in your pantry right now, except maybe the black cocoa powder.
- Perfect for Cozy Nights : These are made for cold weather, rainy afternoons, or any time you need a little edible hug. They pair beautifully with a cup of tea or coffee.
- Crowd-Pleaser : I brought these to a potluck and three people asked for the recipe before I even left. Kids love the color, adults love the flavor combo.
- Unbelievably Delicious : The texture is what gets everyone. It’s not a typical dense chocolate cupcake. It’s light, almost airy, with a fine crumb that feels fancy without being fussy.
What makes this recipe different is the balance. Most black velvet recipes lean too heavy on the cocoa, making them bitter. This one uses just enough black cocoa for that dramatic color and deep flavor, but balances it with buttermilk and a touch of vinegar for tenderness. The orange buttercream isn’t an afterthought either — it’s bright enough to cut through the richness, but not so citrusy that it tastes like breakfast. It’s comfort food that feels a little special, you know?
This is the kind of recipe that makes you close your eyes after the first bite. It’s simple enough for a Tuesday night but impressive enough for a holiday gathering. And honestly, it’s the kind of baking that fills your kitchen with that cozy, warm smell that just makes everything feel better.
What Ingredients You Will Need
This recipe uses simple, wholesome ingredients that work together to create something truly special. Most of these are pantry staples, which means you can whip these up without a special trip to the store.
For the Black Velvet Cupcakes
- 1 ½ cups all-purpose flour (spooned and leveled — don’t scoop directly from the bag)
- ¾ cup black cocoa powder (I prefer Rodelle or King Arthur for the deepest color; regular Dutch-process cocoa works too, but the color won’t be as dramatic)
- 1 teaspoon baking soda
- ½ teaspoon salt
- 1 cup granulated sugar
- ½ cup packed light brown sugar (adds moisture and a hint of molasses)
- ½ cup unsalted butter, softened to room temperature
- 2 large eggs, room temperature (cold eggs will make the batter curdle)
- 1 teaspoon vanilla extract
- 1 cup buttermilk, room temperature (adds tenderness and helps activate the baking soda)
- 1 tablespoon white vinegar (don’t skip this — it reacts with the baking soda for lift)
For the Orange Buttercream
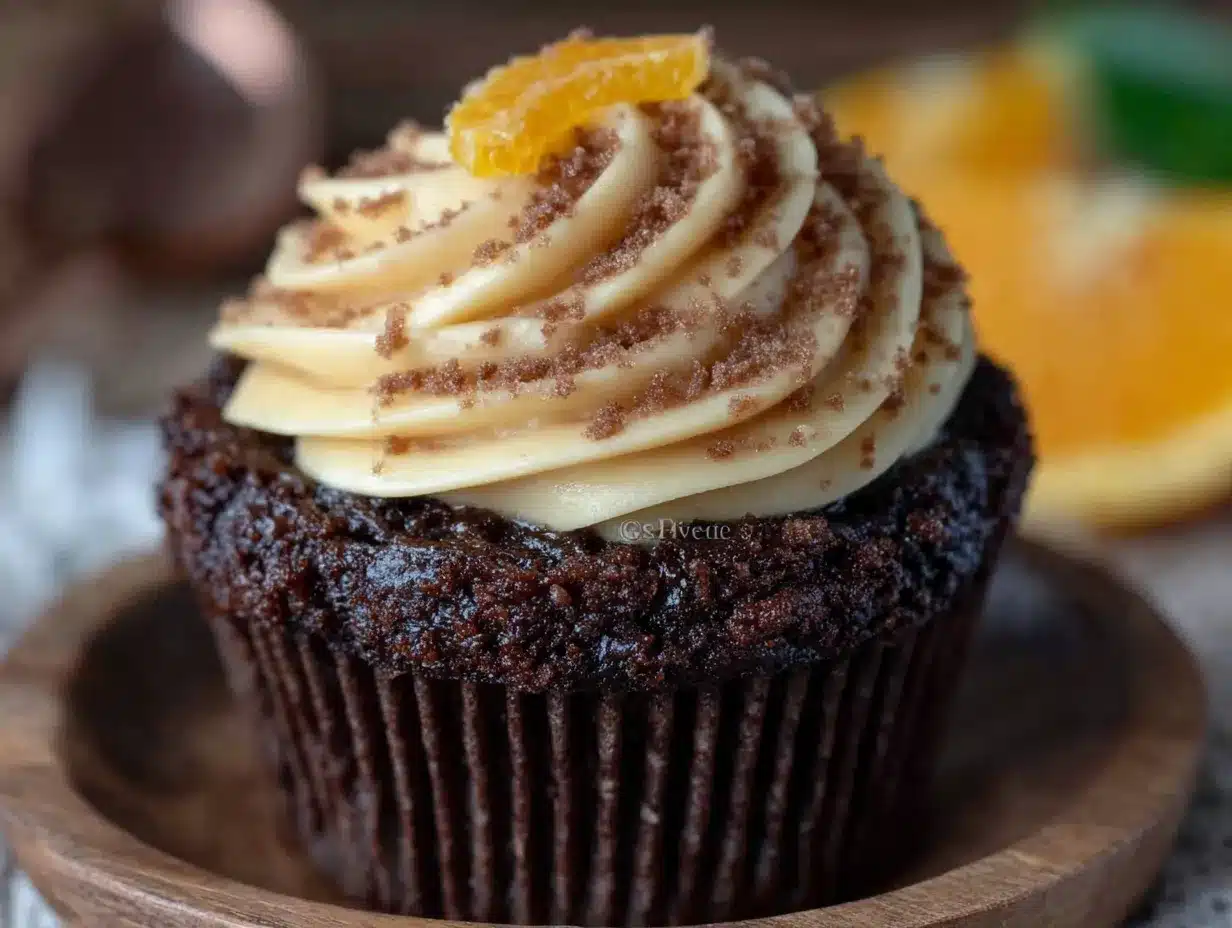
- 1 cup unsalted butter, softened (use good quality — it makes a difference in taste and texture)
- 3 ½ cups powdered sugar, sifted (sifting prevents lumps)
- 2 tablespoons heavy cream (or whole milk in a pinch)
- 1 tablespoon fresh orange zest (from about one large orange — don’t use dried zest)
- 2 tablespoons fresh orange juice (strained to remove pulp)
- ½ teaspoon vanilla extract
- Pinch of salt
For Garnish (Optional)
- Orange zest curls (use a vegetable peeler for pretty ribbons)
- Black sanding sugar or edible glitter (for a little drama)
A quick note on the cocoa powder: black cocoa powder is what gives these cupcakes that signature dark color and mild Oreo-like flavor. You can find it at most baking supply stores or online. If you only have regular Dutch-process cocoa, your cupcakes will still taste amazing — they just won’t have that dramatic black color. I’ve made them both ways, and honestly, both are delicious. The black cocoa version just feels more special for occasions.
For the oranges, grab a navel orange or any sweet variety. You want oranges that feel heavy for their size — that means they’re juicy. And please, please zest before you juice. I learned that the hard way and ended up with grated knuckles and no zest.
Equipment Needed
You don’t need a professional bakery setup for these. Here is what you will need:
- Standard 12-cup muffin tin (non-stick or light-colored metal works best)
- Paper cupcake liners (I like white or black liners for contrast; avoid the cheap thin ones that peel off)
- Two large mixing bowls (one for dry ingredients, one for wet)
- Electric hand mixer or stand mixer (for the buttercream; you can whisk by hand but your arm will hate you)
- Whisk
- Rubber spatula
- Cooling rack
- Piping bag with a star tip (Wilton 1M or similar; a zip-top bag with the corner snipped works in a pinch)
- Microplane or fine grater (for zesting)
- Measuring cups and spoons
- Kitchen scale (optional but helpful for consistent results)
If you don’t have a piping bag, don’t stress. I’ve used a sturdy zip-top bag plenty of times. Just fill it, snip off the corner, and pipe away. It won’t look as fancy, but it will taste the same. Also, if your muffin tin is dark-colored, reduce the baking temperature by 25°F — dark pans absorb more heat and can over-brown the edges.
Preparation Method
Let me walk you through this step by step. I’ve made enough mistakes with this recipe that I can tell you exactly what to watch out for.
- Preheat your oven to 350°F (175°C). Line your muffin tin with paper liners. This recipe makes exactly 12 cupcakes, so don’t try to squeeze out 13 — I’ve tried, and it never works.
- In a medium bowl, whisk together the flour, black cocoa powder, baking soda, and salt. Make sure there are no lumps in the cocoa powder. If you see little dark clumps, press them through a sieve. Trust me, nobody wants a pocket of raw cocoa in their cupcake.
- In a large bowl, beat the softened butter with both sugars until light and fluffy, about 3 minutes with an electric mixer. Scrape down the sides halfway through. The mixture should look pale and airy, not greasy.
- Add the eggs one at a time, beating well after each addition. Then add the vanilla extract. If the mixture looks curdled at this point, don’t panic — it will come together when you add the dry ingredients.
- Combine the buttermilk and vinegar in a small measuring cup. It will bubble slightly — that’s good. That reaction is going to help your cupcakes rise beautifully.
- Now this is the important part: Add the dry ingredients and the buttermilk mixture to the butter mixture in three additions, starting and ending with the dry ingredients. Mix on low speed until just combined after each addition. Overmixing will make your cupcakes tough. I speak from experience — my first batch came out like hockey pucks because I got distracted and kept mixing.
- The batter will be thin. Don’t worry, that’s normal. It should be pourable, almost like a thin pancake batter. Divide it evenly among the 12 liners, filling each about ⅔ full. I use a cookie scoop for this — it’s less messy and gives you even portions.
- Bake for 18 to 20 minutes, or until a toothpick inserted in the center comes out with just a few moist crumbs. The tops should spring back when lightly pressed. Rotate the pan halfway through baking if your oven has hot spots.
- Let the cupcakes cool in the pan for 5 minutes, then transfer them to a wire rack to cool completely. Do not frost them while they’re warm. I know it’s tempting, but the buttercream will melt into a sad puddle. I’ve done it. It’s not pretty.
- While the cupcakes cool, make the buttercream. In a large bowl, beat the softened butter on medium speed until smooth and creamy, about 2 minutes. It should look pale and spreadable.
- Gradually add the sifted powdered sugar, one cup at a time, beating on low speed. Add the heavy cream, orange zest, orange juice, vanilla, and salt. Beat on medium speed for 3 to 4 minutes until light and fluffy. If the frosting seems too stiff, add another tablespoon of cream. Too loose? Add a little more powdered sugar.
- Once the cupcakes are completely cool, pipe or spread the buttercream on top. I like a generous swirl, but a simple dollop with a knife works beautifully too. Garnish with orange zest curls or black sanding sugar if you’re feeling fancy.
Cooking Tips & Techniques
After making these cupcakes more times than I can count, here is what I’ve learned the hard way so you don’t have to:
Room temperature ingredients matter. I know, I know — everyone says this, but it’s actually true here. Cold butter doesn’t cream properly with sugar, cold eggs can make your batter seize, and cold buttermilk won’t activate the baking soda as effectively. Leave everything on the counter for about an hour before you start. I usually take my ingredients out, then prep my liners and measure everything while they warm up.
Don’t overfill the liners. I got greedy once and filled them almost to the top, thinking I’d get jumbo cupcakes. Instead, I got muffin tops that spread across each other and a mess that took forever to clean. Two-thirds full is the sweet spot.
Check your oven temperature. My oven runs hot, so I always use an oven thermometer. If your cupcakes are browning too quickly on the edges but still raw in the middle, your oven is too hot. Drop the temperature by 25 degrees and extend the baking time by a couple of minutes.
For the buttercream, patience is key. I ruined my first batch by rushing. I added the orange juice too quickly and the frosting separated into a greasy mess. Add the liquid slowly, one tablespoon at a time, and beat well between each addition. If it does separate, don’t toss it — pop the bowl in the fridge for 10 minutes, then beat it again. It usually comes back together.
One more thing: Taste your oranges before you zest them. I once zested an orange that turned out to be mealy and flavorless. All that beautiful zest, wasted. Give the orange a little squeeze first — if it smells like orange, you’re good.
Variations & Adaptations
This recipe is surprisingly flexible. Here are some ways I’ve adapted it over the years:
Dairy-Free Version
Swap the butter for a high-quality vegan butter stick (not the spreadable kind in a tub). Use oat milk or almond milk mixed with 1 tablespoon of lemon juice instead of buttermilk. For the buttercream, use vegan butter and a dairy-free creamer. I tested this version for a friend with a dairy allergy, and honestly, it was almost indistinguishable from the original.
Gluten-Free Adaptation
Substitute the all-purpose flour with a good 1:1 gluten-free baking flour blend. I’ve had the best luck with King Arthur Measure for Measure. Add ¼ teaspoon of xanthan gum if your blend doesn’t already include it. The texture will be slightly more delicate, so handle the cooled cupcakes gently before frosting.
Flavor Twists
If orange isn’t your thing, try lemon buttercream instead — same method, just swap the orange zest and juice for lemon. I made a batch with blood orange buttercream last winter and the color was stunning. You can also add a teaspoon of espresso powder to the dry ingredients for a mocha version that pairs beautifully with the orange.
Mini Cupcake Version
For bite-sized treats, use a mini muffin tin and bake for 10 to 12 minutes. This makes about 36 mini cupcakes. Perfect for parties where people want to try a little of everything without committing to a full-sized dessert.
My personal favorite variation came about by accident. I ran out of black cocoa powder one afternoon and used half black cocoa, half regular Dutch-process. The color was more of a dark charcoal than true black, but the flavor was incredibly rich and complex. Sometimes the best discoveries come from mistakes.
Serving & Storage Suggestions
These cupcakes are best served at room temperature. If you’ve refrigerated them, let them sit out for about 30 minutes before serving. The buttercream softens and the cake becomes more tender — it makes a real difference in texture.
For a cozy presentation, arrange them on a cake stand or a wooden board. A sprinkle of flaky sea salt over the buttercream right before serving adds a lovely contrast to the sweetness. I also love serving them with a hot cup of chai or a strong latte. The warm spices in chai complement the orange notes beautifully.
Storage: Keep unfrosted cupcakes in an airtight container at room temperature for up to 3 days. Frosted cupcakes should be stored in the refrigerator, but bring them back to room temperature before eating. The buttercream will firm up in the fridge, which actually makes it easier to stack them if you’re transporting them somewhere.
Freezing: You can freeze unfrosted cupcakes for up to 3 months. Wrap each one individually in plastic wrap, then place them in a freezer bag. Thaw at room temperature for about an hour before frosting. The buttercream can also be frozen for up to 2 months — just thaw it in the fridge overnight and re-whip it before using.
One thing I’ve noticed: these cupcakes actually taste better the day after baking. The flavors meld together overnight, and the texture stays incredibly moist. So if you’re making them for an event, bake them a day ahead and frost them the morning of. Your future self will thank you.
Nutritional Information & Benefits
Let’s be real — these are cupcakes, not health food. But here’s the approximate breakdown per cupcake with frosting:
| Nutrient | Amount |
|---|---|
| Calories | 385 |
| Total Fat | 18g |
| Saturated Fat | 11g |
| Carbohydrates | 54g |
| Sugar | 42g |
| Protein | 4g |
| Fiber | 2g |
That said, there are some redeeming qualities. Black cocoa powder is rich in antioxidants called flavonoids, which can help reduce inflammation. Oranges provide vitamin C and immune-boosting properties. And honestly, sometimes the mental health benefits of treating yourself to something delicious are worth more than any nutrient count. Baking and sharing food has been shown to reduce stress and increase feelings of connection. So go ahead, have a cupcake. Your heart will thank you.
If you’re watching your sugar intake, you can reduce the sugar in the cupcake batter by a quarter cup without affecting the texture too much. The buttercream is harder to adjust — it needs that sugar for structure — but you can use a sugar substitute like Swerve for a lower-carb option.
Conclusion
These black velvet cupcakes with orange buttercream have become a staple in my kitchen for good reason. They’re the kind of recipe that feels special without being complicated, the kind that makes people light up when you bring them out. That dark, tender cake paired with bright citrus buttercream is a combination that just works — it’s comforting and surprising all at once.
I love that this recipe came to me through a simple act of neighborly kindness. Rosa didn’t give me a lecture or a formal lesson. She just handed me a plate and trusted that I’d figure out the rest. That’s how the best recipes travel, I think — not through rigid instructions, but through small, generous moments.
I hope you make these your own. Maybe you’ll add a different citrus, or try a spice in the buttercream, or serve them at a gathering that matters to you. Whatever you do, I’d love to hear about it. Leave a comment below and tell me how they turned out, or share a photo of your creation. And if you’re looking for more cozy baking inspiration, try our cozy pumpkin crumb cake or these chocolate espresso snickerdoodles for another comforting treat. Happy baking, friends.
Frequently Asked Questions
Can I use regular cocoa powder instead of black cocoa?
Yes, absolutely. Your cupcakes will taste delicious — they just won’t have that dramatic black color. Use Dutch-process cocoa for the closest flavor and texture. The color will be more of a dark brown, which is still beautiful.
Why did my buttercream turn out grainy?
Grainy buttercream usually means the powdered sugar wasn’t sifted, or the butter wasn’t soft enough when you started. Make sure your butter is at genuine room temperature (soft but not melted) and sift your powdered sugar before adding it. If it’s already grainy, try beating it for another minute or two — sometimes it smooths out with extra mixing.
Can I make these cupcakes ahead of time?
Definitely. Bake the cupcakes up to two days ahead and store them unfrosted in an airtight container. Make the buttercream up to three days ahead and keep it in the fridge. Let the buttercream come to room temperature and give it a quick whip before frosting. Frosted cupcakes are best eaten within 24 hours.
My cupcakes sunk in the middle. What went wrong?
This usually happens for one of three reasons: the oven door was opened too early (give them at least 15 minutes before peeking), the batter was overmixed (which creates too much air that collapses), or the baking soda was old. Check the expiration date on your baking soda — it loses potency over time.
Can I use bottled orange juice instead of fresh?
I wouldn’t recommend it. Bottled orange juice lacks the bright, fresh flavor that makes this buttercream special. It also has added sugars and preservatives that can affect the texture. Fresh oranges are worth the extra minute of effort, I promise. Your taste buds will thank you.
Pin This Recipe!
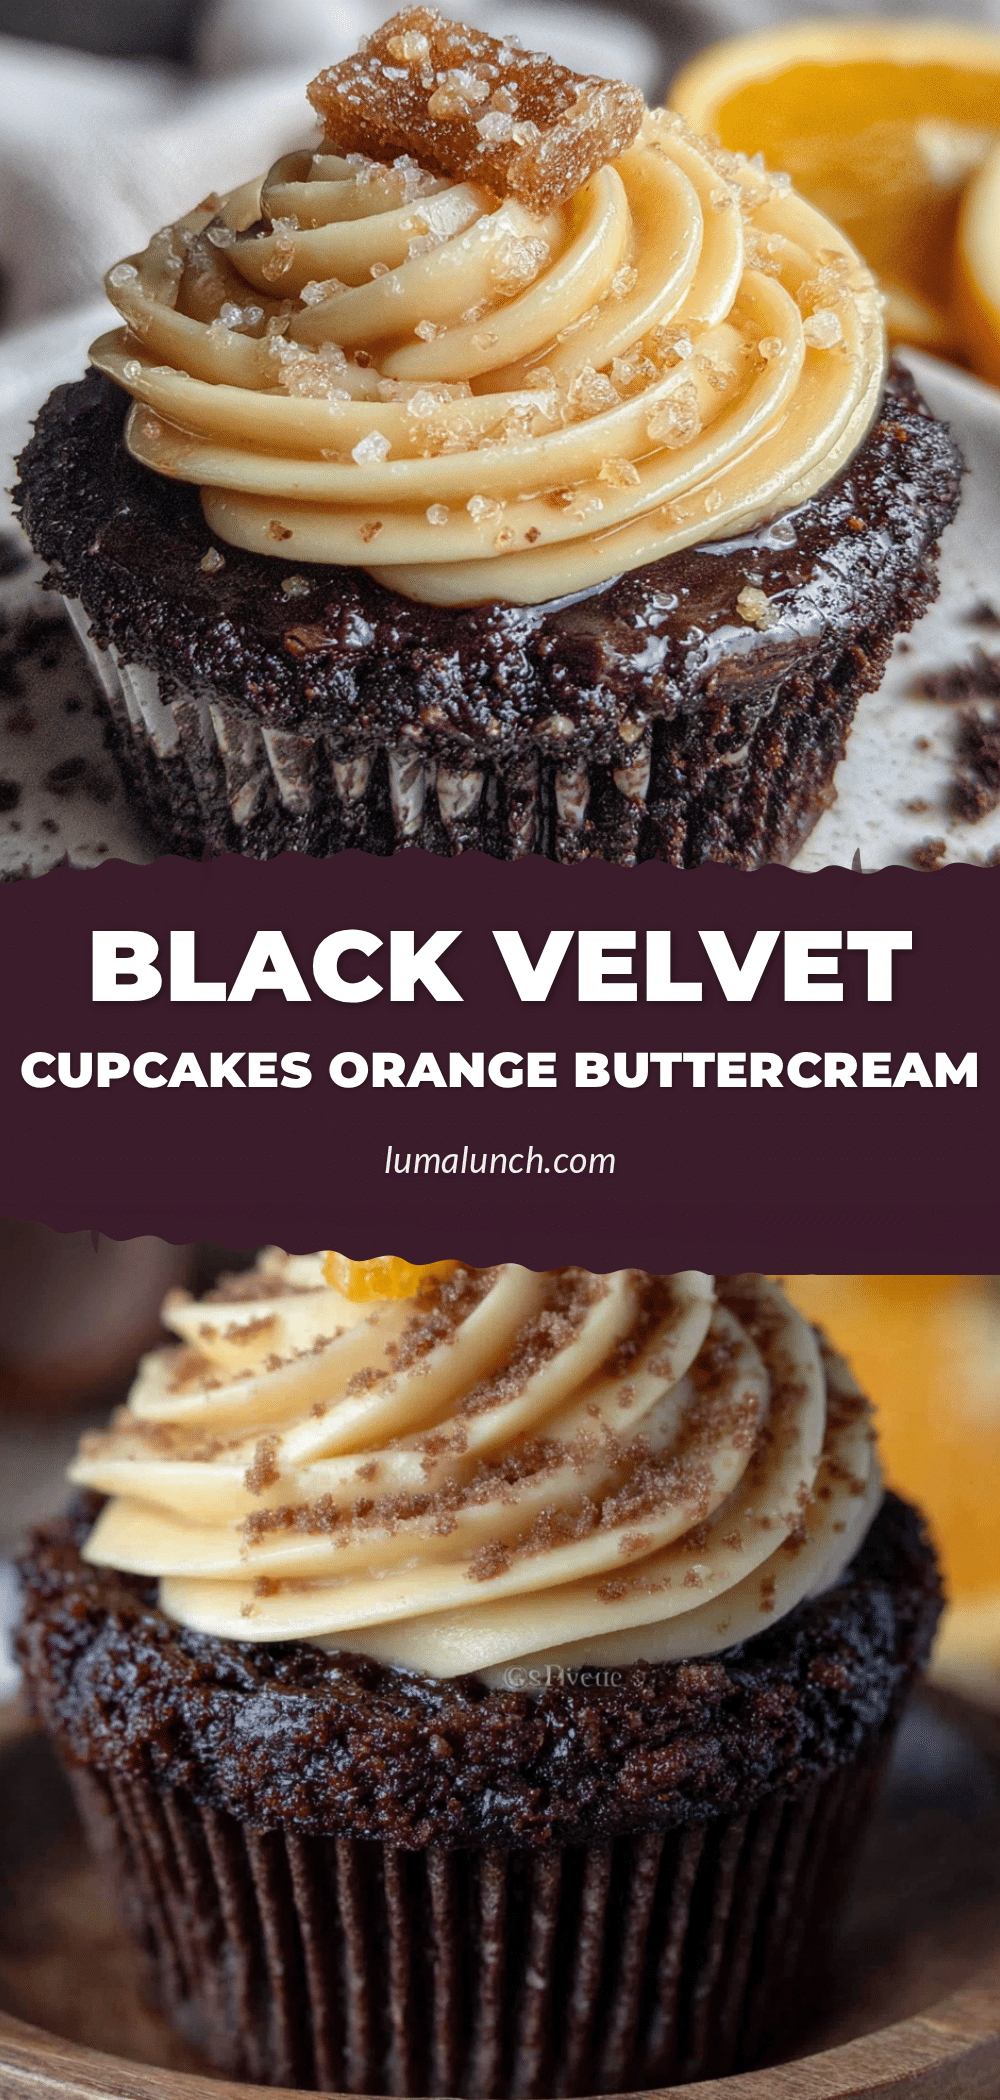
Easy Black Velvet Cupcakes with Orange Buttercream
These impossibly dark, velvety cupcakes are topped with a brilliant orange buttercream that cuts through the richness. A comforting and surprising treat perfect for cozy nights or celebrations.
- Prep Time: 15 minutes
- Cook Time: 20 minutes
- Total Time: 45 minutes
- Yield: 12 servings 1x
- Category: Dessert
- Cuisine: American
Ingredients
- 1 ½ cups all-purpose flour (spooned and leveled)
- ¾ cup black cocoa powder (Rodelle or King Arthur preferred; Dutch-process works too)
- 1 teaspoon baking soda
- ½ teaspoon salt
- 1 cup granulated sugar
- ½ cup packed light brown sugar
- ½ cup unsalted butter, softened to room temperature
- 2 large eggs, room temperature
- 1 teaspoon vanilla extract
- 1 cup buttermilk, room temperature
- 1 tablespoon white vinegar
- 1 cup unsalted butter, softened (for buttercream)
- 3 ½ cups powdered sugar, sifted
- 2 tablespoons heavy cream (or whole milk)
- 1 tablespoon fresh orange zest (from about 1 large orange)
- 2 tablespoons fresh orange juice, strained
- ½ teaspoon vanilla extract
- Pinch of salt
- Orange zest curls (optional, for garnish)
- Black sanding sugar or edible glitter (optional, for garnish)
Instructions
- Preheat oven to 350°F (175°C). Line a 12-cup muffin tin with paper liners.
- In a medium bowl, whisk together flour, black cocoa powder, baking soda, and salt. Press through a sieve if cocoa has lumps.
- In a large bowl, beat softened butter with both sugars until light and fluffy, about 3 minutes with an electric mixer. Scrape down sides halfway through.
- Add eggs one at a time, beating well after each addition. Add vanilla extract.
- Combine buttermilk and vinegar in a small measuring cup (it will bubble slightly).
- Add dry ingredients and buttermilk mixture to butter mixture in three additions, starting and ending with dry ingredients. Mix on low speed until just combined after each addition. Do not overmix.
- Divide batter evenly among 12 liners, filling each about ⅔ full. Batter will be thin.
- Bake for 18 to 20 minutes, until a toothpick inserted in center comes out with a few moist crumbs. Rotate pan halfway through if needed.
- Let cupcakes cool in pan for 5 minutes, then transfer to a wire rack to cool completely.
- While cupcakes cool, make buttercream: Beat softened butter on medium speed until smooth and creamy, about 2 minutes.
- Gradually add sifted powdered sugar, one cup at a time, beating on low speed. Add heavy cream, orange zest, orange juice, vanilla, and salt. Beat on medium speed for 3 to 4 minutes until light and fluffy. Adjust consistency with more cream or powdered sugar if needed.
- Once cupcakes are completely cool, pipe or spread buttercream on top. Garnish with orange zest curls or black sanding sugar if desired.
Notes
Room temperature ingredients are crucial for best results. Black cocoa powder gives the signature dark color and mild Oreo-like flavor; regular Dutch-process cocoa works but color will be less dramatic. For dairy-free, use vegan butter and oat milk with lemon juice. For gluten-free, use a 1:1 gluten-free flour blend with xanthan gum. Cupcakes taste even better the day after baking. Store unfrosted cupcakes at room temperature for up to 3 days; frosted cupcakes in refrigerator but bring to room temperature before serving.
Nutrition
- Serving Size: 1 cupcake with frost
- Calories: 385
- Sugar: 42
- Sodium: 200
- Fat: 18
- Saturated Fat: 11
- Carbohydrates: 54
- Fiber: 2
- Protein: 4
Keywords: black velvet cupcakes, orange buttercream, chocolate cupcakes, citrus frosting, easy cupcake recipe, black cocoa cupcakes


