Love this? Save it for later!
Share the inspiration with your friends
It was 11:30 PM on a rainy Wednesday in early November, and I had a sudden, almost desperate craving for turkey gravy. Not the kind from a packet or a can, but the real stuff—dark, silky, and so rich it coats the back of a spoon. The problem? Thanksgiving was still five days away, and I definitely didn’t have a roasted turkey carcass lying around. I had a few chicken wings in the freezer, a sad-looking onion, and a half-empty bottle of white wine from last weekend. Honestly, it felt like a kitchen experiment gone rogue, but the craving was too loud to ignore. So, I tossed those wings into a pot, added the onion, and poured in that wine. I figured, what’s the worst that could happen? Maybe it wouldn’t taste like Thanksgiving, but it would taste like something.
That late-night kitchen session turned into a bit of a mess—I forgot to strain the drippings properly, and there were little bits of onion floating in the gravy like tiny islands. But you know what? That gravy was the best I’d ever made. It was deep, savory, and had this unexpected richness from the chicken wings that I hadn’t planned. I sat there at 1 AM, dipping a crusty piece of bread into the pot, feeling like I’d stumbled onto something magical. That’s the thing about late-night cooking—you’re not trying to impress anyone, so you just go with your gut. And my gut said, “This is the one.”
Since then, I’ve refined that accidental recipe into something I’m genuinely proud of. This make-ahead turkey gravy is now my secret weapon for every holiday dinner. It saves me from the last-minute panic of making gravy while the turkey rests, and it tastes like I spent hours slaving over the stove—when really, I just let it simmer while I did other things. Maybe you’ve been there, standing over a bubbling pot on Thanksgiving morning, wondering if you’ll ever get everything on the table on time. This gravy is for those moments. It’s the kind of recipe that stays with you, not because it’s fancy, but because it just works.
Why You’ll Love This Recipe
Let me tell you why this make-ahead turkey gravy has become a non-negotiable in my kitchen. First off, it’s a total time-saver. You can make it up to three days before the big meal, which means one less thing to juggle when the turkey is roasting and the rolls are browning. I’ve tested this recipe through countless family dinners, and it always delivers that silky, savory flavor without the stress.
- Quick & Easy: This gravy comes together in about 45 minutes of active time, then simmers happily on the stove while you prep other dishes. Perfect for busy holiday mornings.
- Simple Ingredients: No need for a turkey carcass or fancy stock. You probably have chicken wings, onions, and a splash of wine in your kitchen right now.
- Perfect for Holidays: Whether it’s Thanksgiving, Christmas, or Easter, this gravy is the backbone of a comforting meal. It’s a crowd-pleaser that kids and adults both love.
- Crowd-Pleaser: I’ve served this at potlucks and family gatherings, and it always gets rave reviews. People ask for the recipe every single time.
- Unbelievably Delicious: The texture is smooth, the flavor is deep, and it has that rich, homemade taste that makes you close your eyes after the first bite.
What makes this recipe different from others is the technique. Instead of using a turkey carcass, I use chicken wings to build a deep, savory base. It’s a little unconventional, but it works beautifully. Plus, the make-ahead aspect means the flavors have time to meld, making it even better the next day. This isn’t just another gravy recipe—it’s your best version. It’s comfort food reimagined: faster, simpler, but with the same soul-soothing satisfaction that makes holidays special.
What Ingredients You Will Need
This recipe uses simple, wholesome ingredients to deliver bold flavor and satisfying texture without the fuss. Most of these are pantry staples, which makes it easy to whip up whenever the craving hits.
For the Gravy Base
- Chicken wings (2 pounds) – These are the secret to a rich, meaty flavor without needing a turkey carcass. I like to use whole wings, but drumettes work too.
- Onion (1 large, quartered) – Adds sweetness and depth. Leave the skin on for a deeper color—it sounds weird, but trust me.
- Carrots (2 medium, roughly chopped) – For a subtle sweetness and body. I’ve used parsnips in a pinch, and they work great.
- Celery (2 stalks, roughly chopped) – Adds that classic savory note. Don’t skip it—it makes a difference.
- Garlic cloves (4, smashed) – I recommend using fresh garlic here; the pre-minced stuff just doesn’t have the same punch.
- Dry white wine (1 cup) – Use something you’d drink, like a Sauvignon Blanc. It deglazes the pan and adds acidity to balance the richness.
- Chicken stock (4 cups) – Low-sodium is best so you can control the salt. I prefer Swanson or Kitchen Basics for consistent flavor.
- Fresh thyme (4 sprigs) – Earthy and aromatic. Dried thyme works in a pinch—use 1 teaspoon.
- Bay leaves (2) – For that subtle herbal note. Remove them before blending.
- Unsalted butter (4 tablespoons) – Adds richness and helps thicken the gravy. Use European-style butter for extra creaminess.
- All-purpose flour (1/4 cup) – For thickening. You can use gluten-free flour if needed—just whisk well to avoid lumps.
- Salt and black pepper – To taste. I use kosher salt and freshly ground pepper for the best flavor.
Optional Additions
- Turkey drippings (1/2 cup) – If you have them from the roasted turkey, stir them in at the end for extra flavor. This is a nice touch but not necessary.
- Fresh parsley (2 tablespoons, chopped) – For garnish. Adds a pop of color and freshness.
Equipment Needed
You don’t need a fancy kitchen to make this gravy. Here’s what I use, along with some budget-friendly alternatives.
- Large stockpot or Dutch oven (6-quart) – This is essential for browning the wings and simmering the stock. I use a cast-iron Dutch oven because it holds heat well, but a heavy-bottomed pot works too.
- Fine-mesh strainer – For straining the stock to get a smooth gravy. If you don’t have one, use a colander lined with cheesecloth.
- Whisk – A good whisk prevents lumps when adding the flour. I prefer a balloon whisk for this task.
- Measuring cups and spoons – Accuracy matters for the stock and flour. Use dry measuring cups for the flour.
- Sharp knife and cutting board – For chopping veggies. A dull knife makes the job harder—trust me on this.
- Wooden spoon or spatula – For stirring the roux. A flat-edged spatula helps scrape up the browned bits from the pan.
- Storage containers (glass or plastic) – For refrigerating or freezing the gravy. I use mason jars for easy pouring.
Preparation Method
Here’s how to make this gravy step by step. I’ve included time estimates and sensory cues so you know exactly what to look for.
Step 1: Brown the Chicken Wings (15 minutes)
Heat your large stockpot or Dutch oven over medium-high heat. Add a tablespoon of butter or oil. Once it’s shimmering, add the chicken wings in a single layer (work in batches if needed). Let them cook without moving for 4-5 minutes until the skin is deep golden brown. Flip and repeat on the other side. You’re looking for a rich, caramelized color—this is where the flavor comes from. If the wings stick, they’re not ready to flip. Be patient!
Step 2: Sauté the Vegetables (5 minutes)
Remove the wings from the pot and set them aside. Add the quartered onion, carrots, celery, and smashed garlic. Sauté for 3-4 minutes, stirring occasionally, until the vegetables start to soften and the onions turn translucent. You should smell a sweet, savory aroma. If the pot looks dry, add a splash of water.
Step 3: Deglaze the Pan (2 minutes)
Pour in the cup of white wine. Use your wooden spoon to scrape up all the browned bits from the bottom of the pot—this is called deglazing, and it’s where the magic happens. Let the wine bubble and reduce for about 2 minutes until it’s slightly syrupy. The alcohol will cook off, leaving behind a rich, tangy flavor.
Step 4: Simmer the Stock (45 minutes)
Return the chicken wings to the pot. Add the chicken stock, fresh thyme sprigs, and bay leaves. Bring everything to a boil, then reduce the heat to low. Let it simmer uncovered for 45 minutes. You’ll notice the liquid reducing and the flavors concentrating. Give it an occasional stir. The stock should smell deeply savory and look darker as it cooks.
Step 5: Strain the Stock (5 minutes)
Set your fine-mesh strainer over a large bowl or another pot. Carefully pour the stock through the strainer, pressing on the solids with a spoon to extract as much liquid as possible. Discard the solids (or save the chicken wing meat for another use—it’s great in soup). You should have about 3 cups of rich, golden stock. Let it cool slightly.
Step 6: Make the Roux (5 minutes)
Wipe out the pot and return it to medium heat. Add the 4 tablespoons of butter. Once it melts, whisk in the 1/4 cup of flour. Keep whisking for 2-3 minutes until the mixture turns a light golden color—this is a blond roux. It should smell nutty and look smooth. Don’t let it brown too much, or the gravy will be darker and less creamy.
Step 7: Whisk in the Stock (5 minutes)
Slowly pour the strained stock into the roux, whisking constantly to prevent lumps. Start with a thin stream, then increase to a steady pour. Keep whisking until the gravy thickens and comes to a gentle boil—about 3-4 minutes. It should coat the back of a spoon. If it’s too thick, add a splash more stock or water. Season with salt and pepper to taste.
Step 8: Finish and Store (2 minutes)
Remove the pot from heat. If you have turkey drippings, stir them in now for extra flavor. Let the gravy cool to room temperature, then transfer it to storage containers. Refrigerate for up to 3 days or freeze for up to 3 months. When reheating, warm it gently on the stove, adding a splash of stock if needed.
Cooking Tips & Techniques
I’ve made this gravy more times than I can count, and I’ve learned a few things along the way. Here are my best tips to get it right every time.
- Don’t skimp on browning: The deeper the color on the chicken wings, the richer the flavor. I once rushed this step, and the gravy was bland. Trust me, those extra minutes matter.
- Watch the roux: A blond roux is perfect for gravy. If it gets too dark, the gravy will taste burnt. If it’s too light, it will be pasty. Keep whisking and look for that pale gold color.
- Season gradually: Add salt and pepper at the end, after the gravy has thickened. The stock and drippings can vary in saltiness, so tasting as you go is crucial. I’ve over-salted more than one batch—learn from my mistake!
- Multitask smartly: While the stock simmers, you can prep other dishes like mashed potatoes or green bean casserole. This gravy fits seamlessly into your holiday timeline.
- Fix lumps easily: If your gravy has lumps, pour it through a fine-mesh strainer. It’s a quick fix that saves the texture. I’ve done this plenty of times—no shame in it.
Variations & Adaptations
This recipe is flexible, so feel free to make it your own. Here are some variations I’ve tried and loved.
- Dietary Adaptation (Gluten-Free): Swap the all-purpose flour with a gluten-free blend or cornstarch. For cornstarch, mix 2 tablespoons with 2 tablespoons of cold water to make a slurry, then whisk it into the stock at the end. It works perfectly.
- Seasonal Variation (Herb-Infused): Add fresh sage or rosemary along with the thyme. I did this for Christmas dinner, and the earthy flavors paired beautifully with the turkey.
- Flavor Twist (Mushroom Gravy): Sauté 8 ounces of sliced mushrooms with the vegetables. The umami from the mushrooms adds incredible depth. My vegetarian friends love this version over mashed potatoes.
- Allergen-Friendly (Dairy-Free): Use olive oil or a plant-based butter substitute instead of butter. The texture will be slightly different, but the flavor is still great.
- Personal Variation (Spicy Kick): I once added a pinch of cayenne pepper and a splash of apple cider vinegar at the end. It gave the gravy a subtle warmth that cut through the richness. My family was skeptical, but they loved it.
Serving & Storage Suggestions
This gravy is as versatile as it is delicious. Here’s how to serve and store it for the best results.
- Serving Temperature: Serve the gravy warm, not piping hot. Let it sit for a minute after reheating to allow the flavors to settle. It should be pourable but not watery.
- Presentation: Pour the gravy into a warmed gravy boat or a small pitcher. Garnish with a sprinkle of fresh parsley for a pop of color. For a rustic look, serve it in a small cast-iron skillet.
- Complementary Dishes: This gravy is perfect over roasted turkey, mashed potatoes, stuffing, or even biscuits for breakfast. I’ve also used it as a sauce for roasted vegetables—it’s that good.
- Refrigerator Storage: Store the gravy in an airtight container for up to 3 days. The flavors will meld and deepen, making it even better the next day. I often make it two days before Thanksgiving.
- Freezer Storage: Freeze the gravy in freezer-safe bags or containers for up to 3 months. Thaw it overnight in the refrigerator before reheating. The texture remains smooth.
- Reheating Methods: Reheat the gravy gently on the stovetop over low heat, whisking occasionally. If it’s too thick, add a splash of stock or water. You can also microwave it in 30-second bursts, stirring between each. Avoid boiling, as it can cause the gravy to separate.
- Flavor Development: This gravy actually improves with time. The herbs and spices meld together, creating a more complex flavor profile. I always prefer it the day after I make it.
Nutritional Information & Benefits
Here are the estimated nutritional values per serving (about 1/4 cup of gravy). These are based on the recipe as written, without optional additions.
- Calories: 120
- Total Fat: 8g
- Saturated Fat: 4g
- Cholesterol: 35mg
- Sodium: 300mg (varies with stock and added salt)
- Total Carbohydrates: 8g
- Dietary Fiber: 0g
- Sugars: 2g
- Protein: 4g
This gravy offers some surprising health benefits. The chicken wings provide collagen and protein, which support joint health and skin elasticity. The vegetables add vitamins A and C from the carrots and antioxidants from the onions and garlic. Using homemade stock also means you control the sodium, making it a healthier choice than store-bought gravies. If you’re watching your fat intake, you can use a plant-based butter substitute. This recipe is naturally gluten-free if you use a gluten-free flour blend, and it’s dairy-free with the right substitutions. As a home cook, I love that I can enjoy a rich, indulgent gravy without the guilt—it’s all about balance.
Conclusion
This make-ahead turkey gravy has become a staple in my kitchen, and I think it will be in yours too. It’s simple, forgiving, and delivers that deep, homemade flavor that makes holiday meals special. Whether you’re a seasoned cook or a beginner, this recipe is designed to work for you. I’ve made it for Thanksgiving, Christmas, and even random Tuesday dinners, and it never disappoints. The best part? You can customize it to your taste—add more herbs, a splash of wine, or a pinch of spice. It’s your gravy now.
I’d love to hear how it turns out for you. Drop a comment below with your favorite variation or any tips you discovered. Share this recipe with a friend who needs a little less stress in their holiday cooking. And if you make it, tag me in your photos—I can’t wait to see your gravy in action. Until next time, happy cooking, and remember: the best meals are the ones made with a little patience and a lot of love.
Frequently Asked Questions
Can I use turkey wings instead of chicken wings?
Yes, absolutely. Turkey wings will give an even more intense turkey flavor. Just note that they may take a bit longer to brown due to their size. The cooking time remains the same.
How do I make this gravy vegetarian?
To make a vegetarian version, skip the chicken wings and use vegetable stock instead. Sauté mushrooms with the vegetables for added umami. You can also add a splash of soy sauce or tamari for depth.
Can I make this gravy ahead of time for a holiday dinner?
Yes, that’s the beauty of this recipe! You can make it up to 3 days in advance and store it in the refrigerator. Reheat it gently on the stove, adding a splash of stock if needed. It actually tastes better the next day.
Why is my gravy lumpy?
Lumps usually happen when the roux isn’t whisked smoothly or when the stock is added too quickly. To fix it, whisk vigorously or pour the gravy through a fine-mesh strainer. Next time, add the stock in a slow, steady stream while whisking constantly.
Can I freeze this gravy?
Yes, this gravy freezes beautifully. Let it cool completely, then transfer it to freezer-safe bags or containers. It will keep for up to 3 months. Thaw it overnight in the refrigerator before reheating. The texture remains smooth and delicious.
Pin This Recipe!

Best Make-Ahead Turkey Gravy Recipe from Scratch

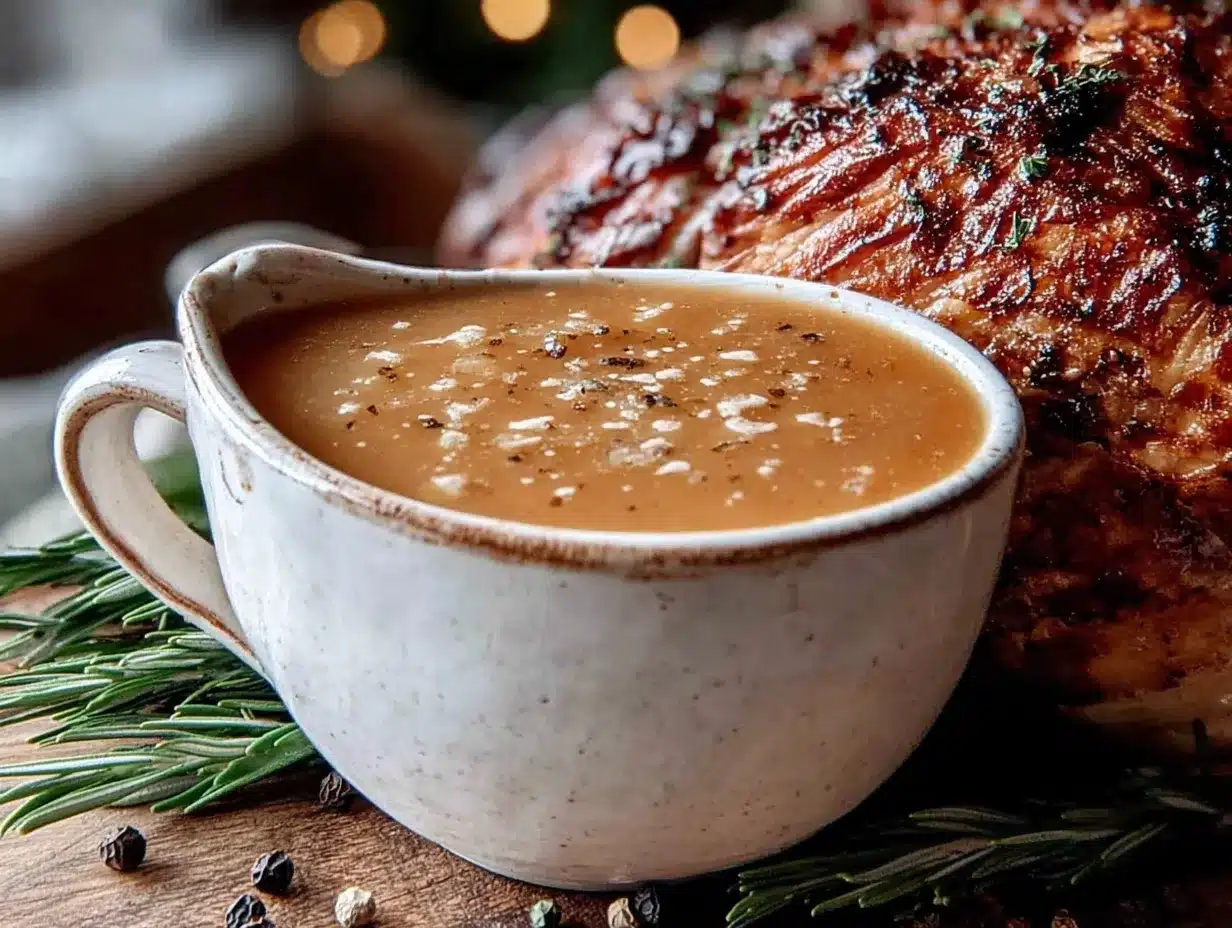
This make-ahead turkey gravy is rich, silky, and deeply savory, made with chicken wings for a flavorful base. It saves you from last-minute holiday stress and tastes even better the next day.
- Prep Time: 15 minutes
- Cook Time: 1 hour 5 minutes
- Total Time: 1 hour 20 minutes
- Yield: 8 servings 1x
- Category: Sauce
- Cuisine: American
Ingredients
- 2 pounds chicken wings
- 1 large onion, quartered
- 2 medium carrots, roughly chopped
- 2 stalks celery, roughly chopped
- 4 garlic cloves, smashed
- 1 cup dry white wine (e.g., Sauvignon Blanc)
- 4 cups low-sodium chicken stock
- 4 sprigs fresh thyme (or 1 teaspoon dried)
- 2 bay leaves
- 4 tablespoons unsalted butter
- 1/4 cup all-purpose flour
- Salt and black pepper to taste
- 1/2 cup turkey drippings (optional)
- 2 tablespoons fresh parsley, chopped (optional, for garnish)
Instructions
- Brown the chicken wings: Heat a large stockpot or Dutch oven over medium-high heat. Add a tablespoon of butter or oil. Once shimmering, add the chicken wings in a single layer (work in batches if needed). Cook without moving for 4-5 minutes until deep golden brown. Flip and repeat on the other side. Remove wings and set aside.
- Sauté the vegetables: Add the quartered onion, carrots, celery, and smashed garlic to the pot. Sauté for 3-4 minutes, stirring occasionally, until vegetables soften and onions turn translucent.
- Deglaze the pan: Pour in the white wine. Use a wooden spoon to scrape up all browned bits from the bottom. Let the wine bubble and reduce for about 2 minutes until slightly syrupy.
- Simmer the stock: Return the chicken wings to the pot. Add chicken stock, fresh thyme sprigs, and bay leaves. Bring to a boil, then reduce heat to low. Simmer uncovered for 45 minutes, stirring occasionally.
- Strain the stock: Set a fine-mesh strainer over a large bowl or pot. Pour the stock through, pressing on solids with a spoon to extract as much liquid as possible. Discard solids. You should have about 3 cups of stock.
- Make the roux: Wipe out the pot and return to medium heat. Add 4 tablespoons of butter. Once melted, whisk in 1/4 cup of flour. Keep whisking for 2-3 minutes until the mixture turns a light golden color (blond roux) and smells nutty.
- Whisk in the stock: Slowly pour the strained stock into the roux, whisking constantly to prevent lumps. Start with a thin stream, then increase to a steady pour. Continue whisking until the gravy thickens and comes to a gentle boil, about 3-4 minutes. It should coat the back of a spoon. Season with salt and pepper to taste.
- Finish and store: Remove from heat. If using, stir in turkey drippings. Let cool to room temperature, then transfer to storage containers. Refrigerate for up to 3 days or freeze for up to 3 months. Reheat gently on the stove, adding a splash of stock if needed.
Notes
For a deeper flavor, brown the chicken wings well. Use a blond roux for the best texture. Season gradually at the end. This gravy can be made up to 3 days ahead and improves with time.
Nutrition
- Serving Size: 1/4 cup
- Calories: 120
- Sugar: 2
- Sodium: 300
- Fat: 8
- Saturated Fat: 4
- Carbohydrates: 8
- Protein: 4
Keywords: make-ahead turkey gravy, homemade gravy, turkey gravy from scratch, holiday gravy, chicken wing gravy


