Love this? Save it for later!
Share the inspiration with your friends
I was standing in the baking aisle of our local grocery store last Tuesday, staring at a bag of chow mein noodles, when it hit me. I was seven years old again, sitting cross-legged on my aunt Maggie’s sticky kitchen floor, watching her snap those same crunchy noodles in half while she told me we were making “spider legs.” She passed away three years ago, and I hadn’t thought about those cookies in maybe twenty years. But there I was, a grown woman with two kids and a sensible grocery list, suddenly desperate to remember the exact way she’d press the chocolate dough into those lopsided little bodies. I grabbed the noodles, a bag of chocolate chips I didn’t need, and honestly, I almost cried right there by the seasonal candy display. The thing is, I couldn’t quite remember the recipe. I knew it involved peanut butter and melted chocolate, but the proportions? No clue. So I spent the next two evenings in my own kitchen, making mess after mess. The first batch was too dry. The second batch melted into puddles. But that third batch—the one where I finally stopped overthinking and just let the dough feel right in my hands—that was it. That was her cookie. Maybe you’ve been there too, chasing a taste you can barely describe, hoping your kids will love it as much as you once did. These spider cookies aren’t just Halloween treats. They’re the ones that make my daughter squeal and my son carefully count the legs before taking a bite. And honestly? That’s worth every crumb on my kitchen floor.
Why You’ll Love This Recipe
I’ve tested this recipe about six times now, and let me tell you—the version I’m sharing today is the one that actually works for real families. Not the Pinterest-perfect kind that falls apart the second you look at it. These cookies hold together, they taste amazing, and they’re genuinely fun to make with kids.
- Quick & Easy: You can have these assembled in under 30 minutes. No chilling time. No complicated steps. Just mix, shape, and decorate.
- Simple Ingredients: You probably already have peanut butter, chocolate chips, and powdered sugar in your pantry. The only “special” ingredient is chow mein noodles, and they’re cheap.
- Perfect for Halloween (or Any Spooky Night): These are my go-to for classroom parties, neighborhood cookie swaps, or just a silly Tuesday night treat.
- Crowd-Pleaser: My kids argue over who gets to count the legs. Their friends ask for the recipe. Even my husband, who claims he doesn’t like “cute food,” ate four in one sitting.
- Unbelievably Delicious: The combination of creamy peanut butter, rich chocolate, and that unexpected crunch from the noodles? It’s next-level comfort food. I mean it.
What makes these different from every other spider cookie recipe out there is the texture. Most versions use crispy rice cereal, which gets soft after a few hours. Chow mein noodles stay crunchy for days. Plus, I’ve nailed the dough-to-chocolate ratio so the cookies don’t crumble when you pick them up. This isn’t just another Halloween cookie—it’s the one that makes you close your eyes after the first bite. It’s spooky season comfort food, reimagined with a crunch that actually lasts.
What Ingredients You Will Need
This recipe uses simple, pantry-friendly ingredients to deliver big flavor and that satisfying crunch without any fuss. Most of these are staples you already have, and the few that aren’t are easy to find and budget-friendly.
- 1 cup creamy peanut butter (I recommend Skippy or Jif for the best texture—natural peanut butter can separate and make the dough oily)
- 1 cup semisweet chocolate chips (adds richness; use dark chocolate if you prefer less sweetness)
- 1 cup powdered sugar (helps bind the dough and gives it that melt-in-your-mouth sweetness)
- 1 teaspoon vanilla extract (pure vanilla is best, but imitation works fine in a pinch)
- 2 cups chow mein noodles (these are the “spider legs”—look for them in the Asian foods aisle or near the snack section)
- 1 tablespoon unsalted butter (helps the chocolate melt smoothly and adds a touch of richness)
- Candy eyes (optional but highly recommended for the full spider effect; I get mine at the craft store or online)
A quick note on the chow mein noodles: don’t substitute with crispy rice cereal or pretzel sticks. I tried both in my testing, and they either got soggy or were too thick. Chow mein noodles have the perfect thin, crunchy texture that mimics real spider legs. Also, if you’re using natural peanut butter, you’ll need to stir it really well before measuring, and you might need to add an extra tablespoon of powdered sugar to compensate for the oil separation.
For the chocolate, I prefer Ghirardelli semisweet chips because they melt evenly and have a nice snap when set. But honestly, any brand works. Just avoid white chocolate for the coating—it’s too sweet and doesn’t harden as firmly.
Equipment Needed
You don’t need fancy gadgets for these cookies. Here’s what I used:
- Mixing bowls (one medium, one small)
- Baking sheet lined with parchment paper or a silicone mat
- Microwave-safe bowl (for melting chocolate)
- Spoon or spatula for mixing
- Measuring cups and spoons
- Small cookie scoop (optional, but helps make evenly sized cookies)
If you don’t have a microwave, you can melt the chocolate in a double boiler on the stovetop. Just be careful not to let any water get into the chocolate, or it’ll seize up and get grainy. I learned that the hard way with my first attempt—had to toss the whole batch and start over. Also, if you don’t have a cookie scoop, just use a tablespoon to portion the dough. It doesn’t have to be perfect. My aunt Maggie always used her hands, and her cookies were the best.
Preparation Method
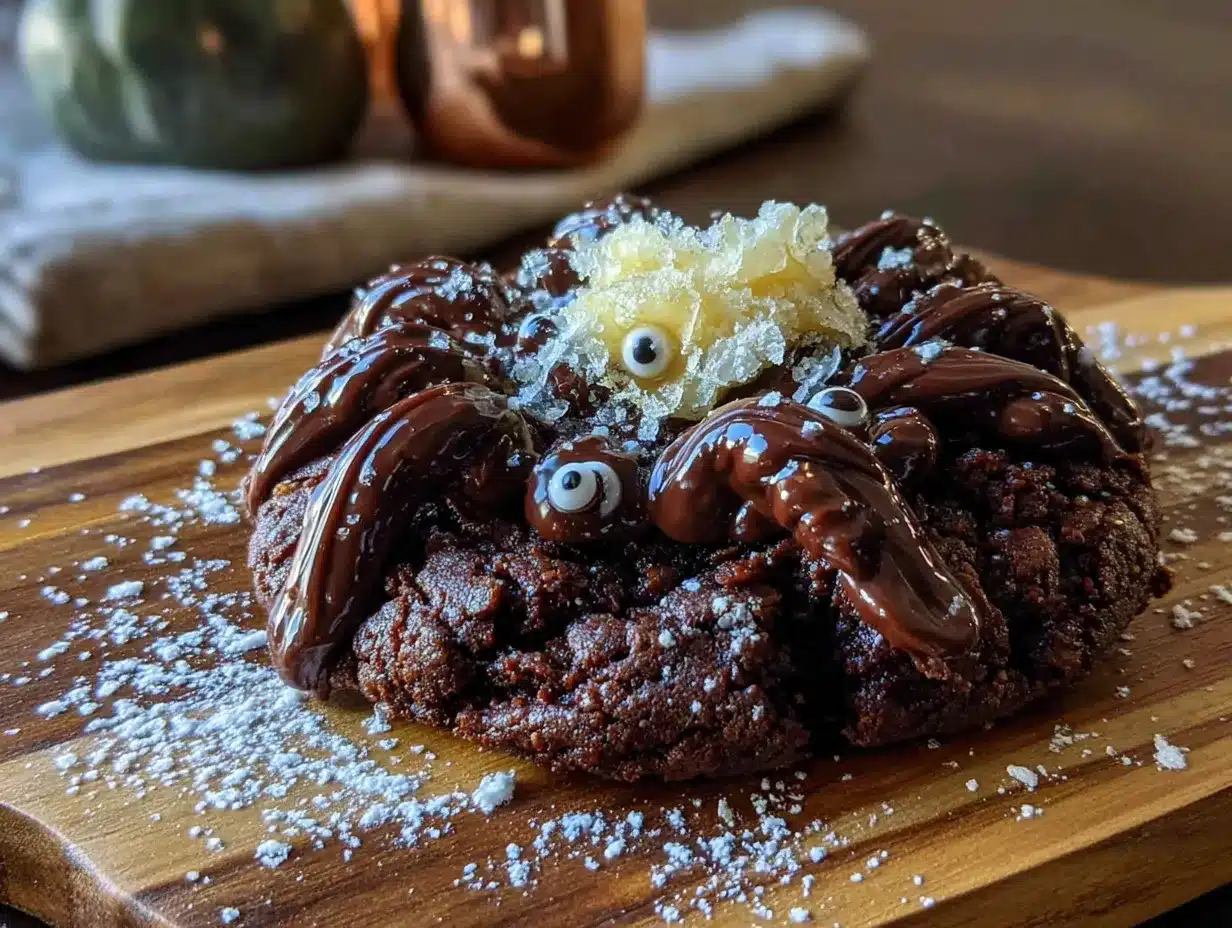
- Melt the chocolate and peanut butter together. In a microwave-safe bowl, combine the chocolate chips, peanut butter, and butter. Microwave in 30-second intervals, stirring between each, until completely smooth. This usually takes about 1 minute total. Be careful not to overheat—the chocolate can burn if you go too long. The mixture should look glossy and smell amazing.
- Add the powdered sugar and vanilla. Stir in the powdered sugar and vanilla extract until fully combined. The mixture will thicken into a dough-like consistency. If it seems too sticky, add another tablespoon of powdered sugar. If it’s too dry, add a teaspoon of melted butter. You want it to hold together when pressed but not be greasy.
- Form the cookie bodies. Scoop out tablespoon-sized portions of the dough and roll them into balls. Place them on the prepared baking sheet, spacing them about 2 inches apart. You should get about 18 to 20 cookies, depending on how generous you are with your scoops.
- Insert the spider legs. This is the fun part. Take the chow mein noodles and break them into pieces about 2 inches long. Gently press four pieces into each side of the dough ball, angling them slightly outward so they look like spider legs. Don’t push them all the way in—leave about half an inch sticking out. The dough will firm up as it sets, holding the legs in place.
- Add the candy eyes. Press two candy eyes into the front of each spider. If the dough is too sticky, dip your fingers in a little powdered sugar first. Position them close together for a cute look or farther apart for a goofy expression. My son likes to make his spiders “cross-eyed” by putting the eyes really close.
- Let them set. Place the baking sheet in the refrigerator for about 15 to 20 minutes, or until the cookies are firm to the touch. If you’re in a hurry, you can pop them in the freezer for 5 minutes, but watch them closely—they can get too hard and crack when you bite into them.
- Serve or store. Once set, transfer the cookies to a plate or airtight container. They’re best served cold or at room temperature. The legs stay crunchy for up to 3 days if stored properly.
A few things I learned the hard way: Don’t overmix the dough after adding the powdered sugar. It can get tough and crumbly. Also, if your hands get sticky while rolling the balls, just wash them and dry them well. A little moisture can make the dough slide right off your fingers.
Cooking Tips & Techniques
I messed up this recipe more times than I care to admit, so let me save you some trouble. Here are the biggest lessons I learned:
- Don’t skip the butter. I tried making these without butter once, thinking I’d save a few calories. The chocolate seized up and the dough was a crumbly mess. That little bit of butter keeps everything smooth and pliable.
- Use room temperature ingredients. If your peanut butter is straight from the fridge, it won’t blend well with the melted chocolate. Let it sit out for about 15 minutes before you start. Same goes for the butter—softened is better than cold.
- Break the noodles carefully. If you snap them too aggressively, they’ll shatter into tiny pieces. Gently bend them until they break naturally. You want clean breaks, not crumbs. I let my kids do this part—they love the crunching sound, and it keeps them busy while I mix the dough.
- Work quickly once the dough is mixed. The chocolate starts to set as it cools, so you want to shape the cookies and insert the legs within about 10 minutes. If the dough gets too firm, just microwave it for 10 seconds to soften it up again.
- Test one cookie first. Before you commit to shaping all 20, make one test cookie. Insert the legs, add the eyes, and see if it holds together. If the legs fall out, you need to press them in deeper. If the dough cracks, it’s too dry—add a little more melted butter.
I also learned that these cookies are surprisingly forgiving. One batch I made had legs sticking out at all different angles, and my daughter said they looked like “dancing spiders.” She loved them even more. So don’t stress about perfection. Kids don’t care if the legs are even. They care if it’s delicious and fun.
Variations & Adaptations
One of the best things about this recipe is how easy it is to customize. Here are a few ways I’ve changed it up:
- Peanut-Free Version: Swap the peanut butter for sunflower seed butter or WowButter. The texture is almost identical, and the taste is still great. Just make sure to check that the chow mein noodles are processed in a peanut-free facility if allergies are a concern.
- Dark Chocolate Lovers: Use dark chocolate chips instead of semisweet. The bitterness balances the sweetness of the powdered sugar beautifully. I did this for a Halloween party last year, and the adults went crazy for them.
- Spider Web Decoration: After the cookies set, drizzle a little melted white chocolate over the tops in a zigzag pattern to look like spider webs. It’s extra work, but it looks amazing on a dessert table.
- Gluten-Free Option: Most chow mein noodles are made from wheat flour, but you can find gluten-free versions at specialty stores or online. Alternatively, use gluten-free pretzel sticks broken into small pieces.
- Spooky Color Twist: Add a drop of orange or black food coloring to the dough before shaping. My kids love making “monster spiders” with green dough and red eyes. It’s a fun way to get creative without changing the flavor.
My personal favorite variation is the dark chocolate version with a pinch of sea salt sprinkled on top. The salty-sweet-crunchy combination is irresistible. I made a batch for a neighbor who was going through a tough time, and she texted me later saying she ate six in one sitting. No regrets.
Serving & Storage Suggestions
These cookies are best served cold, straight from the fridge. The legs stay extra crunchy, and the chocolate has a nice snap. If you’re serving them at room temperature, they’re still delicious, but the legs soften slightly after about an hour.
For presentation, I like to arrange them on a black platter or a dark-colored plate to make the spiders pop. Add a few fake spider webs from the dollar store, and you’ve got a Halloween centerpiece that doubles as dessert. My kids love when I put them on a “spooky snack table” with other treats like pumpkin-shaped cheese crackers and apple slices cut to look like ghosts.
As for storage, keep them in an airtight container in the refrigerator for up to 5 days. The legs will stay crunchy for about 3 days, then start to soften. If you need to store them longer, you can freeze them for up to 2 months. Just layer them between sheets of parchment paper so the legs don’t break off. To thaw, let them sit in the fridge overnight—don’t microwave them, or the chocolate will melt and the legs will get soggy.
One thing I love about these cookies is that the flavors actually get better after a day in the fridge. The peanut butter and chocolate meld together, and the texture becomes perfectly firm. So if you’re making them for a party, do it the day before. Your future self will thank you.
Nutritional Information & Benefits
Let’s be real—these are cookies, not health food. But they do have a few redeeming qualities. Here’s the estimated nutrition per cookie (based on 20 cookies):
| Nutrient | Amount |
|---|---|
| Calories | 185 |
| Total Fat | 11g |
| Saturated Fat | 4g |
| Carbohydrates | 20g |
| Sugar | 13g |
| Protein | 4g |
The peanut butter provides a decent amount of protein and healthy fats, which helps keep you fuller longer than a typical sugar cookie. The dark chocolate (if you use it) is rich in antioxidants. And honestly, there’s something to be said for the joy factor—making memories with your kids in the kitchen is good for the soul, even if it’s not on a nutrition label.
If you’re watching your sugar intake, you can reduce the powdered sugar by a couple of tablespoons, but the dough won’t hold together as well. For a lower-carb option, use sugar-free chocolate chips and a sugar substitute like Swerve. I haven’t tested that version personally, but I’ve heard good things from readers.
Potential allergens: peanuts, dairy, wheat (from the chow mein noodles), and soy (often in chocolate chips). Always check labels if you’re serving someone with allergies.
Conclusion
These spider cookies aren’t just a Halloween treat—they’re a little piece of my childhood that I get to share with my own kids now. Every time I make them, I think of my aunt Maggie’s sticky kitchen floor and the way she’d laugh when my cousins and I fought over who got the most legs. That memory is worth more than any perfect Pinterest photo.
I hope you give these a try, whether it’s for a spooky party, a classroom celebration, or just a random Tuesday that needs a little fun. Don’t be afraid to customize them—make them silly, make them spooky, make them your own. And if your kids end up with lopsided legs and cross-eyed spiders, even better. That’s the good stuff.
I’d love to hear how yours turn out! Leave a comment below and let me know what variations you tried. Did your kids go crazy for them? Did you add a secret ingredient? Share your spider cookie stories—I read every single one. And if you’re looking for more kid-friendly treats, check out my mummy hot dogs or my pumpkin patch brownies. Happy baking, and may your cookies be crunchy, chocolatey, and full of love.
Frequently Asked Questions
Can I make these spider cookies ahead of time?
Absolutely! These cookies actually taste better after a day in the fridge. You can make them up to 3 days in advance and store them in an airtight container in the refrigerator. Just don’t add the candy eyes until right before serving if you want them to stay bright and not soften.
Why did my cookies fall apart?
This usually happens when the dough is too dry or the legs are pressed in too shallow. Make sure you’re using creamy peanut butter (not natural) and that you’ve added enough powdered sugar to bind the dough. Also, press the chow mein noodles in at least halfway—they should feel secure when you gently wiggle them.
Can I use crispy rice cereal instead of chow mein noodles?
You can, but I don’t recommend it. Crispy rice cereal gets soft and chewy within a few hours, while chow mein noodles stay crunchy for days. If you’re serving these immediately, rice cereal works fine. But for make-ahead treats, stick with the noodles.
How do I keep the legs from breaking off?
The key is to refrigerate the cookies until they’re fully set before moving them. The cold chocolate holds the legs in place. Also, handle them gently when storing—layer them with parchment paper so the legs don’t get crushed. If a leg does break off, just eat it. No one’s judging.
Are these cookies safe for kids with peanut allergies?
Not as written, no. But you can easily make them peanut-free by swapping the peanut butter for sunflower seed butter or WowButter. Just be sure to check that all other ingredients (especially the chocolate chips and chow mein noodles) are processed in a nut-free facility if allergies are severe.
Pin This Recipe!
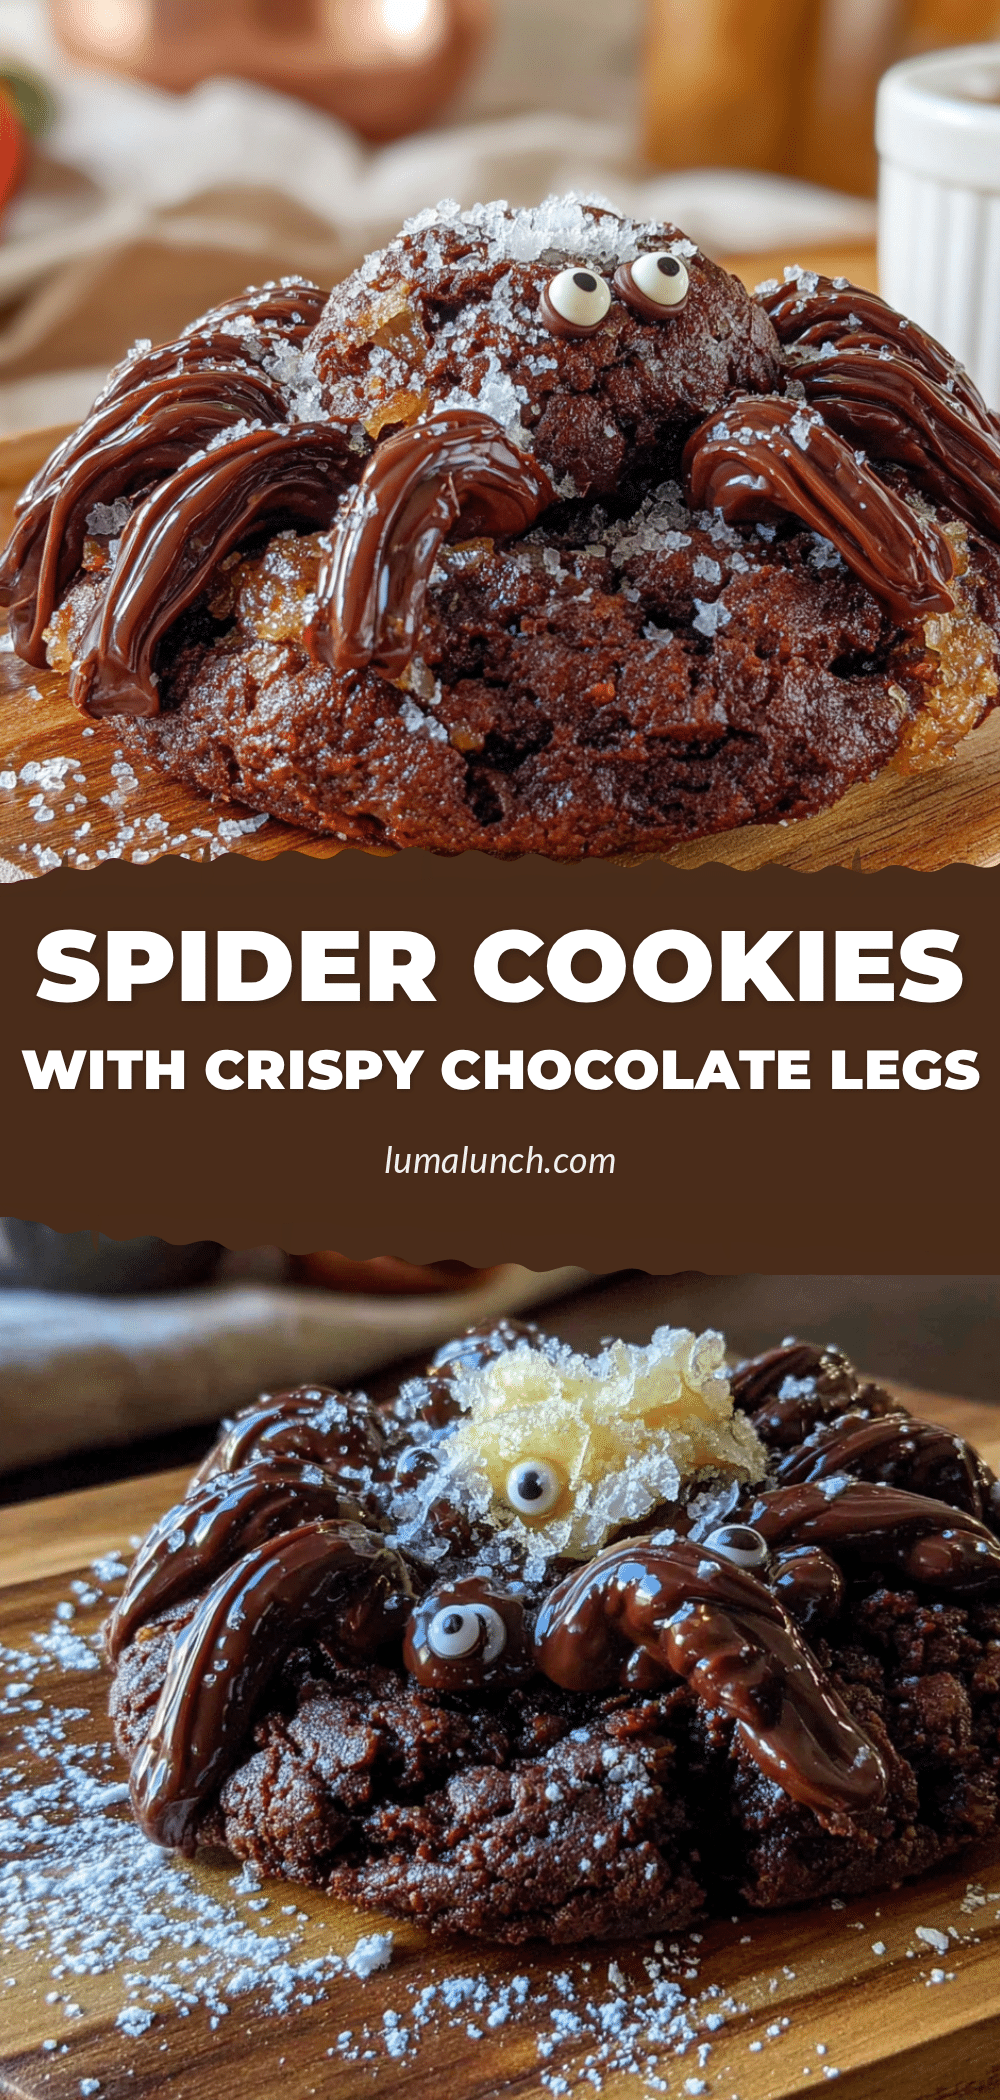
Kid-Approved Spider Cookies with Crispy Chocolate Legs
These spider cookies are a nostalgic Halloween treat made with peanut butter, chocolate, and crunchy chow mein noodles for legs. They’re quick, easy, and perfect for making with kids.
- Prep Time: 15 minutes
- Cook Time: 5 minutes
- Total Time: 25 minutes
- Yield: 18-20 cookies 1x
- Category: Dessert
- Cuisine: American
Ingredients
- 1 cup creamy peanut butter (Skippy or Jif recommended)
- 1 cup semisweet chocolate chips
- 1 cup powdered sugar
- 1 teaspoon vanilla extract
- 2 cups chow mein noodles
- 1 tablespoon unsalted butter
- Candy eyes (optional)
Instructions
- Melt the chocolate and peanut butter together. In a microwave-safe bowl, combine the chocolate chips, peanut butter, and butter. Microwave in 30-second intervals, stirring between each, until completely smooth (about 1 minute total).
- Add the powdered sugar and vanilla. Stir in the powdered sugar and vanilla extract until fully combined. The mixture will thicken into a dough-like consistency. If too sticky, add another tablespoon of powdered sugar; if too dry, add a teaspoon of melted butter.
- Form the cookie bodies. Scoop out tablespoon-sized portions of the dough and roll them into balls. Place on a parchment-lined baking sheet, spacing about 2 inches apart. You should get 18 to 20 cookies.
- Insert the spider legs. Break chow mein noodles into pieces about 2 inches long. Gently press four pieces into each side of the dough ball, angling them slightly outward. Leave about half an inch sticking out.
- Add the candy eyes. Press two candy eyes into the front of each spider. If the dough is too sticky, dip your fingers in a little powdered sugar.
- Let them set. Place the baking sheet in the refrigerator for 15 to 20 minutes, or until the cookies are firm to the touch. Alternatively, freeze for 5 minutes.
- Serve or store. Once set, transfer to a plate or airtight container. Best served cold or at room temperature. Legs stay crunchy for up to 3 days if stored properly.
Notes
Don’t substitute chow mein noodles with crispy rice cereal or pretzel sticks—they get soggy or are too thick. Use creamy peanut butter (not natural) for best texture. Work quickly once dough is mixed as chocolate sets. Refrigerate cookies to set legs firmly.
Nutrition
- Serving Size: 1 cookie
- Calories: 185
- Sugar: 13
- Sodium: 85
- Fat: 11
- Saturated Fat: 4
- Carbohydrates: 20
- Fiber: 1
- Protein: 4
Keywords: spider cookies, Halloween cookies, peanut butter cookies, chocolate cookies, chow mein noodles, no-bake cookies, kid-friendly


