Love this? Save it for later!
Share the inspiration with your friends
My neighbor Marco asked why I couldn’t just pour warm caramel straight into the cream and skip the custard-making madness. I started to explain why that wouldn’t work — something about emulsion, fat content, the science of ice cream structure. Then I stopped. I mean, honestly, I’d been making ice cream the “proper” way for years, sweating over double boilers and whisking eggs into ribbons. Marco just wanted salted caramel ice cream without the drama. So I tried it his way. And let me tell you, watching that thick, glossy caramel ripple through the cold cream without a single curdle was one of those humbling kitchen moments you don’t forget. The whole process took maybe fifteen minutes of actual work. No custard base, no tempering eggs, no ice cream maker required. Just four ingredients and a whisk. I stood there in my tiny kitchen on a Tuesday night, spoon in hand, genuinely delighted that I’d been wrong for so long.
The texture was impossibly creamy — not icy, not dense, just that perfect scoopable softness you get from fancy brands. The salt cut through the sweetness like it knew exactly what it was doing. Marco just shrugged and said, “Told you.” Maybe you’ve been there, standing over a complicated recipe wondering why it has to be so hard when all you want is a bowl of something cold and sweet. That’s the thing about this no-churn salted caramel ice cream — it doesn’t need a fancy technique or a chemistry degree. It needs patience for the caramel, sure, but the rest is almost embarrassingly simple. I’ve made this for summer barbecues, for bad days that needed fixing, and for no reason at all except that the weather was warm and I had cream in the fridge. Every single time, someone asks for the recipe. And every single time, I get to watch their face when I say, “There’s no ice cream maker involved.” That moment never gets old.
Why You’ll Love This Recipe
Let me be real with you — I’ve tested this recipe about a dozen times to get the texture just right. No one wants icy, crystallized ice cream, and I’ve definitely made my share of those batches. After tweaking the caramel temperature, the whipping time, and the freeze duration, this version is the one I keep coming back to. It’s the kind of recipe that makes you feel like a kitchen genius without actually doing much work.
- Only 4 Ingredients : Heavy cream, sweetened condensed milk, sugar, and salt. That’s it. No eggs, no stabilizers, no weird additives.
- No Ice Cream Maker Needed : Seriously. A hand mixer or stand mixer does all the work.
- Ready in Under 30 Minutes of Active Time : The hardest part is waiting for it to freeze.
- Perfect for Hot Days or Rough Days : Cold, sweet, salty — it hits every comfort note.
- Customizable : Add chocolate chunks, swirl in peanut butter, or double the salt if you’re that kind of person.
What makes this different from other no-churn recipes is the caramel technique. Most versions use store-bought caramel sauce, which has stabilizers and preservatives that can make the ice cream grainy. This homemade caramel is made from scratch with just sugar and water, then swirled into the cream mixture at exactly the right moment. The result is a silky, soft ice cream with ribbons of deep, buttery caramel that stay chewy even after freezing. It’s not just another version — it’s the version that made my neighbor Marco smug about being right.
This is the kind of ice cream that makes you close your eyes after the first bite. The salt hits first, then the sweetness spreads, and the creaminess just lingers. It’s comfort food reimagined — simpler, faster, but with the same soul-soothing satisfaction. Perfect for impressing guests without breaking a sweat, or for turning a Tuesday evening into something worth remembering.
What Ingredients You Will Need
This recipe uses simple, everyday ingredients to create something that tastes far more complicated than it is. Most of these are probably already in your kitchen, which makes this the perfect last-minute dessert.
- 2 cups (480 ml) heavy cream — Cold, straight from the fridge. The colder it is, the faster it whips. I prefer heavy cream with at least 36% milk fat for the best texture. (Avoid ultra-pasteurized if you can find it; it doesn’t whip as stiffly.)
- 1 can (14 ounces / 397 grams) sweetened condensed milk — This is the secret to the creamy texture without an ice cream maker. It adds sweetness and prevents ice crystals. I’ve used both name-brand and store-brand; they both work fine.
- 1 cup (200 grams) granulated sugar — For the caramel. Don’t substitute with brown sugar here; the caramel needs plain white sugar to develop that clean, deep flavor.
- 1/4 cup (60 ml) water — Just tap water is fine. It helps the sugar dissolve evenly before caramelizing.
- 1 teaspoon flaky sea salt — This is non-negotiable for the salted caramel flavor. I use Maldon sea salt flakes for their delicate crunch, but any flaky sea salt works. Avoid table salt — it’s too fine and can make the caramel taste harsh.
- 1/2 teaspoon vanilla extract (optional) — Not essential, but it rounds out the flavors beautifully. I add it most of the time.
Ingredient Selection Tips: For the cream, look for a brand that lists only cream and milk as ingredients — no gums or stabilizers. For the condensed milk, I’ve found that Nestlé and Carnation both work well, but the store-brand versions are usually identical in composition. If you’re in a pinch, you can even make your own condensed milk by simmering whole milk and sugar until reduced, but honestly, the canned stuff is easier and gives consistent results.
Substitution Guidance: Need a dairy-free version? Full-fat coconut cream can replace the heavy cream, and there are dairy-free sweetened condensed milk options available (or you can make your own with coconut milk and sugar). The texture will be slightly different — more coconut flavor, slightly less creamy — but it’s still delicious. For a lower-sugar version, use a sugar-free sweetened condensed milk alternative, though the caramel will need to be made with a sugar substitute that caramelizes, like allulose. I haven’t tested that extensively, so your mileage may vary.
Equipment Needed
You don’t need much for this recipe, which is part of the beauty. Here’s what I use every time:
- Medium saucepan — For making the caramel. A light-colored pan is best so you can see the sugar changing color. I use a stainless steel saucepan; dark nonstick pans make it hard to judge doneness.
- Large mixing bowl — For whipping the cream. Make sure it’s clean and dry; any grease will prevent the cream from whipping properly.
- Hand mixer or stand mixer — A hand mixer works perfectly. If you’re using a stand mixer, use the whisk attachment. You can also whip the cream by hand with a whisk, but it’ll take about 8-10 minutes of vigorous work.
- 8×4-inch loaf pan — For freezing the ice cream. Any container works, but a loaf pan gives nice slices. I like glass because I can see the layers.
- Spatula — For folding the cream and condensed milk together, and for swirling the caramel.
- Parchment paper or plastic wrap — To cover the surface of the ice cream before freezing; this prevents ice crystals from forming on top.
Budget-Friendly Options: If you don’t have a loaf pan, use any freezer-safe container — a plastic tub, a metal bowl, even a muffin tin for individual portions. If you don’t have a hand mixer, a whisk and some elbow grease will work; just make sure the cream is very cold. I’ve also used a food processor to whip cream in a pinch, though it’s harder to control and you risk over-whipping.
Preparation Method
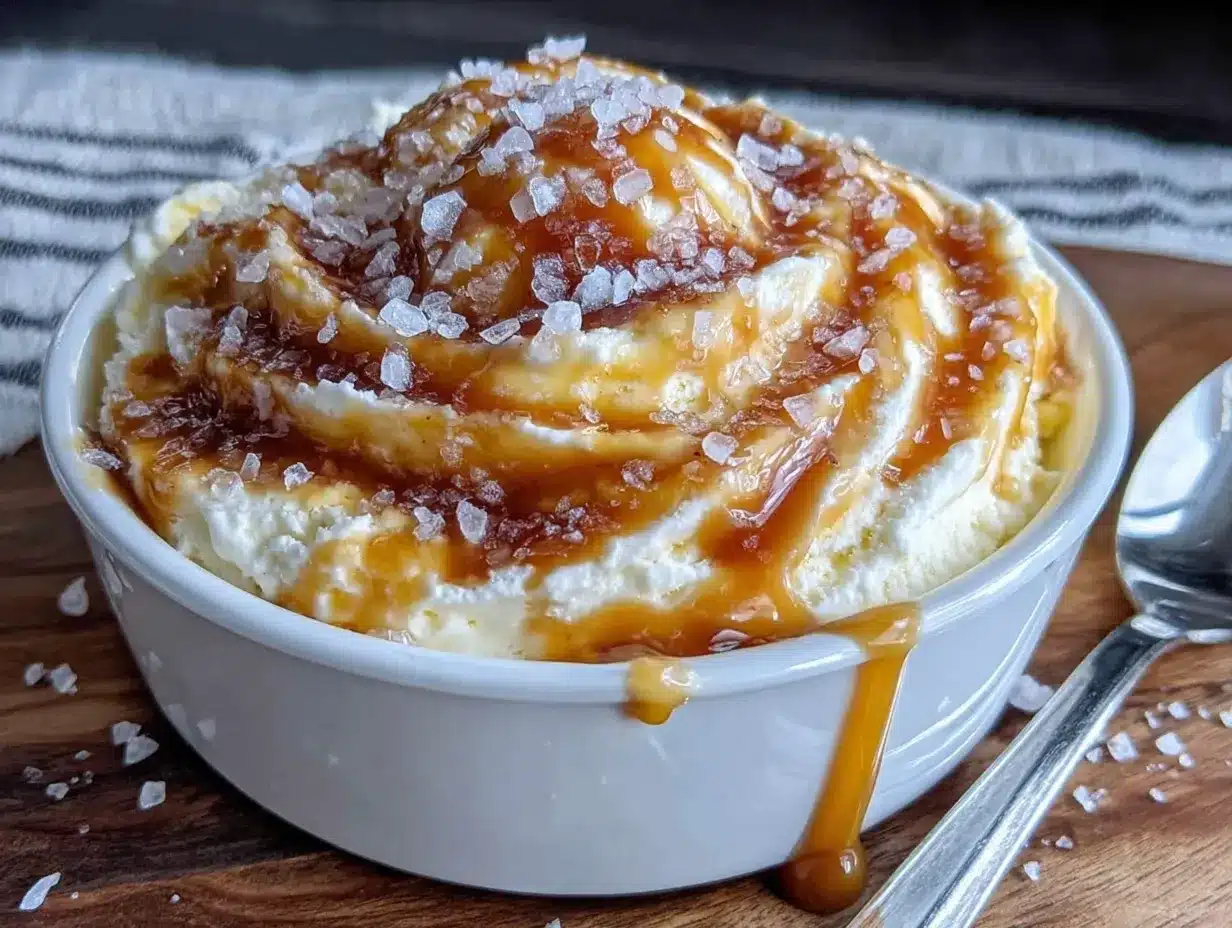
- Make the caramel sauce. In a medium saucepan, combine 1 cup (200 grams) granulated sugar and 1/4 cup (60 ml) water. Stir gently with a clean spatula until the sugar looks like wet sand. Place the pan over medium heat and let it come to a boil. Do not stir from this point on — trust me, stirring can cause the sugar to crystallize. Instead, swirl the pan occasionally by holding the handle and gently rotating it. Watch for the color to change from clear to pale gold to a deep amber. This takes about 6-8 minutes. The moment it reaches a rich amber color (think the color of a penny), remove it from the heat immediately. It will keep cooking from the residual heat, so don’t wait until it’s too dark.
- Add the salt and vanilla. Carefully pour in 1 teaspoon flaky sea salt and 1/2 teaspoon vanilla extract (if using). The caramel will bubble up violently — that’s normal. Let it settle for about 30 seconds, then stir gently with a long-handled spoon. The caramel will be very hot, so be careful. Set it aside to cool for about 10 minutes. It should still be warm but not scorching hot when you add it to the cream mixture.
- Whip the cream. Pour 2 cups (480 ml) cold heavy cream into a large mixing bowl. Using a hand mixer or stand mixer with the whisk attachment, whip the cream on medium-high speed until stiff peaks form. This takes about 3-4 minutes with a mixer. You’re looking for peaks that stand straight up when you lift the beaters. Be careful not to over-whip — if the cream starts looking grainy or separates into butter, you’ve gone too far. If that happens, start over with fresh cream; there’s no saving it.
- Fold in the condensed milk. Pour the entire can (14 ounces / 397 grams) of sweetened condensed milk over the whipped cream. Using a spatula, gently fold the condensed milk into the cream. Work from the bottom up, rotating the bowl as you go. Don’t stir vigorously — you want to keep as much air in the mixture as possible. Fold until no white streaks remain. The mixture should be thick, fluffy, and pale ivory in color.
- Swirl in the caramel. Pour about two-thirds of the cooled caramel over the cream mixture. Reserve the remaining one-third for topping. Using a knife or skewer, gently swirl the caramel through the cream mixture. Don’t over-swirl — you want distinct ribbons of caramel, not a uniform color. A few figure-eight motions are enough. The mixture will look marbled and gorgeous.
- Transfer to the pan. Spoon the mixture into your loaf pan or freezer container. Smooth the top with a spatula. Drizzle the reserved caramel over the top, then use the knife to create a few more swirls on the surface.
- Cover and freeze. Press a piece of parchment paper or plastic wrap directly onto the surface of the ice cream. This prevents ice crystals from forming. Place the pan in the freezer and freeze for at least 6 hours, preferably overnight. The ice cream needs to be completely solid before serving.
- Let it soften before serving. This is the step everyone forgets. Remove the ice cream from the freezer and let it sit at room temperature for 5-10 minutes before scooping. This makes a huge difference in texture. If you try to scoop it straight from the freezer, it’ll be rock hard and you’ll break your spoon. Trust me on this.
Cooking Tips & Techniques
I’ve made this recipe enough times to know exactly where things can go wrong. Here are the lessons I learned the hard way so you don’t have to.
The caramel is the tricky part. My first attempt at homemade caramel turned into a solid sugar brick because I stirred it. The golden rule is: once the sugar starts boiling, don’t touch it with a spoon. Swirl the pan gently if you need to even out the color. Also, watch the color closely — caramel goes from perfect to burnt in about 30 seconds. I once looked away to answer my phone and ended up with a pan of bitter, dark syrup that smelled like regret. When in doubt, pull it off the heat a little early; the residual heat will finish the job.
Temperature matters. Your cream should be very cold when you whip it. I put my bowl and beaters in the freezer for 10 minutes before starting. The caramel should be warm but not hot when you add it to the cream mixture. If it’s too hot, it can melt the whipped cream and deflate all that air you worked for. If it’s too cold, it won’t swirl nicely and will just sink to the bottom. Let it cool for about 10 minutes after making it — it should feel warm to the touch but not uncomfortable.
Don’t skip the parchment paper. I know it seems fussy, but pressing plastic wrap or parchment directly onto the surface of the ice cream prevents freezer burn and ice crystals. I’ve forgotten this step before, and the top layer of the ice cream was crunchy and unpleasant. Just do it.
Multitasking tip: While the caramel is cooling, whip the cream. While the ice cream is freezing, clean up the kitchen. This recipe comes together quickly, but the active time is so short that you can easily do all the prep in under 20 minutes.
Variations & Adaptations
This base recipe is incredibly versatile. Here are some ways I’ve adapted it over the years:
Chocolate Salted Caramel: Add 1/3 cup cocoa powder to the condensed milk before folding it into the cream. Sift the cocoa powder first to avoid lumps. The chocolate flavor pairs beautifully with the salted caramel — it’s like a fancy ice cream shop flavor but made at home.
Peanut Butter Swirl: Warm 1/2 cup creamy peanut butter in the microwave for 20 seconds, then swirl it into the ice cream mixture along with the caramel. The peanut butter adds a savory richness that balances the sweetness. I made this for a summer cookout and it disappeared before the regular vanilla ice cream.
Vegan Version: Replace the heavy cream with full-fat coconut cream (chilled overnight) and use a dairy-free sweetened condensed milk. The coconut flavor will come through, so this works best if you enjoy that tropical note. The texture is slightly less creamy but still very good. I tested this for a friend with dairy allergies and she said it was the best vegan ice cream she’d ever had.
Espresso Salted Caramel: Add 2 teaspoons instant espresso powder to the caramel after removing it from the heat. The coffee flavor deepens the caramel and adds a grown-up bitterness. This is my personal favorite for late-night snacking.
Mix-In Ideas: Fold in 1/2 cup toasted pecans, chocolate chips, or crushed pretzels after swirling the caramel. The pretzels add a salty crunch that plays perfectly with the soft ice cream. I once added crushed shortbread cookies and it was divine.
Serving & Storage Suggestions
This ice cream is best served slightly softened, about 5-10 minutes out of the freezer. Scoop it into bowls or cones — or, honestly, eat it straight from the pan with a spoon. I won’t judge.
Presentation: For a pretty dessert, scoop the ice cream into chilled bowls and drizzle with extra caramel sauce (I always make a little extra). Sprinkle a few more flakes of sea salt on top for that Instagram-worthy look. A dollop of whipped cream never hurts, but it’s not necessary.
Pairings: This ice cream is amazing on its own, but it also pairs beautifully with warm desserts. Serve it alongside a slice of warm apple pie, a brownie, or a chocolate lava cake. The contrast between hot and cold, soft and creamy, is pure magic. For drinks, a strong coffee or espresso is the perfect companion — the bitterness cuts through the sweetness.
Storage: Keep the ice cream in an airtight container in the freezer for up to 2 weeks. After that, it starts to develop ice crystals and the texture becomes less creamy. If you notice ice crystals forming, it’s a sign that the container wasn’t sealed properly or the surface wasn’t covered. To refresh frozen ice cream, let it soften slightly and stir it vigorously before refreezing — this redistributes the fat and sugar and improves the texture.
Reheating (sort of): If the ice cream is too hard to scoop, microwave the container for 10-15 seconds to soften the edges. Don’t overdo it, or you’ll have soup. Alternatively, run your ice cream scoop under hot water before each scoop — that trick works like a charm.
Nutritional Information & Benefits
Let’s be honest — this is a treat, not a health food. But knowing what’s in it helps you enjoy it mindfully. Per serving (approximately 1/2 cup), here’s the estimated breakdown:
- Calories: 380-420
- Fat: 24g (mostly from cream, which provides satisfying richness)
- Carbohydrates: 42g (from sugar and condensed milk)
- Protein: 4g (from the dairy)
- Sugar: 38g
- Sodium: 180mg (from the sea salt)
Health Considerations: The heavy cream provides some calcium and vitamin A, but this is definitely a dessert for occasional indulgence. If you’re watching your sugar intake, you can reduce the caramel amount or use a sugar substitute in the caramel (though the texture will change). The salted caramel does contain dairy and is not suitable for vegans unless modified. For a lighter version, you can use half-and-half instead of heavy cream, but the texture will be less creamy and more icy.
My personal philosophy? Life is short. Eat the ice cream. Just maybe not the whole pan in one sitting.
Conclusion
This no-churn salted caramel ice cream is proof that you don’t need fancy equipment or complicated techniques to make something truly special. With just four ingredients and a little patience, you can create a dessert that tastes like it came from a fancy ice cream shop — but costs a fraction of the price and takes almost no effort. I’ve made this for birthdays, for bad days, for hot summer afternoons, and for quiet nights when I just wanted something sweet. Every single time, it delivers.
I’d love to hear how yours turns out. Did you try a variation? Add a crazy mix-in? Discover a trick I didn’t mention? Drop a comment below and share your creation — I read every single one and I’m always looking for new ideas to try. And if you loved this recipe, share it with a friend who needs a little sweetness in their life. Honestly, the world could use more homemade ice cream and fewer complicated recipes.
Now go make some caramel. Your future self will thank you.
Frequently Asked Questions
Can I make this without a hand mixer?
Absolutely. You can whip the cream by hand with a whisk, but it’ll take about 8-10 minutes of steady work. Make sure the cream is very cold, and use a large bowl to give yourself room to move. It’s a good arm workout!
Why did my caramel turn into a hard lump?
This usually happens if you stir the caramel while it’s boiling, or if sugar crystals get on the sides of the pan. To avoid this, don’t stir after the sugar starts boiling, and use a wet pastry brush to wash down any sugar crystals that form on the sides of the pan. If it does crystallize, you can try adding a splash of water and reheating gently, but honestly, it’s often easier to start over.
Can I use store-bought caramel sauce instead?
You can, but the texture won’t be the same. Store-bought caramel sauces often contain corn syrup and stabilizers that can make the ice cream grainy or too sweet. Homemade caramel is worth the extra few minutes — trust me.
How long does this ice cream last in the freezer?
It’s best within the first 2 weeks. After that, ice crystals can develop and the texture becomes less creamy. To extend its life, make sure the surface is covered with parchment or plastic wrap, and keep the container sealed tightly.
Can I double this recipe?
Yes, but you’ll need a larger container for freezing, and the freezing time will be longer — about 8-10 hours instead of 6. Use a 9×13-inch pan or two loaf pans. The caramel recipe can be doubled easily, just use a larger saucepan.
Pin This Recipe!
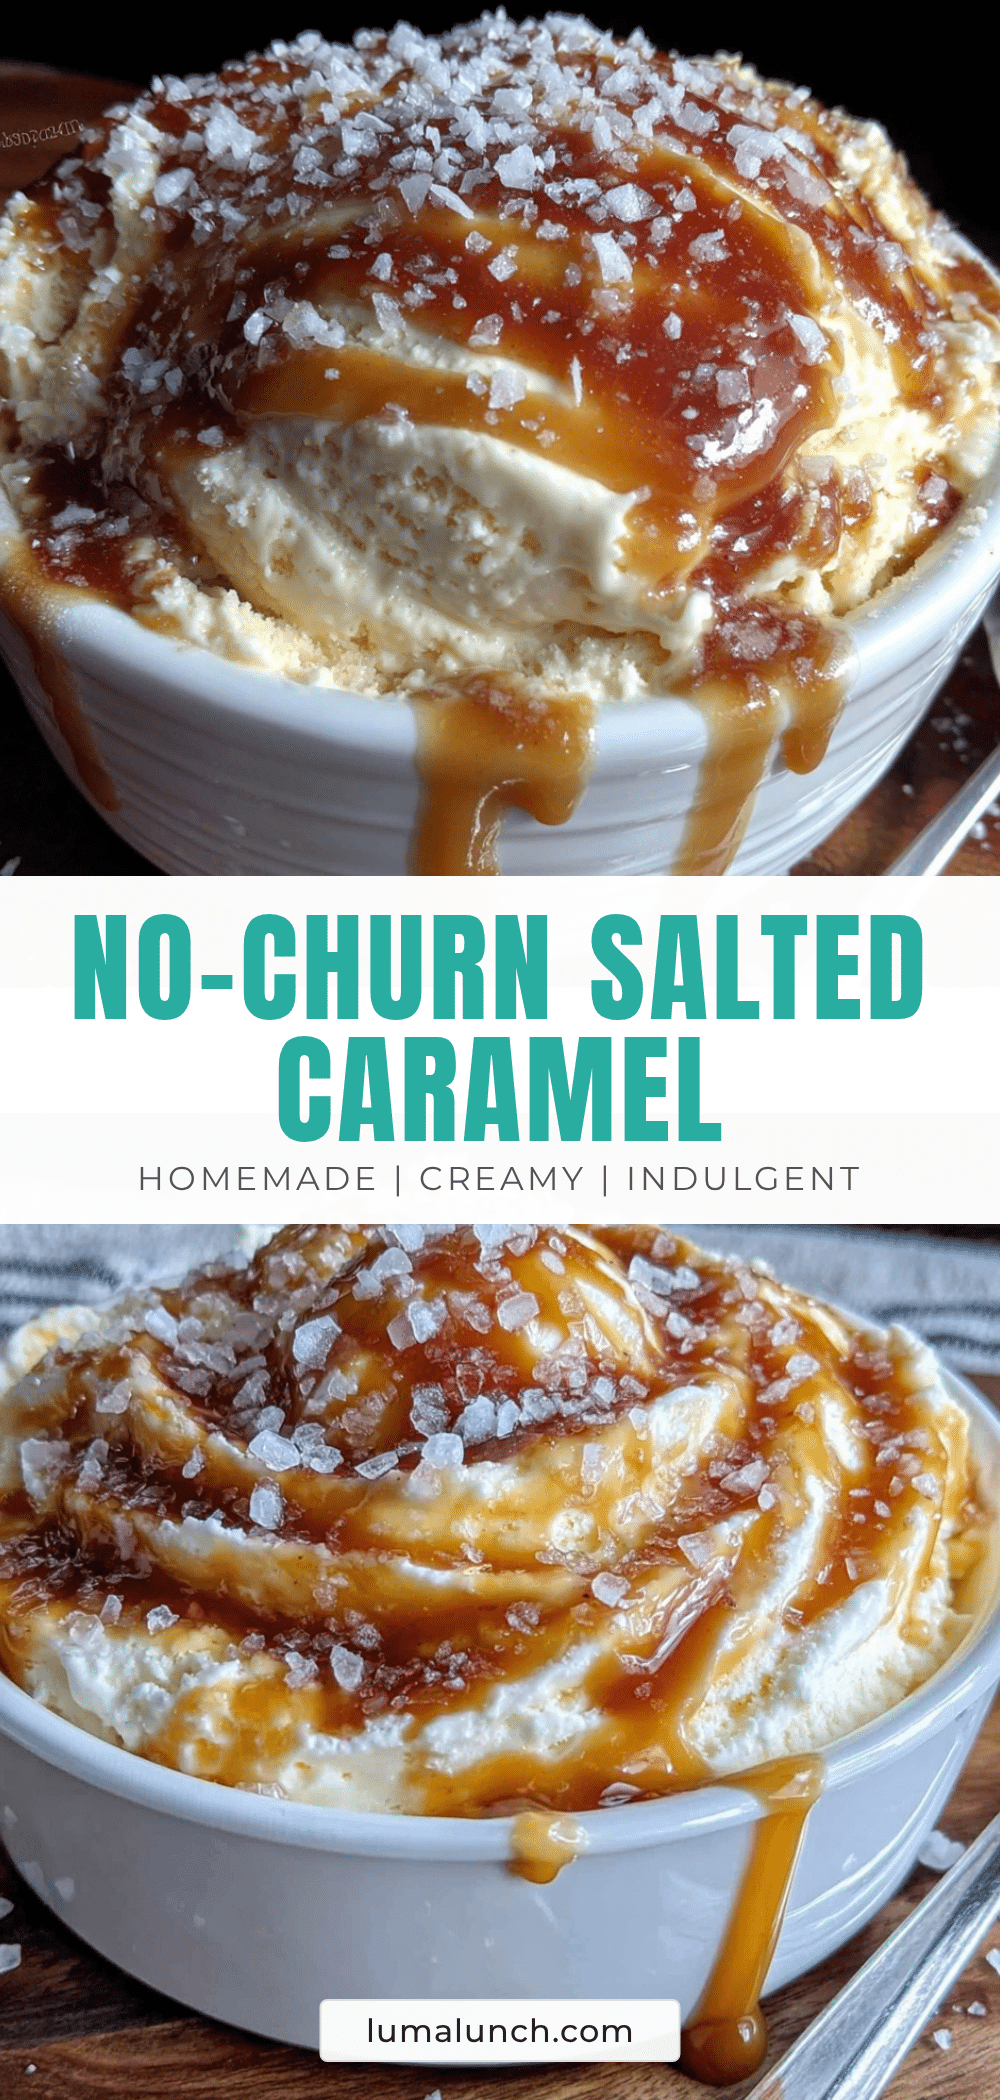
Homemade No-Churn Salted Caramel Ice Cream: Easy 4-Ingredient Recipe
This no-churn salted caramel ice cream is incredibly creamy and requires only 4 ingredients and no ice cream maker. It’s a simple, foolproof dessert that delivers rich, buttery caramel ribbons with a perfect salty-sweet balance.
- Prep Time: 15 minutes
- Cook Time: 10 minutes
- Total Time: 6 hours 25 minutes (includes freezing)
- Yield: 8 servings 1x
- Category: Dessert
- Cuisine: American
Ingredients
- 2 cups (480 ml) heavy cream
- 1 can (14 ounces / 397 grams) sweetened condensed milk
- 1 cup (200 grams) granulated sugar
- 1/4 cup (60 ml) water
- 1 teaspoon flaky sea salt
- 1/2 teaspoon vanilla extract (optional)
Instructions
- Make the caramel sauce: In a medium saucepan, combine 1 cup (200 grams) granulated sugar and 1/4 cup (60 ml) water. Stir gently until the sugar looks like wet sand. Place over medium heat and bring to a boil. Do not stir; instead, swirl the pan occasionally. Cook until the mixture turns a deep amber color, about 6-8 minutes. Remove from heat immediately.
- Add the salt and vanilla: Carefully pour in 1 teaspoon flaky sea salt and 1/2 teaspoon vanilla extract (if using). The caramel will bubble up. Let it settle for 30 seconds, then stir gently. Set aside to cool for about 10 minutes.
- Whip the cream: Pour 2 cups (480 ml) cold heavy cream into a large mixing bowl. Using a hand mixer or stand mixer with whisk attachment, whip on medium-high speed until stiff peaks form, about 3-4 minutes.
- Fold in the condensed milk: Pour the entire can (14 ounces / 397 grams) of sweetened condensed milk over the whipped cream. Gently fold with a spatula until no white streaks remain. The mixture should be thick, fluffy, and pale ivory.
- Swirl in the caramel: Pour about two-thirds of the cooled caramel over the cream mixture. Reserve the remaining one-third for topping. Using a knife or skewer, gently swirl the caramel through the cream mixture with a few figure-eight motions. Do not over-swirl.
- Transfer to the pan: Spoon the mixture into a loaf pan or freezer container. Smooth the top with a spatula. Drizzle the reserved caramel over the top and create a few more swirls on the surface.
- Cover and freeze: Press a piece of parchment paper or plastic wrap directly onto the surface of the ice cream. Freeze for at least 6 hours, preferably overnight.
- Let it soften before serving: Remove from the freezer and let sit at room temperature for 5-10 minutes before scooping.
Notes
The caramel is the trickiest part: do not stir once it starts boiling, and watch the color closely to avoid burning. Let the caramel cool for about 10 minutes before adding to the cream mixture. Pressing parchment or plastic wrap directly onto the surface prevents ice crystals. For best texture, let the ice cream soften for 5-10 minutes before serving.
Nutrition
- Serving Size: 1/2 cup
- Calories: 400
- Sugar: 38
- Sodium: 180
- Fat: 24
- Saturated Fat: 15
- Carbohydrates: 42
- Protein: 4
Keywords: no-churn ice cream, salted caramel, homemade ice cream, easy dessert, 4-ingredient recipe


