Love this? Save it for later!
Share the inspiration with your friends
I was standing in the middle of a hardware store last Thursday—looking for a specific type of paintbrush, not thinking about anything except whether I’d grabbed the wrong size—when this scent hit me. It wasn’t the hardware store. It was the air near the gardening section, where someone had propped open a back door, and the breeze carried in this faint, sweet, almost nutty smell. And just like that, I was seven years old, sitting on a cracked vinyl stool in my Aunt Delia’s kitchen, watching her mash bananas with a fork that had a bent tine.
She wasn’t a fancy cook. Her banana bread came out lopsided more often than not, and she never measured the walnuts—just tossed in a handful and called it good. But that smell. That specific, warm, brown-sugar-and-ripe-banana smell that filled her tiny apartment every single Sunday afternoon. I haven’t thought about that stool in years. Or the way she’d wipe her hands on her apron and say, “Well, that’s done,” like she’d just conquered something huge. Honestly, I’d forgotten all of it until that gust of wind in the hardware aisle.
I bought the paintbrush, but I also bought three overripe bananas on the way home. You know that feeling when a memory grabs you by the collar and won’t let go until you do something about it? That was it. I needed to make that banana bread. Not a fancy version with sour cream or a streusel topping—just the classic, one-bowl, walnut-studded loaf that tastes like Sunday afternoons and cracked vinyl stools. Maybe you’ve been there, standing in some random place, when a smell yanks you backward in time. This is my attempt to hold onto that feeling, one slightly lopsided loaf at a time.
Why You’ll Love This Recipe
Let me tell you why this banana bread has become my go-to for every potluck, brunch, and casual dinner party I’ve hosted over the past two years. It’s not just because it’s easy—though it absolutely is. It’s because this loaf has a way of making people stop mid-conversation and say, “Wait, who made this?”
- One Bowl, No Fuss: You don’t need a mixer, a sifter, or a separate bowl for dry ingredients. Everything comes together in one bowl, which means less cleanup and more time for the things that actually matter—like sneaking a slice before guests arrive.
- Simple Ingredients, Maximum Flavor: Ripe bananas, pantry staples, and a generous handful of walnuts. That’s it. No buttermilk, no yogurt, no secret ingredient that requires a special trip to the store.
- Perfect for Hosting: This loaf looks impressive on a cake stand, slices beautifully, and pairs with just about anything—coffee, tea, a glass of milk, or even a scoop of vanilla ice cream for dessert. It’s the kind of thing you can make the night before and still have people think you slaved away.
- Always a Crowd-Pleaser: I’ve brought this to a book club, a backyard barbecue, and a friend’s holiday party. Every single time, someone asked for the recipe. It’s that good.
- Unbelievably Moist: The secret? Using really ripe bananas—the ones with brown spots that look past their prime. They break down beautifully and keep the bread tender for days.
This isn’t just another banana bread recipe. It’s the one I’ve tweaked and tested until the texture was exactly right—moist but not dense, nutty but not overpowering, sweet but not cloying. It’s the kind of bread that makes you close your eyes after the first bite, even if you’re standing in your kitchen in your pajamas.
What Ingredients You Will Need
This recipe uses simple, wholesome ingredients to deliver that classic banana bread flavor and tender crumb without any unnecessary fuss. Most of these are probably in your kitchen right now—which is exactly the point.
For the Banana Bread Batter
- 3 large ripe bananas, mashed (about 1½ cups / 360 ml)—the riper, the better. Look for bananas with brown spots; they’re sweeter and easier to mash.
- ⅓ cup (75 g) unsalted butter, melted—I use salted butter in a pinch, just reduce the added salt slightly.
- ¾ cup (150 g) granulated sugar—you can also use light brown sugar for a deeper, molasses-like flavor.
- 1 large egg, room temperature—cold eggs can seize the butter, so let yours sit out for 15 minutes.
- 1 teaspoon vanilla extract—pure vanilla extract makes a difference, but imitation works fine too.
- 1½ cups (190 g) all-purpose flour—spoon and level it; don’t scoop directly from the bag or you’ll end up with too much.
- 1 teaspoon baking soda—this is your leavening agent; don’t skip it or the bread won’t rise.
- ½ teaspoon salt—fine sea salt or table salt both work.
- ½ cup (60 g) chopped walnuts—toasted for extra flavor, but raw works too.
Optional Add-Ins
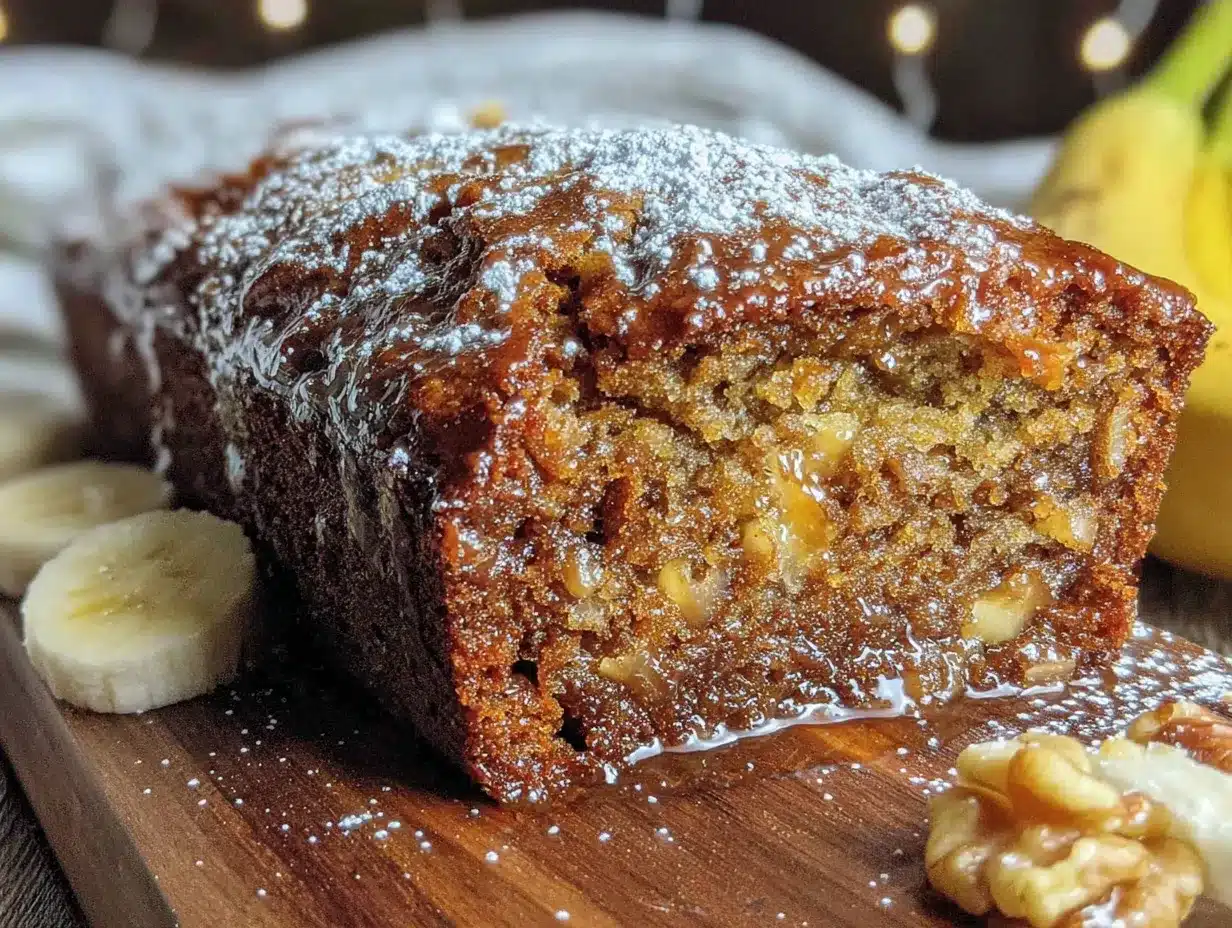
- ¼ cup (30 g) chocolate chips—because sometimes you want a little chocolate with your banana.
- 1 tablespoon ground cinnamon—adds warmth and pairs beautifully with the walnuts.
- 1 tablespoon milk (dairy or plant-based)—if your batter seems too thick, this loosens it up.
When it comes to walnuts, I personally prefer buying them whole and chopping them myself—pre-chopped nuts can be stale. I’ve had great luck with Fisher Nuts or the bulk bin at my local grocery store. And for the flour, King Arthur all-purpose is my go-to, but any brand works.
Equipment Needed
The beauty of this recipe is that you don’t need much. Here’s what you’ll need to have on hand:
- One large mixing bowl—glass, ceramic, or stainless steel all work fine.
- A fork or potato masher—for mashing the bananas. A fork is easier to clean, but a masher gets the job done faster.
- A wooden spoon or rubber spatula—for mixing the batter. I prefer a spatula because it scrapes the sides clean.
- A 9×5-inch (23×13 cm) loaf pan—glass, metal, or silicone all work. If you’re using a dark metal pan, reduce the oven temperature by 25°F (14°C) to prevent over-browning.
- Parchment paper—not strictly necessary, but it makes lifting the loaf out a breeze. I learned this the hard way after a stuck loaf crumbled apart on me.
- Cooling rack—allows air to circulate so the bottom doesn’t get soggy.
- Measuring cups and spoons—for accuracy. I’ve ruined too many loaves by eyeballing the flour.
Budget-friendly tip: You don’t need a fancy loaf pan. A basic non-stick one from the grocery store works perfectly. Just grease it well.
Preparation Method
Alright, let’s get to it. This is the part where the magic happens. Follow these steps, and you’ll have a beautiful, golden-brown loaf that smells like home.
- Preheat your oven to 350°F (175°C). Position the rack in the center of the oven. While it’s heating, grease your loaf pan with butter or non-stick spray. If you’re using parchment paper, cut a strip long enough to hang over the two long sides—this creates handles for easy lifting later.
- Mash the bananas. In your large mixing bowl, add the three ripe bananas. Mash them with a fork or potato masher until they’re mostly smooth with a few small lumps remaining. You want some texture, not baby food. This should take about 30 seconds.
- Add the melted butter. Pour the melted butter over the mashed bananas and stir until combined. The mixture will look a little glossy—that’s good. If your butter was too hot, it might look slightly separated; don’t worry, it’ll come together in the next step.
- Mix in the sugar, egg, and vanilla. Add the granulated sugar, room-temperature egg, and vanilla extract. Stir vigorously with your wooden spoon or spatula until everything is well blended. The mixture should be smooth and slightly lighter in color. This is also where I sometimes forget to add the vanilla—if you do, just stir it in later. It’ll be fine.
- Add the dry ingredients. Sprinkle the flour, baking soda, and salt over the wet mixture. Stir gently, just until no streaks of flour remain. Over-mixing at this stage will make your bread tough, so stop as soon as it comes together. A few small lumps are okay.
- Fold in the walnuts. Add the chopped walnuts and fold them in with a few gentle strokes. If you’re using chocolate chips or cinnamon, add them now too. The batter should be thick but scoopable—if it seems too stiff, add a tablespoon of milk.
- Pour the batter into the prepared pan. Scrape every last bit out of the bowl—this is the best part. Spread the batter evenly with your spatula. Give the pan a gentle tap on the counter to release any air bubbles.
- Bake for 55-65 minutes. Place the pan in the center of the oven. Bake until the top is golden brown and a toothpick inserted into the center comes out clean or with a few moist crumbs. Start checking at 55 minutes—every oven runs a little differently. My old oven always took exactly 60 minutes, but my new one is done at 58.
- Cool in the pan for 10 minutes. Set the loaf pan on a cooling rack. Let it rest for 10 minutes—this allows the structure to set so it doesn’t fall apart when you remove it.
- Transfer to the cooling rack. Run a knife around the edges if needed, then lift the loaf out using the parchment paper handles (or carefully invert it). Let it cool completely on the rack before slicing. I know it’s tempting to cut into it warm, but it will crumble. Trust me, I’ve been there.
One more thing: if the top is browning too quickly but the center isn’t done yet, loosely tent the pan with aluminum foil for the last 10-15 minutes of baking. This saved my loaf more times than I can count.
Cooking Tips & Techniques
Over the years, I’ve learned a few things the hard way so you don’t have to. Here are my best tips for perfect banana bread every time.
Use really, really ripe bananas. I cannot stress this enough. The bananas should have brown spots—even black spots are fine. They should be soft to the touch and smell intensely sweet. If your bananas aren’t ripe enough, the bread will be less flavorful and more dense. I’ve actually put bananas in a paper bag with an apple overnight to speed up the process. It works.
Don’t over-mix the batter. This is the most common mistake I see. Once you add the flour, mix just until it disappears. Over-mixing develops gluten, which makes the bread tough and rubbery instead of tender and moist. I once had a loaf that came out so dense, I could have used it as a doorstop. Learn from my failure.
Toast the walnuts first. This is a game-changer. Spread the chopped walnuts on a baking sheet and toast them in the preheating oven for 5-7 minutes, until they’re fragrant and slightly darker. Let them cool before folding them into the batter. Toasted walnuts add a deeper, nuttier flavor that takes this bread from good to unforgettable.
Let it cool completely. I know, I know. The smell is intoxicating. But slicing into warm banana bread is a recipe for disaster. The structure hasn’t fully set, and you’ll end up with a crumbly mess. I’ve done this at least three times, and every time I tell myself I’ll wait next time. Spoiler: I don’t. But you should.
Use room-temperature ingredients. Cold eggs can cause the melted butter to seize, which affects the texture. Let your egg sit on the counter for 15 minutes before starting. If you forgot, place it in a bowl of warm water for 5 minutes.
Variations & Adaptations
This recipe is incredibly versatile. Here are some of my favorite ways to change it up, depending on who’s coming over or what I have in the pantry.
Gluten-Free Version: Swap the all-purpose flour with a 1:1 gluten-free baking flour blend. I’ve used Bob’s Red Mill and King Arthur’s gluten-free blends with great results. The texture will be slightly more crumbly, but the flavor is still spot-on.
Dairy-Free Version: Replace the butter with melted coconut oil or a plant-based butter. I’ve also used applesauce (same amount) for a lower-fat version, though the texture is a bit more cake-like. Both work beautifully.
Chocolate Chip Banana Bread: Fold in ½ cup (85 g) of semi-sweet chocolate chips along with the walnuts. This is my go-to when I’m bringing this to a gathering with kids. It disappears in minutes.
Spiced Banana Bread: Add 1 teaspoon of cinnamon, ½ teaspoon of nutmeg, and ¼ teaspoon of ground ginger to the flour mixture. This gives the bread a warm, almost chai-like flavor that’s perfect for fall gatherings.
Vegan Version: Use a flax egg (1 tablespoon ground flaxseed mixed with 3 tablespoons water, let sit for 5 minutes) instead of the regular egg, and replace the butter with coconut oil. I’ve tested this for a friend who’s vegan, and honestly, I couldn’t tell the difference.
Serving & Storage Suggestions
This banana bread is wonderful on its own, but here are a few ways to make it feel extra special when you’re hosting.
Serving Temperature: Serve at room temperature or slightly warm. If you’re reheating slices, pop them in a 300°F (150°C) oven for 5-7 minutes, or microwave for 15 seconds. A warm slice with a pat of butter melting into it? Pure heaven.
Presentation Ideas: Place the whole loaf on a wooden cutting board or a cake stand. Slice it in the kitchen and arrange the slices on a platter for a more polished look. I like to sprinkle a few extra toasted walnuts on top for visual appeal.
What to Serve Alongside: A hot cup of coffee or tea is the classic pairing. For brunch, serve it alongside scrambled eggs and fresh fruit. For dessert, add a scoop of vanilla ice cream or a dollop of whipped cream. I’ve even used it as the base for a bread pudding—it’s incredible.
Storage Instructions: Wrap the cooled loaf tightly in plastic wrap or aluminum foil. Store at room temperature for up to 4 days. Do not refrigerate—it will dry out the bread. If you live in a humid climate, you can store it in an airtight container instead.
Freezing Instructions: This bread freezes beautifully. Wrap the cooled loaf in plastic wrap, then a layer of aluminum foil, and freeze for up to 3 months. To thaw, leave it on the counter overnight, or unwrap and microwave individual slices for 20-30 seconds. I always keep a loaf in the freezer for unexpected guests.
Nutritional Information & Benefits
Here’s the approximate nutritional breakdown for one slice (based on 10 slices per loaf):
| Nutrient | Amount Per Slice |
|---|---|
| Calories | 245 |
| Total Fat | 11g |
| Saturated Fat | 4.5g |
| Cholesterol | 35mg |
| Sodium | 210mg |
| Total Carbohydrates | 34g |
| Dietary Fiber | 2g |
| Sugars | 18g |
| Protein | 4g |
Bananas are packed with potassium, which supports heart health and muscle function. Walnuts are a great source of omega-3 fatty acids, which are good for brain health. This bread also provides a decent amount of fiber, especially if you use whole wheat flour (swap half the all-purpose flour for whole wheat). For a lower-sugar option, reduce the sugar to ½ cup (100 g)—the bananas add plenty of natural sweetness.
Potential allergens: This recipe contains wheat (gluten), eggs, dairy (butter), and tree nuts (walnuts). For allergen-friendly substitutions, see the Variations section above.
Conclusion
This classic banana bread with walnuts has become more than just a recipe in my kitchen—it’s a little piece of memory I can hold onto and share with the people I care about. Every time I pull a golden loaf out of the oven, I think of Aunt Delia’s cracked vinyl stool and that hardware store breeze. And every time I see someone take that first bite and close their eyes, I know I’ve passed a little of that feeling along.
I hope you’ll make this your own. Add chocolate chips if that’s your thing. Swap the walnuts for pecans. Double the recipe and freeze one for later. The beauty of this bread is that it’s forgiving, flexible, and always, always welcome at a gathering.
So go ahead—grab those spotty bananas on your counter, preheat your oven, and get mixing. And when you do, I’d love to hear about it. Drop a comment below and tell me how yours turned out, or share your own twist on this classic. Happy baking, friends!
Frequently Asked Questions
Can I use frozen bananas for this recipe?
Absolutely! Thaw them completely, then drain off any excess liquid before mashing. Frozen bananas are actually sweeter than fresh ones, so they work beautifully.
Why did my banana bread sink in the middle?
This usually happens if the bread is underbaked or if you opened the oven door too early. Make sure your oven is fully preheated, and resist the urge to peek for the first 45 minutes.
Can I make this without walnuts?
Of course! Simply omit the walnuts, or replace them with pecans, chocolate chips, or dried fruit like raisins or chopped dates.
How do I know when the banana bread is done?
Insert a toothpick or skewer into the center. If it comes out clean or with a few moist crumbs, it’s done. The top should also be golden brown and spring back when lightly touched.
Can I double this recipe?
Yes! Double all the ingredients and bake in two loaf pans. The baking time may increase by 5-10 minutes, so start checking at the 55-minute mark.
Pin This Recipe!
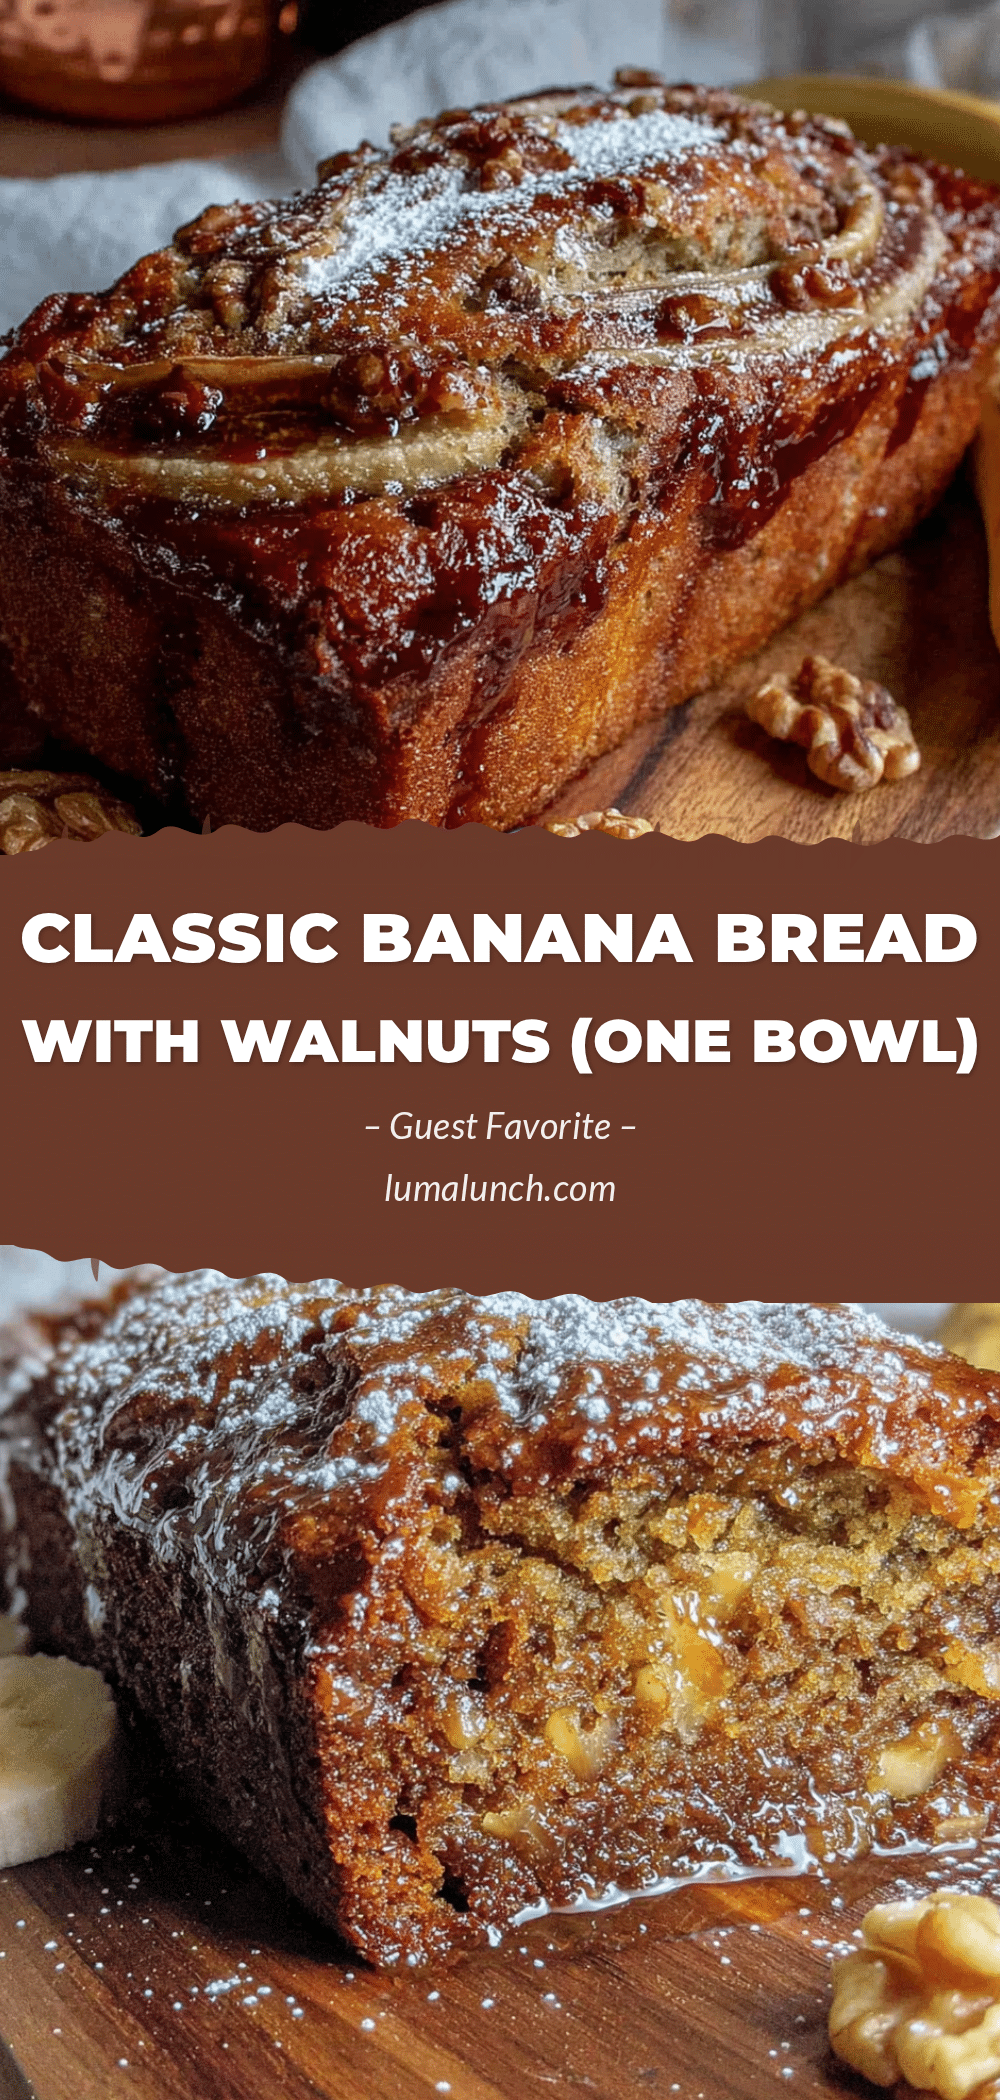
Best Classic Banana Bread with Walnuts (One Bowl)
This classic banana bread with walnuts is moist, tender, and packed with flavor. Made in one bowl with simple ingredients, it’s the perfect comfort food that tastes like Sunday afternoons.
- Prep Time: 15 minutes
- Cook Time: 60 minutes
- Total Time: 1 hour 15 minutes
- Yield: 10 servings 1x
- Category: Dessert
- Cuisine: American
Ingredients
- 3 large ripe bananas, mashed (about 1½ cups / 360 ml)
- ⅓ cup (75 g) unsalted butter, melted
- ¾ cup (150 g) granulated sugar
- 1 large egg, room temperature
- 1 teaspoon vanilla extract
- 1½ cups (190 g) all-purpose flour
- 1 teaspoon baking soda
- ½ teaspoon salt
- ½ cup (60 g) chopped walnuts
- ¼ cup (30 g) chocolate chips (optional)
- 1 tablespoon ground cinnamon (optional)
- 1 tablespoon milk, dairy or plant-based (optional)
Instructions
- Preheat your oven to 350°F (175°C). Position the rack in the center of the oven. Grease your loaf pan with butter or non-stick spray. If using parchment paper, cut a strip long enough to hang over the two long sides.
- In your large mixing bowl, mash the three ripe bananas with a fork or potato masher until mostly smooth with a few small lumps remaining.
- Pour the melted butter over the mashed bananas and stir until combined.
- Add the granulated sugar, room-temperature egg, and vanilla extract. Stir vigorously until everything is well blended and smooth.
- Sprinkle the flour, baking soda, and salt over the wet mixture. Stir gently just until no streaks of flour remain. Do not over-mix.
- Fold in the chopped walnuts (and chocolate chips or cinnamon if using) with a few gentle strokes. If batter seems too stiff, add a tablespoon of milk.
- Pour the batter into the prepared pan and spread evenly. Tap the pan gently on the counter to release air bubbles.
- Bake for 55-65 minutes, until the top is golden brown and a toothpick inserted into the center comes out clean or with a few moist crumbs. Start checking at 55 minutes.
- Cool in the pan for 10 minutes on a cooling rack.
- Run a knife around the edges if needed, then lift the loaf out using parchment paper handles. Let cool completely on the rack before slicing.
Notes
Use really ripe bananas with brown spots for best flavor and moisture. Toast walnuts before adding for deeper flavor. Do not over-mix the batter to avoid tough bread. Let cool completely before slicing to prevent crumbling. If top browns too quickly, tent with foil for last 10-15 minutes.
Nutrition
- Serving Size: 1 slice
- Calories: 245
- Sugar: 18
- Sodium: 210
- Fat: 11
- Saturated Fat: 4.5
- Carbohydrates: 34
- Fiber: 2
- Protein: 4
Keywords: banana bread, classic banana bread, walnut banana bread, one bowl banana bread, easy banana bread, moist banana bread


