Love this? Save it for later!
Share the inspiration with your friends
I was standing in the baking aisle of my local grocery store last December, staring at a display of candy canes, when a sharp, cool whiff of peppermint hit me — and suddenly I was seven years old at my Aunt Carol’s kitchen table. She had this chipped ceramic plate she always used for holiday treats, and on it sat a slice of the darkest, most decadent chocolate cake I’d ever seen, topped with what looked like crushed candy canes and white chocolate. I remember the way the mint cut through the rich cocoa, that little jolt of cool in every bite. I didn’t even know what peppermint bark was back then. I just knew I wanted another slice — and another.
Aunt Carol passed away a few years ago, and honestly, I’ve spent every holiday season since trying to get that exact taste back. You know that feeling when you’re chasing a memory you can almost, but not quite, hold onto? That was me with this cake. I tried a dozen different recipes. Some were too dry. Some had that artificial mint flavor that tastes more like toothpaste than dessert. And some just didn’t have that perfect contrast between the rich, fudgy cake and the crunchy, cool topping.
Then, last year, I finally cracked it. I was making my go-to chocolate bundt cake — the one that never fails me — and I had a bag of peppermint bark leftover from a holiday gift exchange. I chopped it up, folded some into the batter, and smashed the rest on top with a cream cheese glaze. Let me tell you, when I pulled that cake out of the pan, the whole kitchen smelled like Christmas morning. I stood there, fork in hand, and took a bite. And there it was. That exact feeling from Aunt Carol’s kitchen. Maybe you’ve been there — that moment when a recipe finally tastes like the memory you’ve been carrying around. That’s why I keep making this cake. It’s not just dessert. It’s a time machine.
Why You’ll Love This Easy Peppermint Bark Chocolate Bundt Cake
This isn’t just another holiday cake. This is the one you’ll make year after year, the one people ask for by name at every family gathering. I’ve tested this recipe six times (yes, six — my neighbors were very happy about it), and I can tell you with confidence that it delivers every single time.
- Quick & Easy : From start to finish, this cake comes together in about an hour. Most of that time is hands-off baking, which means you can wrap presents or just sit down with a cup of coffee while your kitchen fills with that incredible peppermint-chocolate aroma.
- Simple Ingredients : No fancy grocery trips needed. You likely have most of these ingredients in your pantry right now — flour, sugar, cocoa powder, eggs, butter. The only special item is a bag of peppermint bark, and you can find that at any grocery store during the holidays.
- Perfect for Holiday Gatherings : This cake is a showstopper on any dessert table. It’s festive, it’s beautiful, and it feeds a crowd. Plus, it travels well, so you can bring it to parties without worrying about it falling apart.
- Crowd-Pleaser : I’ve served this to kids, adults, even my picky mother-in-law, and every single person has asked for the recipe. The combination of rich chocolate and cool peppermint is universally loved.
- Unbelievably Delicious : The texture is what really sets this cake apart. It’s dense and fudgy, almost like a brownie in cake form, with little pockets of melted peppermint bark throughout. And that glaze? It sets into a crackly, sweet shell that gives way to the soft cake underneath.
What makes this recipe different from all the others? It’s the technique. I fold crushed peppermint bark into the batter, which means every slice has those little crunchy, minty surprises. And instead of a plain powdered sugar glaze, I use a cream cheese-based glaze that adds just the right amount of tang to balance the sweetness. It’s not just another version of peppermint chocolate cake — it’s the best version. The one that makes you close your eyes after the first bite.
What Ingredients You Will Need
This recipe uses simple, wholesome ingredients to deliver bold flavor and satisfying texture without the fuss. Most of these are pantry staples, so you probably already have them on hand. Here’s what you’ll need:
For the Cake
- All-purpose flour, 2 cups (240g) — Spoon and level it into your measuring cup for best results. I’ve found that scooping directly from the bag can pack the flour and make the cake dry.
- Granulated sugar, 1 ¾ cups (350g) — Regular white sugar works perfectly here. No need for anything fancy.
- Unsweetened cocoa powder, ¾ cup (75g) — I recommend Hershey’s Special Dark or Ghirardelli for the richest flavor. The darker the cocoa, the better it balances the sweet peppermint.
- Baking powder, 1 ½ teaspoons — Make sure it’s fresh! Old baking powder can leave your cake flat and dense.
- Baking soda, 1 ½ teaspoons — Same rule applies — check the expiration date.
- Salt, 1 teaspoon — Just regular table salt. It enhances the chocolate flavor.
- Large eggs, 2, at room temperature — If you forgot to take them out of the fridge, place them in a bowl of warm water for 5 minutes.
- Whole milk, 1 cup (240ml) — You can substitute with buttermilk for an even more tender crumb. I’ve done it both ways, and buttermilk adds a lovely tang.
- Vegetable oil, ½ cup (120ml) — This keeps the cake incredibly moist. I use canola or avocado oil. Do not substitute with butter here — oil is what gives bundt cakes that signature tender texture.
- Vanilla extract, 2 teaspoons — Pure vanilla extract makes a difference, but imitation works in a pinch.
- Hot water or hot coffee, 1 cup (240ml) — This is the secret to a deep, rich chocolate flavor. Coffee enhances the cocoa without making the cake taste like coffee. I promise.
- Crushed peppermint bark, 1 cup (about 6 oz) — I use the pre-made bags from the store. You can also make your own by melting dark chocolate and white chocolate together and topping with crushed candy canes.
For the Cream Cheese Glaze
- Cream cheese, 4 oz, softened — Full-fat cream cheese gives the best texture. Low-fat can make the glaze runny.
- Unsalted butter, 2 tablespoons, softened — Let it sit out for about 30 minutes.
- Powdered sugar, 1 ½ cups (180g) — Sift it if it’s lumpy. Nobody wants a lumpy glaze.
- Vanilla extract, ½ teaspoon
- Milk, 2-3 tablespoons — Add one tablespoon at a time until you reach your desired consistency.
For the Topping
- Additional crushed peppermint bark, ½ cup — For sprinkling on top of the glaze.
- Optional: Crushed candy canes, 2-3 — For extra crunch and color.
Equipment Needed
You don’t need a professional bakery setup for this cake. Here’s what you’ll need:
- 10-12 cup bundt pan — This is non-negotiable. A standard 10-cup pan works perfectly. I love my Nordic Ware Anniversary pan — it releases cakes like a dream. If you’re using an older or non-stick pan, make sure to grease it thoroughly.
- Electric hand mixer or stand mixer — You can mix this batter by hand, but a mixer makes it much easier, especially for the glaze.
- Large mixing bowl — For the dry ingredients.
- Medium mixing bowl — For the wet ingredients.
- Whisk — For combining dry ingredients.
- Rubber spatula — For scraping down the sides of the bowl and folding in the peppermint bark.
- Cooling rack — Essential for even cooling. If you don’t have one, you can use the inverted pan method, but a rack is better.
- Piping bag or zip-top bag — For drizzling the glaze. A zip-top bag with the corner snipped off works just as well.
Preparation Method
- Preheat your oven to 350°F (175°C). Position the rack in the center of the oven. While it’s heating, generously grease your bundt pan. I use a pastry brush to apply a thin layer of shortening, then dust it with cocoa powder instead of flour — this prevents any white residue on your finished cake. Make sure you get into all the nooks and crannies of the pan.
- In a large bowl, whisk together the dry ingredients. Combine the flour, sugar, cocoa powder, baking powder, baking soda, and salt. Whisk for about 30 seconds to aerate everything evenly. This step is important — you want the leavening agents distributed throughout the flour so your cake rises evenly.
- In a separate medium bowl, whisk the wet ingredients. Beat the eggs lightly, then add the milk, vegetable oil, and vanilla extract. Whisk until smooth and well combined. Don’t overmix — just until the eggs are broken up and everything looks uniform.
- Pour the wet ingredients into the dry ingredients. Use a rubber spatula to fold them together gently. The batter will be very thick at this point — that’s normal. Don’t worry if there are a few lumps. Overmixing at this stage can make the cake tough.
- Slowly add the hot water or coffee. Pour it in a steady stream while stirring gently with the spatula. The batter will thin out considerably and become silky smooth. This is the magic step — the hot liquid “blooms” the cocoa powder, deepening the chocolate flavor. The batter should be thin enough to pour easily.
- Fold in the crushed peppermint bark. Reserve about ¼ cup for the topping. Gently fold the remaining ¾ cup into the batter with a few quick strokes. Don’t overmix — you want distinct pieces of peppermint bark throughout the cake, not melted into the batter.
- Pour the batter into the prepared bundt pan. Use the spatula to scrape every last bit out of the bowl. Gently tap the pan on the counter a few times to release any air bubbles. This also helps the batter settle into all the ridges of the pan.
- Bake for 45-55 minutes. Start checking at 45 minutes. Insert a long skewer or toothpick into the thickest part of the cake — it should come out with a few moist crumbs attached, not wet batter. If the top is browning too quickly, tent it loosely with aluminum foil for the last 10 minutes.
- Cool the cake in the pan for 15 minutes. Set the pan on a wire rack. This resting time is crucial — it allows the cake to firm up enough to hold its shape when you flip it out. Don’t skip this step or your cake might fall apart.
- Invert the cake onto the cooling rack. Place the rack on top of the pan, then carefully flip them over together. Lift the pan off slowly. If the cake sticks, let it sit for another 5 minutes and try again. Let the cake cool completely before glazing — about 1 hour.
- Make the cream cheese glaze. While the cake cools, beat the softened cream cheese and butter together until smooth and fluffy, about 2 minutes. Gradually add the powdered sugar, beating on low speed to prevent a sugar cloud. Add the vanilla extract and 2 tablespoons of milk. Beat until smooth. If the glaze is too thick, add another tablespoon of milk. It should be thick but pourable — think heavy cream consistency.
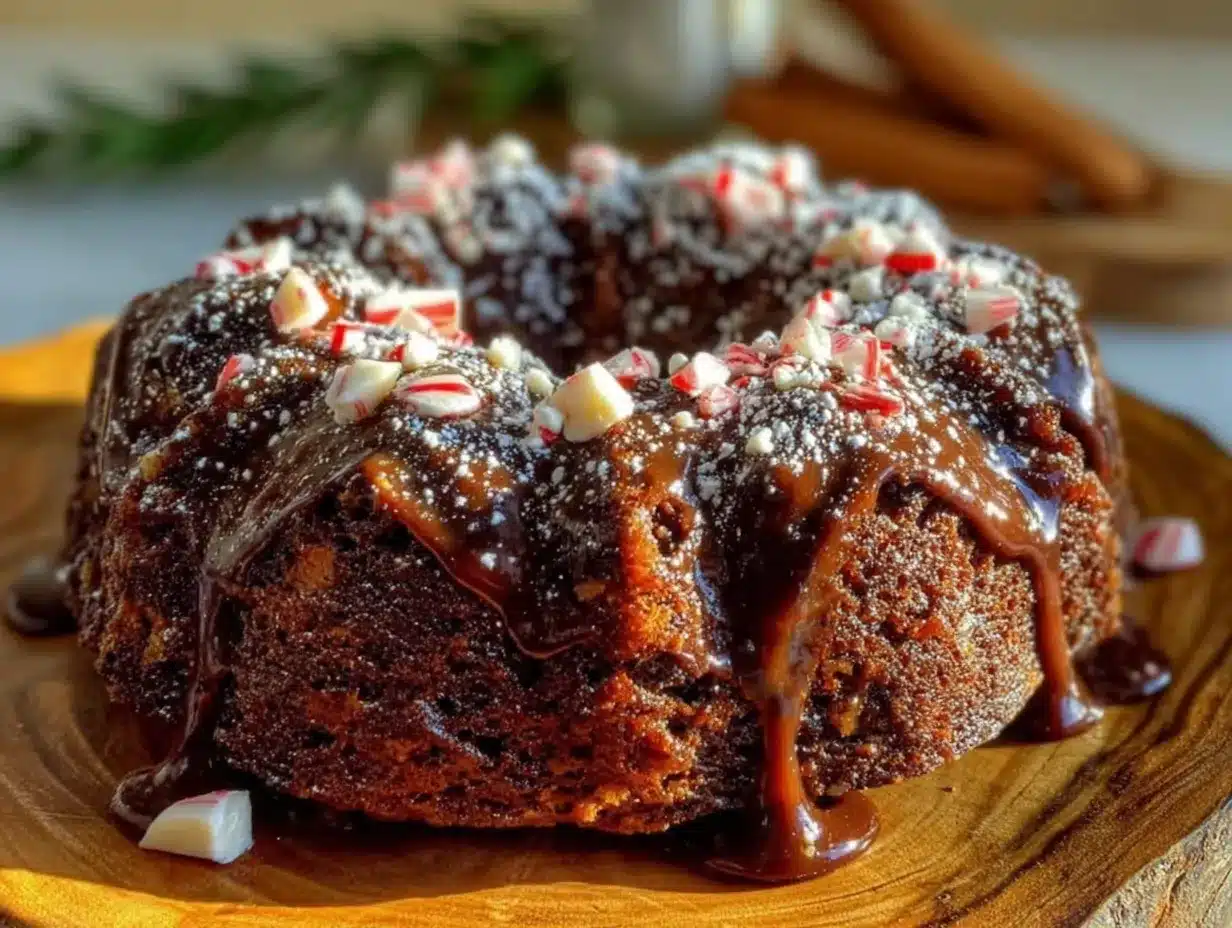
- Glaze the cake. Once the cake is completely cool, transfer it to a serving plate. Drizzle the glaze over the top, letting it cascade down the sides. I like to use a piping bag or a zip-top bag with the corner snipped off for more control. Immediately sprinkle the reserved crushed peppermint bark and optional candy cane pieces over the glaze before it sets.
Cooking Tips & Techniques
I’ve made this cake more times than I can count, and I’ve learned a few things the hard way. Here are my best tips for success:
Don’t skip the hot liquid. I know it sounds weird to add hot water or coffee to a cake batter, but trust me on this one. The heat helps dissolve the cocoa powder and intensifies the chocolate flavor. I’ve forgotten to heat the water before, and the cake was noticeably less rich. If you’re using coffee, just make sure it’s not boiling — hot from the pot is perfect.
Grease your pan like you mean it. There’s nothing more heartbreaking than a beautiful bundt cake that refuses to leave the pan. I use a pastry brush to apply a thick layer of shortening, making sure to get into every crevice. Then I dust it with cocoa powder instead of flour — this prevents any white streaks on the finished cake. If you’re using a non-stick spray, make sure it contains flour (like Baker’s Joy).
Let the cake cool in the pan for exactly 15 minutes. I once got distracted and let it cool for 30 minutes. The cake stuck to the pan and came out in pieces. Another time I flipped it too early and it collapsed. Fifteen minutes is the sweet spot — long enough for the structure to set, but not so long that the steam condenses and makes the cake stick.
Crush the peppermint bark to the right size. You want pieces that are about the size of a pea — not too big that they sink to the bottom, and not too small that they disappear into the batter. I put the bark in a zip-top bag and gently tap it with a rolling pin. Some fine crumbs are fine, but aim for mostly small chunks.
Room temperature ingredients matter. I know it’s tempting to use cold eggs and milk straight from the fridge, but room temperature ingredients emulsify better, creating a smoother, more tender crumb. If you’re short on time, place the eggs in a bowl of warm water for 5 minutes and microwave the milk for 15 seconds.
Variations & Adaptations
This recipe is incredibly versatile. Here are some ways to make it your own:
Gluten-Free Version: Substitute the all-purpose flour with a 1:1 gluten-free baking blend. I’ve used Bob’s Red Mill and King Arthur’s Measure for Measure with great results. Just make sure the blend contains xanthan gum — that’s what provides the structure that gluten normally would. The texture will be slightly more delicate, so handle the cake gently when inverting it.
Dairy-Free Version: Use a plant-based milk like oat or almond milk in place of whole milk. For the glaze, use dairy-free cream cheese (I like Violife or Kite Hill) and vegan butter. The cake will still be moist and delicious — I’ve tested this for a friend with dairy allergies, and she couldn’t tell the difference.
Double Chocolate Peppermint Cake: Add ½ cup of dark chocolate chips to the batter along with the peppermint bark. The extra pockets of melted chocolate make this even more decadent. I did this for a Christmas party last year, and it was the first thing to disappear from the dessert table.
White Chocolate Peppermint Version: Swap the dark peppermint bark for white chocolate peppermint bark. The white chocolate pairs beautifully with the dark cocoa in the cake, creating a striking visual contrast. Top with extra white chocolate shavings for a snowy effect.
Mint Extract Option: If you can’t find peppermint bark, add ½ teaspoon of peppermint extract to the batter and top the cake with crushed candy canes. The flavor will be more straightforward mint, but it’s still delicious. Just be careful — peppermint extract is very strong. Start with ¼ teaspoon and taste the batter.
Serving & Storage Suggestions
This cake is best served at room temperature, which allows the glaze to soften slightly and the flavors to meld. If you’ve stored it in the fridge, let it sit on the counter for about 30 minutes before serving.
For a truly stunning presentation, dust the top with a light sprinkle of powdered sugar before adding the peppermint bark. I like to serve it on a white cake stand so the dark chocolate and red-and-white peppermint really pop. A few sprigs of fresh mint around the base add a nice touch of green for the holidays.
This cake pairs beautifully with a cup of hot coffee or a glass of cold milk. For adult gatherings, a peppermint mocha or a glass of port wine complements the flavors perfectly. I’ve also served it with a scoop of vanilla bean ice cream, and let me tell you — the warm cake with cold ice cream is pure heaven.
Storage: Store the cake in an airtight container at room temperature for up to 3 days. If you live in a humid climate, refrigerate it to prevent the glaze from getting sticky. The cake actually tastes better on day two — the flavors have time to meld and deepen.
Freezing: This cake freezes beautifully. Wrap the unglazed cake tightly in plastic wrap, then in aluminum foil. Freeze for up to 3 months. When you’re ready to serve, thaw it overnight in the refrigerator, then bring to room temperature before glazing. I often make two cakes at once — one to serve and one to save for later.
Reheating: If you prefer your cake warm, microwave individual slices for 10-15 seconds. The glaze will soften and the cake will become almost fudgy. Just don’t overheat it, or the chocolate pieces can burn.
Nutritional Information & Benefits
Let’s be real — this is a holiday indulgence, not a health food. But that doesn’t mean it’s completely without merits. Here’s the breakdown per slice (based on 12 servings):
- Calories: Approximately 420
- Fat: 18g
- Carbohydrates: 62g
- Protein: 6g
- Fiber: 3g
- Sugar: 42g
The dark cocoa powder provides antioxidants called flavonoids, which are linked to heart health. Peppermint has been shown to aid digestion and can help soothe an upset stomach — which might come in handy after a big holiday meal. And while the sugar content is high, this is a treat meant to be enjoyed in moderation as part of a balanced diet.
For those watching their intake, you can reduce the sugar by ¼ cup without significantly affecting the texture. I’ve done this before, and the cake is still plenty sweet, especially with the glaze. If you have dietary restrictions, the gluten-free and dairy-free variations above work beautifully.
Conclusion
This Easy Peppermint Bark Chocolate Bundt Cake is more than just a dessert — it’s a holiday tradition waiting to happen. It’s the cake that brings people together, that fills your kitchen with the unmistakable smell of Christmas, that makes everyone at the table close their eyes and smile. I’ve been making it for years now, and it never gets old. Every time I pull that golden-brown bundt out of the pan and drizzle the creamy glaze over the top, I think of Aunt Carol and her chipped ceramic plate. And I smile.
I hope you’ll give this recipe a try. Make it for your family. Bring it to your holiday party. Or just make it for yourself on a quiet December evening with a cup of tea and your favorite Christmas movie. Don’t be afraid to customize it — add more peppermint, swap the glaze, throw in some chocolate chips. The best recipes are the ones you make your own.
When you do make it, I’d love to hear how it turned out. Leave a comment below and tell me about your own holiday memories with chocolate and peppermint. Share a photo of your cake on Pinterest and tag me — I want to see your beautiful creation. And if you have any questions along the way, just ask. I’m always here to help.
Happy baking, friends. May your holidays be sweet, your kitchen warm, and your cake pan perfectly greased!
Frequently Asked Questions
Can I use a different type of pan for this cake?
Yes, you can use a 9×13 inch rectangular pan or two 9-inch round cake pans. Just adjust the baking time — a 9×13 pan will take about 35-40 minutes, and round pans will take 25-30 minutes. The bundt pan gives the most dramatic presentation, but the cake tastes just as good in any shape.
Can I make this cake ahead of time?
Absolutely. You can bake the cake up to 2 days in advance and keep it wrapped tightly at room temperature. Add the glaze and toppings on the day you plan to serve it for the best presentation. You can also freeze the unglazed cake for up to 3 months.
Why did my cake stick to the pan?
This usually happens for one of three reasons: the pan wasn’t greased thoroughly, the cake wasn’t cooled long enough in the pan, or the pan has scratches that create sticking points. Make sure to use a generous amount of shortening or baking spray with flour, and let the cake cool for exactly 15 minutes before inverting.
Can I use candy canes instead of peppermint bark?
Yes, but the texture will be different. Candy canes are harder and don’t melt as smoothly into the batter. I recommend crushing them very finely and using them mainly as a topping. For the batter, stick with peppermint bark or add ½ teaspoon of peppermint extract instead.
Is this cake suitable for people with nut allergies?
Yes, this recipe is naturally nut-free. However, always check the labels on your peppermint bark and other ingredients to make sure they weren’t processed in a facility that handles nuts. Some brands of peppermint bark may contain almond or other nut oils for flavoring.
Pin This Recipe!
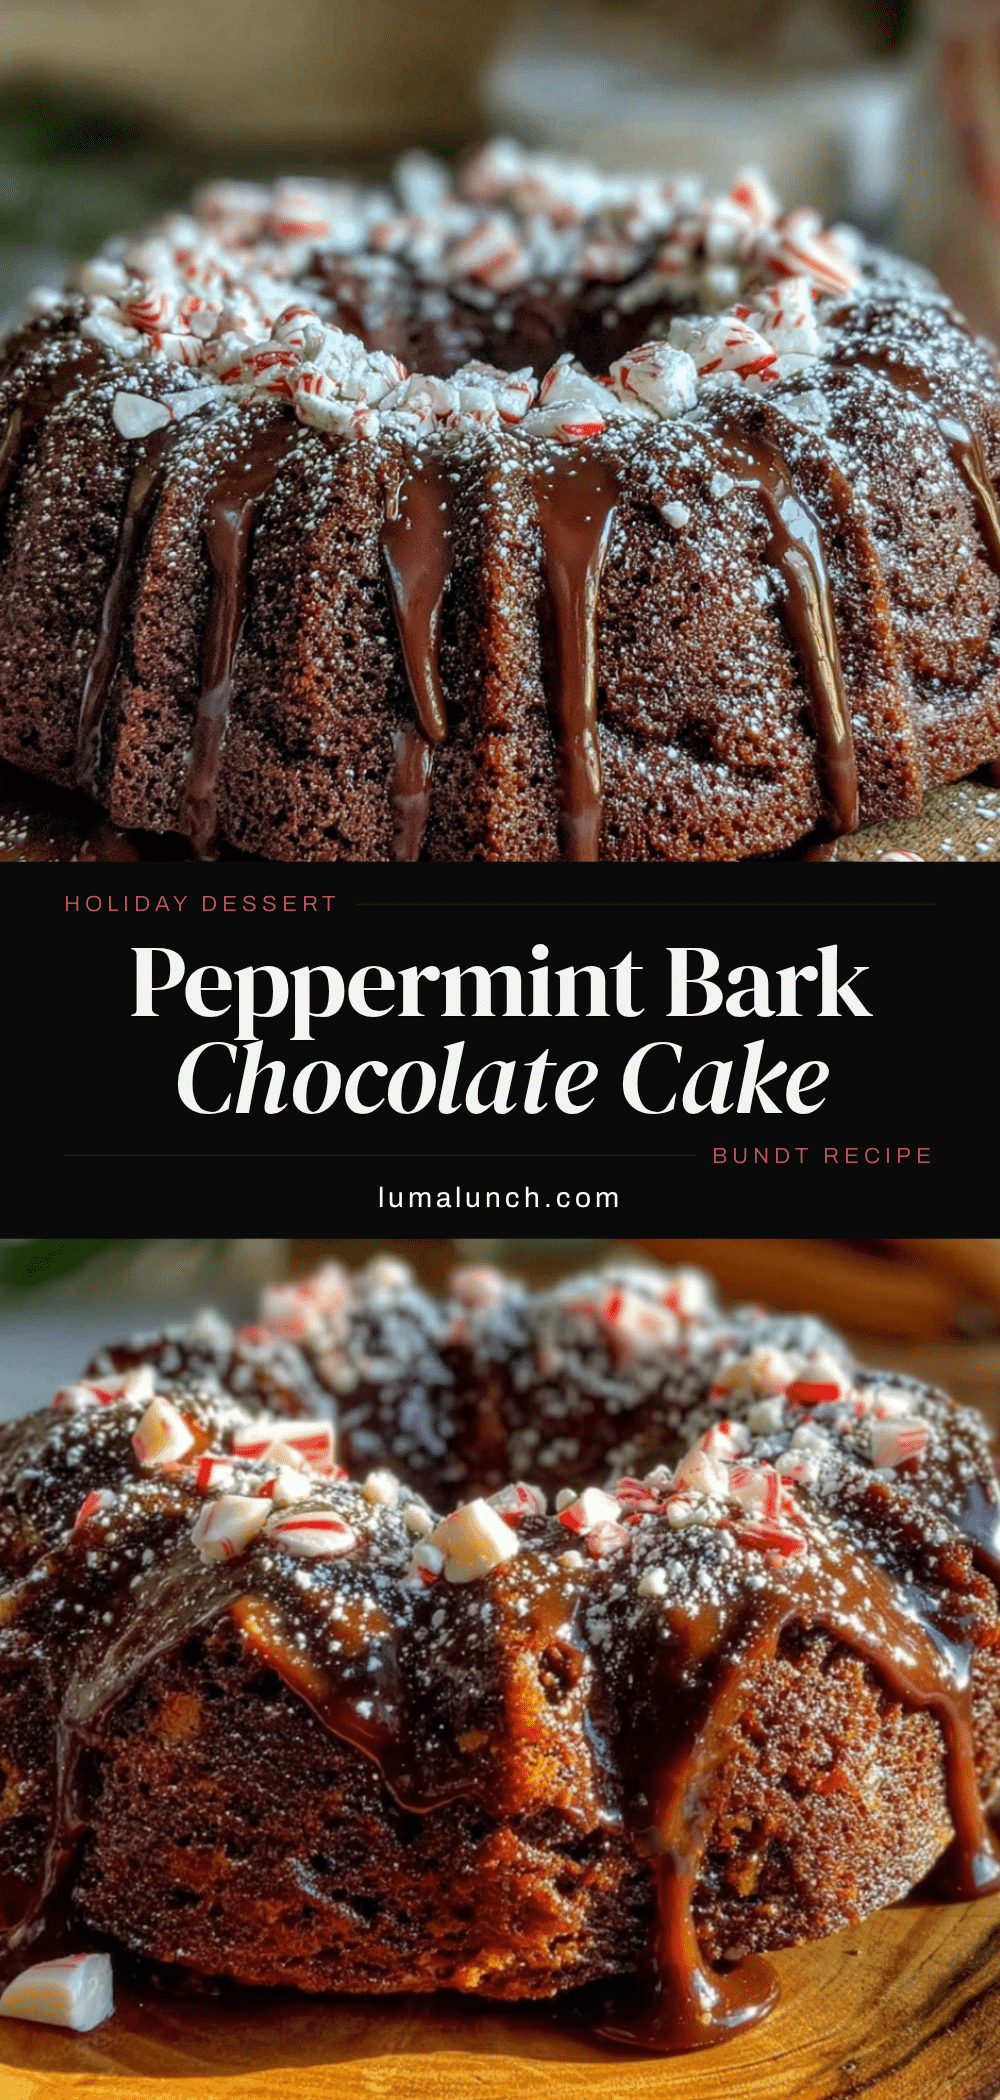
Easy Peppermint Bark Bundt Cake: The Best Holiday Dessert
This Easy Peppermint Bark Chocolate Bundt Cake is a rich, fudgy holiday dessert with crushed peppermint bark folded into the batter and a tangy cream cheese glaze. It’s a nostalgic, crowd-pleasing treat that comes together in about an hour.
- Prep Time: 15 minutes
- Cook Time: 50 minutes
- Total Time: 1 hour 5 minutes
- Yield: 12 servings 1x
- Category: Dessert
- Cuisine: American
Ingredients
- 2 cups (240g) all-purpose flour
- 1 ¾ cups (350g) granulated sugar
- ¾ cup (75g) unsweetened cocoa powder
- 1 ½ teaspoons baking powder
- 1 ½ teaspoons baking soda
- 1 teaspoon salt
- 2 large eggs, at room temperature
- 1 cup (240ml) whole milk
- ½ cup (120ml) vegetable oil
- 2 teaspoons vanilla extract
- 1 cup (240ml) hot water or hot coffee
- 1 cup (about 6 oz) crushed peppermint bark
- 4 oz cream cheese, softened
- 2 tablespoons unsalted butter, softened
- 1 ½ cups (180g) powdered sugar
- ½ teaspoon vanilla extract
- 2–3 tablespoons milk
- ½ cup additional crushed peppermint bark (for topping)
- 2–3 crushed candy canes (optional, for topping)
Instructions
- Preheat your oven to 350°F (175°C). Position the rack in the center of the oven. Generously grease your bundt pan with shortening and dust with cocoa powder.
- In a large bowl, whisk together the flour, sugar, cocoa powder, baking powder, baking soda, and salt for about 30 seconds.
- In a separate medium bowl, whisk the eggs lightly, then add the milk, vegetable oil, and vanilla extract. Whisk until smooth.
- Pour the wet ingredients into the dry ingredients and fold together gently with a rubber spatula until just combined. The batter will be thick.
- Slowly add the hot water or coffee in a steady stream while stirring gently. The batter will thin out and become silky smooth.
- Fold in ¾ cup of the crushed peppermint bark, reserving ¼ cup for the topping. Do not overmix.
- Pour the batter into the prepared bundt pan. Gently tap the pan on the counter a few times to release air bubbles.
- Bake for 45-55 minutes, until a skewer inserted into the thickest part comes out with a few moist crumbs. Tent with foil if browning too quickly.
- Cool the cake in the pan on a wire rack for exactly 15 minutes.
- Invert the cake onto the cooling rack and let cool completely, about 1 hour.
- Make the cream cheese glaze: Beat the softened cream cheese and butter together until smooth and fluffy, about 2 minutes. Gradually add the powdered sugar, then the vanilla extract and 2 tablespoons of milk. Beat until smooth. Add more milk if needed to reach a thick but pourable consistency.
- Once the cake is completely cool, transfer to a serving plate. Drizzle the glaze over the top, letting it cascade down the sides. Immediately sprinkle the reserved crushed peppermint bark and optional candy cane pieces over the glaze before it sets.
Notes
Don’t skip the hot liquid—it deepens the chocolate flavor. Grease the pan thoroughly to prevent sticking. Let the cake cool in the pan for exactly 15 minutes before inverting. Crush peppermint bark to pea-sized pieces. Room temperature ingredients ensure a tender crumb.
Nutrition
- Serving Size: 1 slice
- Calories: 420
- Sugar: 42
- Sodium: 380
- Fat: 18
- Saturated Fat: 8
- Carbohydrates: 62
- Fiber: 3
- Protein: 6
Keywords: peppermint bark, bundt cake, chocolate cake, holiday dessert, Christmas cake, peppermint chocolate cake, easy bundt cake


