Love this? Save it for later!
Share the inspiration with your friends
My neighbor Carol asked why I couldn’t just brown the butter with the sage from the start instead of adding it later. I opened my mouth to explain the whole thing about sage burning and butter solids separating and all the reasons that wouldn’t work. Then I stopped. Honestly, I had no good answer. I’d just always done it the other way because that’s how my grandmother taught me, and I never questioned it.
So I tried it her way. I stood there watching that butter foam and sizzle with the sage leaves floating around like tiny green boats, fully prepared to dump it all out and start over. The kitchen smelled incredible, I’ll give her that. But I was sure the sage would turn bitter and the butter would scorch and I’d have to pretend it was fine while my neighbor smiled that knowing smile.
The sage didn’t burn. The butter didn’t scorch. And that stuffing? It was the best batch I’d ever made, and I’ve been making this recipe for Thanksgiving for almost fifteen years. The sage infused the butter from the very beginning, mellowing out into this deep, almost woodsy flavor that I’d been missing all along. Carol just shrugged when I told her, like she knew it would work. Which, okay, she did.
Maybe you’ve been there — someone suggests something that goes against everything you thought you knew about cooking, and you resist because it feels wrong. Then you try it and realize you’ve been making things harder for yourself for no reason. That’s this recipe in a nutshell. This Perfect Brown Butter Sage Stuffing with Sourdough is the version I should have been making all along, and now I’m never going back.
Why You’ll Love This Recipe
This isn’t just another stuffing recipe that disappears into the background of your holiday table. This is the dish people ask about the next day. The one your brother-in-law requests for his birthday dinner. The one that turns stuffing skeptics into stuffing believers.
Here is why this recipe stands out:
- Deep, Nutty Flavor — Browning the butter with fresh sage creates a flavor foundation that plain butter just can’t touch. It’s rich, toasty, and slightly sweet with herbal notes running through every bite.
- Perfect Texture Every Time — Sourdough holds its shape better than regular bread, giving you crispy edges on top and tender, custard-like bites underneath. No mushy stuffing here.
- Make-Ahead Friendly — You can assemble this stuffing a day ahead and bake it when you’re ready. That’s a game-changer when you’re hosting and every minute counts.
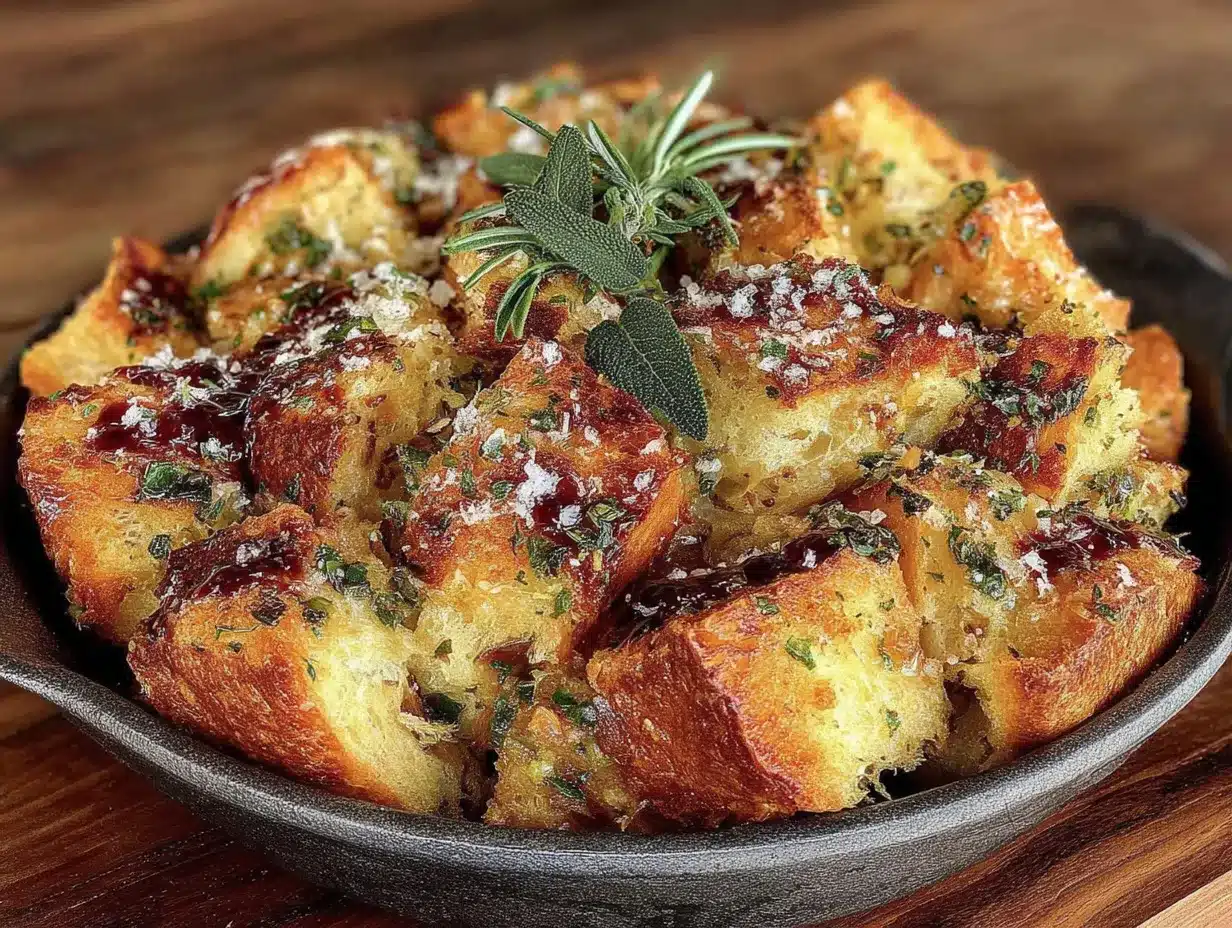
- Impressive Without Stress — It looks beautiful coming out of the oven, golden brown with sage leaves scattered across the top. Your guests will think you spent hours on it. You’ll know it came together in under an hour.
- Crowd-Sized Portions — This recipe scales beautifully for large gatherings. I’ve made it for twelve people and for sixty, and it works every time with no adjustments needed.
What makes this different from every other stuffing recipe online? It’s the technique. Browning the butter with the sage isn’t just a flavor shortcut — it changes the entire profile of the dish. The sage becomes less sharp and more savory, while the butter develops those nutty notes that pair perfectly with the tangy sourdough. I tested this recipe six times before I got it right, tweaking the liquid ratio and the bake time until the texture was exactly what I wanted.
This is the stuffing that makes you close your eyes after the first bite. It’s comfort food at its finest, but elevated enough to feel special. Perfect for holiday dinners, Sunday suppers with friends, or any gathering where you want to serve something memorable.
What Ingredients You Will Need
This recipe uses simple, wholesome ingredients that come together to create something far greater than the sum of their parts. Most of these are pantry staples or easy to find at any grocery store.
For the stuffing base:
- 1 large loaf (about 1 pound) day-old sourdough bread, cut into 1-inch cubes (stale bread absorbs the liquid better and holds its shape during baking)
- 1/2 cup unsalted butter (I prefer Kerrygold for its rich flavor, but any good-quality butter works)
- 1/2 cup fresh sage leaves, roughly chopped (about 20-25 leaves — don’t skimp on this)
- 2 medium yellow onions, diced (about 3 cups)
- 4 celery stalks, diced (about 1 1/2 cups)
- 4 cloves garlic, minced
- 2 cups low-sodium chicken or vegetable broth (low-sodium is important so you can control the salt)
- 2 large eggs, lightly beaten
- 1 teaspoon kosher salt (plus more to taste)
- 1/2 teaspoon black pepper
- 1/2 teaspoon dried thyme
- 1/4 teaspoon dried rosemary
For the topping:
- 2 tablespoons unsalted butter, melted
- 8-10 fresh sage leaves (for that beautiful golden garnish)
- Flaky sea salt for finishing (trust me on this)
A note on the bread: Sourdough is non-negotiable here. I know some recipes call for French bread or brioche, but sourdough’s tanginess cuts through the richness of the brown butter and keeps the stuffing from feeling heavy. Look for a loaf that’s at least a day old. If your bread is fresh, cube it and spread it on a baking sheet in a 300°F oven for about 10 minutes to dry it out.
For the broth, I use chicken broth because it adds more depth, but vegetable broth works beautifully if you’re keeping this vegetarian. Just make sure it’s a good-quality one — the broth is a major flavor component, not just a liquid.
The fresh sage is worth seeking out. Dried sage has its place, but it can’t replicate the aromatic quality that fresh sage brings to browned butter. If you absolutely must substitute, use half the amount of dried sage and add it with the dried herbs rather than browning it with the butter.
Equipment Needed
You don’t need anything fancy for this recipe, which is part of its beauty. Here is what you’ll need:
- Large skillet or sauté pan (for browning the butter and cooking the vegetables)
- 9×13-inch baking dish (or similar 3-quart casserole dish)
- Large mixing bowl (for combining everything)
- Chef’s knife and cutting board
- Wooden spoon or silicone spatula
- Measuring cups and spoons
- Whisk (for beating the eggs)
If you don’t have a 9×13-inch dish, you can use a 10-inch cast iron skillet for a more rustic presentation. Just make sure it’s well-seasoned so the stuffing doesn’t stick. I’ve also made this in a disposable aluminum pan when I was bringing it to a friend’s house, and it worked perfectly.
For the butter browning, a light-colored skillet is actually better than a dark nonstick one. You want to see the butter solids turning golden so you can pull it off the heat at exactly the right moment. I learned this the hard way after burning three batches in my dark nonstick pan.
Preparation Method
- Preheat your oven to 375°F. Position a rack in the middle of the oven. If you’re making this ahead, you can skip this step and reheat the assembled dish later.
- Prepare the sourdough cubes. If your bread isn’t already stale, spread the cubes on a baking sheet and toast them in the oven for 8-10 minutes, stirring halfway through. You want them dry but not browned. Set aside to cool slightly.
- Brown the butter with sage. Place your large skillet over medium heat and add the 1/2 cup of butter. Let it melt completely, then add the chopped sage leaves. Swirl the pan occasionally as the butter foams and sizzles. After about 4-5 minutes, the butter solids will turn golden brown and smell nutty and incredible. The sage leaves will crisp up slightly. Remove from heat immediately — browned butter can go from perfect to burnt in seconds.
- Cook the vegetables. Return the skillet to medium heat. Add the diced onions and celery to the brown butter and sage mixture. Cook for 6-8 minutes, stirring occasionally, until the onions are translucent and the celery has softened. Add the minced garlic and cook for one more minute until fragrant. The kitchen should smell absolutely amazing at this point.
- Combine the base ingredients. In your large mixing bowl, combine the dried sourdough cubes with the cooked vegetable mixture. Toss gently to distribute everything evenly. Let this cool for about 5 minutes — you don’t want to scramble the eggs when you add them.
- Whisk the liquid mixture. In a separate bowl or measuring cup, whisk together the chicken broth, beaten eggs, salt, pepper, thyme, and rosemary. Make sure the eggs are fully incorporated into the broth.
- Pour and combine. Pour the liquid mixture over the bread and vegetables. Use a spatula to gently fold everything together until the liquid is evenly absorbed. Don’t overmix — you want some texture, not a paste. Let this sit for 5-10 minutes so the bread can absorb the liquid. The mixture should look moist but not soupy.
- Transfer to baking dish. Grease your 9×13-inch dish with butter or cooking spray. Spread the stuffing mixture evenly in the dish. Don’t pack it down — a loose, craggy top creates those crispy bits everyone fights over.
- Add the topping. Drizzle the 2 tablespoons of melted butter over the top. Arrange the remaining fresh sage leaves decoratively across the surface. Sprinkle with flaky sea salt.
- Bake. Place the dish in the preheated oven and bake for 30-35 minutes, until the top is golden brown and crispy. The stuffing should be set but still slightly jiggly in the center — it will continue to set as it rests. For extra crispy edges, broil for 2-3 minutes at the end, watching carefully so the sage leaves don’t burn.
- Rest before serving. Let the stuffing rest for 5-10 minutes after it comes out of the oven. This allows the custard to fully set and makes serving easier. The aroma at this point is absolutely intoxicating.
Cooking Tips & Techniques
Let me save you from the mistakes I made while developing this recipe. First, do not skip drying out the bread. I know it seems like an unnecessary step, but fresh bread turns into glue when you add liquid. Day-old sourdough that’s been cubed and air-dried or lightly toasted is the difference between fluffy, tender stuffing and a dense brick.
The butter browning is where most people get nervous, and I get it. I ruined three batches before I figured out the trick. Watch for the butter to foam up, then subside. Once the foam clears, you’ll see tiny brown specks forming at the bottom of the pan. That’s when you swirl and pay attention. The color should be a warm amber, like honey. The second you smell that nutty aroma, pull it off the heat. It will continue cooking in the hot pan for another 30 seconds.
Here is a trick I learned from a pastry chef friend: use a light-colored pan for browning butter. Dark nonstick pans make it nearly impossible to see the color change. I switched to a stainless steel skillet and haven’t burned a batch since.
For the liquid ratio, start with less broth than you think you need. Different breads absorb liquid differently, and sourdough tends to be more absorbent than softer breads. Add the broth gradually and let it sit for a few minutes before deciding if you need more. The mixture should look moist but not wet, and when you press a handful, it should hold together without liquid dripping out.
Timing is everything when you’re hosting. I assemble this stuffing the night before, cover it tightly with foil, and refrigerate it. The next day, I let it sit on the counter for 30 minutes while the oven preheats, then bake it as directed. If you’re baking it cold from the refrigerator, add 10-15 minutes to the bake time.
Variations & Adaptations
This stuffing is wonderfully adaptable, and I’ve tried several variations over the years. Here are some of my favorites:
Vegetarian Version: Use vegetable broth instead of chicken broth and add 8 ounces of sautéed mushrooms along with the onions and celery. Cremini or shiitake mushrooms add that savory, umami quality that mimics the depth you’d get from meat-based broth. I made this for a vegetarian friend’s Thanksgiving and she said it was the best stuffing she’d ever had.
Sausage and Apple Variation: Brown 1 pound of Italian sausage (casings removed) in the skillet before cooking the vegetables. Remove the sausage and set aside, then proceed with the recipe as written. Add one diced Granny Smith apple along with the celery. Stir the cooked sausage back in when you combine everything. The sweetness of the apple and the savory sausage complement the brown butter beautifully.
Gluten-Free Adaptation: Substitute the sourdough with a good-quality gluten-free bread. Look for one that’s sturdy and not too sweet — I’ve had good results with Against the Grain brand. Dry it out thoroughly in the oven, as gluten-free bread tends to be more delicate and can turn mushy if it’s too fresh. The rest of the recipe remains the same.
Herb Variation: If you don’t have fresh sage, use a combination of fresh thyme, rosemary, and parsley. Use 2 tablespoons of mixed fresh herbs, chopped finely. Add them with the garlic rather than browning them with the butter, as delicate herbs can burn more easily than hardy sage.
Extra Crispy Version: Spread the stuffing in a thinner layer in a larger baking dish and increase the oven temperature to 400°F. Bake for 25-30 minutes, then broil for 2-3 minutes. The increased surface area means more crispy edges, which is never a bad thing.
Serving & Storage Suggestions
Serve this stuffing hot from the oven, straight from the baking dish to the table. The crispy top and tender interior are at their absolute best within 15 minutes of coming out of the oven. If you’re serving it alongside a roast turkey or chicken, let the meat rest while the stuffing bakes, and bring everything to the table at the same time.
This stuffing pairs beautifully with roasted poultry of any kind, but it’s also fantastic alongside a glazed ham or a hearty mushroom wellington. For a complete holiday plate, serve it with creamy mashed potatoes, roasted green beans with almonds, and a tart cranberry sauce to cut through the richness.
Leftover stuffing is honestly one of the best parts of this recipe. Store it in an airtight container in the refrigerator for up to 4 days. To reheat, place individual portions in a 350°F oven for 10-15 minutes, or until heated through and crispy on top. You can also reheat it in a skillet over medium heat, which gives you even more crispy edges.
This stuffing freezes beautifully, which is great if you’re cooking for a smaller gathering. Assemble the stuffing in a freezer-safe dish but don’t bake it. Cover tightly with foil and freeze for up to 3 months. To bake from frozen, add about 20 minutes to the bake time and cover with foil for the first half of baking to prevent the top from burning before the center is heated through.
The flavors actually deepen overnight in the refrigerator, so leftovers taste even better the next day. I’ve been known to make a second batch just for weekday lunches after the holiday chaos dies down.
Nutritional Information & Benefits
Per serving (based on 12 servings): approximately 290 calories, 14g fat, 8g saturated fat, 55mg cholesterol, 620mg sodium, 34g carbohydrates, 2g fiber, 4g sugar, 8g protein.
This stuffing offers some surprising nutritional benefits. Sourdough bread is fermented, which means it’s easier to digest than regular bread and has a lower glycemic index. The fermentation process also increases the availability of minerals like iron and zinc.
Fresh sage is packed with antioxidants and has anti-inflammatory properties. It’s been used in traditional medicine for centuries to support digestion and memory function. Combined with the healthy fats in butter (yes, real butter has benefits when used in moderation), this stuffing provides a satisfying balance of nutrients.
For those watching their sodium, use low-sodium broth and reduce the added salt to 1/2 teaspoon. The fresh herbs provide plenty of flavor without relying on salt. You can also use a whole wheat sourdough for additional fiber.
This recipe contains gluten and dairy. For a dairy-free version, substitute the butter with a high-quality plant-based butter like Miyoko’s. For a gluten-free version, use the gluten-free bread adaptation mentioned in the variations section.
Conclusion
This Perfect Brown Butter Sage Stuffing with Sourdough has earned its place at my holiday table, and I think it deserves a spot at yours too. It’s the dish that proves simple ingredients, treated with care and a little patience, can create something truly memorable.
I love that this recipe taught me to question my own assumptions in the kitchen. My neighbor Carol had no culinary training, no fancy techniques, just a simple question that made me rethink everything. That’s the beauty of cooking — you never stop learning, and sometimes the best lessons come from the most unexpected places.
Whether you’re making this for a crowd or just treating yourself to something special, I hope you’ll give it a try. Customize it with your favorite add-ins, scale it up or down, make it your own. And if you discover your own twist that makes it even better, I’d love to hear about it.
Drop a comment below and let me know how your stuffing turned out. Share a photo of your golden, crispy masterpiece. And if you’re feeling generous, tell me about the time someone proved you wrong in the kitchen — I promise I won’t judge.
Frequently Asked Questions
Can I make this stuffing ahead of time?
Absolutely. Assemble the stuffing completely but don’t bake it. Cover and refrigerate for up to 24 hours. When you’re ready to bake, let it sit at room temperature for 30 minutes, then bake as directed, adding 10-15 minutes to the total time.
Can I use dried sage instead of fresh?
You can, but the flavor will be different. Fresh sage has a milder, more aromatic quality that works beautifully with brown butter. If using dried, use 2 tablespoons and add it with the dried herbs rather than browning it with the butter, as dried sage can become bitter when cooked at high heat.
Why is my stuffing soggy?
Soggy stuffing usually means too much liquid or bread that wasn’t dried out enough. Make sure your sourdough cubes are thoroughly stale or toasted before adding the liquid. Start with less broth than you think you need and add gradually. The mixture should be moist but not wet.
Can I cook this stuffing inside a turkey?
I don’t recommend it. This stuffing is designed to be baked separately for the best texture and food safety. Cooking stuffing inside a turkey can lead to uneven cooking and potential food safety issues. Plus, baking it separately gives you those crispy edges that make this recipe so special.
How do I scale this recipe for a larger crowd?
This recipe easily doubles or triples. Use a larger baking dish or split it between two dishes. The only adjustment is the bake time — a larger dish may need an extra 10-15 minutes. Check for doneness by looking for a golden brown top and a center that’s set but still slightly jiggly.
Pin This Recipe!

Best Brown Butter Sage Stuffing with Sourdough Recipe

This Perfect Brown Butter Sage Stuffing with Sourdough is the version I should have been making all along. It’s the dish that proves simple ingredients, treated with care and a little patience, can create something truly memorable.
- Prep Time: 20 minutes
- Cook Time: 35 minutes
- Total Time: 55 minutes
- Yield: 12 servings 1x
- Category: Side Dish
- Cuisine: American
Ingredients
- 1 large loaf (about 1 pound) day-old sourdough bread, cut into 1-inch cubes
- 1/2 cup unsalted butter
- 1/2 cup fresh sage leaves, roughly chopped (about 20–25 leaves)
- 2 medium yellow onions, diced (about 3 cups)
- 4 celery stalks, diced (about 1 1/2 cups)
- 4 cloves garlic, minced
- 2 cups low-sodium chicken or vegetable broth
- 2 large eggs, lightly beaten
- 1 teaspoon kosher salt
- 1/2 teaspoon black pepper
- 1/2 teaspoon dried thyme
- 1/4 teaspoon dried rosemary
- 2 tablespoons unsalted butter, melted (for topping)
- 8–10 fresh sage leaves (for garnish)
- Flaky sea salt for finishing
Instructions
- Preheat your oven to 375°F. Position a rack in the middle of the oven.
- If your bread isn’t already stale, spread the cubes on a baking sheet and toast them in the oven for 8-10 minutes, stirring halfway through. Set aside to cool slightly.
- Place your large skillet over medium heat and add the 1/2 cup of butter. Let it melt completely, then add the chopped sage leaves. Swirl the pan occasionally as the butter foams and sizzles. After about 4-5 minutes, the butter solids will turn golden brown and smell nutty. Remove from heat immediately.
- Return the skillet to medium heat. Add the diced onions and celery to the brown butter and sage mixture. Cook for 6-8 minutes, stirring occasionally, until the onions are translucent and the celery has softened. Add the minced garlic and cook for one more minute until fragrant.
- In your large mixing bowl, combine the dried sourdough cubes with the cooked vegetable mixture. Toss gently to distribute everything evenly. Let this cool for about 5 minutes.
- In a separate bowl or measuring cup, whisk together the chicken broth, beaten eggs, salt, pepper, thyme, and rosemary.
- Pour the liquid mixture over the bread and vegetables. Use a spatula to gently fold everything together until the liquid is evenly absorbed. Let this sit for 5-10 minutes so the bread can absorb the liquid.
- Grease your 9×13-inch dish with butter or cooking spray. Spread the stuffing mixture evenly in the dish. Don’t pack it down.
- Drizzle the 2 tablespoons of melted butter over the top. Arrange the remaining fresh sage leaves decoratively across the surface. Sprinkle with flaky sea salt.
- Place the dish in the preheated oven and bake for 30-35 minutes, until the top is golden brown and crispy. For extra crispy edges, broil for 2-3 minutes at the end, watching carefully.
- Let the stuffing rest for 5-10 minutes after it comes out of the oven before serving.
Notes
Do not skip drying out the bread. Use a light-colored pan for browning butter to see the color change. For make-ahead, assemble the stuffing completely but don’t bake it; cover and refrigerate for up to 24 hours. When ready to bake, let it sit at room temperature for 30 minutes, then bake as directed, adding 10-15 minutes to the total time.
Nutrition
- Serving Size: 1 serving
- Calories: 290
- Sugar: 4
- Sodium: 620
- Fat: 14
- Saturated Fat: 8
- Carbohydrates: 34
- Fiber: 2
- Protein: 8
Keywords: stuffing, brown butter, sage, sourdough, Thanksgiving, holiday, side dish


