Love this? Save it for later!
Share the inspiration with your friends
My grandmother had a cookie philosophy, and it was simple: thin, crispy, and just shy of burnt. For thirty-two years, I defended that philosophy with the kind of loyalty usually reserved for sports teams or political parties. Thick cookies? Those underbaked, doughy monstrosities that pass for “bakery-style” these days? No thank you. I’d say it at every bake sale, every holiday cookie exchange, every time someone handed me something that looked more like a muffin top than a proper cookie. “If I wanted cake,” I’d announce, “I’d make cake.” Then last November, my neighbor Marie showed up at my door holding a container of these thick, golden-brown discs, still warm, with chocolate chips threatening to escape from every edge. “I made too many,” she said, which is neighbor-code for “I made these specifically for you because I know you’re stressed about your book deadline.” I took them out of politeness, set them on the counter, and honestly forgot about them for two hours. When I finally grabbed one out of pure hunger, I bit into it expecting disappointment. Instead, I stood there in my kitchen, mid-bite, staring at the cookie like it had personally offended me by being this good. The edges had that perfect caramelized crunch I’d always loved, but the center—the center was soft without being raw, chewy without being dense, and so buttery it practically dissolved. I ate three more standing up, and then I called Marie for the recipe. She laughed for a full minute before she told me. Here’s the thing about these cozy bakery-style chocolate chip cookies: they don’t need you to compromise. You don’t have to choose between crisp edges and a soft center, between a traditional cookie and something closer to a scone. These thick, chewy beauties give you everything, and they do it without any fancy ingredients or complicated techniques. Maybe you’ve been on the thin-cookie train your whole life like I was. Maybe you’ve tried thick cookies before and found them disappointing—underbaked in the middle, greasy, or just not worth the hype. I get it. I really do. But let me tell you, this version changed my mind so completely that I now keep a batch of cookie dough in my freezer at all times, and I’ve started buying my chocolate chips in bulk from a restaurant supply store. The conversion is complete, and honestly, I’ve never been happier to be wrong.
Why You’ll Love This Recipe
These aren’t just any chocolate chip cookies. After testing this recipe at least eight times over the course of two months, I can tell you exactly why this version stands out from every other thick cookie recipe you’ve tried.
- Perfectly Thick Without Being Doughy : The secret is in the flour-to-fat ratio and a crucial resting period that lets the dough hydrate properly. You get that impressive height without any raw center.
- Crisp Edges, Soft Centers : That bakery-style contrast isn’t luck—it comes from using melted butter and the right combination of white and brown sugars. The edges caramelize into something almost like toffee while the center stays tender.
- No Stand Mixer Required : Everything comes together in one bowl with a wooden spoon or spatula. Less cleanup, more cookies, happier you.
- Pantry-Friendly Ingredients : No cake flour, no bread flour, no specialty extracts. You probably have everything except maybe the chocolate chips, and honestly, you probably have those too.
- Freezer-Friendly Dough : This dough freezes beautifully for up to three months, which means you’re always 15 minutes away from warm cookies. That’s not an exaggeration—I’ve timed it.
- Consistently Reliable : I’ve made these in humid weather, dry weather, high altitude, and sea level. They turn out the same every single time. That kind of reliability matters when you’re baking for a crowd or just really, really need a cookie.
These cozy bakery-style chocolate chip cookies are the kind that make people close their eyes when they take the first bite. They’re the kind you bring to a party and everyone asks for the recipe before you’ve even put the container down. And honestly? They’re the kind that made a lifelong thin-cookie loyalist completely change her stance on what a cookie should be. If that’s not a testament, I don’t know what is.
What Ingredients You Will Need
This recipe uses simple, everyday ingredients to create something that tastes far more complicated than it is. The magic isn’t in obscure ingredients—it’s in how you handle them.
- 2 cups (260g) all-purpose flour — Spoon and level your flour, please. Scooping directly from the bag can add up to 30 extra grams, which will give you dry, cakey cookies instead of thick, chewy ones. I use Gold Medal unbleached for everyday baking, but King Arthur works beautifully too.
- 1 teaspoon baking soda — Make sure your baking soda is fresh. If it’s been sitting in your cabinet for more than six months, test it by dropping a little into vinegar—it should fizz aggressively.
- 1/2 teaspoon salt — I use fine sea salt in the dough and save flaky sea salt for sprinkling on top before baking. If you only have table salt, use 1/4 teaspoon instead—table salt is much denser.
- 1 cup (226g) unsalted butter, melted and slightly cooled — This is the key to the texture. Melted butter gives you that chewy, dense crumb because it incorporates differently than creamed butter. Let it cool for about 5 minutes after melting—you don’t want it hot enough to cook the eggs.
- 1 cup (200g) packed light brown sugar — Brown sugar brings moisture and that deep, almost caramel flavor. Pack it firmly into your measuring cup. If you’re out of brown sugar, you can make a quick substitute by mixing 1 cup of white sugar with 1 tablespoon of molasses.
- 1/2 cup (100g) granulated sugar — The white sugar helps with spreading and creates those crispy edges. Don’t skip it or reduce it, or your cookies won’t spread properly.
- 2 large eggs, room temperature — Cold eggs will seize up your melted butter and create a greasy dough. If you forgot to take them out ahead of time, place them in a bowl of warm water for 5 minutes.
- 2 teaspoons vanilla extract — Use real vanilla, not imitation. The flavor difference is noticeable, especially in a simple recipe like this where vanilla plays a starring role. I prefer Nielsen-Massey, but any pure vanilla extract will work.
- 2 cups (340g) semi-sweet chocolate chips — I use Ghirardelli 60% cacao chips for the best balance of sweetness and chocolate flavor. You can also chop up a dark chocolate bar for those beautiful chocolate puddles—I do this about half the time now because the irregular pieces look more bakery-style.
Optional but Recommended:
- Flaky sea salt for sprinkling — Maldon or any flaky salt. That tiny bit of salt on top right when they come out of the oven makes the chocolate taste more chocolatey and adds a professional finish.
Equipment Needed
You don’t need a professional bakery setup for these cookies. Here’s what you’ll actually use:
- Large mixing bowl — Any bowl works, but I prefer a wide, shallow one for easier mixing. My go-to is a ceramic bowl from a local potter, but glass or stainless steel work just fine.
- Wooden spoon or silicone spatula — A sturdy spoon is all you need. No electric mixer required, which means less cleanup and more control over the dough.
- Measuring cups and spoons — For accuracy, I recommend using a kitchen scale for the flour. If you’re using measuring cups, the spoon-and-level method is non-negotiable.
- Baking sheets — Light-colored, rimmed baking sheets work best. Dark sheets absorb more heat and can over-brown the bottoms. I use Nordic Ware half-sheet pans and they’ve never let me down.
- Parchment paper or silicone baking mat — Parchment paper is cheap and disposable; silicone mats are reusable and environmentally friendly. Both work beautifully. Avoid greasing the pan directly—it changes how the cookies spread.
- Cookie scoop (1.5-tablespoon size) — This is worth the $8 investment. It gives you uniform cookies that bake evenly. If you don’t have one, use two spoons to portion the dough, but be aware that your baking time might vary slightly between batches.
- Cooling rack — Essential for letting the cookies set properly. If you leave them on the hot baking sheet, they’ll continue to cook and can become overdone.
Preparation Method
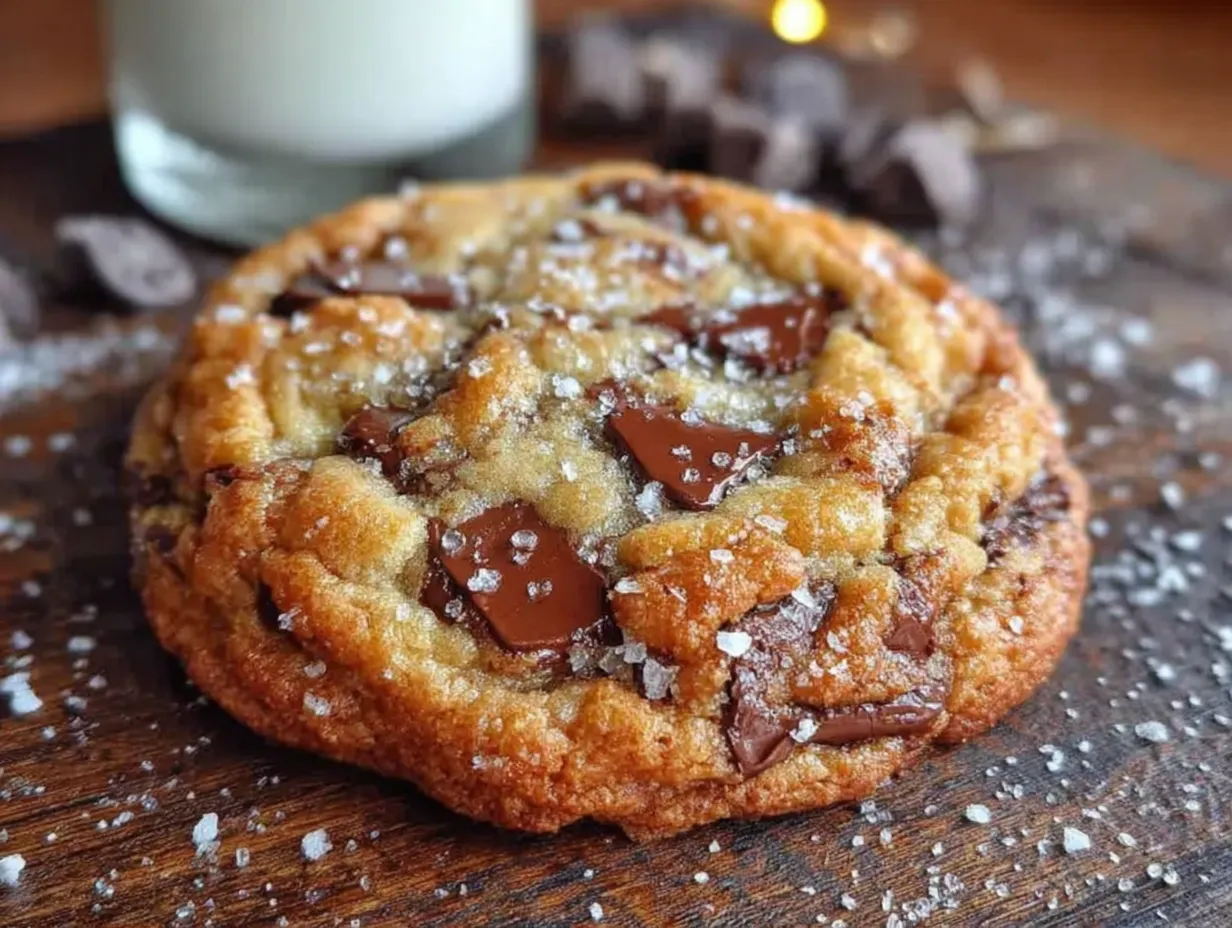
This process is straightforward, but each step matters. Take your time, and you’ll be rewarded with the best cookies of your life.
-
Melt the butter and let it cool slightly. In a small saucepan or microwave-safe bowl, melt 1 cup of unsalted butter until just liquid. Don’t let it boil or brown—you want it melted, not cooked. Let it sit for about 5 minutes until it’s warm but not hot. You should be able to touch it comfortably without burning yourself.
-
Whisk together the dry ingredients. In a medium bowl, whisk together 2 cups of all-purpose flour, 1 teaspoon of baking soda, and 1/2 teaspoon of salt. Whisking aerates the flour and distributes the leavening evenly. Set this aside while you work on the wet ingredients.
-
Combine the sugars and melted butter. In your large mixing bowl, combine 1 cup of packed light brown sugar and 1/2 cup of granulated sugar. Pour the slightly cooled melted butter over the sugars and stir with your wooden spoon until they’re fully combined. The mixture will look like wet sand—that’s exactly what you want. Take a moment to scrape the bottom of the bowl; butter loves to hide down there.
-
Add the eggs and vanilla. Crack 2 room-temperature eggs into the sugar-butter mixture and add 2 teaspoons of vanilla extract. Stir vigorously until everything is smooth and glossy. The mixture should lighten slightly in color and look almost like caramel sauce. If it looks separated or greasy, your butter was too hot—don’t panic, just stir in a tablespoon of flour from your measured amount and keep going.
-
Fold in the dry ingredients. Add the flour mixture to the wet ingredients in two additions, folding gently with your spatula after each addition. Stop mixing as soon as you no longer see streaks of flour. Overmixing at this stage develops gluten, which makes cookies tough instead of tender. A few flour streaks are better than overmixed dough.
-
Add the chocolate chips. Pour in 2 cups of semi-sweet chocolate chips and fold them in with just a few strokes. The dough will be thick and slightly stiff—almost like play dough. If it seems too soft, it might need a few minutes in the fridge before scooping.
-
Chill the dough (this is non-negotiable). Cover the bowl with plastic wrap and refrigerate for at least 30 minutes, but ideally 2 hours. Overnight is even better. This step is what gives you those thick, bakery-style cookies. Chilling solidifies the butter, which means the cookies spread less in the oven and develop those tall, chewy centers. I learned this the hard way after baking a batch immediately and ending up with flat, greasy pancakes.
-
Preheat the oven. About 15 minutes before you’re ready to bake, preheat your oven to 375°F (190°C). Line two baking sheets with parchment paper or silicone mats. If you only have one baking sheet, let it cool completely between batches—a hot sheet will cause the dough to spread before it even hits the oven.
-
Scoop and shape the dough. Use your cookie scoop to portion the dough into 1.5-tablespoon balls. Place them on the prepared baking sheets about 3 inches apart—these cookies spread, and they need room to breathe. For that truly bakery-style look, gently press a few extra chocolate chips into the tops of each dough ball. This is purely cosmetic, but it makes them look like they came from a fancy shop.
-
Bake one sheet at a time. Place one baking sheet on the center rack and bake for 10-12 minutes. At 10 minutes, the cookies should look golden brown around the edges but still pale and slightly puffy in the center. That’s exactly what you want. If you prefer crispier cookies, go to 12 minutes, but watch them carefully—they go from perfect to overdone very quickly.
-
Cool on the baking sheet. When you pull the cookies out, let them rest on the hot baking sheet for exactly 5 minutes. This is when the magic happens—the residual heat finishes cooking the centers while the edges set. If you try to move them immediately, they’ll fall apart. If you have flaky salt, sprinkle a pinch on each cookie right when they come out of the oven.
-
Transfer to a cooling rack. After 5 minutes, use a thin spatula to transfer the cookies to a wire rack. Let them cool completely if you want that perfect chewy texture. I know it’s hard to wait, but warm cookies are more fragile and can crumble easily. Plus, the flavor actually develops more as they cool.
Cooking Tips & Techniques
After making these cookies more times than I care to admit, I’ve collected some hard-won wisdom that will save you from my mistakes.
The chilling debate is over—just chill the dough. I tried baking these without chilling once, and the cookies spread into thin, greasy disks. The 30-minute minimum chill time isn’t optional; it’s structural. The cold butter creates steam pockets in the oven, which gives you that tall, craggy top. If you’re in a hurry, shape the dough into balls first, then chill them for 20 minutes in the freezer. That works in a pinch, but the flavor develops better with a longer, slower chill in the fridge.
Your oven temperature might be lying to you. Most home ovens run hot or cold by 25-50 degrees. I learned this when my first batch came out burned on the bottom but pale on top. An oven thermometer costs about $7 and will save you from ruined batches. If your cookies consistently brown too fast on the bottom, try using a second baking sheet nested underneath for insulation—it sounds silly, but it works.
Don’t overmix the dough. This is the most common mistake I see in cookie recipes. Once you add the flour, mix only until it disappears. Overmixing develops gluten, which gives you tough, bread-like cookies instead of tender, chewy ones. I actually stopped using my stand mixer for cookies entirely because it was too easy to overmix by accident.
Room temperature eggs matter more than you think. I once tried to speed things up by using cold eggs straight from the fridge. The butter seized up immediately, creating a lumpy, greasy dough that baked into uneven cookies. If you forget to set your eggs out, place them in a bowl of warm tap water for 5 minutes. They’ll be perfectly room temperature without any risk of cooking them.
Bake one sheet at a time. I know it’s tempting to cram two sheets in the oven to save time, but the uneven heat distribution will give you inconsistent results. The top sheet will brown faster, and the bottom sheet will spread more. Bake one sheet on the center rack, and you’ll get perfect cookies every time.
Variations & Adaptations
This recipe is wonderfully adaptable. Here are some variations I’ve tested and loved:
Double Chocolate Chip Cookies: Replace 1/4 cup of the all-purpose flour with 1/4 cup of unsweetened cocoa powder. Use white chocolate chips instead of semi-sweet for a striking contrast, or keep the semi-sweet for an intense chocolate-on-chocolate experience. This version is dangerously good—I’ve eaten four in one sitting without shame.
Gluten-Free Version: Substitute the all-purpose flour with a good quality 1:1 gluten-free baking flour blend. I’ve had excellent results with Bob’s Red Mill 1-to-1 Baking Flour. Add an extra tablespoon of milk or water to the dough since gluten-free flours absorb more moisture. The texture will be slightly more delicate, but the flavor is still outstanding.
Nut Butter Twist: Replace 1/4 cup of the melted butter with 1/4 cup of creamy peanut butter or almond butter. This adds richness and a subtle nutty flavor that pairs beautifully with the chocolate. If you use natural nut butter (the kind that separates), stir it well before measuring. This variation also works beautifully with dark chocolate chunks.
Seasonal Add-Ins: In the fall, add 1/2 teaspoon of cinnamon and 1/4 teaspoon of nutmeg to the dry ingredients, and fold in 1/2 cup of toasted pecans along with the chocolate chips. In the spring, swap 1/2 cup of the chocolate chips for dried cherries or chopped white chocolate. In the summer, add 1/2 cup of shredded coconut for a tropical twist.
Brown Butter Version: For an even more complex flavor, brown the butter before using it. Melt the butter in a saucepan over medium heat, swirling occasionally, until it turns golden brown and smells nutty—about 5-7 minutes. Pour it into a bowl and let it cool completely before using. Brown the butter the night before and let it solidify at room temperature, then proceed with the recipe as written. The nutty, toasty flavor is absolutely worth the extra step.
Serving & Storage Suggestions
These cookies are best served slightly warm, when the chocolate is still soft and the edges have that perfect snap. If you’re serving them at room temperature, let them come fully to room temp—about 30 minutes out of the fridge—for the best texture.
For serving: Arrange the cookies on a pretty plate or in a lined basket. A glass of cold milk is the classic pairing, but these also go beautifully with a cup of strong coffee or a mug of hot chocolate. For dessert, serve two cookies with a scoop of vanilla ice cream sandwiched between them—instant ice cream sandwich, and yes, it’s as good as it sounds.
Storage at room temperature: Store baked cookies in an airtight container at room temperature for up to 5 days. To keep them soft, add a slice of bread to the container—the cookies will absorb the moisture from the bread and stay chewy. Replace the bread slice every other day. I’ve kept cookies fresh for a full week using this trick.
Freezing baked cookies: Let the cookies cool completely, then place them in a single layer in a freezer-safe bag or container. They’ll keep for up to 3 months. Thaw at room temperature for about 15 minutes, or pop them in a 300°F oven for 5 minutes to re-crisp the edges.
Freezing cookie dough: This is my favorite method. Scoop the dough into balls, place them on a parchment-lined baking sheet, and freeze until solid (about 2 hours). Transfer the frozen dough balls to a freezer bag. When you want cookies, bake them directly from frozen—just add 2-3 minutes to the baking time. You’re always 15 minutes away from fresh, warm cookies. I currently have 24 dough balls in my freezer, and it brings me an unreasonable amount of comfort.
Nutritional Information & Benefits
Let’s be honest: these are cookies, not health food. But they’re made with real, recognizable ingredients, and that counts for something. Here’s the approximate nutritional breakdown per cookie (based on 24 cookies):
| Nutrient | Amount |
|---|---|
| Calories | 195 |
| Total Fat | 11g |
| Saturated Fat | 7g |
| Cholesterol | 35mg |
| Sodium | 115mg |
| Total Carbohydrates | 25g |
| Dietary Fiber | 1g |
| Sugars | 16g |
| Protein | 3g |
Dark chocolate contains antioxidants called flavonoids, which have been linked to heart health benefits. The eggs provide protein and essential vitamins, and the butter, while indulgent, contains fat-soluble vitamins A, D, E, and K. These cookies are best enjoyed as an occasional treat in the context of an otherwise balanced diet. I personally believe that food should nourish both body and soul, and sometimes the soul needs a really good chocolate chip cookie.
Conclusion
These cozy bakery-style chocolate chip cookies represent everything I’ve come to love about baking: simple ingredients transformed by technique and patience into something genuinely special. They’re the cookies I bring to potlucks, the ones I make for new neighbors, the ones I bake when I need comfort or want to celebrate something small. They’ve converted at least three thin-cookie loyalists that I know of, and I suspect they’ll convert you too.
The beauty of this recipe is how forgiving it is. Even if you overmix slightly or forget to chill the dough for the full two hours, you’ll still end up with cookies that are better than anything from a store. And when you nail it—when you get that perfect contrast between crisp edge and chewy center, when the chocolate is still slightly melty and the salt flakes catch on your tongue—you’ll understand why I spent two months testing and retesting this recipe until it was exactly right.
I’d love to hear how these turn out for you. Did you try any of the variations? Did you have to resist eating the whole batch in one sitting? Drop a comment below and let me know—your stories are what make this community so wonderful. And if you’re feeling generous, share a photo of your cookies on Pinterest with the hashtag #CozyBakeryCookies. Nothing makes my day like seeing these cookies in someone else’s kitchen.
Frequently Asked Questions
Can I use margarine instead of butter?
I don’t recommend it. Butter provides the flavor and structure that makes these cookies special. Margarine has a higher water content, which will change the texture and make your cookies spread more. If you need a dairy-free option, use a high-quality vegan butter stick (not the spreadable kind in a tub).
Why did my cookies turn out flat?
Flat cookies are usually caused by one of three things: the butter was too warm when you mixed the dough, the dough wasn’t chilled long enough, or your baking soda is expired. Try chilling the dough for at least 2 hours next time, and make sure your butter is cooled to room temperature before mixing.
Can I reduce the sugar in this recipe?
You can reduce the sugar by up to 1/4 cup total, but be aware that sugar isn’t just for sweetness—it contributes to the texture, spread, and moisture of the cookies. If you reduce it too much, your cookies will be more cakey and less chewy. I’ve tested this with a 1/4 cup reduction and the results were still good, just slightly less caramelized.
How do I get those perfect, bakery-style crinkles on top?
The crinkly top comes from the combination of melted butter and adequate chilling. When the cold dough hits the hot oven, the outside sets quickly while the inside continues to spread, creating those beautiful cracks and crinkles. Make sure your dough is thoroughly chilled, and don’t press the dough balls flat before baking—let them do their thing naturally.
Can I make these cookies vegan?
Yes, with some modifications. Replace the butter with vegan butter sticks, use a flax egg (1 tablespoon ground flaxseed mixed with 3 tablespoons water, let sit for 5 minutes) for each regular egg, and use vegan chocolate chips. The texture will be slightly different—a bit more delicate—but the flavor is still excellent. I’ve tested this with my vegan friend Sarah and she gave them an enthusiastic thumbs up.
Pin This Recipe!

Cozy Bakery-Style Chocolate Chip Cookies: Easy Thick & Chewy
These thick, chewy chocolate chip cookies have crisp edges and soft centers, made with simple ingredients and no stand mixer required. Perfect for any occasion, they’re freezer-friendly and consistently reliable.
- Prep Time: 15 minutes
- Cook Time: 12 minutes
- Total Time: 2 hours 27 minutes (includes chilling)
- Yield: 24 cookies 1x
- Category: Dessert
- Cuisine: American
Ingredients
- 2 cups (260g) all-purpose flour
- 1 teaspoon baking soda
- 1/2 teaspoon salt
- 1 cup (226g) unsalted butter, melted and slightly cooled
- 1 cup (200g) packed light brown sugar
- 1/2 cup (100g) granulated sugar
- 2 large eggs, room temperature
- 2 teaspoons vanilla extract
- 2 cups (340g) semi-sweet chocolate chips
- Flaky sea salt for sprinkling (optional)
Instructions
- Melt the butter and let it cool slightly. In a small saucepan or microwave-safe bowl, melt 1 cup of unsalted butter until just liquid. Don’t let it boil or brown. Let it sit for about 5 minutes until warm but not hot.
- Whisk together the dry ingredients. In a medium bowl, whisk together 2 cups of all-purpose flour, 1 teaspoon of baking soda, and 1/2 teaspoon of salt. Set aside.
- Combine the sugars and melted butter. In a large mixing bowl, combine 1 cup of packed light brown sugar and 1/2 cup of granulated sugar. Pour the slightly cooled melted butter over the sugars and stir until fully combined. The mixture will look like wet sand.
- Add the eggs and vanilla. Crack 2 room-temperature eggs into the sugar-butter mixture and add 2 teaspoons of vanilla extract. Stir vigorously until smooth and glossy.
- Fold in the dry ingredients. Add the flour mixture to the wet ingredients in two additions, folding gently after each addition. Stop mixing as soon as no streaks of flour remain.
- Add the chocolate chips. Pour in 2 cups of semi-sweet chocolate chips and fold them in with just a few strokes. The dough will be thick and slightly stiff.
- Chill the dough. Cover the bowl with plastic wrap and refrigerate for at least 30 minutes, but ideally 2 hours. Overnight is even better.
- Preheat the oven to 375°F (190°C). Line two baking sheets with parchment paper or silicone mats.
- Scoop and shape the dough. Use a cookie scoop to portion the dough into 1.5-tablespoon balls. Place them on the prepared baking sheets about 3 inches apart. Optionally, press a few extra chocolate chips into the tops.
- Bake one sheet at a time on the center rack for 10-12 minutes. The cookies should look golden brown around the edges but still pale and slightly puffy in the center.
- Cool on the baking sheet for exactly 5 minutes. If using flaky salt, sprinkle a pinch on each cookie right when they come out of the oven.
- Transfer to a cooling rack using a thin spatula. Let cool completely for the best chewy texture.
Notes
Chilling the dough is non-negotiable for thick cookies. Use room temperature eggs to prevent butter from seizing. Bake one sheet at a time for even results. For best texture, let cookies cool completely on a wire rack.
Nutrition
- Serving Size: 1 cookie
- Calories: 195
- Sugar: 16
- Sodium: 115
- Fat: 11
- Saturated Fat: 7
- Carbohydrates: 25
- Fiber: 1
- Protein: 3
Keywords: chocolate chip cookies, thick cookies, chewy cookies, bakery-style cookies, easy cookie recipe, homemade cookies


