Love this? Save it for later!
Share the inspiration with your friends
My dad swore he hated vinegar. For forty-seven years, that man avoided anything pickled, refused salad dressings that weren’t ranch, and made a face if someone opened a jar of pickles within ten feet of him. Then I found him in the kitchen last November, shivering after a long day working outside in the cold rain, holding a shot glass full of something that smelled like a war between garlic and horseradish. He downed it in one gulp, shuddered, and muttered, “That’s terrible. Give me another.”
I had just finished my first real batch of fire cider. I’d been reading about it for weeks, honestly — every natural health blog I followed was buzzing about this stuff around flu season. I finally got around to making it on a gloomy Tuesday afternoon, mostly because I had a bunch of root vegetables sitting in my fridge that needed using up. I didn’t tell him what was in it. I just handed him a shot and watched his face cycle through about six different emotions. And you know that feeling when you catch someone proving themselves wrong without even realizing it? That was the moment I knew this recipe was something special.
Fire cider is one of those old-school remedies that feels almost too simple to work. It’s basically raw apple cider vinegar infused with immune-supporting ingredients like garlic, ginger, horseradish, onion, and hot peppers. You let it sit for a few weeks, then strain it and take it by the spoonful or shot when you feel something coming on. The first time I made it, I accidentally used way too much cayenne and my husband thought I was trying to poison him. But the second batch? That was the sweet spot. Now I keep a jar brewing in my pantry from September through March, right next to the honey and the black beans I keep meaning to use.
What makes this recipe different from the store-bought versions is the control you have over the heat and the flavor. Some commercial fire ciders taste like straight battery acid with a side of regret. This version lets the ingredients breathe — you get the warmth of the ginger, the punch of the garlic, the earthiness of the turmeric, and just enough heat to clear your sinuses without making you cry into your morning coffee. I’ve been making this for three cold seasons now, and it’s become my go-to whenever I feel that scratchy throat creeping in.
Why You’ll Love This Recipe
Let me tell you why this fire cider has earned a permanent spot in my kitchen. I’ve tested about seven different versions over the years, and this one hits that perfect balance between medicinal and actually drinkable. Here’s what makes it worth your time:
- Simple Ingredients : You probably already have most of these in your kitchen right now. No fancy supplement blends or obscure herbs that require a trip to three different stores. Just real food ingredients doing what they do best.
- Budget-Friendly : A single batch costs about the same as one bottle of mediocre cold medicine, but it makes way more servings and lasts for months in the fridge.
- Customizable Heat Level : You get to decide how spicy this gets. Want a gentle warmth? Use less pepper. Want to clear your sinuses for a week? Go wild with the habanero. It’s entirely up to you.
- Actually Works : I’m not a doctor and I won’t pretend to be one, but I can tell you that I’ve gone two full winters without a serious cold since I started taking this regularly. My neighbor swears by it too, and she’s a nurse.
- Zero Cooking Required : No stovetop, no oven, no fancy equipment. You just chop, layer, and wait. It’s practically lazy — in the best possible way.
This isn’t just another wellness trend that’ll sit in your fridge until you throw it out. This is the kind of recipe that makes you feel like you’re actually doing something good for yourself. There’s something deeply satisfying about taking a shot of something you made with your own hands and feeling that warmth spread through your chest. It’s comfort and medicine all in one, and honestly, that’s hard to beat when cold season hits.
What Ingredients You Will Need
This recipe uses simple, whole ingredients that work together to create a powerful immune-supporting tonic. Most of these are pantry staples or easy to find at any grocery store. Here’s what you’ll need and why each one matters:
Base Ingredients
- Raw apple cider vinegar (with the mother) — 4 cups (960 ml). This is non-negotiable. The cloudy stuff with the floating blob is what you want. Bragg’s is my go-to, but any brand with the mother works. The mother contains beneficial bacteria and enzymes that support gut health and immunity.
- Fresh ginger root — 1/2 cup, thinly sliced or chopped (about 4 ounces). Ginger brings warmth and anti-inflammatory properties. I leave the skin on because it’s full of nutrients and the vinegar will extract everything anyway.
- Fresh turmeric root — 1/4 cup, thinly sliced (about 2 ounces). Turmeric gives that beautiful golden color and adds serious anti-inflammatory power. If you can’t find fresh, use 2 tablespoons of dried turmeric — but fresh really is better here.
- Fresh horseradish root — 1/4 cup, peeled and chopped (about 2 ounces). This is the fire in fire cider. It opens up your sinuses like nothing else. If you can’t find fresh horseradish, you can use prepared horseradish — just reduce the amount to 2 tablespoons since it’s already potent.
- Garlic cloves — 10-12 cloves, smashed. Garlic is the immune system’s best friend. Smashing the cloves releases more allicin, which is the compound responsible for most of garlic’s health benefits.
- Medium yellow onion — 1, chopped roughly. Onion adds depth and its own set of immune-supporting compounds. Red onion works too, but yellow gives a milder flavor.
- Lemon — 1 medium, sliced into rounds. The vitamin C boost and the brightness it adds to the flavor. Use organic if you can, since you’re leaving the peel on.
Spices and Heat
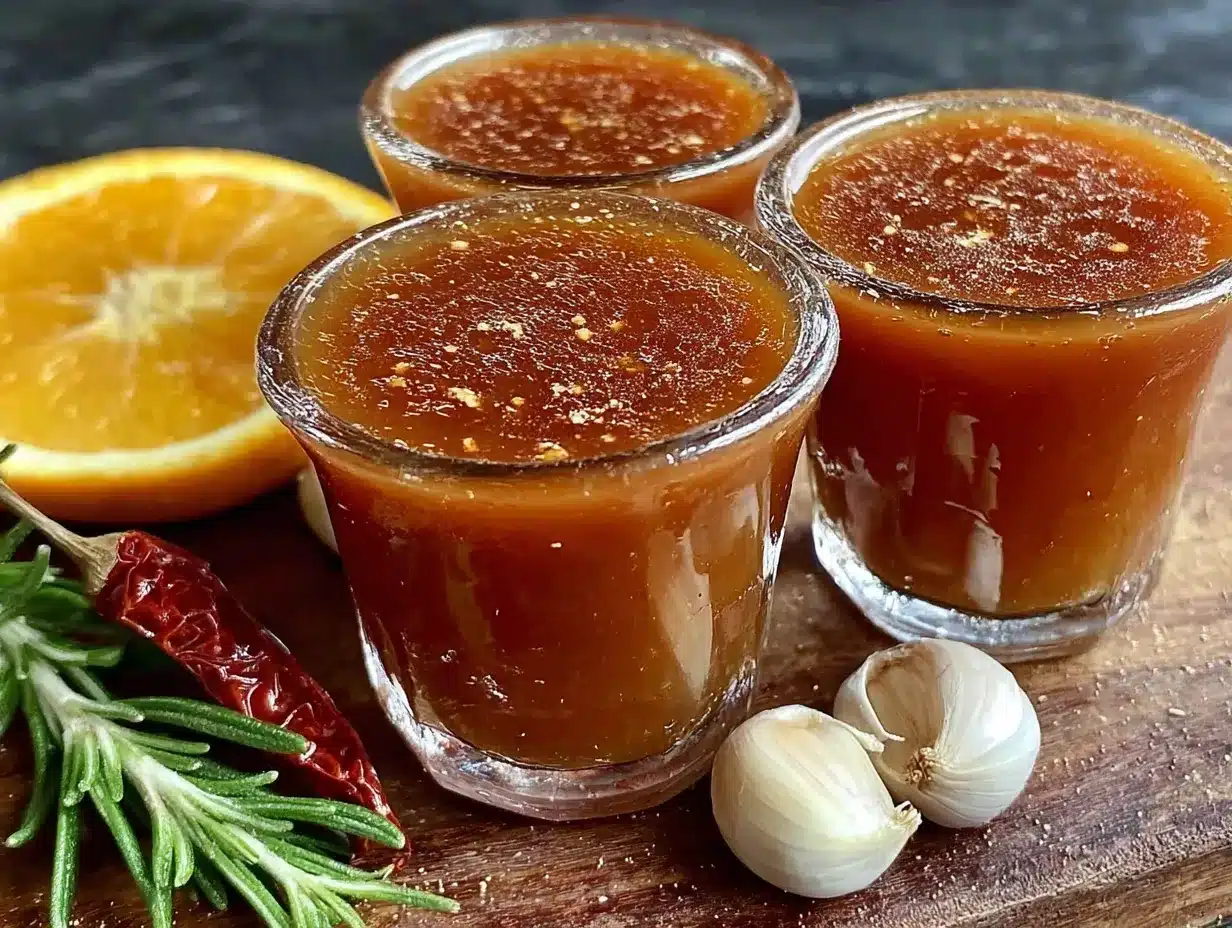
- Cayenne pepper — 1 teaspoon (or more if you’re brave). This is where the heat lives. Start with less and add more to your next batch once you know your tolerance.
- Black peppercorns — 1 teaspoon, whole. Black pepper helps your body absorb the curcumin in turmeric more effectively. It’s a small addition with a big impact.
- Whole cloves — 1/2 teaspoon. Cloves add a warm, slightly sweet note and have antimicrobial properties. Don’t skip these — they round out the flavor beautifully.
- Fresh rosemary sprig — 1 (optional but recommended). Rosemary adds an earthy, piney note that complements the other ingredients. I threw this in on a whim one time and never went back.
Sweetener (Optional)
- Raw honey — 2-3 tablespoons, added after straining. Honey makes the medicine go down easier and adds its own antimicrobial benefits. Local raw honey is ideal if you can find it. For a vegan version, use maple syrup instead.
Ingredient Tip: Look for firm, unblemished roots when shopping for ginger and turmeric. If the ginger is wrinkled or soft, it’s past its prime and won’t have as much flavor or potency. And please, please use raw apple cider vinegar — the pasteurized stuff just won’t give you the same results.
Equipment Needed
You don’t need much for this recipe, which is one of the reasons I love it. Here’s what you’ll want to have on hand:
- Quart-sized glass jar with a tight-fitting lid. A wide-mouth mason jar works perfectly. Avoid plastic or metal containers — the vinegar can react with them over time.
- Cutting board and knife for prepping your ingredients. Nothing fancy needed.
- Measuring cups and spoons for getting the proportions right.
- Fine-mesh strainer or cheesecloth for straining the finished cider. I use a nut milk bag because it’s reusable and makes straining super easy.
- Funnel for transferring the strained cider into storage bottles without making a mess.
- Glass storage bottles with dropper tops or tight lids for the finished product. Amber glass bottles are nice because they protect the cider from light, but any clean glass jar works.
If you don’t have a fine-mesh strainer, a clean dish towel or even a coffee filter will work in a pinch. I once strained a batch through a clean sock — don’t judge me, it was an emergency and the store was closed. The sock worked fine, but I don’t recommend it as a long-term solution.
Preparation Method
Making fire cider is more about patience than skill. The actual hands-on time is maybe twenty minutes. The waiting is the hard part. Here’s how to do it:
- Prep your ingredients. Wash all your produce well. You don’t need to peel the ginger or turmeric unless the skin looks really gnarly — just scrub them clean. Slice the ginger and turmeric into thin rounds or small chunks. Peel and chop the horseradish into small pieces. Smash the garlic cloves with the flat side of your knife. Chop the onion roughly. Slice the lemon into thin rounds.
- Layer everything in your jar. Start with the harder ingredients at the bottom — ginger, turmeric, horseradish. Then add the garlic, onion, and lemon slices. Toss in the cayenne, black peppercorns, and whole cloves. If you’re using rosemary, tuck the sprig down the side of the jar. Pack everything in fairly tightly — you want the jar to be about two-thirds full of solids.
- Pour in the vinegar. Slowly pour the raw apple cider vinegar over the ingredients until everything is completely submerged. The solids will float a bit at first, and that’s okay. Leave about half an inch of headspace at the top of the jar. Use a chopstick or butter knife to gently poke around and release any air bubbles trapped between the ingredients.
- Seal and shake. Put the lid on tightly and give the jar a good shake. You’ll see the vinegar immediately start to take on color from the turmeric and ginger. Label your jar with the date — trust me, you’ll forget when you started it if you don’t.
- Store and wait. Place the jar in a cool, dark place — your pantry or a kitchen cabinet works perfectly. Shake the jar gently once a day for the first week. This helps redistribute the flavors and ensures everything infuses evenly. After that, you can leave it alone to do its thing.
- Let it infuse for 3-4 weeks. I know, I know — that feels like forever. But the magic really happens during this time. The vinegar slowly extracts all the beneficial compounds from the ingredients. The flavor deepens and mellows. At two weeks, it’ll taste harsh and aggressive. At three weeks, it starts to come together. At four weeks, it’s smooth enough to take straight. I’ve let batches go for six weeks before and they were incredible, but four is the sweet spot for most people.
- Taste test around week 3. Dip a clean spoon in and taste it. Is it strong enough? Does it have enough heat? This is your chance to adjust. If you want it spicier, add more cayenne and let it go another week. If the garlic is too punchy, strain it now and call it done. Trust your taste buds here.
- Strain and bottle. When you’re happy with the flavor, strain the vinegar through your fine-mesh strainer or cheesecloth into a large measuring cup or bowl. Discard the solids — they’ve given everything they’ve got. Use your funnel to transfer the liquid into clean glass storage bottles. If you’re adding honey, stir it in now while the cider is at room temperature. Start with 2 tablespoons and taste, adding more if you want it sweeter.
- Store in the fridge. Your finished fire cider will keep in the refrigerator for up to a year. The flavor will continue to mellow over time. I’ve found it hits its peak around the two-month mark, but it’s delicious right from the start.
Warning: When you first open the jar after the infusion period, the smell will hit you like a freight train. Open it near a window or under the stove vent if you can. My husband once opened a batch in our small kitchen and we had to air the place out for an hour. You’ve been warned.
Cooking Tips & Techniques
After making this recipe more times than I can count, I’ve picked up a few tricks that make the process smoother and the results better. Here’s what I wish someone had told me the first time:
Don’t peel your ginger and turmeric. I used to spend forever scraping the skin off with a spoon, and then I realized — the vinegar is going to extract everything anyway. The skin contains nutrients and flavor compounds you’d be throwing away. Just scrub them well and slice them up. Your future self will thank you for saving those fifteen minutes.
Use a wide-mouth jar. The first batch I made used a narrow-neck bottle and getting the ingredients in and out was a nightmare. Wide-mouth mason jars make layering the ingredients easy and straining is infinitely less frustrating. Trust me on this one.
Label everything with dates. I cannot stress this enough. I once had three jars of various ferments in my pantry and had no idea which one was the fire cider, which was the kombucha, and which was the jar of pickled onions I’d forgotten about. A piece of masking tape and a sharpie will save you from some truly confusing taste tests.
Start with less heat. You can always add more cayenne, but you can’t take it out. My first batch was so spicy I could only take it in 1/4 teaspoon doses. It lasted me two years. Start with 1/2 teaspoon of cayenne and work your way up in future batches once you know your tolerance.
Shake daily for the first week. This is the step most people skip, and it makes a real difference. The ingredients settle at the bottom and the vinegar on top doesn’t extract as efficiently. A daily shake keeps everything in contact and results in a more balanced, flavorful finished product.
One mistake I made: I once used distilled white vinegar because I ran out of apple cider vinegar. Don’t do this. The flavor was harsh and thin, and it lacked all the beneficial properties that come from the mother. It was basically just spicy vinegar water. I ended up throwing the whole batch out. Stick with the raw apple cider vinegar — it’s the star of the show for a reason.
Variations & Adaptations
One of the best things about fire cider is how flexible it is. You can tweak it to match your taste preferences, dietary needs, or whatever ingredients you have on hand. Here are some variations I’ve tried and loved:
Milder Version for Sensitive Stomachs : If the heat is too much for you, skip the cayenne entirely and use only half the horseradish. Add an extra slice of lemon and a cinnamon stick for warmth without the burn. This version is gentler on the stomach and still has plenty of immune-supporting benefits. I made this for my mom, who has a sensitive digestive system, and she actually finishes her bottle before cold season is over.
Extra-Hot “Clear Your Sinuses” Version : For the brave souls out there, add a whole habanero or serrano pepper (sliced in half) along with 2 teaspoons of cayenne. Throw in some extra horseradish too. This version is not for the faint of heart — it’ll clear your sinuses, make your eyes water, and probably wake up your ancestors. I take this version when I feel a cold really settling in and it knocks it out fast.
Herbal Garden Version : In the summer when my herb garden is overflowing, I add fresh thyme, oregano, sage, and a sprig of lavender along with the rosemary. The herbs add complexity and their own antimicrobial properties. This version tastes more like a savory garden tonic and less like a spicy vinegar bomb. It’s my favorite for spring and early fall when I’m just trying to stay healthy, not fight off an active cold.
Sweet and Spicy Version : If you find the straight vinegar too harsh, double the honey or swap half the apple cider vinegar for unfiltered apple juice. Let the apple juice ferment slightly during the infusion period — it adds a natural sweetness and a tiny bit of fizz. This version is dangerously drinkable and great for getting kids to take their “medicine” without a fight.
Quick Version (3-Day Fire Cider) : If you need something now and can’t wait three weeks, you can make a quick version by simmering all the ingredients (except the vinegar and honey) in water for 20 minutes, then mixing the strained liquid with equal parts apple cider vinegar and honey. It won’t have the same depth of flavor or potency as the long-infused version, but it’ll do in a pinch. I’ve made this when I felt a cold coming on and didn’t have a batch ready — it worked well enough to get me through.
Serving & Storage Suggestions
Fire cider is potent stuff, so a little goes a long way. Here’s how I like to use mine:
Daily Maintenance Dose: Take 1 tablespoon (about half a shot glass) first thing in the morning, before breakfast. It wakes up your digestive system and gives your immune system a gentle nudge. Chase it with a glass of water if the taste is strong — the water helps neutralize the vinegar on your teeth too, which is good for your enamel.
At the First Sign of a Cold: Bump it up to 1-2 tablespoons, 2-3 times a day. Take it straight or mix it into a small amount of warm water with extra honey and lemon. This is when the fire cider really shines — that warmth spreading through your chest feels like your body’s own little furnace fighting off the invaders.
In Cooking: Fire cider makes an incredible salad dressing base. Mix 2 tablespoons with 3 tablespoons olive oil, a teaspoon of Dijon mustard, and a pinch of salt. It’s also great splashed into soups, stews, or braised greens for a hit of acidity and heat. I drizzle it over roasted vegetables sometimes and it’s amazing.
Storage: Keep your fire cider in a tightly sealed glass bottle in the refrigerator. It will keep for up to a year, though the flavor is best within the first 6 months. The color may darken over time and some sediment might settle at the bottom — that’s normal and harmless. Just give the bottle a gentle shake before using.
Reheating Note: Don’t heat fire cider directly. The beneficial enzymes and probiotics in the raw vinegar and honey are destroyed by high heat. If you want it warm, stir it into hot water or tea after it’s been poured, rather than heating the cider itself.
Flavor Development: The flavor actually improves with age. After about two months in the fridge, the harsh edges soften and the different ingredients blend together into something more harmonious. I always try to make a batch in early fall so it’s at its peak by the time cold season really hits in January.
Nutritional Information & Benefits
While I’m not a nutritionist or a doctor, here’s what the research says about the key ingredients in this fire cider and why they’re good for you:
- Apple cider vinegar supports healthy digestion and may help balance blood sugar levels. The “mother” contains beneficial bacteria that act as a probiotic.
- Garlic is rich in allicin, a compound with antimicrobial and immune-supporting properties. Some studies suggest regular garlic consumption may reduce the frequency of colds.
- Ginger has anti-inflammatory and antioxidant effects. It’s also great for settling an upset stomach — a bonus during cold season when digestive issues often pop up.
- Turmeric contains curcumin, a powerful anti-inflammatory compound. The black pepper in this recipe helps your body absorb it more effectively.
- Horseradish contains compounds that may help clear sinuses and support respiratory health. It’s also antimicrobial.
- Honey has natural antibacterial properties and soothes sore throats. Local raw honey may also help with seasonal allergies.
Estimated per 1-tablespoon serving: Approximately 15 calories, 0g fat, 3g carbohydrates, 0g protein, 0g fiber. These values will vary depending on your specific ingredients and whether you add honey.
Dietary Notes: This recipe is naturally gluten-free, dairy-free, and vegan if you use maple syrup instead of honey. It’s also paleo-friendly and Whole30-compliant without the sweetener.
Allergen Warning: None of the common allergens are present in this recipe, but if you have sensitivities to any of the ingredients, please adjust accordingly. The horseradish and cayenne can be irritating to people with certain digestive conditions.
Conclusion
Look, I’m not going to tell you that fire cider will magically prevent every cold that comes your way. But I will tell you that it’s become an essential part of my cold-season routine, and I notice a real difference when I’m consistent with it. There’s something powerful about taking a moment each morning to do something intentional for your health — even if that something tastes like spicy vinegar and makes you cough a little.
This recipe is forgiving, flexible, and deeply satisfying to make. You can adjust it to your taste, experiment with different herbs and spices, and eventually develop your own signature blend. That’s the beauty of it — it’s yours. And when you take that first shot of something you made with your own hands, feeling the warmth spread through your chest, you’ll understand why this old folk remedy has been around for generations.
So grab a jar, raid your produce drawer, and give this a try. Your future self — the one sitting in a warm kitchen while everyone else is sniffling through cold season — will thank you. And if you come up with a brilliant variation, please come back and tell me about it. I’m always looking for new ideas to try in my next batch.
Stay warm, stay healthy, and keep that fire burning.
Frequently Asked Questions
Can I use dried herbs instead of fresh?
Yes, you can substitute dried herbs for fresh in most cases. Use about one-third of the amount called for fresh, since dried herbs are more concentrated. For turmeric and ginger, fresh really does make a noticeable difference in flavor and potency, but dried will work in a pinch.
How long does fire cider actually last?
Properly stored in the refrigerator in a sealed glass container, fire cider will keep for up to a year. The flavor is best within the first six months, but it remains safe to consume as long as no mold develops and it still smells and tastes like it should. If you see mold or an off smell, toss it and start fresh.
Can I take fire cider if I’m pregnant or breastfeeding?
This is a question for your healthcare provider. Fire cider contains ingredients like horseradish, cayenne, and large amounts of garlic that may not be suitable during pregnancy or while breastfeeding. Some of these ingredients are considered generally safe in food amounts, but fire cider is more concentrated. Always check with your doctor first.
Why does my fire cider look cloudy or have sediment at the bottom?
That’s completely normal and actually a good sign. The cloudiness comes from the “mother” in the raw apple cider vinegar and from the fine particles of the ingredients that make it through the straining process. The sediment is just concentrated flavor and nutrients settling out over time. Give it a gentle shake before using and don’t worry about it.
Can I make fire cider without horseradish?
Absolutely. Horseradish adds a distinctive kick, but you can skip it and still have a perfectly good fire cider. Increase the ginger and garlic slightly to compensate, or add extra cayenne for heat. I’ve made horseradish-free versions for friends who can’t find it locally and they’ve turned out great — just a little different in character.
Pin This Recipe!

Immune-Boosting Fire Cider Tonic Shots for Cold Season

A potent, homemade fire cider tonic made with raw apple cider vinegar, garlic, ginger, horseradish, and spices. This immune-supporting remedy is easy to make, customizable, and perfect for cold season.
- Prep Time: 20 minutes
- Cook Time: 0 minutes
- Total Time: 3-4 weeks (infusion time)
- Yield: Approximately 3 cups (48 servings of 1 tablespoon each) 1x
- Category: Tonic / Remedy
- Cuisine: American / Folk Remedy
Ingredients
- 4 cups (960 ml) raw apple cider vinegar (with the mother)
- 1/2 cup fresh ginger root, thinly sliced (about 4 ounces)
- 1/4 cup fresh turmeric root, thinly sliced (about 2 ounces)
- 1/4 cup fresh horseradish root, peeled and chopped (about 2 ounces)
- 10–12 garlic cloves, smashed
- 1 medium yellow onion, roughly chopped
- 1 medium lemon, sliced into rounds
- 1 teaspoon cayenne pepper (or more to taste)
- 1 teaspoon whole black peppercorns
- 1/2 teaspoon whole cloves
- 1 fresh rosemary sprig (optional)
- 2–3 tablespoons raw honey (optional, added after straining)
Instructions
- Wash all produce well. Do not peel ginger or turmeric unless skin is very dirty; just scrub clean. Slice ginger and turmeric into thin rounds or small chunks. Peel and chop horseradish into small pieces. Smash garlic cloves with the flat side of a knife. Roughly chop onion. Slice lemon into thin rounds.
- Layer ingredients in a quart-sized glass jar: start with ginger, turmeric, and horseradish at the bottom. Add garlic, onion, and lemon slices. Add cayenne, black peppercorns, and whole cloves. If using rosemary, tuck the sprig down the side. Pack solids until jar is about two-thirds full.
- Slowly pour raw apple cider vinegar over ingredients until completely submerged. Leave about 1/2 inch headspace. Use a chopstick or butter knife to release air bubbles.
- Seal jar tightly and shake well. Label with the date.
- Store in a cool, dark place (pantry or cabinet). Shake gently once daily for the first week, then leave undisturbed.
- Let infuse for 3-4 weeks. Taste at week 3 to check strength and heat; adjust if needed (add more cayenne for heat, or strain early if garlic is too strong).
- When flavor is to your liking, strain through a fine-mesh strainer or cheesecloth into a large measuring cup or bowl. Discard solids.
- If using honey, stir in 2-3 tablespoons at room temperature. Taste and add more if desired.
- Transfer to clean glass storage bottles using a funnel. Store in the refrigerator for up to one year.
Notes
Start with less cayenne (1/2 teaspoon) if you are sensitive to heat; you can always add more. Shake daily for the first week to ensure even extraction. When opening after infusion, do so near a window or vent as the smell is very strong. Do not heat the finished cider directly to preserve beneficial enzymes and probiotics. The flavor improves with age; it is best within the first 6 months but keeps up to a year in the fridge.
Nutrition
- Serving Size: 1 tablespoon (15 ml)
- Calories: 15
- Sugar: 2
- Sodium: 5
- Carbohydrates: 3
Keywords: fire cider, immune booster, cold remedy, apple cider vinegar, garlic, ginger, horseradish, turmeric, homemade tonic, wellness shot


