Love this? Save it for later!
Share the inspiration with your friends
I was standing in the frozen food aisle last Tuesday, staring at a row of sad-looking canned soups, when the smell hit me. It wasn’t real, of course — just a phantom memory, sharp as a bell. Suddenly I was seven years old, sitting at my Aunt Claire’s tiny kitchen table, a thermos in front of me that felt warm through the metal. She’d twist off the cup, pour this pale green soup that was somehow the most vivid thing I’d ever tasted. I remember the way the steam fogged up her glasses as she said, “Drink it slow, kiddo. It’s got to last you till lunch.”
That thermos was my secret weapon through a dozen field trips, countless school days, and one particularly miserable winter where we had a substitute bus driver who kept the heat off. I mean, honestly, I tried to recreate that soup a hundred times. I’d make regular broccoli cheddar soup, pack it in a thermos, and by noon it was a lukewarm, separated mess. The cheese would clump, the broccoli would go mushy, and I’d end up buying school lunch anyway. You know that feeling when you’re chasing a memory and you just can’t catch it?
This Creamy Thermos-Friendly Cheesy Broccoli Soup is the result of about fifteen failed batches, a lot of grumbling, and one accidental discovery involving cornstarch and evaporated milk. It stays creamy, stays hot, and actually tastes better after a few hours in a thermos. I keep making it because it’s the closest I’ve come to that feeling — warm, safe, and ready for whatever the day throws at you.
Why You’ll Love This Recipe
Let me tell you, this isn’t just another broccoli soup recipe that promises to be thermos-friendly and then lets you down. I’ve tested this thing six ways from Sunday, and here’s what makes it different.
- Thermos-Perfect Texture: Most cheesy soups turn into a grainy mess by lunchtime. This one uses a clever combination of evaporated milk and a touch of cream cheese to keep things silky smooth, even after hours in a thermos. No separation, no clumping — just creamy goodness.
- Simple Ingredients: You probably have most of this in your kitchen right now. No fancy cheese blends or hard-to-find thickeners. Just real food that works.
- Perfect for Busy Days: Pack it for work, school, road trips, or those days when you know you won’t have time for a proper lunch. It’s a warm hug in a thermos.
- Kid-Approved and Adult-Friendly: The cheese does the heavy lifting here. Even picky eaters go for this one, and adults appreciate that it doesn’t taste like “diet food” trying to be something it’s not.
- Make-Ahead Magic: This soup actually gets better after a day in the fridge. The flavors meld together, and it reheats beautifully.
I’m not going to tell you this is the most authentic French onion soup you’ve ever had — because it’s not trying to be. It’s comfort food that works with your life, not against it. The kind of soup that makes you close your eyes after the first sip, even if you’re eating it at your desk.
What Ingredients You Will Need
This recipe uses straightforward, pantry-friendly ingredients that come together to create something genuinely special. Here’s what you’ll need and why each one matters.
For the Soup Base
- 2 tablespoons unsalted butter (adds richness and helps sauté the aromatics)
- 1 medium yellow onion, diced (about 1 cup; builds the savory foundation)
- 2 cloves garlic, minced (fresh is best here, but jarred works in a pinch)
- 3 tablespoons all-purpose flour (this is our thickening agent — don’t skip it)
- 2 cups low-sodium chicken or vegetable broth (I prefer Swanson chicken broth for its clean flavor)
- 1 cup whole milk (adds creaminess without being too heavy)
- 1 cup evaporated milk (the secret to thermos-friendly texture — it won’t separate like regular milk)
- 2 cups fresh or frozen broccoli florets, chopped small (frozen works great here; just thaw and drain them first)
- 1 medium carrot, finely diced (adds sweetness and color)
- ½ teaspoon salt (plus more to taste)
- ¼ teaspoon black pepper
- ¼ teaspoon smoked paprika (optional, but adds a lovely depth)
For the Cheesy Finish
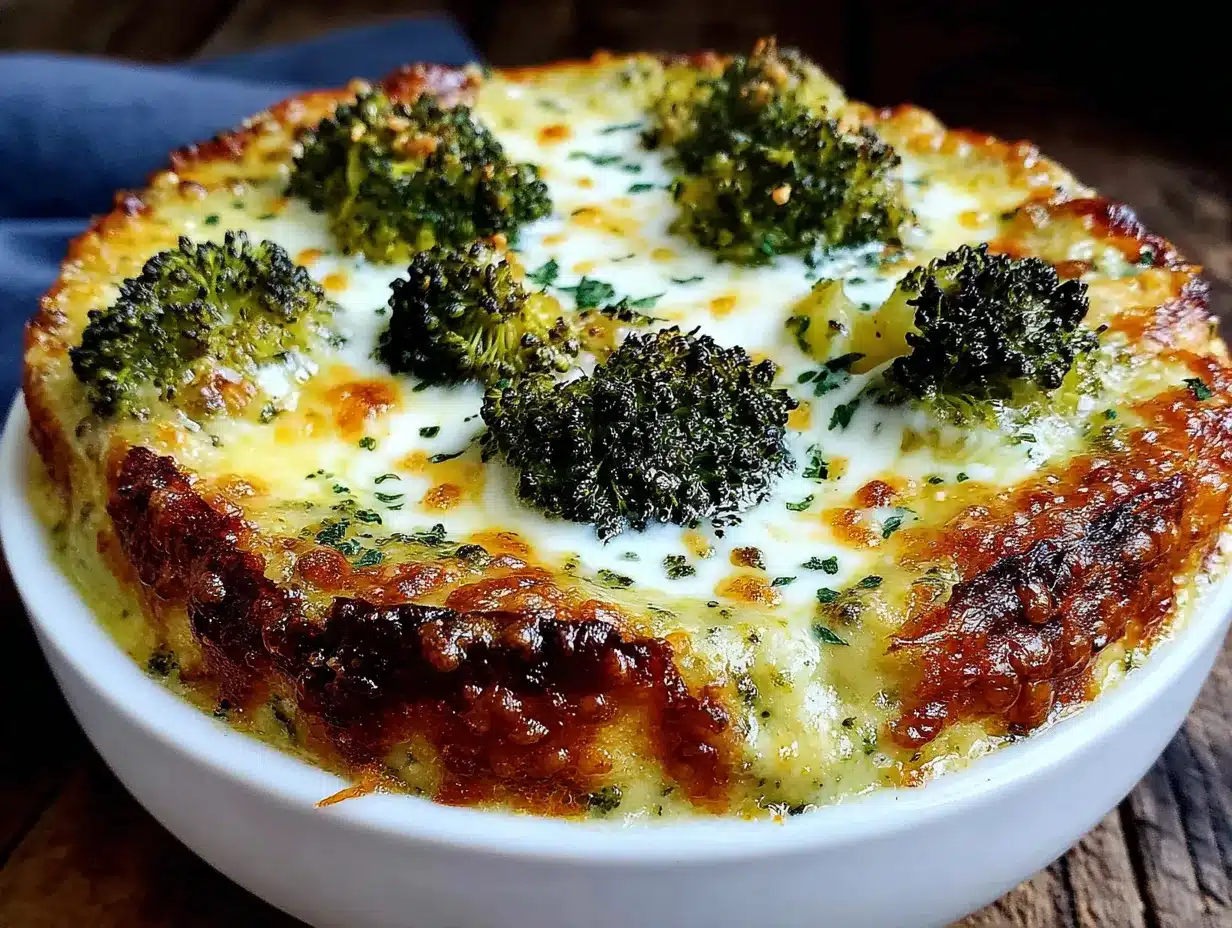
- 2 cups sharp cheddar cheese, freshly shredded (please, please shred your own — pre-shredded has anti-caking agents that mess with the texture)
- 2 ounces cream cheese, softened and cut into small pieces (this is what keeps the soup silky even after it sits)
Ingredient Tip: Look for a block of sharp cheddar from Cabot or Tillamook — they melt beautifully and have that tangy flavor that makes the soup sing. If you’re dairy-sensitive, you can substitute the milk with unsweetened oat milk and use a dairy-free cheddar shred, but the texture won’t be quite as stable in a thermos.
Equipment Needed
You don’t need a professional kitchen for this one. Here’s what I use:
- Large Dutch oven or heavy-bottomed pot (I use my trusty Lodge enameled Dutch oven — it holds heat evenly and prevents scorching)
- Wooden spoon or silicone spatula (for stirring without scratching your pot)
- Box grater or food processor with shredding disc (for shredding that cheese — a microplane works in a pinch but takes forever)
- Immersion blender or regular blender (optional, for a smoother texture; I prefer it chunky, personally)
- Measuring cups and spoons
- Cutting board and sharp knife
- Thermos (pre-warmed with hot water for best results — more on that later)
If you don’t have an immersion blender, you can use a regular blender in batches, just be careful with hot liquids. Let the soup cool slightly first and only fill the blender halfway. I learned that lesson the hard way, let me tell you.
Preparation Method
Alright, let’s get cooking. This comes together in about 35 minutes, and most of that is hands-off simmering.
- Prep your ingredients first. Dice the onion, mince the garlic, shred the cheese, and chop the broccoli into small, bite-sized pieces. Having everything ready makes the process smooth and prevents that frantic “where’s the salt?” moment.
- Melt the butter in your Dutch oven over medium heat. Once it’s foaming, add the diced onion. Cook for 4-5 minutes, stirring occasionally, until the onion is translucent and just starting to brown at the edges. You want it soft, not crispy.
- Add the minced garlic and cook for another 30 seconds until fragrant. Don’t let it burn — burnt garlic turns bitter and ruins the whole pot. I’ve done it. It’s sad.
- Sprinkle the flour over the onion mixture. Stir constantly for about 1-2 minutes. This cooks out the raw flour taste and creates a roux that will thicken your soup beautifully. It should look like a pale paste clinging to the onions.
- Slowly pour in the chicken broth while whisking continuously. This prevents lumps from forming. Keep whisking until the mixture is smooth and starts to thicken slightly, about 2 minutes.
- Add the milk and evaporated milk, whisking to combine. Bring the mixture to a gentle simmer — not a rolling boil, just a few lazy bubbles breaking the surface. Boiling can cause the dairy to separate later.
- Add the broccoli and diced carrot. Stir everything together, reduce the heat to medium-low, and let it simmer for 10-12 minutes. The broccoli should be tender but not mushy. You want it to hold its shape a little, especially since it will continue cooking in the thermos.
- Remove the pot from heat. This is important — you never want to add cheese to a boiling liquid, or it will get grainy. Let it sit for 2-3 minutes to cool slightly.
- Add the cream cheese pieces and stir until completely melted and incorporated. This takes about a minute of patient stirring.
- Gradually add the shredded cheddar cheese, a handful at a time, stirring constantly. Wait until each addition is mostly melted before adding the next. This gradual approach ensures a silky, smooth texture.
- Season with salt, pepper, and smoked paprika. Taste and adjust. I usually add another pinch of salt here — cheese can handle it.
- If you want a smoother soup, use your immersion blender right in the pot for 15-20 seconds. I prefer it chunky, so I skip this step. Your call.
Pro Tip for Thermos Packing: While the soup is simmering, fill your thermos with boiling water and let it sit for 5 minutes. This pre-heats the thermos so the soup stays hot longer. Right before you pour in the soup, dump the water out. It makes a huge difference.
Cooking Tips & Techniques
I’ve made this soup enough times to know where things can go wrong. Here’s what I’ve learned:
Don’t skip the evaporated milk. I know it seems like an extra step, but it’s the key to thermos-friendly texture. Regular milk breaks down over time, especially with the acidity from the cheese. Evaporated milk is more stable and keeps everything creamy for hours.
Low heat is your friend. I once cranked the heat to speed things up and ended up with a soup that looked like scrambled eggs floating in broth. Cheese sauce is delicate — treat it gently. Low and slow, always.
Shred your own cheese. I know, I know, it’s annoying. But pre-shredded cheese is coated with cellulose and potato starch to prevent clumping, and those additives make your soup grainy. A block of cheddar takes two minutes to shred and the difference is night and day.
Let it cool before packing. I know you want it piping hot in the thermos, but if you pour boiling soup into a pre-heated thermos, it can actually overcook the broccoli and make the cheese separate. Let the soup cool for about 10 minutes after cooking, then pack it. It will still be hot at lunchtime, I promise.
Fill the thermos to the top. Less air in the thermos means less heat loss. Fill it as full as you can without spilling. I use a funnel to make this easier and less messy.
Variations & Adaptations
This recipe is flexible, and I’ve tried a few different versions over the years. Here are my favorites:
- Broccoli-Cauliflower Blend: Swap half the broccoli for cauliflower florets. It makes the soup even creamier and adds a mild, nutty flavor. My neighbor Sarah tried this and now makes it exclusively that way.
- Spicy Southwest Version: Add a diced jalapeño (seeds removed if you want less heat) along with the onion, and swap the smoked paprika for cumin. Top with a dollop of sour cream when serving. It’s a whole different soup, and honestly, it’s amazing.
- Dairy-Free Adaptation: Use unsweetened oat milk instead of whole milk, and a dairy-free cream cheese substitute. For the cheddar, I’ve had good luck with Violife or Miyoko’s shreds. The texture won’t be quite as stable in a thermos, but it’s still delicious.
- Protein-Packed Version: Stir in 1 cup of shredded rotisserie chicken or cooked, crumbled turkey sausage after the cheese is melted. This turns it into a full meal that can easily replace a lunch sandwich.
- Extra-Veggie Boost: Add a handful of spinach or kale right at the end, stirring until wilted. You won’t even taste it, and it adds color and nutrients. Great for sneaking veggies into picky eaters’ lunches.
Serving & Storage Suggestions
This soup is designed for thermos packing, but it’s also lovely served fresh. Here’s how to handle both.
For Fresh Serving: Ladle the soup into bowls and top with extra shredded cheddar, a crack of black pepper, and maybe some croutons or crusty bread on the side. It’s thick, creamy, and incredibly satisfying on a cold day.
For Thermos Packing: Follow the pre-heating tip I mentioned earlier. Pour the soup in, seal it tight, and it will stay hot for 4-5 hours. I’ve tested it on 8-hour workdays and it’s still warm at lunch — not piping hot, but definitely hot enough to enjoy.
Storage: This soup keeps beautifully in the fridge for up to 5 days. Store it in an airtight container. The flavors actually deepen and meld together overnight, so leftovers taste even better.
Reheating: Reheat gently on the stovetop over medium-low heat, stirring occasionally. If it’s too thick, add a splash of milk or broth to thin it out. You can also microwave it in 30-second bursts, stirring between each, but be careful not to overheat it or the cheese can separate.
Freezing: This soup freezes well for up to 3 months. Let it cool completely, then transfer to freezer-safe containers or zip-top bags. Thaw overnight in the fridge and reheat gently. The texture might be slightly less creamy after freezing, but it’s still really good.
Nutritional Information & Benefits
Per serving (about 1.5 cups, based on 4 servings):
- Calories: 385
- Protein: 18g
- Fat: 26g
- Carbohydrates: 18g
- Fiber: 4g
- Sugar: 9g
- Sodium: 720mg
Broccoli is packed with vitamin C, vitamin K, and fiber, while the carrots add beta-carotene. The cheese provides calcium and protein, making this a surprisingly balanced meal. If you’re watching sodium, use low-sodium broth and go easy on the added salt — the cheese brings plenty of its own.
This isn’t a “diet” soup by any means, but it’s a real-food meal that keeps you full and satisfied. I’d rather eat this than a sad salad any day of the week.
Conclusion
This Creamy Thermos-Friendly Cheesy Broccoli Soup is the recipe I wish I’d had fifteen years ago, standing in that frozen food aisle. It’s warm, comforting, and actually works the way it’s supposed to — no sad, separated soup at lunchtime. Just creamy, cheesy goodness that tastes like a hug in a thermos.
I’d love for you to try it and make it your own. Add extra veggies, swap the cheese, throw in some protein — whatever works for your family. And if you come up with a variation you love, drop it in the comments below. I’m always looking for new ideas, and honestly, I think Aunt Claire would be thrilled to know her soup is still out there, keeping people warm.
Happy cooking, and here’s to never eating sad canned soup again!
Frequently Asked Questions
Can I use frozen broccoli instead of fresh?
Absolutely! Frozen broccoli works great. Just thaw it first and drain off any excess water. Frozen florets are often more tender than fresh, so they’ll break down a bit more during cooking, which actually makes the soup creamier.
Why did my soup turn out grainy?
Grainy soup usually means the cheese was added to liquid that was too hot, or you used pre-shredded cheese. Always remove the pot from heat before adding cheese, and shred your own from a block. The anti-caking agents in pre-shredded cheese are the number one culprit for grainy texture.
How long will the soup stay hot in a thermos?
If you pre-heat your thermos with boiling water for 5 minutes before filling it, the soup should stay hot for 4-5 hours. It won’t be piping hot at lunch, but it will be comfortably warm. For best results, fill the thermos all the way to the top to minimize air space.
Can I make this soup ahead of time?
Yes! This soup actually tastes better the next day. Make it the night before, let it cool completely, and store it in the fridge. Reheat gently on the stovetop before packing it in your thermos in the morning. The flavors meld together beautifully overnight.
Can I use a different type of cheese?
You can, but stick with good melting cheeses. Sharp cheddar is classic, but you can use Gouda, Monterey Jack, or a mix. Avoid hard cheeses like Parmesan on their own — they don’t melt smoothly. If you want to add Parmesan, mix it with a softer melting cheese.
Pin This Recipe!

Creamy Thermos-Friendly Cheesy Broccoli Soup

This creamy, cheesy broccoli soup is specially designed to stay smooth and hot in a thermos for hours. Made with a clever combination of evaporated milk and cream cheese, it’s the perfect make-ahead lunch for busy days, field trips, or work.
- Prep Time: 10 minutes
- Cook Time: 25 minutes
- Total Time: 35 minutes
- Yield: 4 servings 1x
- Category: Soup
- Cuisine: American
Ingredients
- 2 tablespoons unsalted butter
- 1 medium yellow onion, diced (about 1 cup)
- 2 cloves garlic, minced
- 3 tablespoons all-purpose flour
- 2 cups low-sodium chicken or vegetable broth
- 1 cup whole milk
- 1 cup evaporated milk
- 2 cups fresh or frozen broccoli florets, chopped small
- 1 medium carrot, finely diced
- ½ teaspoon salt
- ¼ teaspoon black pepper
- ¼ teaspoon smoked paprika (optional)
- 2 cups sharp cheddar cheese, freshly shredded
- 2 ounces cream cheese, softened and cut into small pieces
Instructions
- Prep your ingredients first. Dice the onion, mince the garlic, shred the cheese, and chop the broccoli into small, bite-sized pieces.
- Melt the butter in your Dutch oven over medium heat. Once foaming, add the diced onion. Cook for 4-5 minutes, stirring occasionally, until translucent and just starting to brown at the edges.
- Add the minced garlic and cook for another 30 seconds until fragrant.
- Sprinkle the flour over the onion mixture. Stir constantly for about 1-2 minutes to cook out the raw flour taste and create a roux.
- Slowly pour in the chicken broth while whisking continuously to prevent lumps. Keep whisking until smooth and slightly thickened, about 2 minutes.
- Add the milk and evaporated milk, whisking to combine. Bring to a gentle simmer (not a rolling boil).
- Add the broccoli and diced carrot. Stir, reduce heat to medium-low, and simmer for 10-12 minutes until broccoli is tender but not mushy.
- Remove the pot from heat and let it sit for 2-3 minutes to cool slightly.
- Add the cream cheese pieces and stir until completely melted and incorporated.
- Gradually add the shredded cheddar cheese, a handful at a time, stirring constantly until each addition is mostly melted before adding the next.
- Season with salt, pepper, and smoked paprika. Taste and adjust.
- If desired, use an immersion blender to puree the soup to a smoother consistency (optional).
Notes
Pre-heat your thermos with boiling water for 5 minutes before filling to keep soup hot longer. Let soup cool for about 10 minutes after cooking before packing to prevent overcooking. Fill thermos to the top to minimize air space. Shred your own cheese from a block for best texture. This soup tastes even better the next day.
Nutrition
- Serving Size: 1.5 cups
- Calories: 385
- Sugar: 9
- Sodium: 720
- Fat: 26
- Saturated Fat: 16
- Carbohydrates: 18
- Fiber: 4
- Protein: 18
Keywords: creamy broccoli soup, thermos soup, cheesy broccoli soup, make-ahead lunch, thermos-friendly soup, broccoli cheddar soup, easy soup recipe


