Love this? Save it for later!
Share the inspiration with your friends
I’m not supposed to play favorites with recipes, but these Sunbutter and Jelly Uncrustables have earned a permanent spot in my freezer. The idea came to me on a random Thursday afternoon when my niece was coming over for a playdate. I had completely forgotten to pick up her favorite store-bought frozen sandwiches, and let’s face it—I was not about to face the wrath of a hangry four-year-old. So I stood there, staring into my pantry, feeling that familiar panic rise.
My sister had recently discovered my nephew has a tree nut allergy, which meant our kitchen needed a serious overhaul. The classic peanut butter and jelly sandwiches we grew up on? Off the table. But I had a brand new jar of sunflower seed butter sitting there, looking hopeful. I grabbed some bread, that jar of sunbutter, and my grandma’s old biscuit cutter, and honestly? I was skeptical. I mean, could this really work as well as the peanut butter version?
The first batch came out a little messy—some jelly leaked, the edges weren’t sealed perfectly, and I definitely got sunflower butter on my favorite sweater. But when my niece took that first bite, her eyes went wide. “More, please,” she said with her mouth full, and I knew I had stumbled onto something special. Maybe you’ve been there—that moment when a kitchen experiment turns into a total win. These nut-free uncrustables aren’t just a substitute. They’re genuinely better in their own way. The sunflower butter has this unique, slightly earthy flavor that pairs perfectly with sweet jelly, and the texture is absolutely spot-on. I’ve been making them ever since, and they’ve saved me more times than I can count.
Why You’ll Love This Recipe
Let me tell you why these Sunbutter and Jelly Uncrustables have become my go-to recipe for busy days, lunch packing, and emergency snacks. I’ve tested this method at least a dozen times, tweaking the sealing technique and experimenting with different bread types to get it just right.
- Quick & Easy: You can whip up a whole batch in under 15 minutes. Seriously, it takes longer to preheat the oven for most recipes than it does to make a week’s worth of these sandwiches.
- Simple Ingredients: You only need four ingredients—bread, sunflower seed butter, jelly, and a little optional butter for toasting. No fancy grocery trips required.
- Perfect for Lunchboxes: These freeze beautifully and thaw by lunchtime, making them ideal for school lunches, picnics, or road trips.
- Nut-Free and Safe: Since they use sunflower seed butter instead of peanut or almond butter, they’re completely safe for nut-free classrooms, daycare centers, and anyone with allergies.
- Crowd-Pleaser: I’ve served these to kids and adults alike, and they disappear every single time. Even peanut butter lovers can’t resist them.
What makes these different from the store-bought version? First, you control the ingredients. No preservatives, no high-fructose corn syrup, no weird additives. Second, the homemade version tastes fresher and more flavorful. The sunflower butter has this rich, nutty depth that commercial versions just can’t match. And honestly, making them yourself costs a fraction of what you’d pay for the pre-made boxes.
This recipe isn’t just good—it’s the kind that makes you feel like a kitchen genius with minimal effort. It’s comfort food reimagined for modern dietary needs, and it delivers the same nostalgic satisfaction without any of the worry.
What Ingredients You Will Need
This recipe uses simple, wholesome ingredients to create that perfect pocket sandwich experience. Most of these are pantry staples you probably already have on hand.
- Bread: 8 slices of your favorite sandwich bread. I recommend using a sturdy white bread or whole wheat bread with a soft but substantial crumb. Avoid super airy breads or those with large holes, as they won’t seal well. I personally prefer Sara Lee Artesano or Pepperidge Farm Farmhouse for the best texture.
- Sunflower Seed Butter: ½ cup sunflower seed butter, well-stirred. I recommend SunButter brand for consistent texture and flavor. Make sure to stir it thoroughly before using, as the oil tends to separate. Look for a brand that doesn’t contain added sugar or palm oil for the cleanest taste.
- Jelly or Jam: ¼ cup of your favorite jelly, jam, or preserves. Grape jelly is the classic choice, but strawberry, raspberry, or even apricot work beautifully. Use seedless varieties if you prefer a smoother texture.
- Butter: 2 tablespoons salted butter, softened (optional). This is for toasting the outside of the uncrustables if you want a warm, golden-brown finish. You can skip it for a cold version.
- Flour: A small amount for dusting your work surface and the biscuit cutter to prevent sticking.
For ingredient selection tips, I always look for sunflower seed butter that has a smooth, creamy consistency without being too runny. Some brands are thinner than others, which can make the sandwiches harder to seal. If your sunbutter seems thin, refrigerate it for 15 minutes before using to firm it up.
As for substitution guidance, you can use any type of bread you like, including gluten-free options. Just make sure the bread is fresh and pliable so it crimps well. For the jelly, you can use reduced-sugar varieties if you’re watching your sugar intake. And if you don’t have sunflower seed butter, you can use other seed butters like pumpkin seed butter or tahini, though the flavor will be different.
Equipment Needed
You don’t need a fancy sandwich sealer to make these uncrustables. Here’s what I use in my own kitchen.
- Biscuit Cutter: A 3½ to 4-inch round biscuit cutter works perfectly. I use a vintage one I found at a thrift store for two dollars. If you don’t have one, you can use a clean, empty tuna can with both ends removed.
- Rolling Pin: A standard rolling pin for flattening the bread slightly. A wine bottle works in a pinch.
- Fork: For crimping the edges if you don’t have a biscuit cutter or want a decorative edge.
- Baking Sheet: A small baking sheet lined with parchment paper for freezing the uncrustables.
- Butter Knife: For spreading the sunbutter and jelly evenly.
- Small Bowl: For holding the flour to dust your cutter.
If you make these often, you might want to invest in an Uncrustables sealer or a pie crust crimper, but honestly, a biscuit cutter and fork work just as well. I’ve been using my basic setup for years and haven’t felt the need to upgrade. Just make sure your biscuit cutter is sharp enough to cut through the bread cleanly without squishing it.
Preparation Method
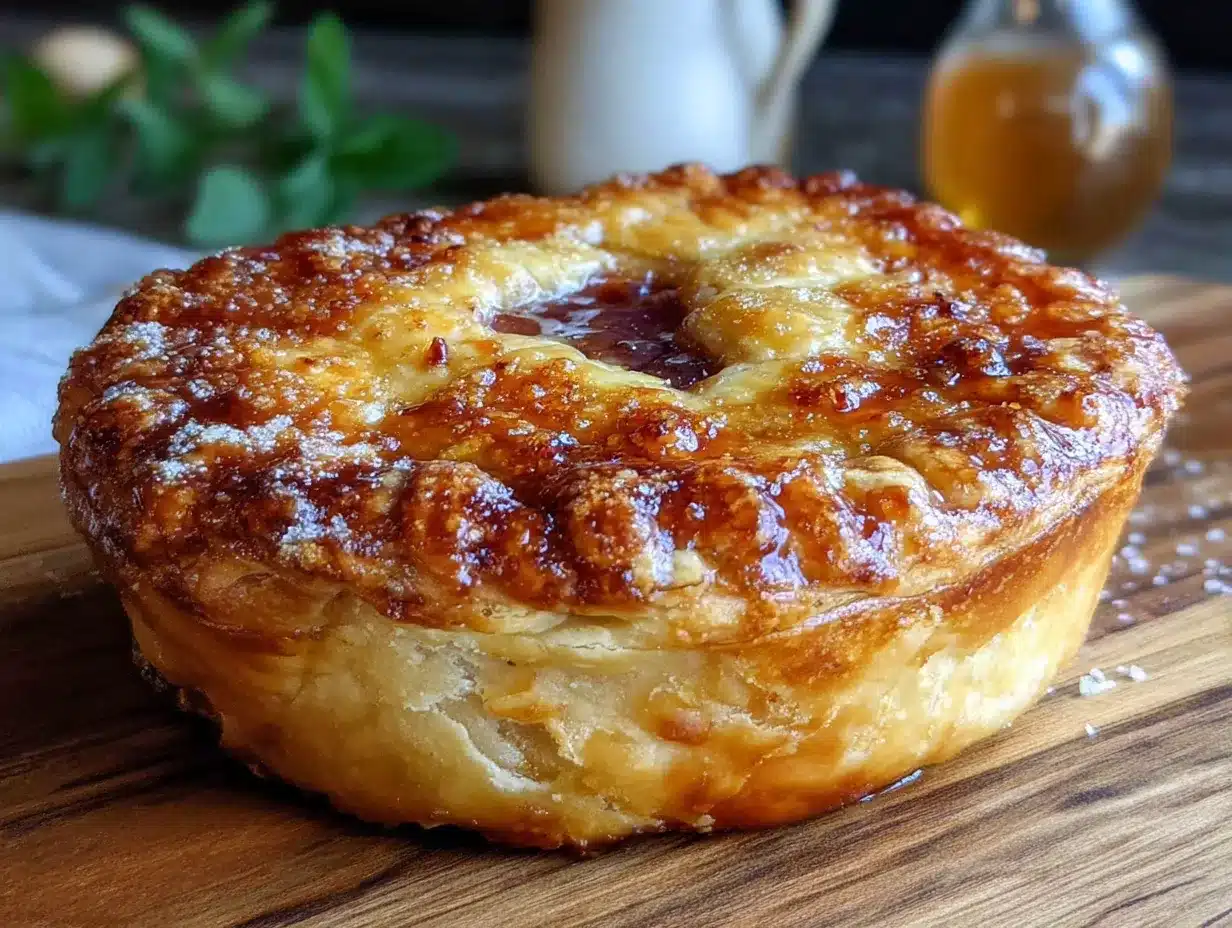
Let me walk you through exactly how I make these Sunbutter and Jelly Uncrustables. I’ve refined this method over many batches, so follow these steps for the best results.
- Prepare your work surface: Lightly dust your counter or cutting board with a small amount of flour. This prevents the bread from sticking when you roll it out. Don’t use too much flour, or it will make the bread dry.
- Flatten the bread: Take one slice of bread and use your rolling pin to gently flatten it to about ¼-inch thickness. Roll evenly from the center outward. You want the bread to be thin but not so thin that it tears. The edges should be slightly thinner than the center.
- Stir your sunbutter: Open your jar of sunflower seed butter and stir it thoroughly. The oil tends to separate, and you want a consistent texture. If it’s too stiff, microwave it for 10 seconds to soften it slightly.
- Spread the sunbutter: Using your butter knife, spread about 1 tablespoon of sunflower seed butter onto the flattened bread slice. Leave a ½-inch border around the edges. This border is crucial for sealing—if you spread all the way to the edge, the sandwich won’t close properly.
- Add the jelly: Spoon about 1½ teaspoons of jelly onto the center of the sunbutter. Don’t spread it all the way to the edges. Keeping it in the center prevents leakage during sealing and freezing.
- Top with second slice: Take another slice of flattened bread and place it on top. Press down gently around the edges to start forming the seal.
- Cut and seal: Dip your biscuit cutter in the flour to prevent sticking. Position it over the center of the sandwich and press down firmly. You want to cut through both layers of bread and create a sealed edge. Twist the cutter slightly as you pull it up to release the sandwich.
- Crimp the edges: If your biscuit cutter didn’t create a perfect seal, use a fork to press down around the edges. This step is optional but helpful for preventing leaks.
- Repeat: Continue with the remaining bread slices until you’ve used all your ingredients. You should get 4 uncrustables from 8 slices of bread.
- Freeze: Place the uncrustables on a parchment-lined baking sheet in a single layer. Freeze for at least 2 hours, or until solid. Once frozen, transfer them to a zip-top freezer bag for storage.
A few sensory cues to watch for: The bread should feel pliable but not mushy after rolling. When you press the cutter down, you should hear a clean cut sound. The edges should look sealed without any jelly peeking through. If you see jelly leaking, you used too much or spread it too close to the edge.
One personal tip I’ve learned: work quickly. If the bread sits out too long, it starts to dry out and won’t seal as well. I usually make these in batches of four, working assembly-line style. Flatten all the bread first, then spread, then assemble.
Cooking Tips & Techniques
I’ve made plenty of mistakes with these uncrustables so you don’t have to. Here are the lessons I learned the hard way.
The bread matters more than you think. I once tried using homemade artisan bread with a crusty exterior. Disaster. The crust wouldn’t seal, and the sandwich fell apart during freezing. Stick with soft, uniform sandwich bread. The softer the bread, the better it seals. Day-old bread actually works better than fresh because it’s slightly drier and less likely to get gummy.
Don’t overfill. I know it’s tempting to load up on jelly, but trust me, less is more. Too much filling causes the edges to burst open during sealing. You want just enough to taste it in every bite without it oozing out. A thin, even layer of sunbutter and a small dollop of jelly in the center is the sweet spot.
Temperature control is key. If your sunbutter is too warm, it will squish out the sides when you press down. If it’s too cold, it won’t spread evenly. Room temperature is perfect. I take my sunbutter out of the fridge about 20 minutes before I start. For the jelly, cold jelly from the fridge actually works better because it stays put and doesn’t run.
Freeze them flat. When you put the uncrustables in the freezer, make sure they’re in a single layer and not touching. If they freeze together, they’ll tear apart when you separate them. I learned this the hard way when I tried to stack them after just an hour of freezing. Total mess.
Toast them differently. For warm uncrustables, I pop them in a toaster oven on the defrost setting for about 3 minutes, then flip and toast for another 2 minutes. This gives you a golden, crispy exterior without burning the filling. A regular toaster works too, but watch them closely—the filling gets hot fast.
Variations & Adaptations
One of the best things about this recipe is how customizable it is. Here are some variations I’ve tried and loved.
Flavor Variations: Swap the grape jelly for strawberry jam, raspberry preserves, or even orange marmalade. I once made a batch with fig jam and it was incredible—the earthy sweetness paired perfectly with the sunflower butter. You can also try mixing different jellies together for a unique flavor combo.
Dietary Adaptations: For gluten-free eaters, use your favorite gluten-free bread. Just be aware that gluten-free bread can be more fragile, so handle it gently. For lower sugar options, use sugar-free jelly or make your own chia seed jam. I’ve also made these with no added sugar sunflower seed butter and they turned out great.
Savory Version: This might sound weird, but hear me out. Use sunbutter and a thin layer of honey or agave, then add a sprinkle of cinnamon. It tastes like a warm, cozy breakfast pastry. My kids actually prefer this version to the jelly one.
Different Shapes: Who says they have to be round? Use a square cookie cutter, a star shape, or even a heart-shaped cutter for special occasions. Just make sure the cutter is large enough to hold the filling without it spilling out.
Baked Version: For a crispy, pie-like texture, brush the outside of the uncrustables with melted butter and bake at 375°F for 10-12 minutes, flipping halfway through. This creates a golden, crunchy exterior that’s absolutely addictive.
I personally love the baked version for weekend brunches. It transforms a simple lunchbox staple into something that feels special. The contrast between the crispy exterior and the soft, warm interior is just perfection.
Serving & Storage Suggestions
These Sunbutter and Jelly Uncrustables are incredibly versatile when it comes to serving and storing. Here’s how I handle both.
Serving Temperature: You can serve them cold, at room temperature, or warm. For lunchboxes, I pack them frozen in the morning, and they thaw perfectly by lunchtime. For a quick snack, I microwave one for 15 seconds to take the chill off. For the ultimate experience, toast them until golden brown and serve warm.
Presentation Ideas: For kids, cut the uncrustables into fun shapes using cookie cutters before serving. I sometimes serve them alongside apple slices and a small container of yogurt for a complete lunch. For adults, these make a great addition to brunch spreads or picnic baskets.
Complementary Dishes: Pair these with fresh fruit, veggie sticks with hummus, or a simple salad for a balanced meal. They also go wonderfully with a warm bowl of tomato soup or a smoothie for a quick lunch combo.
Storage Instructions: Once frozen, transfer the uncrustables to a zip-top freezer bag. They’ll keep for up to 3 months in the freezer. Make sure to squeeze out as much air as possible before sealing to prevent freezer burn. Label the bag with the date so you know when you made them.
Reheating Methods: For the best texture, thaw the uncrustables in the refrigerator overnight, then toast them in a toaster oven or skillet. If you’re in a hurry, microwave one for 20-30 seconds, though the bread won’t be as crispy. For a lunchbox, just pack them frozen—they’ll thaw naturally by lunchtime.
One thing I’ve noticed: the flavors actually meld together better after a day or two in the freezer. Something about the freezing process allows the sunbutter and jelly to marry together, creating a more cohesive taste. So don’t be afraid to make a big batch!
Nutritional Information & Benefits
Here’s a breakdown of what you’re getting in each Sunbutter and Jelly Uncrustable (based on using standard white bread, sunflower seed butter, and grape jelly).
| Nutrient | Amount Per Serving (1 uncrustable) |
|---|---|
| Calories | 210 |
| Total Fat | 9g |
| Saturated Fat | 1.5g |
| Carbohydrates | 28g |
| Fiber | 2g |
| Sugar | 10g |
| Protein | 6g |
| Sodium | 180mg |
Sunflower seed butter is packed with healthy fats, vitamin E, magnesium, and selenium. It’s an excellent source of plant-based protein and contains more fiber than peanut butter. The bread provides complex carbohydrates for sustained energy, making these a great option for active kids and adults alike.
These uncrustables are naturally nut-free, dairy-free (if you skip the butter for toasting), and can be made gluten-free with appropriate bread. They’re also free from common allergens like eggs and soy. Just be sure to check your sunflower seed butter label for any cross-contamination warnings if you have severe allergies.
From a wellness perspective, I love that these give me control over what goes into my family’s food. No preservatives, no artificial flavors, no hydrogenated oils. Just real, wholesome ingredients that taste amazing.
FAQs
Can I use peanut butter instead of sunflower seed butter?
Absolutely! If nut allergies aren’t a concern, you can use creamy peanut butter, almond butter, or any other nut butter. Just keep in mind that the texture and flavor will be different. Peanut butter tends to be thicker, so you might need to spread it a bit thinner.
Why are my uncrustables falling apart in the freezer?
This usually happens for one of three reasons: the bread wasn’t flattened enough, the edges weren’t sealed properly, or you used too much filling. Make sure your bread is rolled to ¼-inch thickness, leave a clear border around the edges when spreading, and press firmly when cutting and sealing.
Can I make these ahead of time for a party?
Yes! These are perfect for parties. Make them up to 3 months in advance and keep them in the freezer. On party day, thaw them in the refrigerator overnight and serve them cold or toast them just before serving. They’re great for birthday parties, playdates, or brunch gatherings.
How do I prevent the jelly from leaking out during toasting?
The key is to use less jelly and keep it centered. Also, make sure your edges are well-sealed. If you’re toasting them, start with a frozen uncrustable and use a lower heat setting. This gives the inside time to warm up without the jelly getting too hot and expanding too quickly.
Can I use homemade bread for this recipe?
You can, but it requires some adjustments. Homemade bread tends to be denser and less pliable than store-bought sandwich bread. You’ll need to roll it out thinner, and it may not seal as easily. I recommend using a slightly smaller biscuit cutter and pressing the edges extra firmly. Day-old homemade bread works better than fresh.
Conclusion
These Sunbutter and Jelly Uncrustables have honestly become a staple in my kitchen, and I think they’ll become one in yours too. They solve the nut-free lunch problem without sacrificing taste or convenience. Whether you’re packing school lunches for allergy-prone kids, looking for a quick breakfast option, or just want a nostalgic treat that’s actually good for you, this recipe delivers every time.
Don’t be afraid to experiment with different breads, jellies, and variations. That’s half the fun of making them yourself. I’ve tried at least ten different combinations, and I’m still discovering new favorites. The basic method is so forgiving that even if you mess up, you’ll still end up with something delicious.
I’d love to hear how yours turn out! Drop a comment below and let me know what jelly you used, or if you tried any fun variations. Did you make them for a school lunch? A road trip? A lazy Sunday morning? Share your stories—I read every single one. And if you’re looking for more nut-free lunch ideas, don’t forget to check out my other recipes. Happy cooking, friends!
Pin This Recipe!
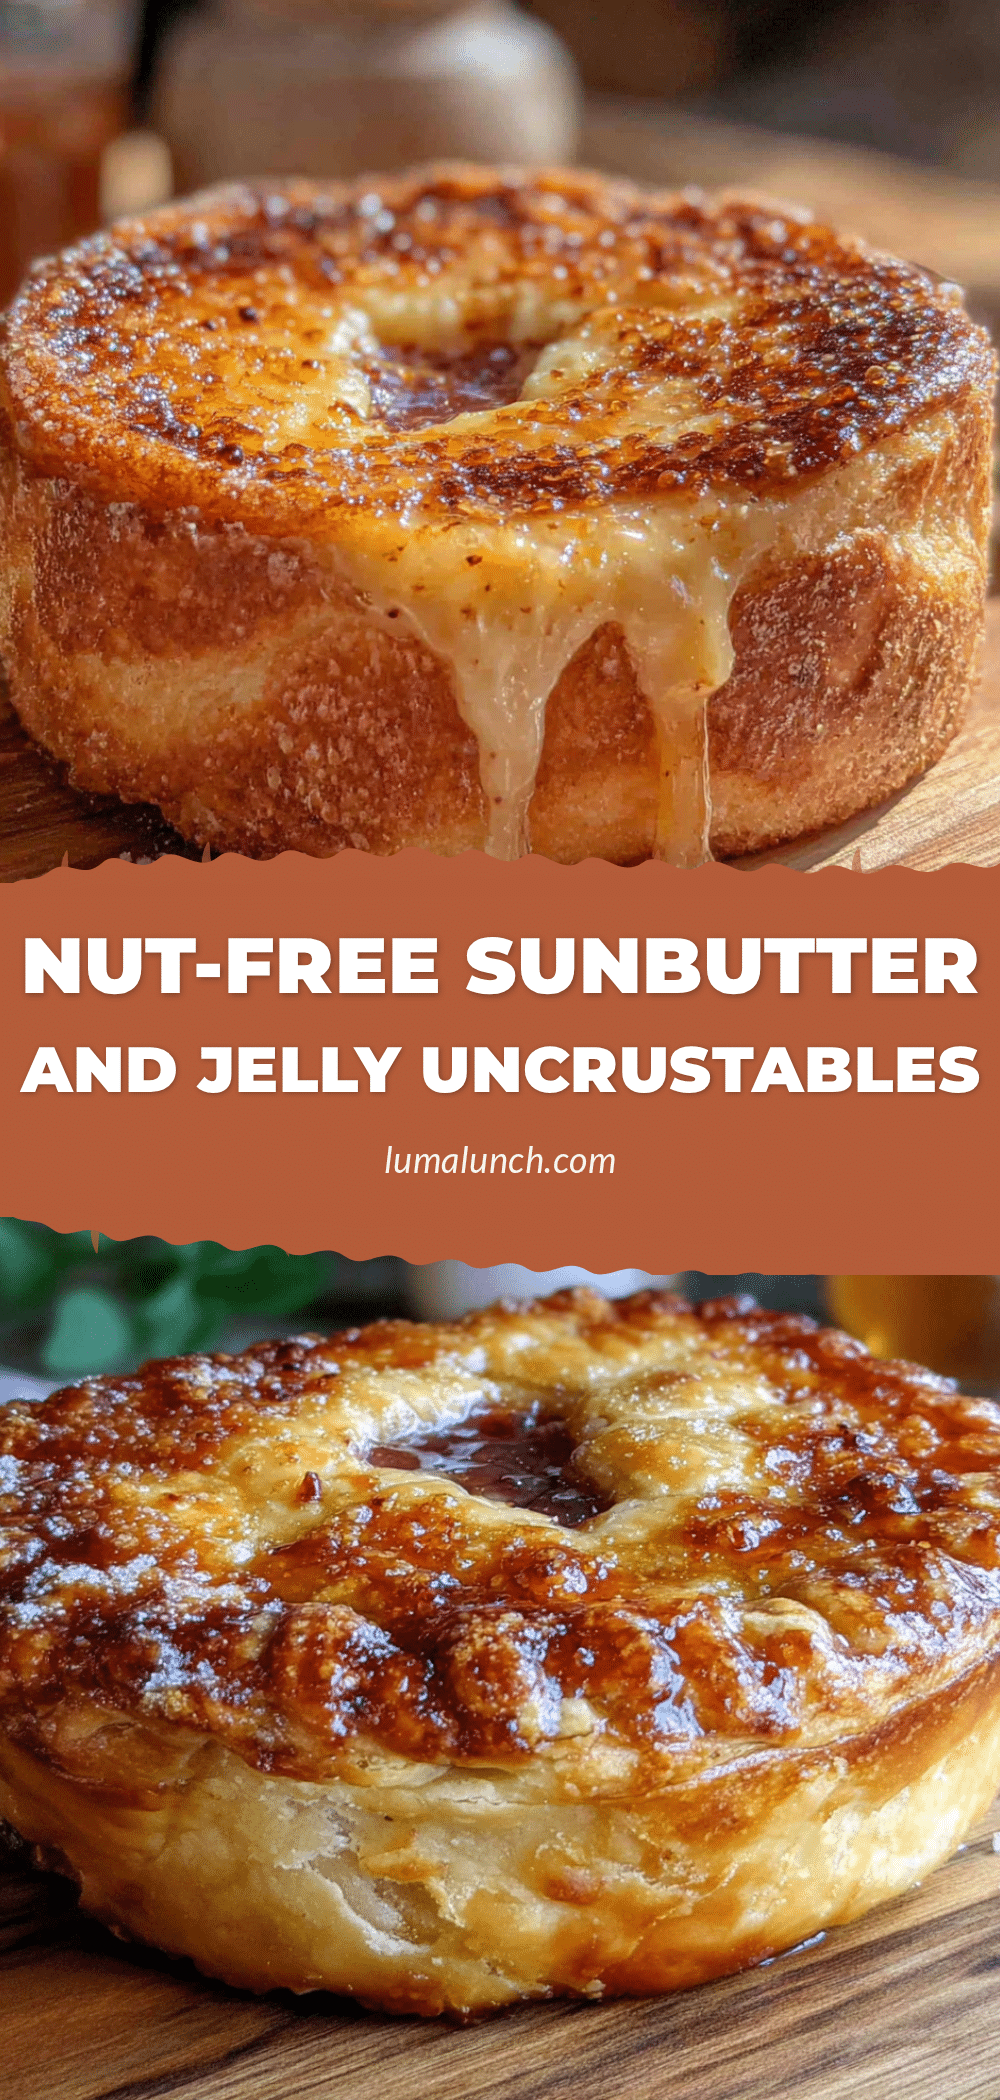
Easy Sunbutter & Jelly Uncrustables: Best Nut-Free Copycat Recipe

These Sunbutter and Jelly Uncrustables are a nut-free twist on the classic lunchbox favorite. Made with sunflower seed butter and your favorite jelly, they freeze beautifully and are perfect for school lunches, picnics, or emergency snacks.
- Prep Time: 15 minutes
- Cook Time: 0 minutes
- Total Time: 15 minutes (plus 2 hours freezing)
- Yield: 4 servings 1x
- Category: Snack
- Cuisine: American
Ingredients
- 8 slices of your favorite sandwich bread (e.g., Sara Lee Artesano or Pepperidge Farm Farmhouse)
- ½ cup sunflower seed butter (well-stirred, e.g., SunButter brand)
- ¼ cup jelly, jam, or preserves (grape, strawberry, raspberry, or apricot)
- 2 tablespoons salted butter, softened (optional, for toasting)
- A small amount of flour for dusting
Instructions
- Lightly dust your counter or cutting board with a small amount of flour to prevent sticking.
- Take one slice of bread and use a rolling pin to gently flatten it to about ¼-inch thickness. Roll evenly from the center outward.
- Stir the sunflower seed butter thoroughly. If it’s too stiff, microwave for 10 seconds to soften slightly.
- Spread about 1 tablespoon of sunflower seed butter onto the flattened bread slice, leaving a ½-inch border around the edges.
- Spoon about 1½ teaspoons of jelly onto the center of the sunbutter. Do not spread to the edges.
- Place another slice of flattened bread on top. Press down gently around the edges to start forming the seal.
- Dip a 3½ to 4-inch round biscuit cutter in flour. Position it over the center of the sandwich and press down firmly to cut through both layers and create a sealed edge. Twist slightly to release.
- If the seal is not perfect, use a fork to press down around the edges.
- Repeat with remaining bread slices to make 4 uncrustables.
- Place the uncrustables on a parchment-lined baking sheet in a single layer. Freeze for at least 2 hours, or until solid. Transfer to a zip-top freezer bag for storage.
Notes
For best results, use soft, uniform sandwich bread. Day-old bread works better than fresh. Keep jelly centered and use less to prevent leakage. Freeze uncrustables in a single layer before transferring to a bag. For warm uncrustables, toast in a toaster oven on defrost for 3 minutes, then flip and toast for 2 minutes.
Nutrition
- Serving Size: 1 uncrustable
- Calories: 210
- Sugar: 10
- Sodium: 180
- Fat: 9
- Saturated Fat: 1.5
- Carbohydrates: 28
- Fiber: 2
- Protein: 6
Keywords: sunbutter and jelly uncrustables, nut-free lunch, copycat uncrustables, sunflower seed butter sandwich, freezer-friendly lunch


