Love this? Save it for later!
Share the inspiration with your friends
I wasn’t expecting lunchbox advice from a retired plumber named Frank, but there I was, standing in the middle of the hardware aisle at our local store, listening to him describe exactly how to make these turkey and cheese pinwheel wraps. I had been complaining to myself—out loud, apparently—about the daily struggle of packing lunches that my kids would actually eat. Frank overheard me and put down his pipe wrench. “You know what my wife used to make for our boys?” he said, wiping his hands on his coveralls. “She’d roll up some turkey and cheese in a tortilla, slice ’em into little circles, and they’d disappear before lunchtime even started.” I honestly thought he was going to tell me about some tool I needed, not a recipe that would change my lunch-packing game forever.
Frank’s description was surprisingly detailed for a guy who probably spent more time under sinks than in kitchens. He told me about the cream cheese spread, the importance of not overstuffing the tortilla, and how his wife would sometimes add a sneaky layer of spinach. I grabbed a notepad from my purse—right there in the plumbing aisle—and scribbled down his instructions. I mean, you know that feeling when someone shares a simple secret that just clicks? That was this moment. The recipe felt so obvious, yet I had never thought of it myself. These turkey and cheese pinwheel wraps are now the reason I don’t dread 7 AM lunch prep anymore.
The first batch I made, I’ll admit, was a bit of a mess. I used too much cream cheese, and the tortillas got soggy by noon. Frank would have shaken his head. But I tweaked it, learned from my mistakes, and now these little pinwheels are a staple in our house. They’re not just easy—they’re the kind of thing that makes you feel like you’ve got lunch figured out. Maybe you’ve been there, staring into the fridge wondering what to pack. Let me tell you, this recipe is the answer you didn’t know you needed.
Why You’ll Love This Recipe
Let’s be honest—packing lunches can feel like a chore. But these easy turkey and cheese pinwheel wraps change everything. I’ve tested this recipe countless times, tweaking the spread-to-filling ratio until it was just right. It’s not just another wrap recipe; it’s the one that actually works for busy mornings, picky eaters, and even grown-up lunchboxes.
- Quick & Easy: These come together in under 10 minutes. Seriously, you can make a batch while your coffee is brewing. Perfect for those mornings when you hit snooze one too many times.
- Simple Ingredients: No fancy grocery trips needed. You likely already have tortillas, deli turkey, cheese, and a spread in your fridge. It’s the ultimate pantry-friendly recipe.
- Perfect for Lunchboxes: Whether it’s for school, work, or a picnic, these pinwheels are portable, mess-free, and fun to eat. Kids love the spiral shape, and adults appreciate the ease.
- Crowd-Pleaser: I’ve served these at playdates, potlucks, and even a casual book club meeting. They disappear fast. Both kids and adults grab them without hesitation.
- Unbelievably Delicious: The combination of creamy spread, savory turkey, and melty cheese wrapped in a soft tortilla is pure comfort food. It’s simple, but somehow, it’s next-level satisfying.
What makes this recipe different from the rest? It’s the technique—spreading the cream cheese all the way to the edges, rolling tightly, and chilling before slicing. That’s the secret to perfect pinwheels that hold their shape. This isn’t just another version of a wrap; it’s my best version, born from Frank’s tip and my own trial and error. It’s the kind of recipe that makes you close your eyes after the first bite, thinking, “Why didn’t I make this sooner?”
What Ingredients You Will Need
This recipe uses simple, wholesome ingredients to deliver bold flavor and satisfying texture without the fuss. Most of these are pantry staples you probably already have on hand, making it easy to whip up a batch anytime.
- Large flour tortillas (10-inch) – Burrito-size works best for rolling. I prefer Mission or a store-brand version that’s soft but sturdy. Avoid extra-thin tortillas, as they can tear.
- 8 oz cream cheese, softened – Full-fat gives the creamiest texture, but reduced-fat works too. Let it sit out for 20 minutes before mixing. (Philadelphia is my go-to brand.)
- 1/4 cup mayonnaise – Adds tang and helps the spread stay smooth. You can use Greek yogurt for a lighter option.
- 1/2 teaspoon garlic powder – For a subtle savory kick. Onion powder works as a substitute.
- 1/4 teaspoon black pepper – Freshly ground is best, but pre-ground works fine.
- 8-10 slices deli turkey – Look for oven-roasted or smoked turkey for the best flavor. I like Boar’s Head or Applegate for clean ingredients. You can also use leftover roasted turkey.
- 8-10 slices provolone cheese – Provolone melts beautifully and has a mild flavor. Swiss, cheddar, or mozzarella are great swaps.
- 1 cup fresh spinach leaves (optional) – Adds color and a nutrient boost. Pat them completely dry before using to prevent sogginess.
- 1/4 cup sun-dried tomatoes, chopped (optional) – For a burst of tangy sweetness. Drain and pat dry first.
Ingredient selection tip: For the best texture, use turkey slices that aren’t too thick or too thin. Thin-sliced turkey rolls more easily without bulking up the pinwheel. If you’re using a block of cream cheese, make sure it’s fully softened to avoid lumps in the spread. For a dairy-free version, use vegan cream cheese and dairy-free cheese slices—just know the texture will be slightly different.
Equipment Needed
You don’t need a fancy kitchen to make these turkey and cheese pinwheel wraps. Just a few basics that you probably already own.
- Cutting board – A large, flat surface for assembling and slicing. I use a wooden board, but plastic works fine.
- Chef’s knife or serrated knife – A sharp knife is crucial for clean slices. A serrated knife works wonders for cutting through tortillas without squishing them.
- Mixing bowl and spatula – For combining the cream cheese spread. A small bowl is plenty.
- Plastic wrap or parchment paper – To wrap the rolls tightly before chilling. This helps them hold their shape.
- Baking sheet or large plate – For chilling the rolls in the fridge. A flat surface prevents them from unrolling.
- Toothpicks (optional) – For securing the pinwheels if you’re transporting them. Not necessary for home use.
I’ve made these with just a butter knife and a plate when I was camping once—they still turned out great. But if you want those perfect, Instagram-worthy spirals, a sharp knife and a little patience go a long way. Budget-friendly tip: skip the fancy rolling mat and just use your hands. It works perfectly.
Preparation Method

Follow these steps carefully, and you’ll have perfect turkey and cheese pinwheel wraps every time. I’ve included time estimates and sensory cues so you know exactly what to look for.
- Make the cream cheese spread (5 minutes): In a small mixing bowl, combine the softened cream cheese, mayonnaise, garlic powder, and black pepper. Stir with a spatula until smooth and fully combined. It should be spreadable but not runny. If it’s too stiff, let it sit for another 5 minutes at room temperature.
- Prepare the tortillas (2 minutes): Lay one flour tortilla flat on your cutting board. If the edges are curling, microwave it for 10 seconds to make it more pliable. This helps prevent cracking when you roll.
- Spread the cream cheese mixture (3 minutes): Using a spatula or butter knife, spread an even layer of the cream cheese mixture over the entire surface of the tortilla, leaving about a 1-inch border around the edges. Don’t skimp—the spread acts as the glue that holds everything together. It should be about 1/8-inch thick.
- Layer the turkey (2 minutes): Place 4-5 slices of deli turkey evenly over the cream cheese, overlapping slightly. Make sure the turkey covers the entire surface, including the edges. This ensures every bite has turkey.
- Add the cheese (1 minute): Lay 4-5 slices of provolone cheese over the turkey, again overlapping slightly. If you’re using spinach or sun-dried tomatoes, sprinkle them evenly over the cheese now. Don’t overstuff—you want the roll to be tight, not bursting.
- Roll it up tightly (3 minutes): Starting from one edge, carefully roll the tortilla into a tight log. Use your fingers to tuck in the filling as you go. Roll slowly and firmly, keeping even pressure. The roll should be snug but not so tight that the filling squishes out the ends.
- Wrap and chill (30 minutes minimum): Tightly wrap the rolled tortilla in plastic wrap or parchment paper, twisting the ends like a candy wrapper. Place it seam-side down on a baking sheet or plate. Refrigerate for at least 30 minutes. This step is non-negotiable—chilling firms up the cream cheese and makes slicing much easier. Trust me, I’ve tried skipping it, and the results were a sad, squished mess.
- Slice into pinwheels (5 minutes): Unwrap the chilled roll and place it on your cutting board. Using a sharp serrated knife, slice the roll into 1-inch thick rounds. Use a gentle sawing motion—don’t press down hard, or you’ll flatten them. You should get about 8-10 pinwheels per tortilla.
- Serve or store (2 minutes): Arrange the pinwheels on a plate or pack them directly into lunchboxes. They’re ready to eat immediately after slicing, but they taste even better after sitting for an hour or two as the flavors meld.
Pro tip: If the pinwheels start to unroll as you slice, they need more chilling time. Pop them back in the fridge for 10-15 minutes before continuing. Also, wipe your knife clean between cuts for neater slices.
Cooking Tips & Techniques
I’ve made these turkey and cheese pinwheel wraps more times than I can count, and I’ve learned a few things the hard way. Here are my best tips for success.
Don’t over-spread the cream cheese. I made this mistake my first time. Too much spread makes the tortilla soggy and the pinwheels sloppy. A thin, even layer is all you need. Think of it as glue, not a filling.
Chill the rolls thoroughly. This is the most important tip. Without at least 30 minutes in the fridge, your pinwheels will fall apart when you slice them. I’ve had days where I was in a rush and skipped this step—total disaster. The cream cheese needs time to firm up and hold everything together.
Use a serrated knife for slicing. A straight-edge chef’s knife can squish the tortilla and push the filling out. A serrated knife cuts cleanly through without crushing. Use a gentle sawing motion, and clean the blade between cuts for the best results.
Keep the filling dry. If you’re adding spinach or sun-dried tomatoes, make sure they’re patted completely dry. Any extra moisture will make the pinwheels soggy by lunchtime. I learned this when I added wet spinach and ended up with a sad, drippy mess.
Multitask efficiently. While the cream cheese is softening, prep your other ingredients. Slice the cheese, pat dry the spinach, and lay out the tortillas. This way, assembly takes just a few minutes. I also make a double batch on Sunday and keep them wrapped in the fridge for easy grab-and-go lunches all week.
Don’t overstuff. It’s tempting to pile on the turkey and cheese, but too much filling makes rolling difficult and causes the pinwheels to bulge. Stick to 4-5 slices of each per tortilla for a perfect balance.
Variations & Adaptations
One of the best things about these turkey and cheese pinwheel wraps is how customizable they are. I’ve tried several variations, and each one has become a favorite in its own right.
Vegetarian version: Skip the turkey and load up on roasted bell peppers, cucumbers, shredded carrots, and hummus instead of cream cheese. The hummus adds a creamy, savory base that holds everything together beautifully.
Spicy southwest twist: Swap the provolone for pepper jack cheese, add a few slices of jalapeño, and mix a teaspoon of chili powder into the cream cheese spread. This version has a nice kick that wakes up your lunch break.
Low-carb option: Use large lettuce leaves (like romaine or butter lettuce) instead of tortillas. Spread the cream cheese mixture on the leaf, layer turkey and cheese, and roll tightly. These are lighter but just as satisfying. They’re best eaten the same day, though, as lettuce gets soggy overnight.
Breakfast pinwheels: Replace turkey with scrambled eggs and bacon bits. Use cheddar cheese and a cream cheese spread mixed with a pinch of paprika. These make a fun, portable breakfast for busy mornings.
Mediterranean version: Swap turkey for roasted chicken or leave it out entirely. Use feta cheese crumbles instead of provolone, and add chopped Kalamata olives, sun-dried tomatoes, and a sprinkle of oregano to the cream cheese spread. It’s like a Greek salad in pinwheel form.
I personally love the Mediterranean version for summer picnics. The flavors are bright and fresh, and they hold up well even in warm weather. Just make sure to keep them chilled until serving.
Serving & Storage Suggestions
These turkey and cheese pinwheel wraps are incredibly versatile when it comes to serving and storing. Here’s how to get the most out of them.
Serving temperature: Serve them cold or at room temperature. They’re perfect straight from the fridge, but if you’re packing them for lunch, they’ll naturally come to room temperature by noon. That’s fine—they taste great either way.
Presentation ideas: Arrange the pinwheels on a platter with the cut sides facing up to show off the spiral. Garnish with fresh herbs like parsley or dill for a pop of color. For lunchboxes, place them in a small container with a side of cherry tomatoes, grapes, or carrot sticks.
Complementary dishes: These pinwheels pair beautifully with a simple side salad, a cup of tomato soup, or some crunchy veggie sticks. For a heartier meal, serve them alongside a bowl of chili or a fruit salad. They also work great as part of a party platter with other finger foods.
Storage instructions: Store leftover pinwheels in an airtight container in the refrigerator for up to 3 days. Place a paper towel at the bottom of the container to absorb any excess moisture. I don’t recommend freezing them, as the cream cheese can become grainy and the tortillas can get soggy upon thawing.
Reheating tips: These are best enjoyed cold, so no reheating is needed. However, if you prefer them slightly warm, you can microwave a few pinwheels for 10-15 seconds. Just be careful not to overheat, or the cream cheese will melt and make a mess.
Flavor development: The flavors actually meld and improve after a few hours in the fridge. I often make these the night before and find they taste even better the next day. The cream cheese spreads its flavor throughout, and the turkey and cheese become perfectly integrated.
Nutritional Information & Benefits
These turkey and cheese pinwheel wraps are not just delicious—they also offer some solid nutritional benefits. Here’s a breakdown of what you’re getting in each serving (based on 2 pinwheels per serving).
| Nutrient | Amount per Serving |
|---|---|
| Calories | 280 |
| Protein | 18g |
| Carbohydrates | 22g |
| Fat | 14g |
| Saturated Fat | 7g |
| Fiber | 2g |
| Sodium | 680mg |
Health benefits of key ingredients: Turkey is a lean source of protein, which helps keep you full and satisfied. Cream cheese provides calcium for bone health, while spinach (if added) offers vitamins A, C, and K, plus iron. The tortillas provide carbohydrates for energy, making these pinwheels a balanced option for lunch.
Dietary considerations: This recipe can be made gluten-free by using gluten-free tortillas. For a lower-sodium version, choose low-sodium deli turkey and reduced-fat cheese. To reduce fat, use reduced-fat cream cheese and turkey breast slices. The recipe is not suitable for vegans as written, but you can adapt it with plant-based alternatives.
Potential allergens: This recipe contains dairy (cream cheese, provolone) and gluten (tortillas). It may also contain traces of soy or other allergens depending on the brands used. Always check labels if you have specific allergies.
From my perspective, these pinwheels are a great way to pack protein and veggies into a lunch that actually tastes good. They’re not a health food, but they’re a balanced, satisfying meal that beats a sad sandwich any day.
Conclusion
These easy turkey and cheese pinwheel wraps have honestly become a lifesaver in my kitchen. From that unexpected conversation with Frank in the hardware store to the countless lunchboxes I’ve packed since, this recipe has proven itself again and again. It’s simple, it’s quick, and it’s the kind of thing that makes you feel like you’ve got your act together—even on the most chaotic mornings.
I hope you give these a try and make them your own. Maybe you’ll add a different cheese or sneak in some extra veggies. Maybe you’ll make them for a party or just for yourself on a busy Tuesday. That’s the beauty of this recipe—it adapts to whatever you need. I’d love to hear how yours turn out. Did you try a fun variation? Did your kids actually eat the spinach? Drop a comment below and let me know. And if you found this helpful, share it with a friend who’s also tired of the lunchtime struggle.
Happy rolling, friends. Your lunchbox is about to get a whole lot more exciting.
Frequently Asked Questions
Can I make these turkey and cheese pinwheel wraps ahead of time?
Absolutely! In fact, I recommend it. You can assemble and roll the tortillas up to 24 hours in advance. Keep them wrapped tightly in plastic wrap in the refrigerator, then slice them just before serving for the freshest results. The flavors actually meld and improve overnight.
How do I prevent my pinwheels from getting soggy?
The key is to keep your ingredients as dry as possible. Pat spinach or any vegetables completely dry before adding them. Also, don’t over-spread the cream cheese—a thin, even layer is all you need. Chilling the rolls for at least 30 minutes before slicing also helps them hold their shape and prevents sogginess.
Can I use a different type of cheese?
Yes, feel free to swap the provolone for any cheese you like. Swiss, cheddar, mozzarella, pepper jack, or even cream cheese with herbs all work wonderfully. Just make sure the cheese slices are thin enough to roll easily without bulking up the pinwheel.
How long do these pinwheels last in the fridge?
Stored in an airtight container, they’ll stay fresh for up to 3 days. Place a paper towel in the container to absorb any excess moisture. After 3 days, the tortillas may start to get a bit soft, but they’re still safe to eat if stored properly.
Can I freeze turkey and cheese pinwheel wraps?
I don’t recommend freezing them. The cream cheese can become grainy upon thawing, and the tortillas can turn soggy. These are best made fresh and stored in the refrigerator. If you need to prep ahead, just assemble the rolls and keep them wrapped in the fridge for up to 24 hours before slicing.
Pin This Recipe!
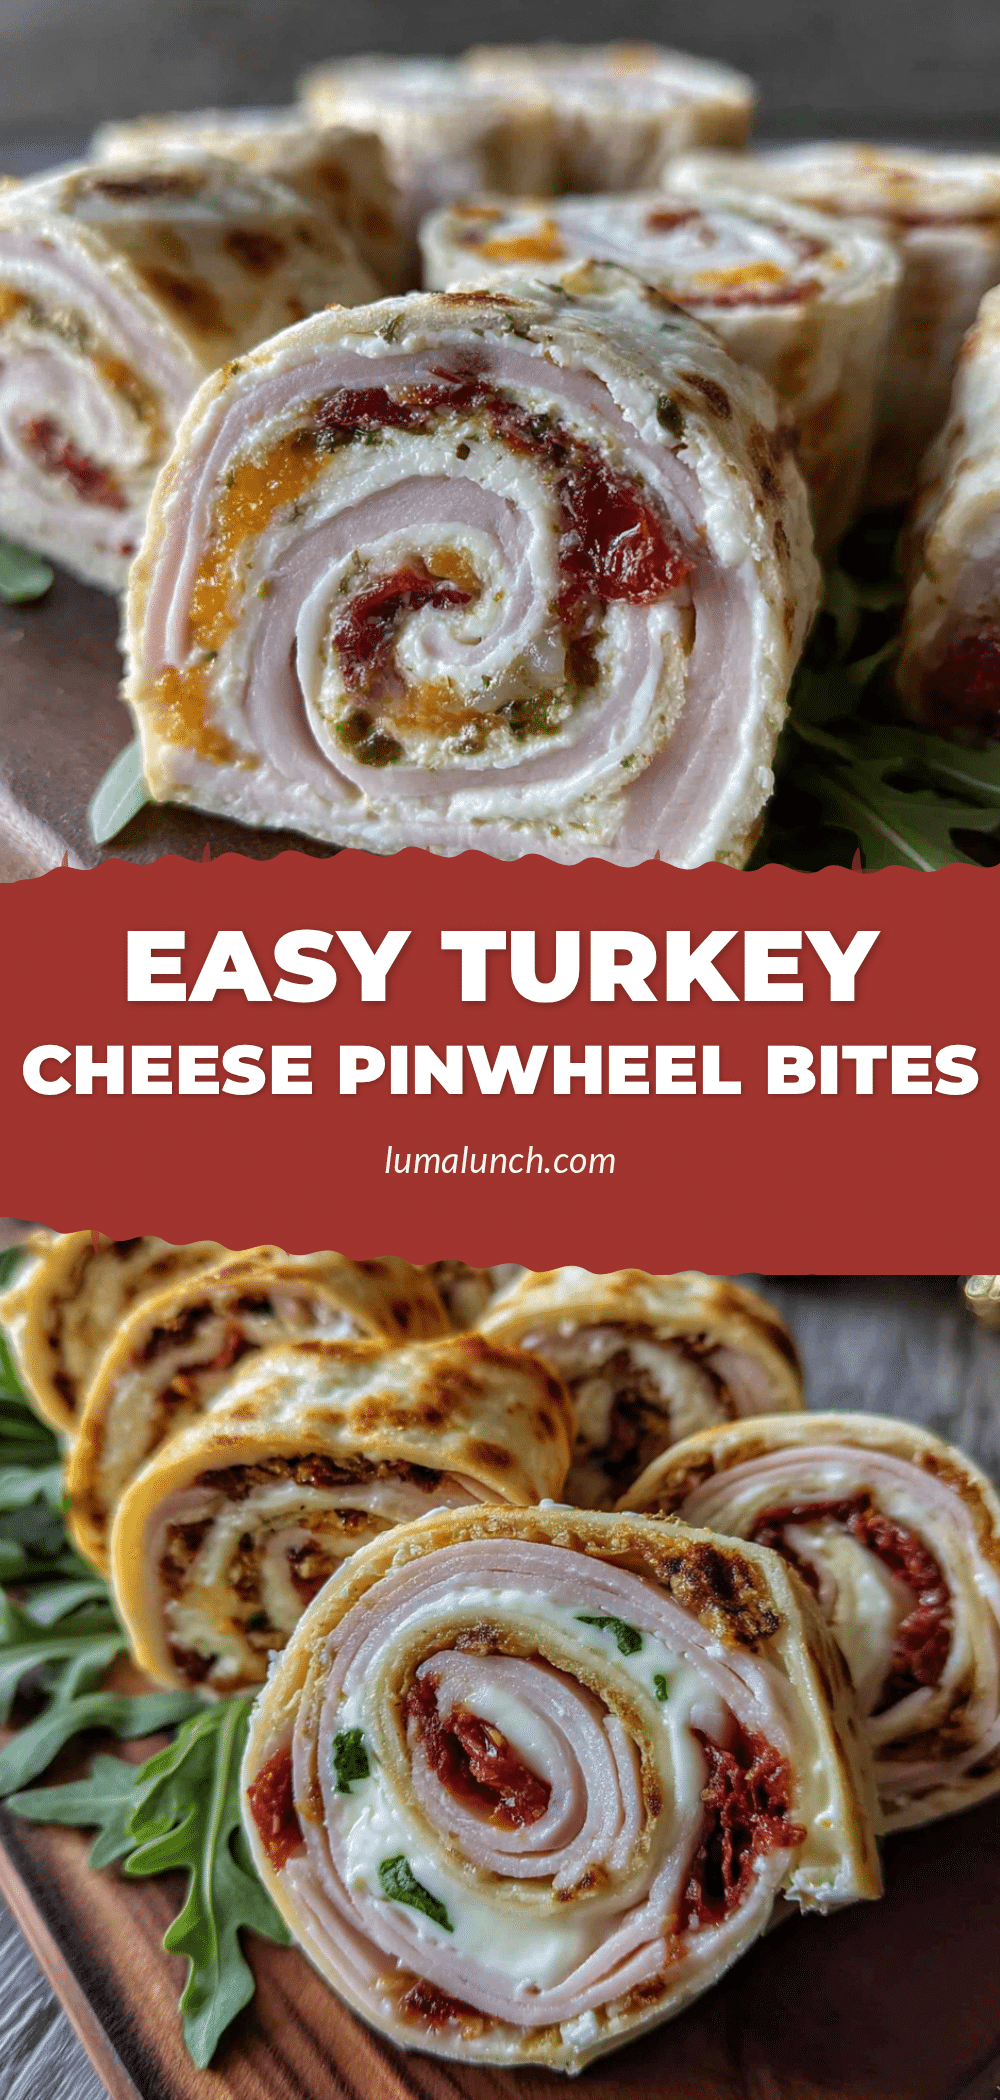
Easy Turkey and Cheese Pinwheel Wraps: Best Lunch Idea

These easy turkey and cheese pinwheel wraps are the perfect lunchbox solution. Made with simple ingredients like tortillas, deli turkey, provolone cheese, and a creamy spread, they come together in under 10 minutes and are a crowd-pleaser for both kids and adults.
- Prep Time: 10 minutes
- Cook Time: 0 minutes
- Total Time: 40 minutes
- Yield: 4 servings 1x
- Category: Lunch
- Cuisine: American
Ingredients
- 4 large flour tortillas (10-inch)
- 8 oz cream cheese, softened
- 1/4 cup mayonnaise
- 1/2 teaspoon garlic powder
- 1/4 teaspoon black pepper
- 8–10 slices deli turkey
- 8–10 slices provolone cheese
- 1 cup fresh spinach leaves (optional)
- 1/4 cup sun-dried tomatoes, chopped (optional)
Instructions
- Make the cream cheese spread (5 minutes): In a small mixing bowl, combine the softened cream cheese, mayonnaise, garlic powder, and black pepper. Stir with a spatula until smooth and fully combined. It should be spreadable but not runny. If it’s too stiff, let it sit for another 5 minutes at room temperature.
- Prepare the tortillas (2 minutes): Lay one flour tortilla flat on your cutting board. If the edges are curling, microwave it for 10 seconds to make it more pliable. This helps prevent cracking when you roll.
- Spread the cream cheese mixture (3 minutes): Using a spatula or butter knife, spread an even layer of the cream cheese mixture over the entire surface of the tortilla, leaving about a 1-inch border around the edges. Don’t skimp—the spread acts as the glue that holds everything together. It should be about 1/8-inch thick.
- Layer the turkey (2 minutes): Place 4-5 slices of deli turkey evenly over the cream cheese, overlapping slightly. Make sure the turkey covers the entire surface, including the edges. This ensures every bite has turkey.
- Add the cheese (1 minute): Lay 4-5 slices of provolone cheese over the turkey, again overlapping slightly. If you’re using spinach or sun-dried tomatoes, sprinkle them evenly over the cheese now. Don’t overstuff—you want the roll to be tight, not bursting.
- Roll it up tightly (3 minutes): Starting from one edge, carefully roll the tortilla into a tight log. Use your fingers to tuck in the filling as you go. Roll slowly and firmly, keeping even pressure. The roll should be snug but not so tight that the filling squishes out the ends.
- Wrap and chill (30 minutes minimum): Tightly wrap the rolled tortilla in plastic wrap or parchment paper, twisting the ends like a candy wrapper. Place it seam-side down on a baking sheet or plate. Refrigerate for at least 30 minutes. This step is non-negotiable—chilling firms up the cream cheese and makes slicing much easier.
- Slice into pinwheels (5 minutes): Unwrap the chilled roll and place it on your cutting board. Using a sharp serrated knife, slice the roll into 1-inch thick rounds. Use a gentle sawing motion—don’t press down hard, or you’ll flatten them. You should get about 8-10 pinwheels per tortilla.
- Serve or store (2 minutes): Arrange the pinwheels on a plate or pack them directly into lunchboxes. They’re ready to eat immediately after slicing, but they taste even better after sitting for an hour or two as the flavors meld.
Notes
Chill the rolls thoroughly for at least 30 minutes before slicing to prevent them from falling apart. Use a serrated knife for clean slices. Keep filling ingredients dry to avoid sogginess. Don’t overstuff the tortillas.
Nutrition
- Serving Size: 2 pinwheels
- Calories: 280
- Sugar: 2
- Sodium: 680
- Fat: 14
- Saturated Fat: 7
- Carbohydrates: 22
- Fiber: 2
- Protein: 18
Keywords: turkey and cheese pinwheel wraps, easy lunch idea, lunchbox recipe, pinwheel sandwiches, turkey wraps


