Love this? Save it for later!
Share the inspiration with your friends
Introduction
“I never thought a dessert could make me jump—until last summer,” my friend Mark confessed as he recounted the story behind these Spooky Creamy Graveyard Dirt Pudding Cups. It all started on a blazing August afternoon when our neighborhood decided to throw a summer Halloween party, a quirky idea that caught everyone off guard. The challenge? Creating a treat that was both chillingly festive and refreshing enough for the heat.
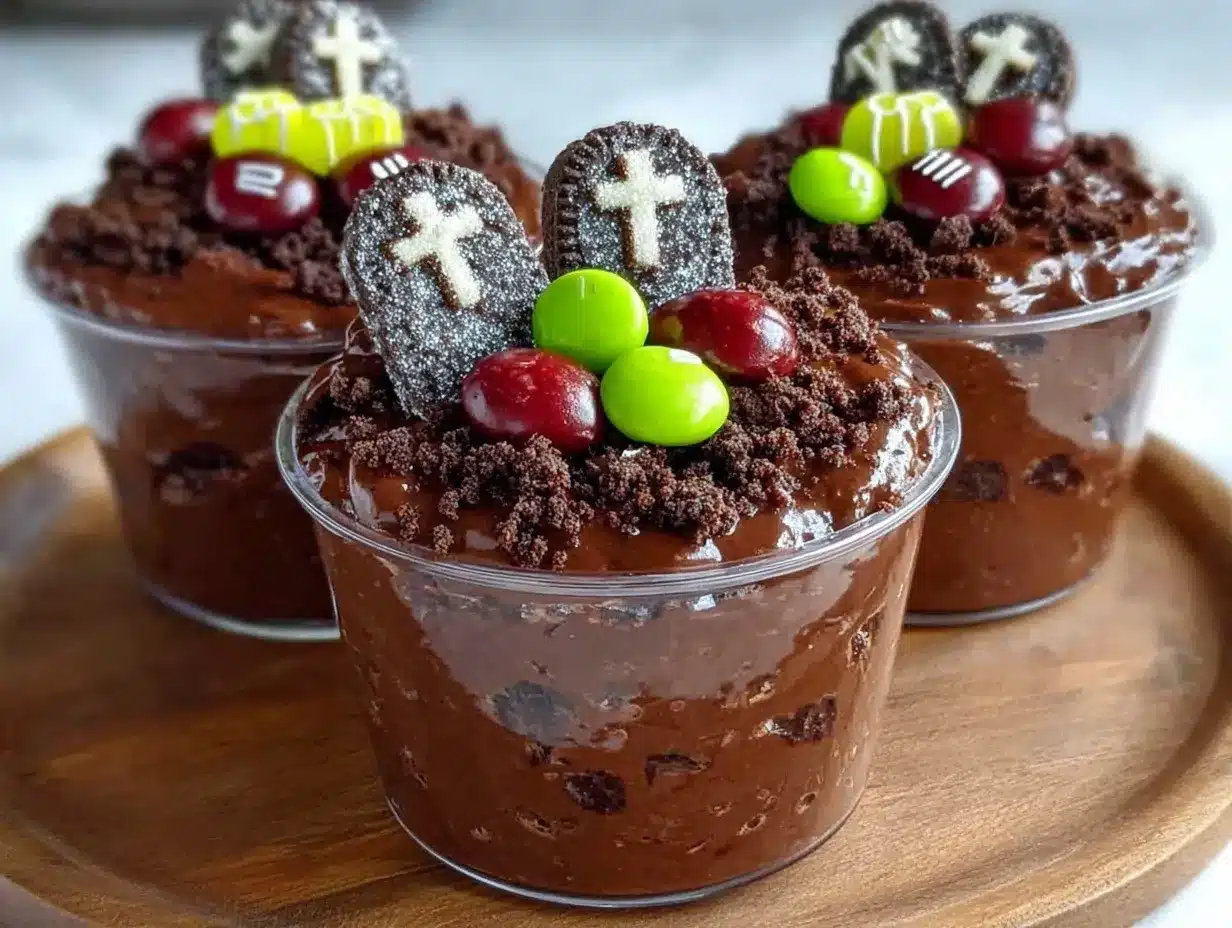
Mark, who usually sticks to classic barbecue fare, surprised everyone by bringing these eerie yet delightful pudding cups. Honestly, seeing crushed cookies that looked like dirt topped with gummy worms and tiny tombstones was both hilarious and oddly appetizing. The creamy pudding underneath contrasted perfectly with the crunchy cookie “soil,” and the whole thing tasted like childhood Halloween nostalgia blended with a cool summer breeze.
That day, between the laughter and the sudden summer thunderstorm that forced us all to huddle under the porch, these pudding cups became the unexpected hit. Maybe you’ve been there—scrambling last minute for a dessert that’s fun, easy, and crowd-pleasing. Let me tell you, this recipe has stuck with me ever since. It’s simple, spooky, and honestly, a little messy—which is part of the charm. Whether you’re planning a late summer bash or just want to surprise the kids with something seasonal and sweet, these pudding cups have got you covered.
Why You’ll Love This Recipe
After testing and tweaking this recipe several times (and trust me, there were plenty of gummy worms casualties along the way), I can say these Spooky Creamy Graveyard Dirt Pudding Cups have earned a permanent spot in my dessert rotation. Here’s why this recipe stands out:
- Quick & Easy: Ready in under 20 minutes, perfect for last-minute summer parties or Halloween themed afternoons.
- Simple Ingredients: No obscure items needed—you probably have most of these in your pantry or fridge already.
- Perfect for Summer Halloween: Cool and creamy, these cups are a refreshing twist when the weather’s still warm but the spooky season is calling.
- Crowd-Pleaser: Kids, adults, and even the neighborhood skeptics love the fun presentation and delicious flavors.
- Unbelievably Delicious: The creamy texture of the pudding combined with the crunchy cookie dirt and chewy gummies is next-level comfort food with a playful touch.
This recipe isn’t your typical chocolate pudding with toppings. The magic is in the balance—the crushed cookies are finely ground to mimic dirt without overwhelming the smooth pudding. Plus, the little cookie tombstones and candy critters add a whimsical touch that’s both creepy and cute. Honestly, every bite feels like a mini Halloween party in your mouth, and that’s why I keep making it year after year.
What Ingredients You Will Need
This recipe uses simple, wholesome ingredients to deliver bold flavor and satisfying texture without the fuss. Most ingredients are pantry staples, and a couple of fun toppings bring the spooky vibe.
- For the Pudding:
- 2 packets (about 5.1 oz / 144 g) instant chocolate pudding mix
- 3 cups (720 ml) cold whole milk (or any milk of your choice)
- 1 teaspoon vanilla extract (adds depth and warmth)
- 1 cup (240 ml) heavy cream, whipped to soft peaks (for extra creaminess)
- For the Dirt Layer:
- 20 Oreo cookies, crushed into fine crumbs (I like Newman’s Own for consistent crunch)
- 2 tablespoons unsalted butter, melted (helps bind the crumbs)
- For Decoration:
- Gummy worms (the squirmier, the better!)
- Mini chocolate chip cookies or rectangular shortbread cookies (to create tombstones)
- White icing or edible marker for tombstone writing (RIP, BOO, etc.)
- Optional: candy pumpkins or edible eyes for extra creepiness
For a dairy-free version, swap the milk and cream with coconut milk and coconut whipped cream. If you want a gluten-free dirt, crushed gluten-free chocolate cookies work well too. In summer, you can also add fresh berries beneath the dirt layer for a surprising fruity twist.
Equipment Needed
- Medium mixing bowl for pudding
- Whisk or electric mixer to whip cream
- Food processor or zip-top bag and rolling pin for crushing cookies
- Small spoon or spatula for layering
- Clear plastic cups or glass dessert cups (around 8–10 oz / 240–300 ml capacity)
- Optional piping bag for whipped cream topping
If you don’t have a food processor, crushing cookies inside a sealed bag with a rolling pin works just fine (though it can get a little messy, as I found when my bag split once). For whipping cream, I’ve had great luck with a handheld mixer, but a stand mixer or even a whisk and some patience will do the trick.
Preparation Method
- Prepare the pudding: In a medium bowl, whisk together the instant chocolate pudding mix and cold milk for about 2 minutes until thickened. Stir in the vanilla extract. Set aside to let it fully set for 5 minutes.
- Whip the cream: In a separate bowl, whip the heavy cream until soft peaks form. Gently fold the whipped cream into the chocolate pudding to create a creamy, airy texture. This step makes the pudding extra luscious, so don’t skip it!
- Make the dirt layer: Crush the Oreo cookies into fine crumbs using a food processor or place them in a zip-top bag and crush with a rolling pin. Mix the crumbs with the melted butter until combined and slightly clumpy (this helps the dirt hold together).
- Assemble the cups: Spoon a layer of pudding into each cup, filling about half. Add a generous layer of the cookie dirt on top, pressing lightly to create an even surface. Add another thin layer of pudding if you want more creaminess, then finish with a final dirt layer.
- Add the decorations: Insert gummy worms so they peek out from the dirt. Place mini cookies or small rectangles standing up as tombstones. Use white icing or edible markers to write spooky messages like “RIP” or “Boo” on the tombstones.
- Chill and serve: Refrigerate the pudding cups for at least 30 minutes to let flavors meld and the dirt set slightly. Serve chilled for the best creamy, crunchy experience.
If the pudding feels too thick after chilling, a quick stir before serving can bring it back to the perfect creamy consistency. And if you’re prepping ahead, these cups hold well overnight but try to add gummy worms and tombstones just before serving to keep them fresh.
Cooking Tips & Techniques
Making these pudding cups is straightforward, but a few little tricks can turn a good batch into an unforgettable one. When whipping the cream, don’t overdo it—it should be soft peaks, not stiff, for the best folding and texture. I once ruined a batch by whipping too long, turning it grainy, so watch closely.
Crushing the Oreos finely is key to mimicking dirt. Big chunks look less realistic and can throw off the texture balance. If you’re short on time, crushed cookie crumbs from store-bought crumbs can work, but fresh crushed Oreos give a richer flavor.
Layering is where the fun happens. Press the cookie crumbs gently but firmly; otherwise, the dirt can fall apart when serving. Using a small spoon helps control the layers and keeps the presentation neat.
Timing is your friend here—prepare the pudding first, then the dirt, and assemble quickly to keep the pudding from setting too hard before layering. Multitasking between whipping cream and crushing cookies can save you precious minutes.
Variations & Adaptations
- Flavor Variations: Swap chocolate pudding for vanilla or butterscotch to change the flavor profile. You can tint vanilla pudding with green food coloring for a “slimy” graveyard effect.
- Dietary Adaptations: Use gluten-free cookies and dairy-free pudding mixes to make this dessert allergy-friendly. Coconut milk pudding and coconut whipped cream are a tasty dairy-free combo.
- Seasonal Twists: For fall, add a sprinkle of cinnamon or pumpkin pie spice to the pudding. Summer parties might enjoy adding fresh berries or edible flowers on top for a pop of color.
- Cooking Method: This recipe requires no baking, making it perfect for hot summer days. For a baked twist, try making a no-bake cheesecake base instead of pudding.
- Personal Variation: I once added a layer of peanut butter mousse below the dirt for a nutty surprise. It was a hit, but be cautious if you’re serving to kids with allergies.
Serving & Storage Suggestions
Serve these pudding cups chilled for the creamiest texture and best flavor. They make a playful centerpiece for summer Halloween parties or backyard gatherings. Pair them with crisp apple slices or a light citrus punch to balance the rich pudding.
Store leftovers covered in the refrigerator for up to 2 days. The cookie dirt may soften slightly over time but remains tasty. Avoid freezing as it can change the pudding texture.
When reheating (if you prefer it slightly warmer), remove the gummy worms and tombstones first and microwave in short intervals, stirring gently. However, these are best enjoyed cold to keep the spooky vibe intact.
Flavors tend to meld after a few hours in the fridge, making the dessert even more harmonious. Just keep the decorations fresh and add them right before serving.
Nutritional Information & Benefits
Each serving of these pudding cups contains approximately 250-300 calories, depending on portion size and toppings. The recipe includes calcium and protein from the milk and cream. While it’s definitely a treat, using whole milk and heavy cream provides a richer, more satisfying dessert that keeps you fuller.
If you swap in dairy-free or low-fat options, the calorie count can be adjusted accordingly. The Oreo cookie crumbs do contain gluten and dairy, so keep that in mind for allergy-sensitive guests.
From a wellness perspective, this dessert is all about balance—indulgent yet approachable. It’s a fun way to enjoy a seasonal treat without overcomplicating things or spending hours in the kitchen.
Conclusion
If you’re looking for a fun, easy, and spooky dessert that feels right for summer Halloween, these Spooky Creamy Graveyard Dirt Pudding Cups are a winner. They’re playful, creamy, and just the right amount of creepy to impress guests without stress. Honestly, I love how this recipe brings together simple ingredients and turns them into something memorable and joyful.
Feel free to customize the decorations or ingredient swaps to suit your taste and dietary needs. I’d love to hear how you make this recipe your own—share your twists and tricks in the comments below! Remember, the best desserts come with a little mess, a lot of fun, and maybe a gummy worm or two sneaking away.
FAQs
Can I make these pudding cups ahead of time?
Yes! Prepare them up to a day in advance and refrigerate. Add gummy worms and tombstone decorations just before serving to keep them fresh.
What can I use if I don’t have Oreo cookies?
You can use any chocolate sandwich cookies or chocolate wafer cookies. For gluten-free options, look for certified gluten-free chocolate cookies.
How do I keep the cookie dirt crunchy?
Mixing the crumbs with melted butter helps bind them and maintain some crunch. Store the cups chilled and avoid adding wet toppings too early.
Can this dessert be made dairy-free?
Absolutely! Use dairy-free milk like coconut or almond milk and dairy-free whipped cream alternatives. Make sure the pudding mix is dairy-free as well.
What’s the best way to decorate the tombstones?
Use white icing or edible food markers to write spooky messages on mini cookies or shortbread rectangles. Let the icing set before placing them in the cups.
For those interested in other creative and seasonal treats, you might enjoy my take on crispy garlic chicken for savory inspiration or these cheesy baked macaroni dishes to round out your party menu.
Pin This Recipe!
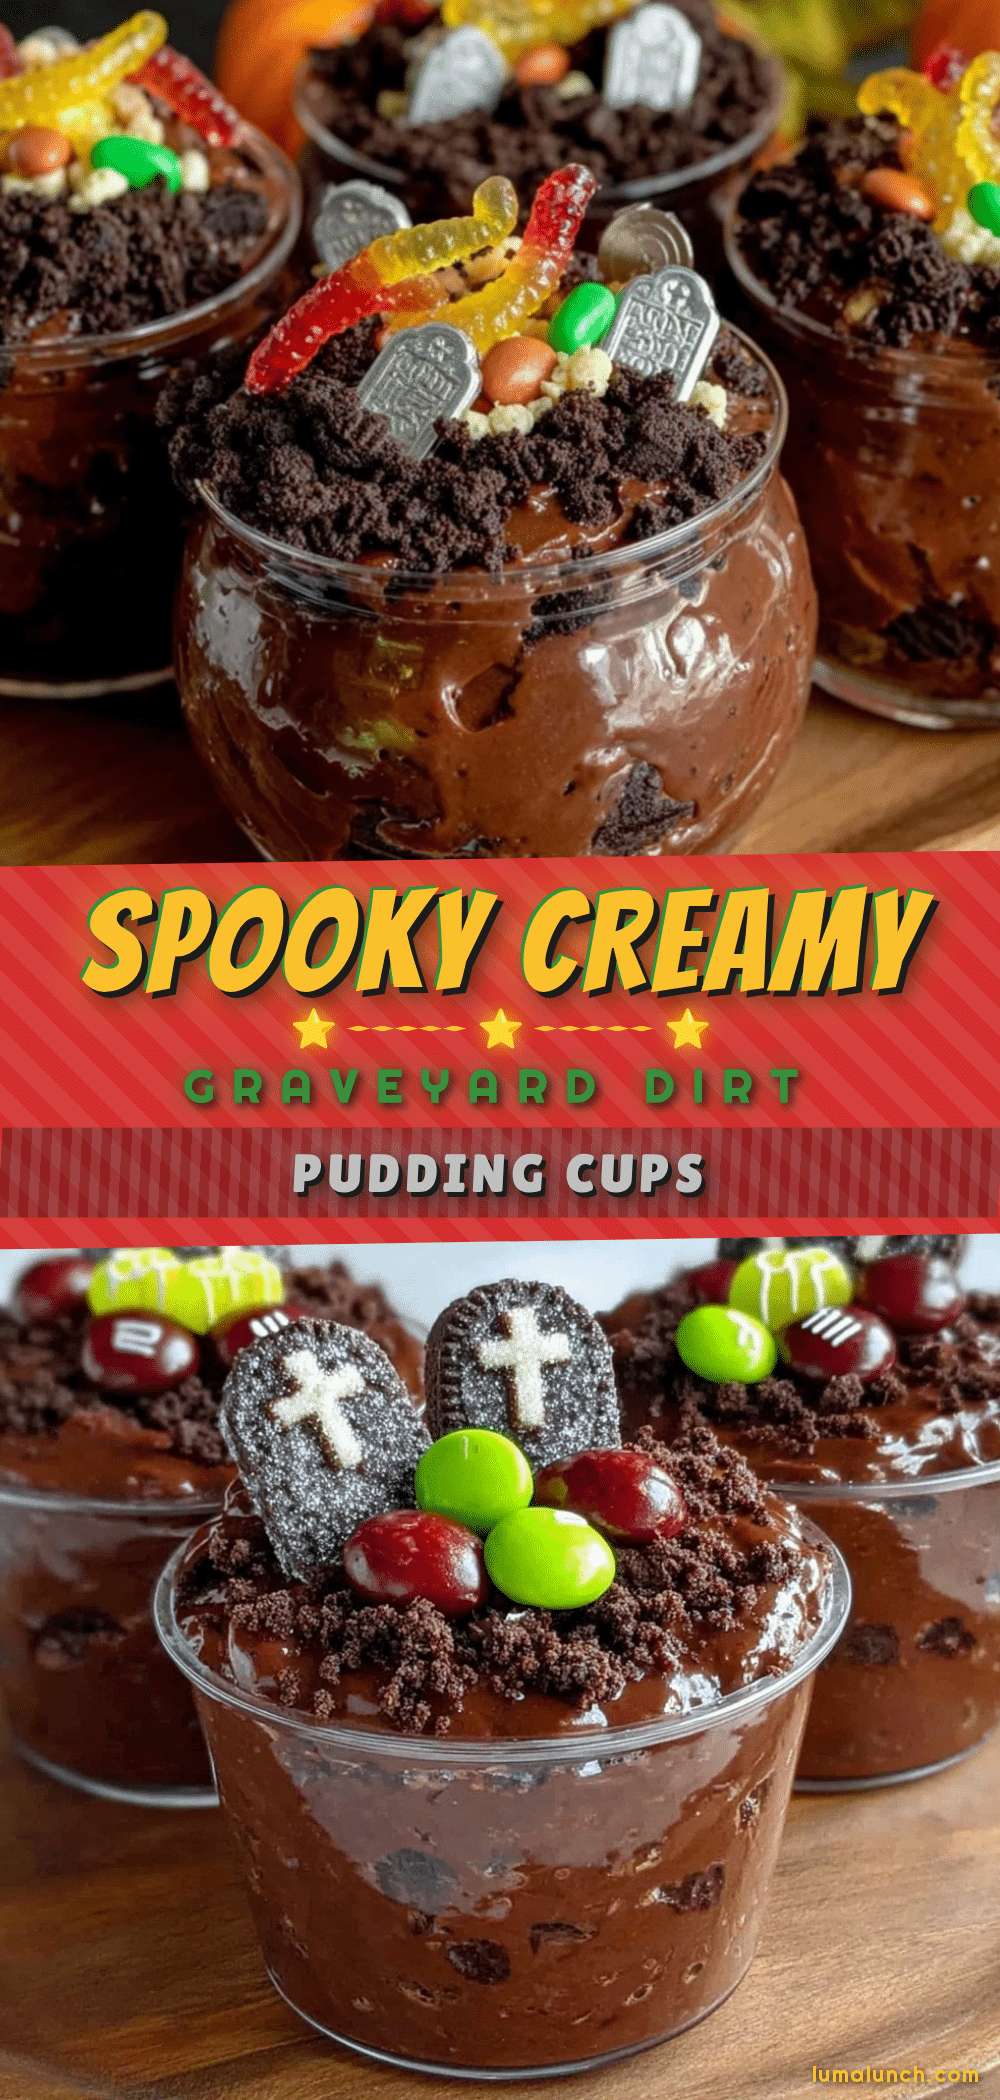
Spooky Creamy Graveyard Dirt Pudding Cups

A fun and easy summer Halloween dessert featuring creamy chocolate pudding layered with crunchy Oreo cookie ‘dirt’ and decorated with gummy worms and cookie tombstones. Perfect for parties and kids, this no-bake treat combines nostalgic flavors with a spooky twist.
- Prep Time: 10 minutes
- Cook Time: 0 minutes
- Total Time: 40 minutes
- Yield: 8 servings 1x
- Category: Dessert
- Cuisine: American
Ingredients
- 2 packets (about 5.1 oz / 144 g) instant chocolate pudding mix
- 3 cups (720 ml) cold whole milk (or any milk of your choice)
- 1 teaspoon vanilla extract
- 1 cup (240 ml) heavy cream, whipped to soft peaks
- 20 Oreo cookies, crushed into fine crumbs
- 2 tablespoons unsalted butter, melted
- Gummy worms
- Mini chocolate chip cookies or rectangular shortbread cookies (for tombstones)
- White icing or edible marker for tombstone writing
- Optional: candy pumpkins or edible eyes for decoration
Instructions
- Prepare the pudding: In a medium bowl, whisk together the instant chocolate pudding mix and cold milk for about 2 minutes until thickened. Stir in the vanilla extract. Set aside to let it fully set for 5 minutes.
- Whip the cream: In a separate bowl, whip the heavy cream until soft peaks form. Gently fold the whipped cream into the chocolate pudding to create a creamy, airy texture.
- Make the dirt layer: Crush the Oreo cookies into fine crumbs using a food processor or place them in a zip-top bag and crush with a rolling pin. Mix the crumbs with the melted butter until combined and slightly clumpy.
- Assemble the cups: Spoon a layer of pudding into each cup, filling about half. Add a generous layer of the cookie dirt on top, pressing lightly to create an even surface. Add another thin layer of pudding if desired, then finish with a final dirt layer.
- Add the decorations: Insert gummy worms so they peek out from the dirt. Place mini cookies or small rectangles standing up as tombstones. Use white icing or edible markers to write spooky messages like “RIP” or “Boo” on the tombstones.
- Chill and serve: Refrigerate the pudding cups for at least 30 minutes to let flavors meld and the dirt set slightly. Serve chilled.
Notes
Do not overwhip the cream; soft peaks are best for folding. Crush Oreos finely to mimic dirt texture. Add gummy worms and tombstones just before serving to keep decorations fresh. For dairy-free or gluten-free versions, substitute ingredients accordingly.
Nutrition
- Serving Size: 1 pudding cup (about
- Calories: 275
- Sugar: 22
- Sodium: 180
- Fat: 15
- Saturated Fat: 8
- Carbohydrates: 32
- Fiber: 2
- Protein: 4
Keywords: Halloween dessert, pudding cups, Oreo dirt, gummy worms, no-bake dessert, summer dessert, spooky treat