Love this? Save it for later!
Share the inspiration with your friends
Introduction
“I never thought I’d be standing in my tiny kitchen at midnight, peeling garlic cloves and chopping dill frantically, but there I was,” I confessed to my neighbor last week. It was one of those rare summer nights when inspiration struck—and honestly, the grocery store was closed, so I had to work with what was in my pantry. A jar of canned green beans sat quietly on the shelf, looking a bit sad and uninspiring. But I remembered a story from a chat I had with an old farmer at the Saturday market, who swore by adding garlic and red pepper flakes to his canned beans for a punch of flavor. So, armed with a few simple ingredients and a borrowed canning pot, I set out on a whim to make my own batch of flavorful dilly canned green beans.
The kitchen smelled like a cozy garden, with fresh dill and sizzling garlic filling the air. I might have forgotten to set a timer once or twice (classic me!), but the result was worth every cracked jar and sticky countertop. You know that feeling when a simple pantry staple turns into a taste sensation? This recipe has stuck with me ever since, perfect for those moments when you want homemade pickling flavor without the fuss. Maybe you’ve been there, staring at canned vegetables thinking, “How can I make this better?” Well, let me tell you—this recipe is your answer.
Why You’ll Love This Recipe
After testing this flavorful dilly canned green beans recipe over several weekends, I can say it hits all the right notes for anyone who loves a quick, tasty, and homemade touch to their pantry staples. Here’s why it’s become a go-to:
- Quick & Easy: Comes together in under 45 minutes, with most of the time spent waiting for jars to cool.
- Simple Ingredients: Uses everyday pantry items like garlic, red pepper flakes, and fresh dill—no specialty stores needed.
- Perfect for Snacking and Meals: Whether you’re looking to jazz up a sandwich, add zing to your salads, or snack straight from the jar, these green beans deliver.
- Crowd-Pleaser: Friends and family always ask for the recipe, especially when the spicy garlic flavor surprises them.
- Unbelievably Delicious: The sharpness of fresh dill combined with the kick from red pepper flakes gives these canned beans a depth you won’t find in store-bought versions.
What makes this recipe stand out? It’s the perfect balance of tangy, garlicky, and spicy, plus the crisp-tender texture that homemade pickled green beans get right. This isn’t just another canned veggie recipe; it’s the kind of jar you’ll want to keep on your shelf for whenever the craving hits or a last-minute gift is needed. Honestly, it’s comfort food with a kick that feels both nostalgic and new.
What Ingredients You Will Need
This recipe uses simple, wholesome ingredients to deliver bold flavor and satisfying texture without the fuss. Most of these are pantry staples or easy to find at your local market.
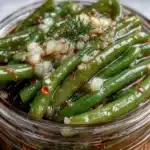
- Fresh green beans: About 3 pounds (1.4 kg), trimmed and rinsed. I prefer firm, slender beans for that perfect snap.
- Fresh dill: 1/2 cup (loosely packed) chopped dill fronds. Adds that classic “dilly” flavor.
- Garlic cloves: 6 large cloves, thinly sliced. I like the bite that sliced garlic gives rather than minced.
- Red pepper flakes: 1 teaspoon, or more if you like it spicy. This gives a subtle heat that wakes up the beans.
- White vinegar (5% acidity): 2 cups (480 ml). This is essential for safe pickling and tangy flavor.
- Water: 2 cups (480 ml), to balance the vinegar.
- Pickling salt or kosher salt: 1 tablespoon. Avoid iodized salt for clear brine.
- Optional: 1 teaspoon black peppercorns for a little extra warmth.
For best results, I usually pick dill from my garden or farmers market, but if fresh isn’t available, good-quality dried dill can substitute (use about 2 tablespoons). For vinegar, a trusted brand like Bragg or Heinz works well. If you want a gluten-free twist, make sure your vinegar is certified gluten-free.
Equipment Needed
- Canning jars with lids and rings: Quart-size (32 oz / 950 ml) jars are perfect for this recipe. Mason jars are ideal and widely available.
- Large pot or canner: For boiling jars and processing. A 16-quart stockpot is what I use and it fits 4 jars comfortably.
- Jar lifter: Essential for safely removing hot jars from boiling water.
- Funnel: Makes filling jars less messy.
- Large mixing bowl: For rinsing and prepping the green beans.
- Sharp knife and cutting board: For trimming beans and slicing garlic.
In a pinch, you can use a large pot and a sturdy spoon to remove jars if you don’t have a jar lifter, but be very careful—safety first! For those new to canning, I recommend checking out a basic canning guide to get comfortable with sterilizing and processing jars. I’ve found that investing in a good-quality canning kit from Ball or Kerr makes the whole process less intimidating and more enjoyable.
Preparation Method
- Sterilize the jars and lids: Place your jars and lids in a large pot of boiling water for 10 minutes to sterilize. Keep them hot until ready to fill. This step is crucial for safe preservation.
- Prepare the green beans: Rinse the green beans thoroughly and trim off the stem ends. If some are longer than 4 inches (10 cm), cut them down to size for easy packing. Set aside in a large bowl.
- Make the pickling brine: In a saucepan, combine 2 cups (480 ml) white vinegar, 2 cups (480 ml) water, and 1 tablespoon pickling salt. Bring to a boil, stirring until the salt dissolves. Remove from heat and set aside.
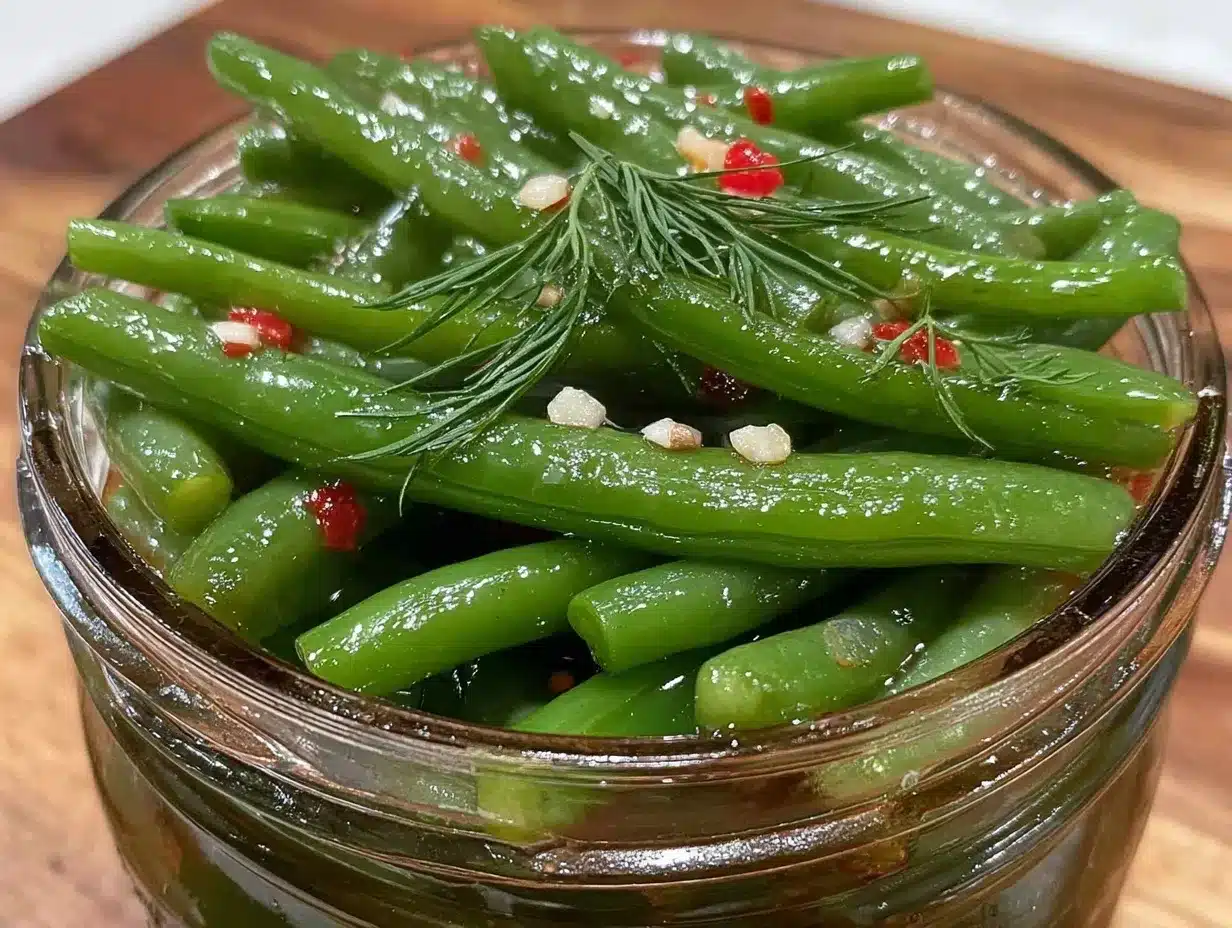
- Pack the jars: Using a funnel, place a few dill sprigs, sliced garlic cloves, and a pinch of red pepper flakes into each jar. Then pack green beans vertically, pushing them gently to fit without breaking. Leave about 1/2 inch (1.3 cm) headspace at the top.
- Pour the hot brine: Carefully ladle the hot brine over the green beans, covering them completely but still maintaining the headspace. Remove any air bubbles by running a non-metallic spatula around the inside edge of the jar.
- Seal and process: Wipe the rims of the jars clean and place the sterilized lids on top. Screw on the rings fingertip-tight. Process jars in boiling water for 10 minutes (adjust time depending on altitude). This seals the jars and preserves the beans.
- Cool and store: Remove jars with the jar lifter and place them on a towel to cool undisturbed for 12-24 hours. Check that lids have sealed (no pop when pressed). Store in a cool, dark place for at least 2 weeks before tasting to develop flavor.
If your lid doesn’t seal properly, you can refrigerate that jar and enjoy those beans within a week. You’ll notice the green beans keep a nice crunch, and the garlic mellows while the red pepper flakes add a subtle lingering heat. I sometimes get impatient and try a jar after 10 days, but honestly, waiting is worth it.
Cooking Tips & Techniques
From my experience, a few little tricks make all the difference when making dilly canned green beans:
- Use fresh, crisp green beans: Wilted or old beans will turn mushy quickly and lose that satisfying crunch.
- Don’t skip the sterilizing step: It might feel tedious, but it’s key to safe, long-lasting preservation.
- Pack jars tightly but gently: Overpacking can cause breakage, underpacking wastes space and may leave beans floating.
- Keep lids fingertip-tight: Too loose and the jar won’t seal, too tight and air can’t escape during processing.
- Customize your spice level: I’ve made batches with double the red pepper flakes for friends who love heat, and it still works great.
- Test the brine before canning: Taste your vinegar-water-salt mixture before pouring—if it’s too sharp, add a bit more water to balance.
One time, I forgot to add the garlic to a batch, and the green beans were fine but honestly missing that punch. I learned that garlic really makes this recipe sing. Also, multitasking while the jars process (I usually prep my next meal or tidy up) helps pass the time and keeps the kitchen less chaotic.
Variations & Adaptations
This recipe is wonderfully flexible. Here are a few ways I’ve adapted it to fit different tastes and dietary needs:
- Low-sodium option: Reduce the salt to 1/2 tablespoon and add a splash of lemon juice for brightness.
- Vegan-friendly spice: Add a few mustard seeds or coriander seeds for a different flavor profile without changing the base method.
- Use fresh hot peppers: Swap red pepper flakes for thinly sliced fresh jalapeño or serrano peppers for a sharper heat.
- Oven-roasted twist: Roast the green beans with garlic and dill before canning to deepen the flavor.
- Personal favorite: Once, I added a teaspoon of smoked paprika, which gave a subtle smoky undertone—totally unexpected but delicious.
For different cooking methods, you could also try refrigerator pickling if you want to skip the hot water bath. Just keep refrigerated and consume within a month.
Serving & Storage Suggestions
These flavorful dilly canned green beans are best served chilled or at room temperature. I love popping one open as a snack straight from the jar or chopping them up for a zesty addition to salads and pasta dishes.
Pair them with hearty sandwiches, grilled meats, or a creamy cheese board to balance their tangy, spicy kick. A crisp white wine or cold beer also complements their fresh flavor beautifully.
Store sealed jars in a cool, dark pantry for up to a year. Once opened, keep refrigerated and consume within 2 weeks for best texture and flavor.
Reheating isn’t necessary, but if you want to use them warm, briefly sauté in a skillet with a bit of olive oil to bring out the garlic aroma.
Over time, the flavors meld even more, making these beans a fantastic gift or a pantry staple for unexpected guests.
Nutritional Information & Benefits
Each serving of these dilly canned green beans (about 1/2 cup or 120 grams) contains roughly:
| Calories | 30 |
|---|---|
| Carbohydrates | 6g |
| Fiber | 2g |
| Protein | 2g |
| Fat | 0g |
| Sodium | 300mg (varies by salt amount) |
Green beans are a great source of vitamins A, C, and K, plus fiber and antioxidants. The garlic adds heart-healthy compounds, while red pepper flakes provide a metabolism boost. This recipe is naturally gluten-free, vegan, and low in calories, making it a smart choice for health-conscious eaters.
Conclusion
If you’re looking for a way to turn simple canned green beans into a jar of bold, tangy, garlicky goodness, this flavorful dilly canned green beans recipe is just what you need. It’s easy, quick, and packed with that perfect balance of heat and herbaceous freshness that keeps me coming back. I love how it transforms humble ingredients into something special with minimal fuss.
Feel free to tweak the spice level or add your own favorite pickling herbs. I promise, once you try this, your pantry will never look at canned green beans the same way again. Don’t forget to share your own twists or questions—I’d love to hear how your batch turns out!
Happy pickling and happy eating!
FAQs
Can I use frozen green beans instead of fresh for this recipe?
Frozen green beans aren’t recommended because they tend to be softer and can become mushy during the canning process. Fresh, crisp beans give the best texture and pickling results.
How long do these canned green beans last once sealed?
Properly sealed and stored jars can last up to one year in a cool, dark place. Once opened, refrigerate and consume within 2 weeks.
Is it necessary to use a water bath canner for this recipe?
Yes, processing the jars in a boiling water bath is important to safely preserve the green beans and prevent spoilage.
Can I reduce the vinegar to make the pickles less tangy?
It’s best not to reduce vinegar below the recommended acidity level (5%) for safety. You can add a bit more water to balance but keep the vinegar strong enough for proper preservation.
What can I substitute if I don’t have fresh dill?
Dried dill weed can work (use about 2 tablespoons), but fresh dill gives a brighter, more pronounced flavor. You can also experiment with other herbs like tarragon for a different twist.
Pin This Recipe!
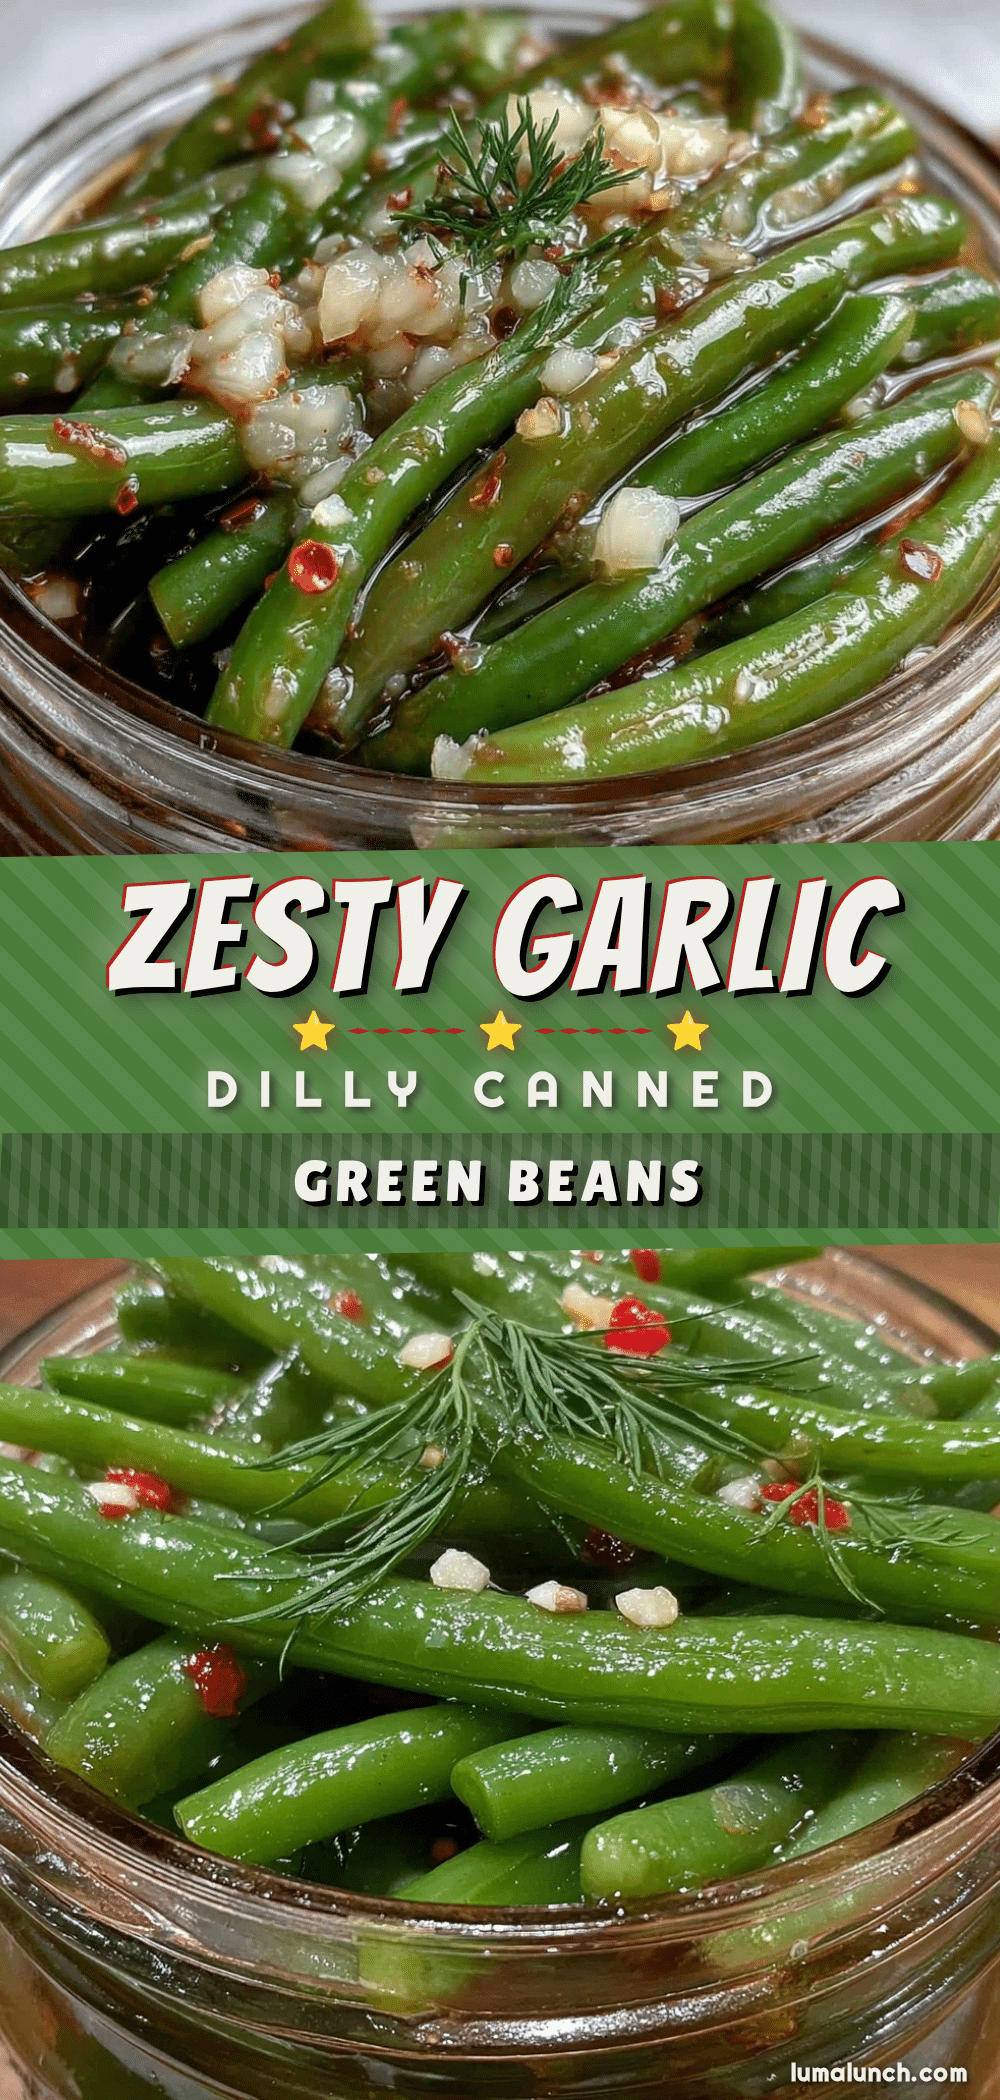
Flavorful Dilly Canned Green Beans Recipe with Garlic and Red Pepper Flakes for Easy Homemade Pickling
A quick and easy recipe to transform canned green beans into flavorful, garlicky, and spicy pickled green beans with fresh dill and red pepper flakes. Perfect for snacking, salads, or gifts.
- Prep Time: 15 minutes
- Cook Time: 30 minutes
- Total Time: 45 minutes
- Yield: 4 quart jars (about 8 servings) 1x
- Category: Preserves / Pickles
- Cuisine: American
Ingredients
- 3 pounds fresh green beans, trimmed and rinsed
- 1/2 cup loosely packed fresh dill fronds, chopped
- 6 large garlic cloves, thinly sliced
- 1 teaspoon red pepper flakes (adjust to taste)
- 2 cups white vinegar (5% acidity)
- 2 cups water
- 1 tablespoon pickling salt or kosher salt
- Optional: 1 teaspoon black peppercorns
Instructions
- Sterilize the jars and lids by placing them in a large pot of boiling water for 10 minutes. Keep them hot until ready to fill.
- Rinse the green beans thoroughly and trim off the stem ends. Cut beans longer than 4 inches to size. Set aside in a large bowl.
- In a saucepan, combine white vinegar, water, and pickling salt. Bring to a boil, stirring until salt dissolves. Remove from heat and set aside.
- Using a funnel, place a few dill sprigs, sliced garlic cloves, and a pinch of red pepper flakes into each jar. Pack green beans vertically, leaving about 1/2 inch headspace.
- Pour the hot brine over the green beans, covering them completely but maintaining headspace. Remove air bubbles with a non-metallic spatula.
- Wipe jar rims clean, place sterilized lids on top, and screw on rings fingertip-tight. Process jars in boiling water for 10 minutes (adjust for altitude).
- Remove jars with a jar lifter and place on a towel to cool undisturbed for 12-24 hours. Check lids have sealed. Store in a cool, dark place for at least 2 weeks before tasting.
Notes
Use fresh, crisp green beans for best texture. Do not skip sterilizing jars for safety. Pack jars tightly but gently to avoid breakage. Keep lids fingertip-tight during processing. Customize spice level by adjusting red pepper flakes. If lids do not seal, refrigerate and consume within a week. For a low-sodium option, reduce salt and add lemon juice. Fresh dill is preferred but dried dill can substitute (use 2 tablespoons).
Nutrition
- Serving Size: 1/2 cup (120 grams)
- Calories: 30
- Sodium: 300
- Carbohydrates: 6
- Fiber: 2
- Protein: 2
Keywords: green beans, pickled green beans, dilly beans, garlic, red pepper flakes, homemade pickles, canned green beans, easy pickling